

It’s well-known that Salesforce includes a number of Standard Objects which can be leveraged for the most common business processes: Accounts representing companies, Contacts representing the employees, and of course Opportunities which, simply put, represent the sales deals, just to name a few. These objects come with certain features that are predefined for you to build scalable processes as easily as possible in your org, and can be combined with other generally available functionality to supercharge enablement and productivity.
In this article, we will zoom into the Salesforce Opportunity object and some of its associated best practices which can help you make the most out of your time while ensuring a smooth end-to-end process.
1. Define Your Opportunity Stages
Defining your Opportunity Stages when starting to transition your Sales process into Salesforce can be viewed as the very first step, which lays the foundation for every other best practice.
The “Stage” standard field on the Opportunity object is a picklist, and if you create a new Salesforce developer edition today, there will be ten out-of-the-box available values. These apply to all organizations at first, with the possibility of customizing them (including their order) as needed to fit your business process.
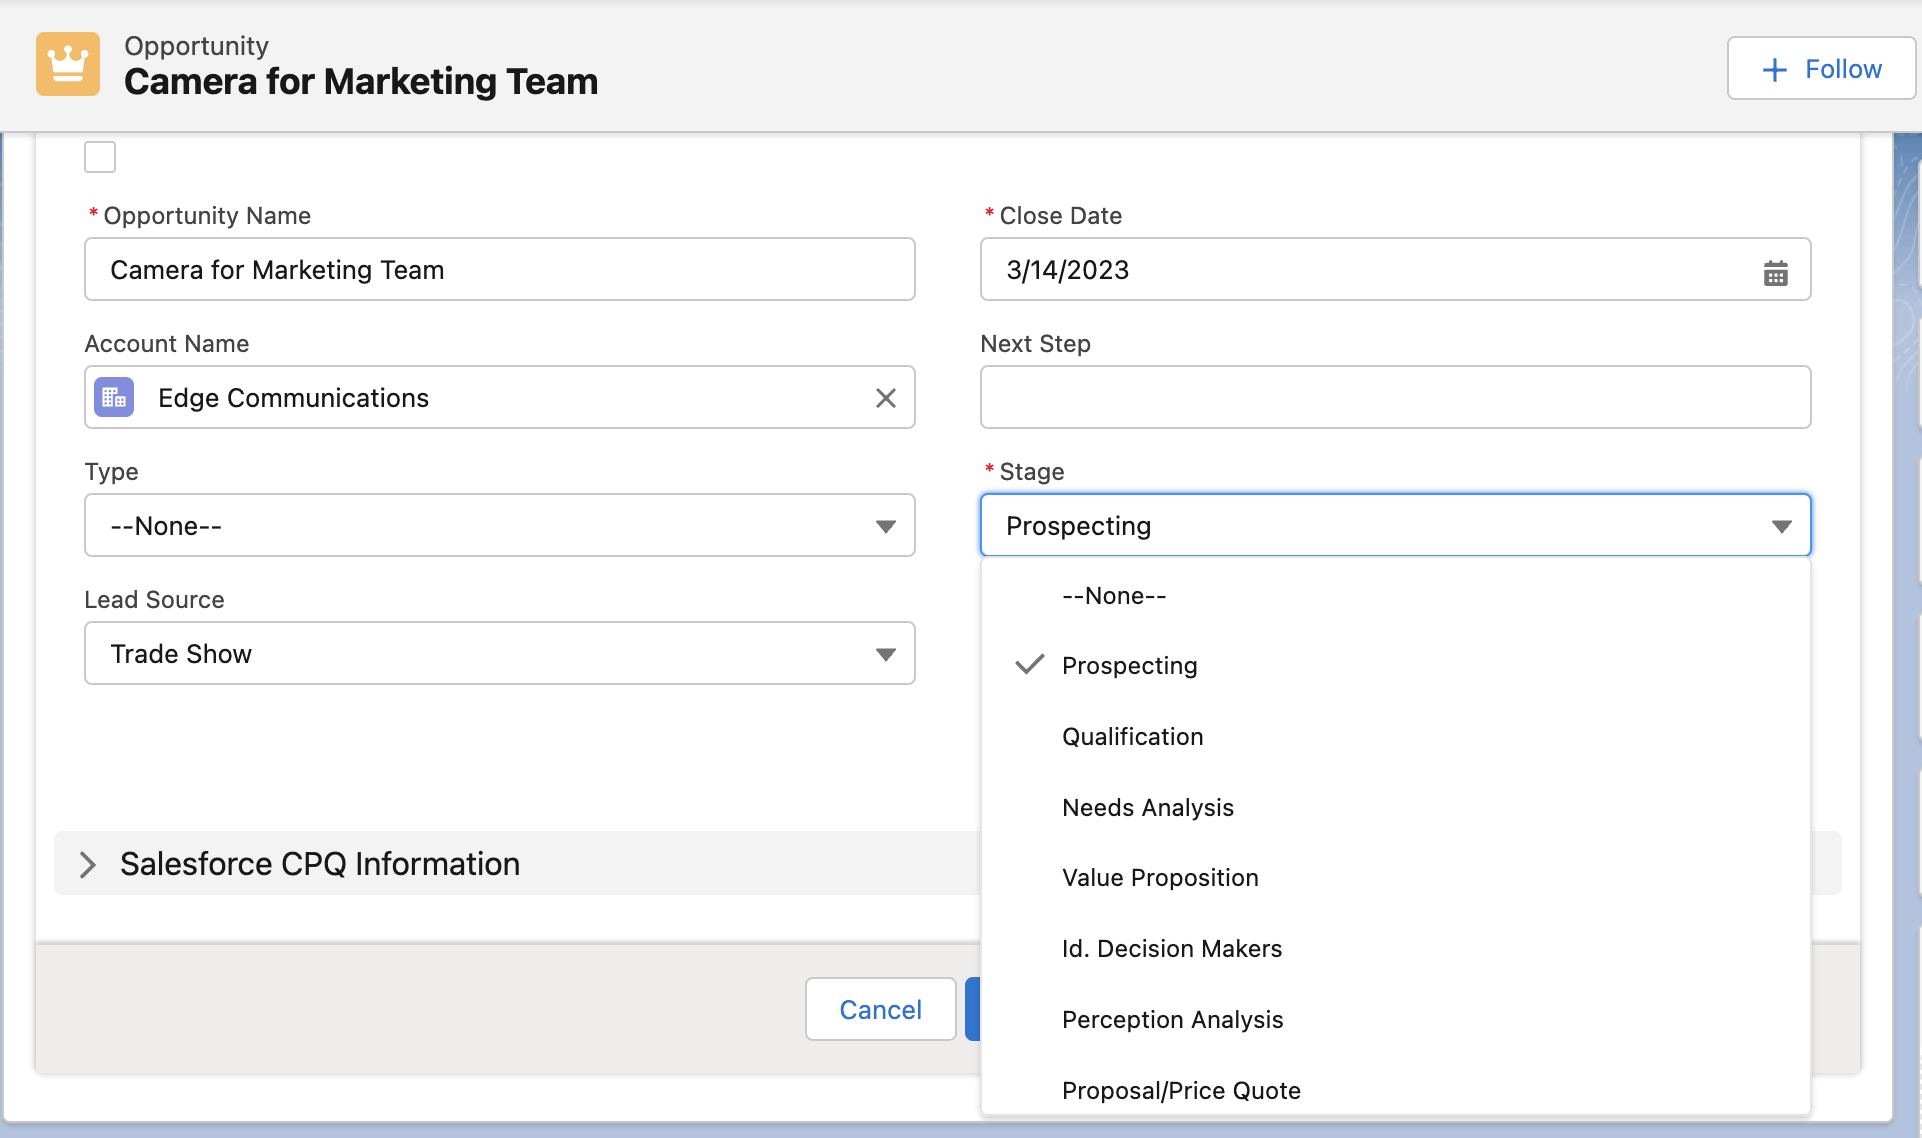
The Opportunity Stage should tell you where in the sales cycle the deal is, and how close it is to an outcome. As you can imagine, there are a few key questions you should have the answer to before embarking on customizing these:
- Which of the Stages do you need? Based on this answer, you can leverage the out-of-the-box ones or create new values.
- Are there multiple Sales processes with different steps in your organization? At this point you should assess if there is a need to start investigating the benefits of Record Types and creating unique sales processes for different types of Opportunities.
- What should happen at each Stage? There should be a documented definition for every Stage you decide to create and/or use in order to remove confusion when users start interacting with these values and be held accountable to progress the Opportunity. These definitions can also be added in the Guidance for Success section of the Path (which we will cover below).
Note: Keep in mind that Opportunities are one of the most heavily used Salesforce objects, and will end up being scrutinized in executive-level reporting, integrations, etc.
The list of questions may go on and on, but one thing you should know is that every Opportunity Stage is also related to a Type, Probability, and Forecast Category value – each one with their particular use.
These values can also be tweaked (to a certain extent) as you customize the way Opportunities are progressed. Making one change to the Opportunity Stage values, depending on your organization’s process, is likely to have a significant downstream impact if these additional attributes are not set up correctly.

Read More:
- Complete Guide & Tutorial to Salesforce Opportunity Stages
- Forecast Categories in Salesforce: Everything You Need to Know
- Complete Guide to Salesforce Record Types
2. Guide Your Sales Team With Salesforce Path
As mentioned in the above section, Opportunity Stages are a key functionality to accurately track progression, alongside with their additional attributes such as Forecast Categories. But even though users might get familiar with selecting a value from a drop-down list, what if there’s something more user friendly you could present them with?
Salesforce Path is a standard Lightning Component which offers the users the possibility to visualize a record’s progression through a picklist’s values as a chevron diagram, keeping them on track while offering up to five “Key Fields” to be completed at the top of the page, and additional “Guidance for Success” – you can build your first path in just a few easy steps!


Note: Path is not limited to Opportunities, or to the Stage field. You can choose the Object and field the Path should be used for, as well as the Record Type when they exist – for example, Renewal Opportunities might as well have their very own Stages and Path!
Additionally, you can see directly on the Path how many days an Opportunity has been in a certain Stage. Users can expand or collapse the extra information, and the fields for each Stage can be edited right under the Path without having to locate the fields on the layout. Plus, because using confetti is always fun for good news, you can enable celebrations for your Path when a certain Stage is selected.
Let’s see the Path in action on an Opportunity’s Record page:
Take a look at this dedicated Trailhead module as well about Path, Opportunity Stages and, Kanban view!
Read More:
3. Use Opportunity Teams
More often than not, especially for larger deals, there is rarely just the Sales Manager involved in successfully closing an Opportunity – there could be a Legal Advisor, a Pre-Sales colleague, and perhaps a Business Development Rep.
The concept of an Opportunity Team is similar to that of an Account Team, which we covered in the article about “Best Practices – Account Object”. Salesforce Opportunity Teams can be used to not only give read or edit access on an otherwise hidden Opportunity (if they OWDs are set to Private or Read Only) but also to correctly identify the attribution of each team member with Opportunity Splits, which you can choose to use or not.
The important part is, Opportunity Teams is a very friendly concept and users should breeze through adding, removing, or editing team members. Plus, assigning the correct roles and creating custom fields particular to your org can be created on the Opportunity Team Member if needed as well!
Find out more about Salesforce’s Opportunity Teams, how they work, and why they’re such a great tool to easily enhance collaboration from our detailed overview into this out of the box functionality.
4. Leverage Validation Rules for Better Data
Data quality is certainly a hot topic across any Salesforce Objects, but especially when it comes to the Opportunities. In the end, Opportunities hold most of the relevant revenue data points and a lot of reporting is built around them. So, what can you do to ensure the key information is always there?
Validation Rules, as you probably know, are a way to alert the user that something is missing or that it should be corrected – and red errors have a very good history of capturing everyone’s attention! Similar to other Salesforce Objects, you can build Validation Rules on the Opportunity Object. Here’s an example related to the Opportunity Stages we covered earlier:

The Validation Rule above will prevent users progressing from the Prospecting Stage to later ones if the “Next Step” does not have at least 20 characters. It will also trigger if an Opportunity that is further down the line is edited and the Next Step does not meet the criteria from this validation.
When the red error appears (either at the top of the page or at field level) the error message you defined when creating the validation rule will show up, hence the user should locate the Next Step field, update it accordingly, and then proceed.


As you can imagine, you can leverage a wide range of formulas depending on the use case at hand, fields from the Object you’re building the validation on, and even user attributes for example.
Read More:
5. Explore Opportunity Contact Roles
Your potential customers might have more than one person from their side involved in negotiating a deal or there might be one person who has played different roles in different Opportunity negotiations. Regardless, there was at least one person that your Sales Manager discussed with regarding the Opportunity, so shouldn’t that be reflected on the Opportunity?
This is where another standard Salesforce functionality comes into the equation. Contact Roles are available on the Opportunity, Contract, and Case in Lightning Experience, with the Account Contact Roles only being an option in Salesforce Classic as of now.
Going back to our Opportunity, the Contact Roles section is actually a related list pointing to the Opportunity Contact Role Standard Object. You can add multiple Contacts in this section, and you can define a Role (even a custom one) for each of them.

Since we covered Validation Rules earlier, you might have noticed the “Primary” label from the above screenshot – a Primary Contact can be selected, or, for example, will be added automatically if the Opportunity is created through Lead conversion. But what if we would like to make it mandatory before being able to progress the Opportunity into Perception Analysis?
A while ago Salesforce made available the ContactId field on the Opportunity, which stores the Id of the Contact marked as Primary in the Opportunity Contact Roles. With this information at hand, requiring a Primary Contact declaratively just got a whole lot easier!


Don’t forget to check out the considerations for using Contact Roles, to ensure you know exactly if any limitation applies to your scenario.
6. Don’t Forget the Products!
Since Opportunities in Salesforce represent the deals with an associated monetary value, we should also know what is actually being proposed and finally sold to the customer, right?
Products, as well as Quotes in the end, help us achieve exactly that, and even though it may sound really simple at first, there are a variety of implications and functionalities to consider, depending on your organization and the way your Products, Price Books, and Prices need to be set up.
For example, you might have a basic scenario where you leverage a Standard Pricebook with the Products having just a simple List Price, or you could be a Salesforce CPQ customer which might make use of a pricing method such as Block Pricing to define the costs based on quantity ranges.


Standard Quotes can be enabled in Setup. You could, for example, require an approval once the offer is ready and then the sellers could easily generate and send a PDF to the prospect.
Any Products previously added to the Opportunity will now appear as Quote Line items as well – edits can be made directly on the Line Items, and then the Quote should be synced back to the Opportunity for the changes to be reflected accordingly on the Opportunity Products.

Regardless of the specifics of your organization, not only should the technical setup for Products and Prices be accurately done, but thorough user enablement should also happen in a very detailed manner. For example, all Sales Managers should be aware that the standard Amount field can no longer be edited even if they have permissions once the Opportunity has associated Products, since the Amount will be calculated based on the Product’s prices and their quantities.
7. Use Automations When Possible
Declaratively automating Salesforce processes is currently powered by Flow only, with Workflow Rules and Process Builder slowly becoming a thing of the past. Check out our tailored list of some of the best ways to start learning flow today!
When Sales Managers create an Opportunity, they must enter a Close Date, which represents the date when they plan to seal the deal. The fun thing about Close Date is that if, at the point when the Opportunity is moved to Closed Won and the Close Date is in the future, it gets updated to today’s date. If it’s in the past or the Opportunity’s Stage is changed to anything else, nothing will happen to the Close Date. Let’s fill the gaps and make this behavior consistent for all scenarios!
Note: The tutorials we are showcasing are built in developer edition orgs with limited data and only a few custom automations. Ensure that you evaluate your existing processes properly before building new ones, including both declarative automations and custom Apex. For Flow specifically, consider the recommended best practices when it comes to the number of record-triggered flows per object.
In the example below, whenever an Opportunity is closed, no matter if Won or Lost, the Close Date will be updated by the Flow to today’s date. Once the Flow is ready, don’t forget to debug and test it!
This is, of course, just one of the many possible automations which can be achieved with Salesforce Flow on the Opportunity Object.
Another perhaps lesser known way to automate and tailor the user experience is Einstein Next Best Action. You should check it out in addition to Salesforce Flow, as not only will it save your sellers’ time, but might also bring the exact outcome you’re looking for through displaying the right recommendation, to the right user, at the right time. For a very simple example, if someone bought a laptop, what about recommending them a backpack which fits their product as well?
8. Report Opportunity Data Changes
When it comes to reports in an organization which leverages Salesforce’s Opportunity Object, chances are that you will find a wide variety of them. There’s simple Salesforce reports, more advanced Salesforce reports, Excel exports, and of course complex data visualizations in tools such as Tableau or CRM Analytics. Practically, if the data is not up to par and users haven’t been properly enabled to update their records, it is bound to be visible when checking out these reports.
There are a lot of readily available Opportunity Standard Report Types, covering everything you might need at the start of your journey. Later on, you can build Custom Report Types as needed, which can also be edited.

For example, the Opportunity History report can offer Sales Operation teams as well as Sales Leadership insight into the amount of changes as well as any back and forth in the Opportunity’s Stage Progression.

Additionally, you can use an Opportunity Field History report to view all details on the changes happening in the fields that you chose to enable field history tracking on the Opportunity for.

In addition to the Salesforce reports you are most likely already familiar with, an extremely powerful feature readily available is Salesforce’s Pipeline Inspection, featuring Einstein Opportunity Scoring. This feature is directed towards Sales Managers as well as Sales Leadership to accurately analyze changes and immediately action Opportunities, based on key insights delivered at their fingertips!

Keep in mind to check the Pipeline Inspection considerations and limits page here.
Final Thoughts
Ultimately, each Salesforce instance is different and so are the business processes that it’s being used for day in day out. Finding the right balance between using the readily available out-of-the-box functionality and building a custom solution, especially for heavily used standard objects such as the Opportunity, will surely save a lot of time and potential technical debt along the way.
Perhaps the one best practice to keep in mind is to always ensure, regardless of what object or process you are working on, that there is no out-of-the-box feature already there waiting for you to use, instead of building the same process from scratch!

Comments: