

Agentforce is one of the most powerful tools Salesforce has put out in a very long time. As a long-time Salesforce Flow enthusiast, it reminds me a lot of this. The purpose of the tool is simple: make Agentic AI accessible to and easy to use for all businesses.
For those who have been sitting on the sidelines and not really having a chance to get involved, you may be curious just how to get started and build your first agent. Strap in, because we’re about to go through just that!
What Is an Agent in Agentforce?
If you’re new to Agentic AI as a whole, you may be curious as to just what an agent is, how it differs from other forms of AI, and what it can actually do for your business. You may have even used ChatGPT, Gemini, or Claude in your personal or work life in recent years.
Agents are a little different. Where LLM chatbots like these walked, agentic AI runs – actually, a better analogy may be that where LLM chatbots talked hypothetically about walking and running, agentic AI can actually walk and run.
It is able to take action, rather than just provide guidance. Salesforce is selling the vision of ‘the agentic enterprise’, being such a future where humans lead teams of agents who perform various specific functions and tasks, empowering the humans to ultimately be more productive than humanly possible (literally).
Salesforce is selling Agentforce as the product that enables this future. Agentforce is a suite of products commanded by humans who work with AI agents to work at incredible scale. These agents are typically configured by Salesforce Admins within the Agentforce Builder in Agentforce Studio.
Every second counts when working in the service spaces, so time spent jumping across records is time that we should be looking to save. In this article, we’re going to go through an example of a basic agent that helps to find any historic Case records that may be related to the Case that the service team member is working on.
What Is Agent Builder?
Agent Builder is the heart of the agentic operation in Salesforce. Think of it like this: as Flow Builder is to Salesforce Flow, so is Agent Builder to Agentforce. The agentic enterprise vision that Salesforce is trying to empower its customers to achieve isn’t going to come with minor changes, and tinkering around with AI is no way to scale an agentic workforce. You need a real tool.
Enter Agentforce Studio and Agent Builder.
This is your new home for any agents that you’re building for your business, performance, and analytics details, connected data libraries, and most importantly, testing. We’ll get to some of these features later in this article (or in linked feature spotlights), but the first thing you’ll want to do is begin building your first agent.
How to Create an Agent in Agentforce
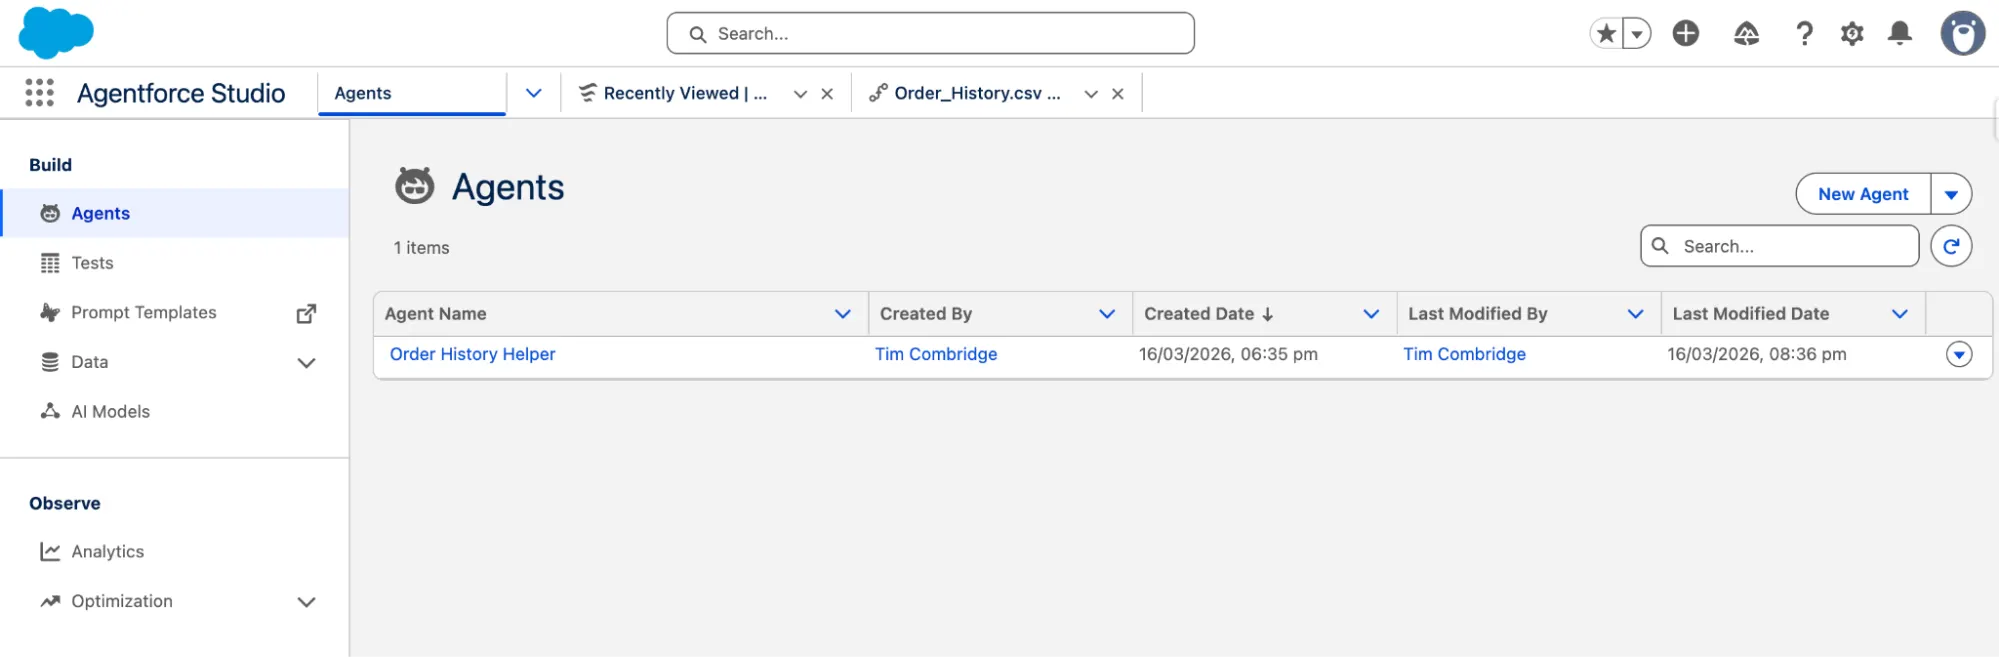
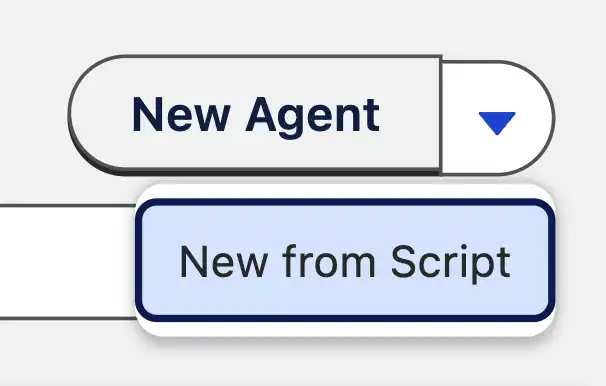
Creating an agent in Agent Builder requires that you have the right license. If you do not currently have this, you can spin up a new developer org and follow along from there. Navigate to the Agentforce Studio app in Salesforce, and from the agents tab, you will need to click New Agent. There is also a dropdown option to create New from Script, but we will use New Agent for now.
This will take you to the first step of agentic creation – either selecting from a list of templates, or describing what you’re looking to build to Agentforce, which will assist in the build.
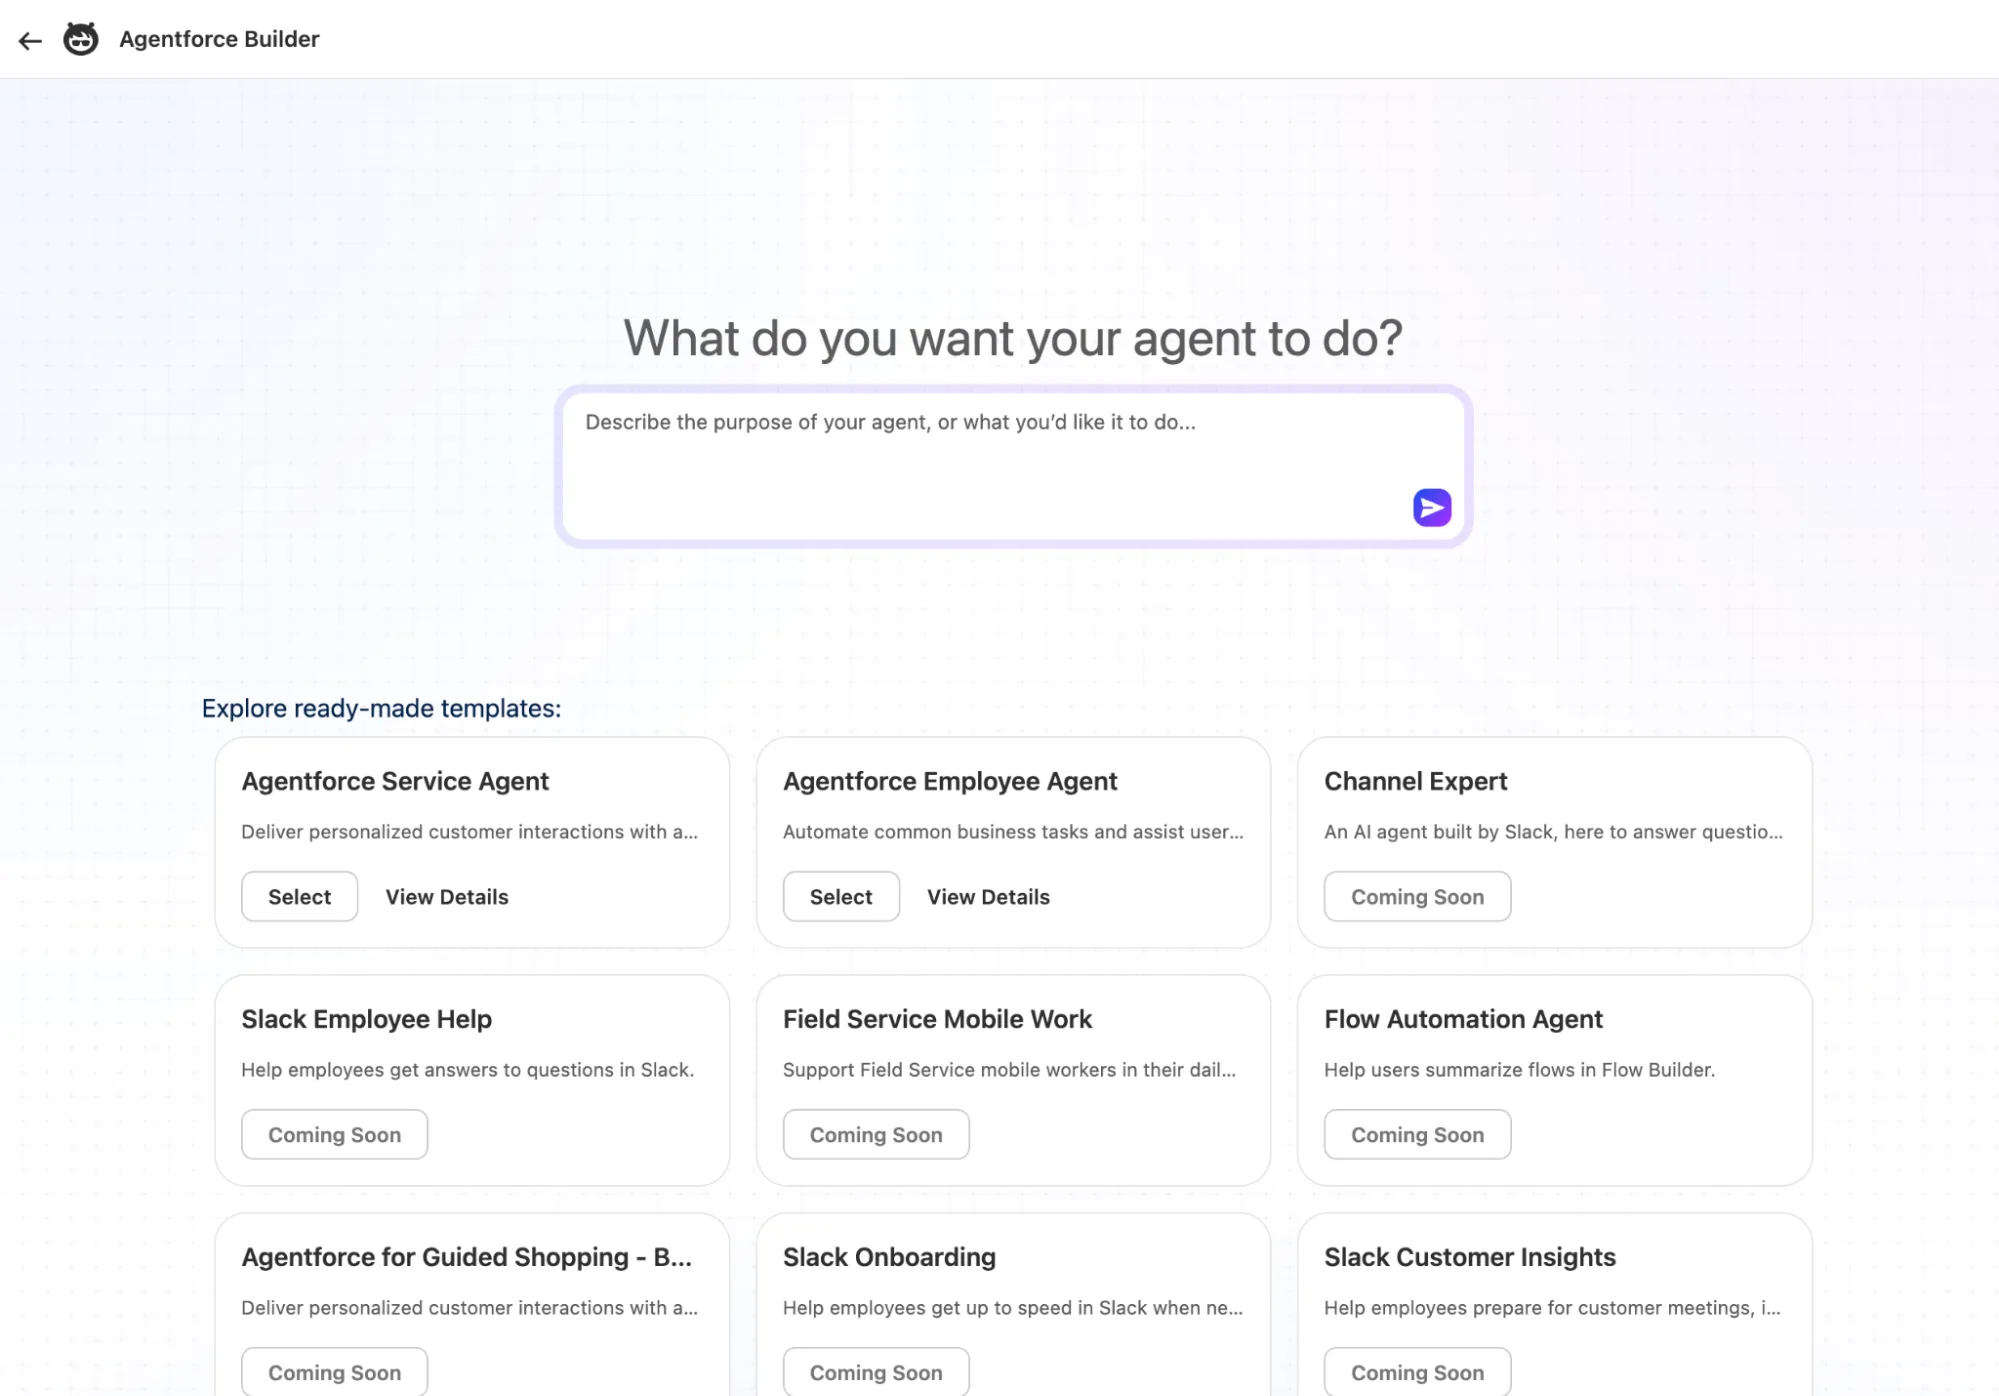
Remember, you don’t want your agent to do EVERYTHING, just like you don’t want one single employee to do EVERYTHING. You need to be careful and consider what role this particular agent will play, and strategically build from there.
For this example, we’re going to build a Service Agent that checks to see if the current Case may be related to any other Cases on the same Account. To achieve this, we’ll start by leveraging the Agentforce Service Agent template. You can see what it will do out-of-the-box by clicking View Details.
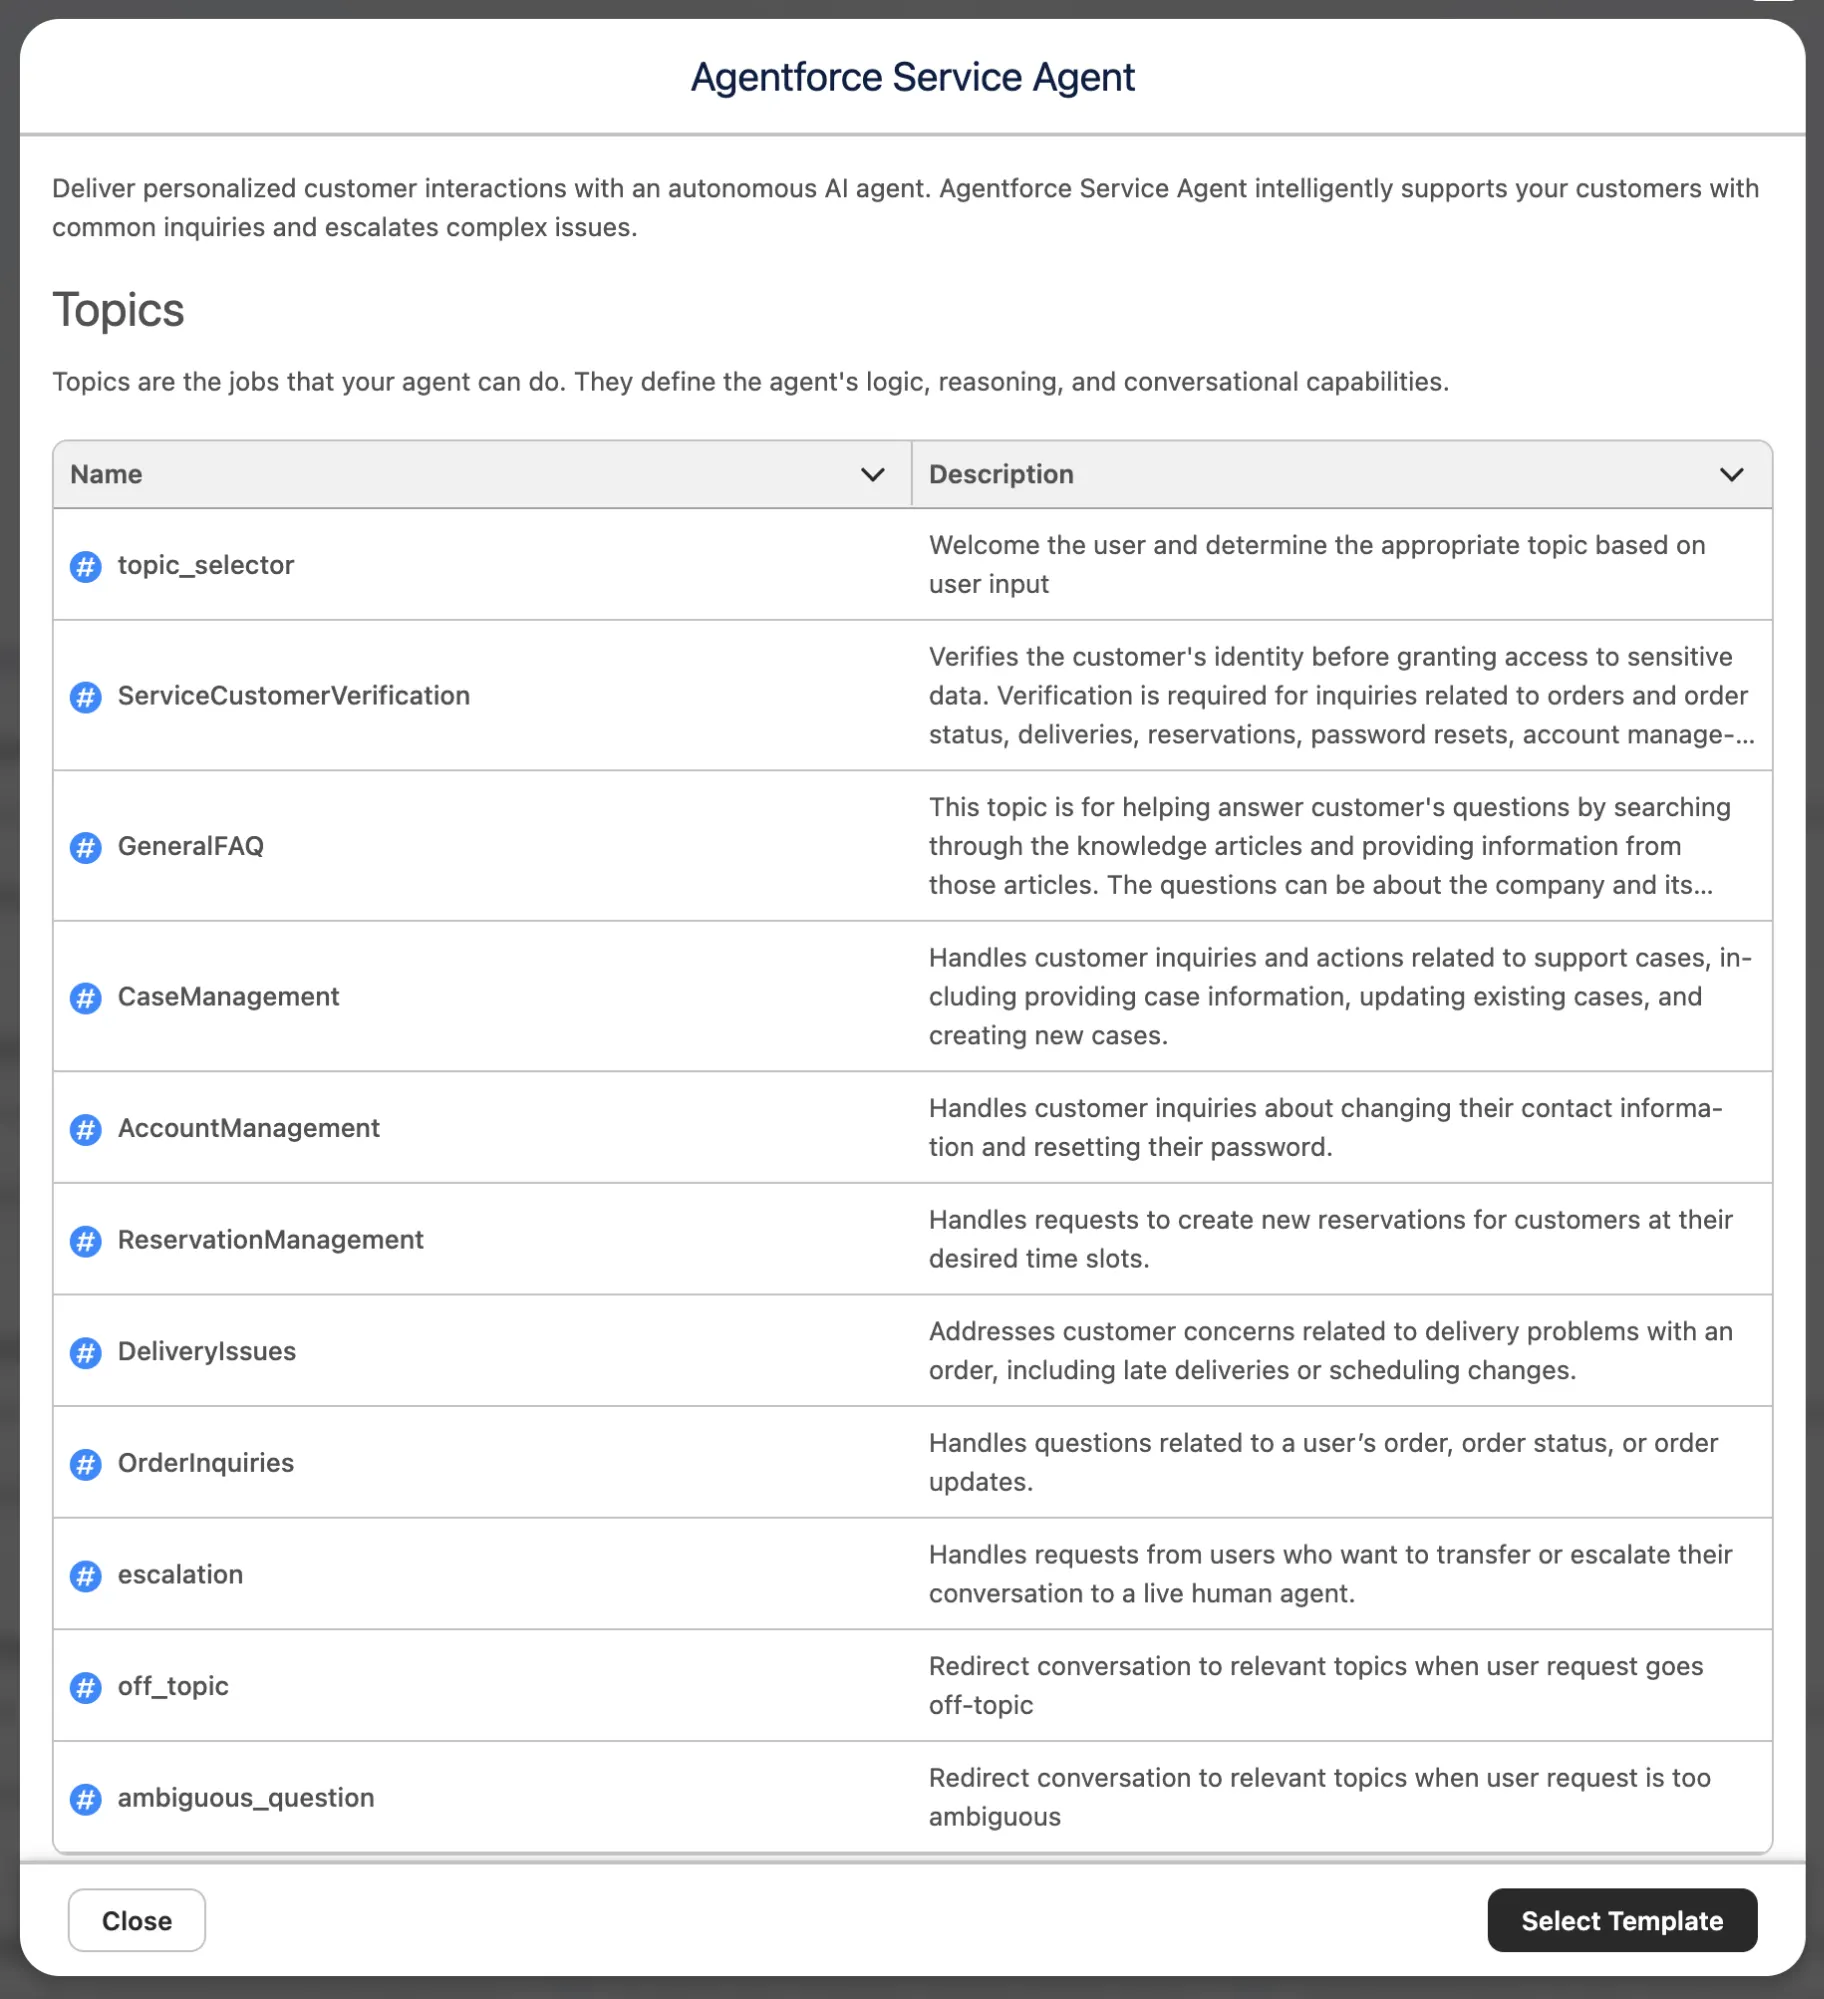
The Topics essentially are a combination of context and groups of actions that can be taken based on that context. They’re made up essentially of the topic name, a description (both of which are in the screenshot above), a scope, some instructions, and the groups of actions that relate to it. The long story short is that these topics help to ground the agent and make sure it’s effective in the way that it functions.
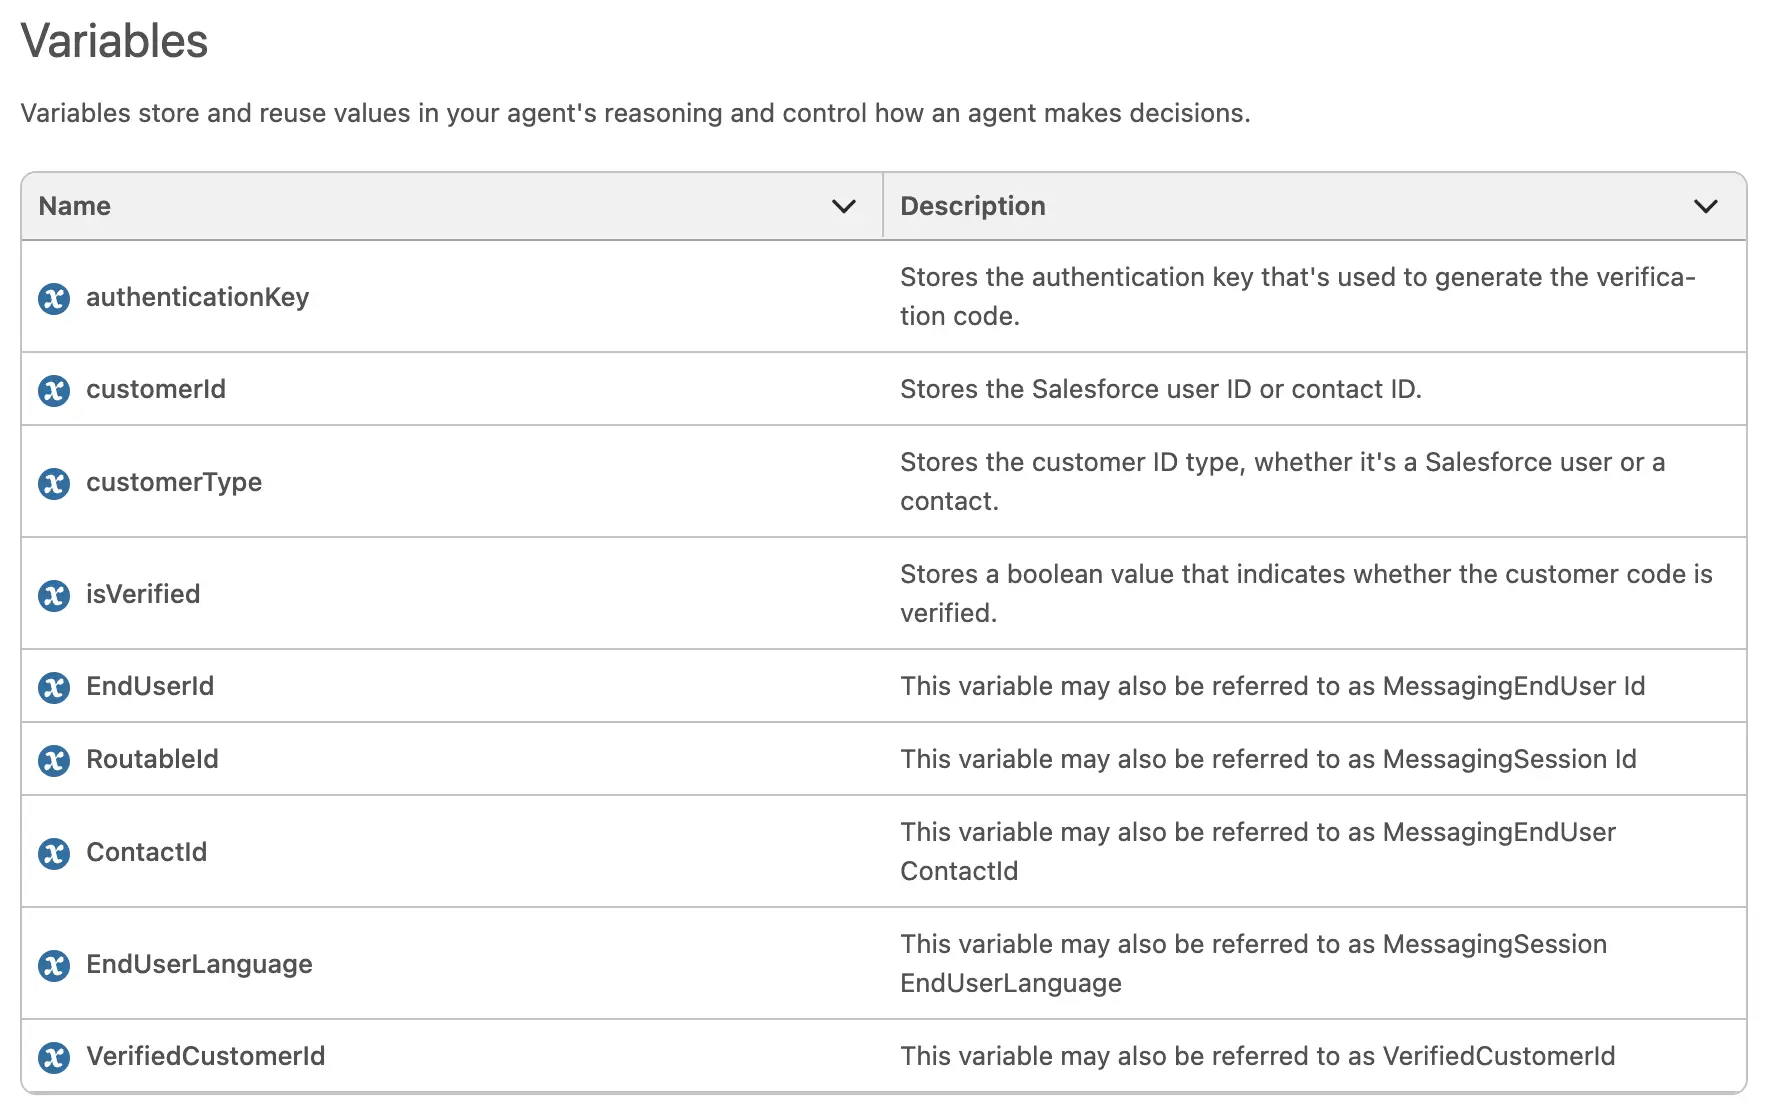
Scroll further down, and you’ll see a list of variables that come pre-built in the template. Similar to Flow or Apex, these variables allow your tool (in this case, an Agent) to contextualize whatever it is working on by receiving different values into structured variables. If your agent is working with a Contact, are they working with John Smith, Jane Doe, or someone else – the variable will fill the agent in on this.
Please keep in mind that you don’t need to use all of the topics of variables that are contained in a template, nor are you limited to just what is shown. This is just a template – a starting point – and you will make changes before pushing live. When you’re familiar with the template, click Select Template to proceed.
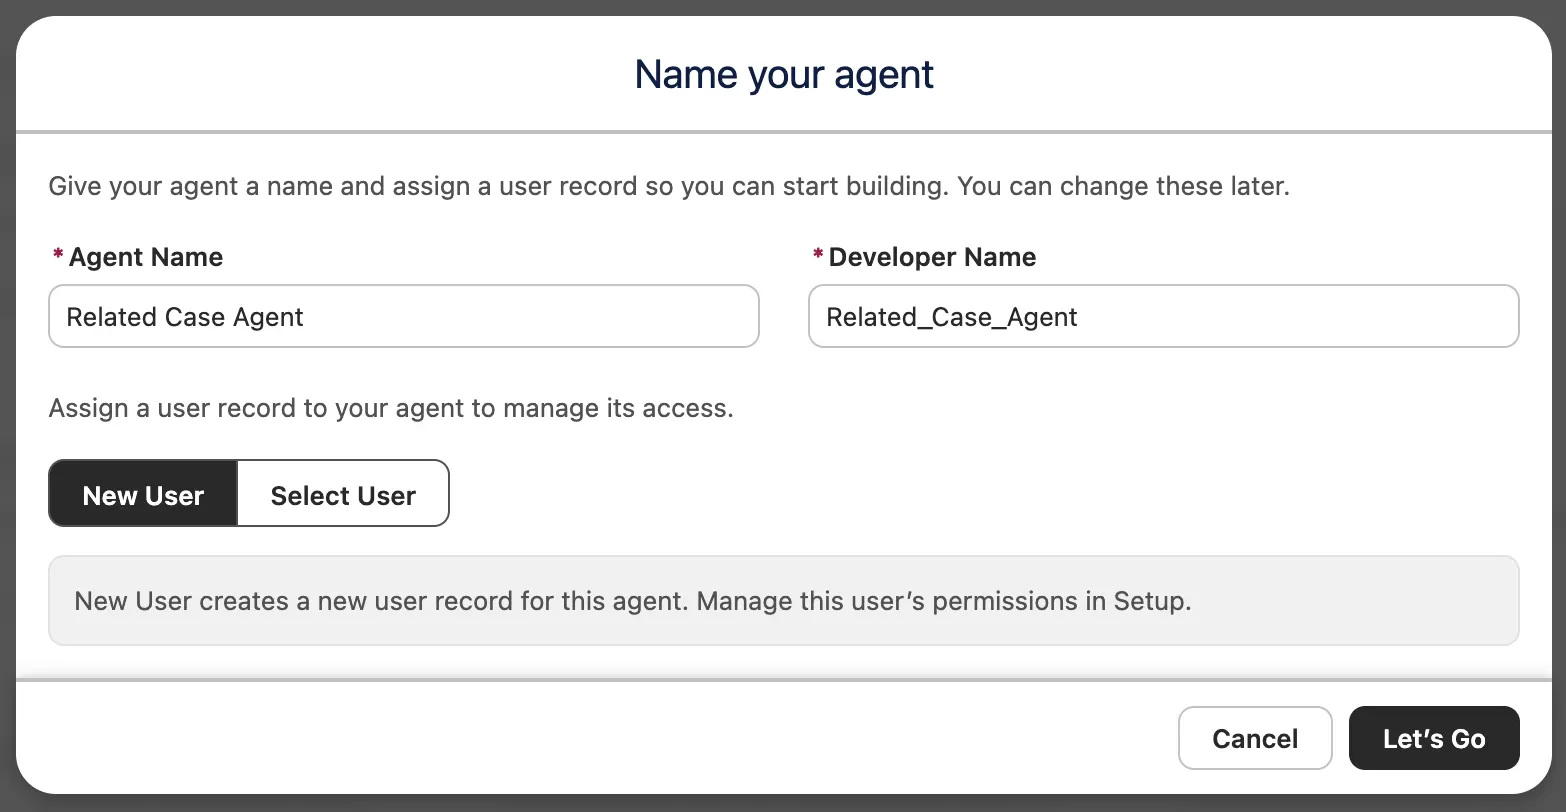
It’s time to name the agent! For this demonstration, we’re going to call this Related Case Agent and link it to a New User. Click Let’s Go to get stuck into the meat and potatoes!
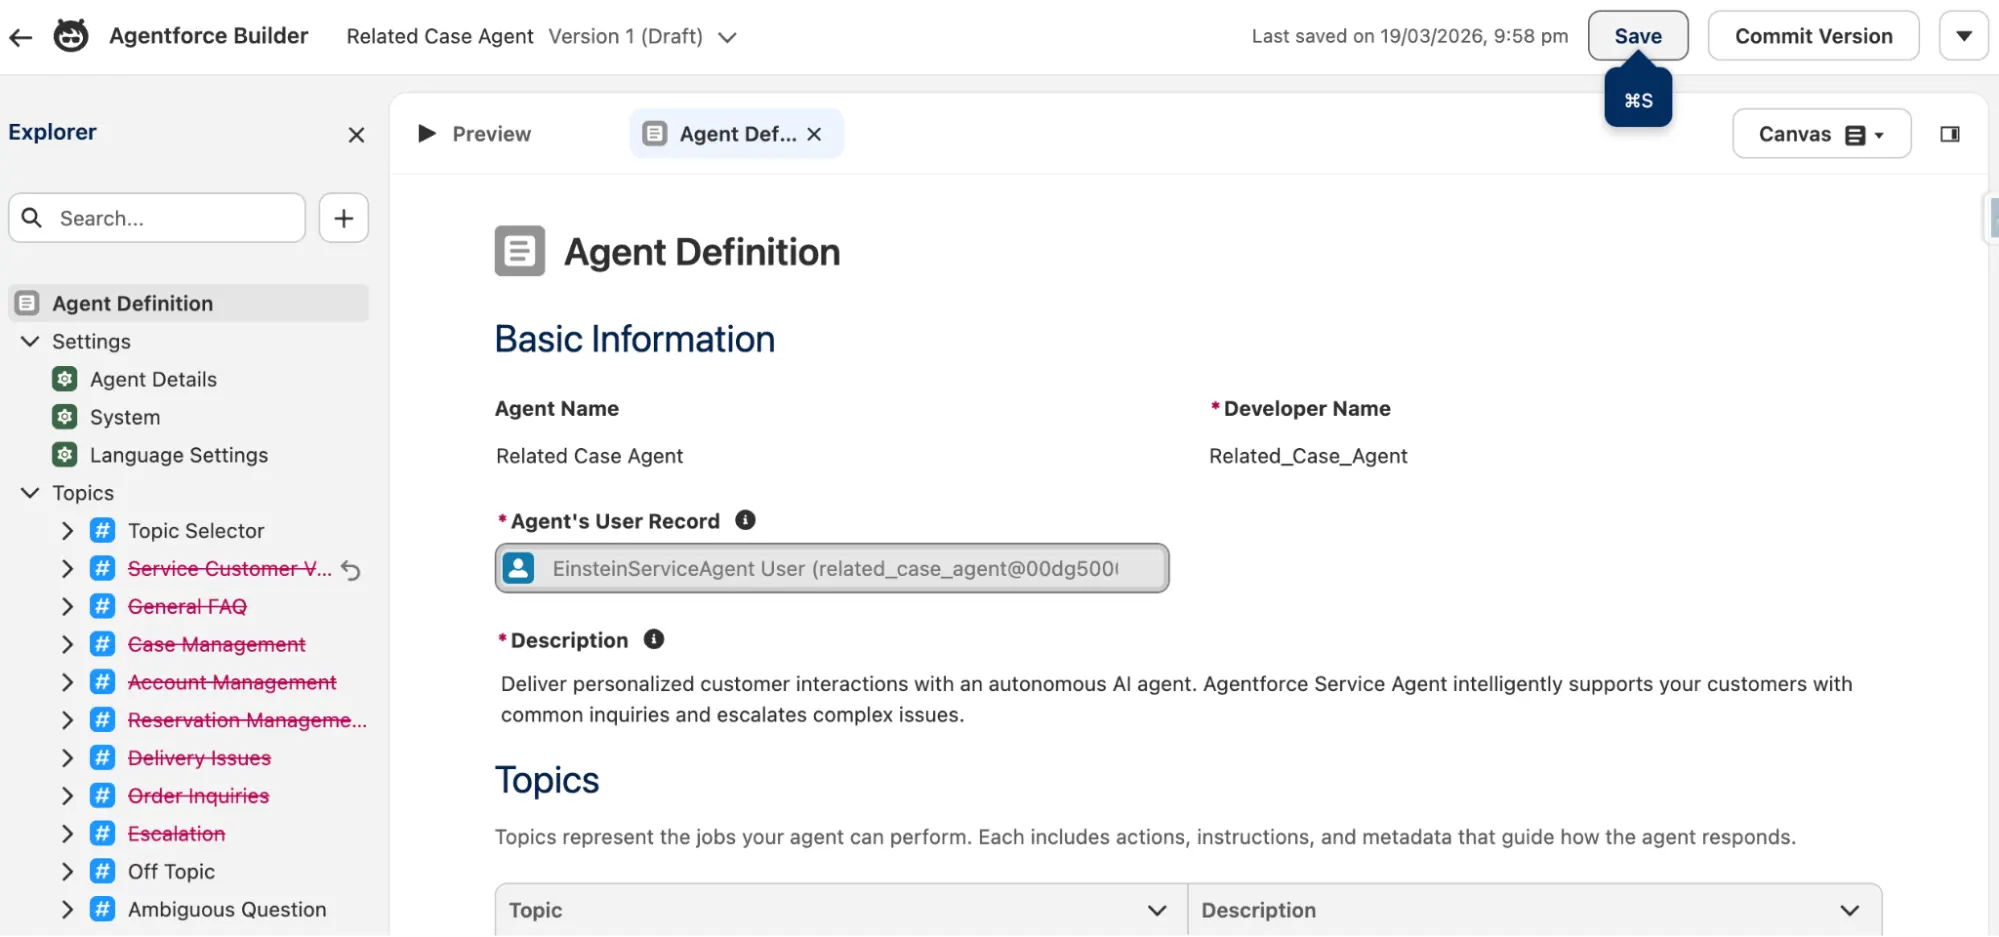
Now we’re getting serious – this is what your agent currently looks like behind the scenes!
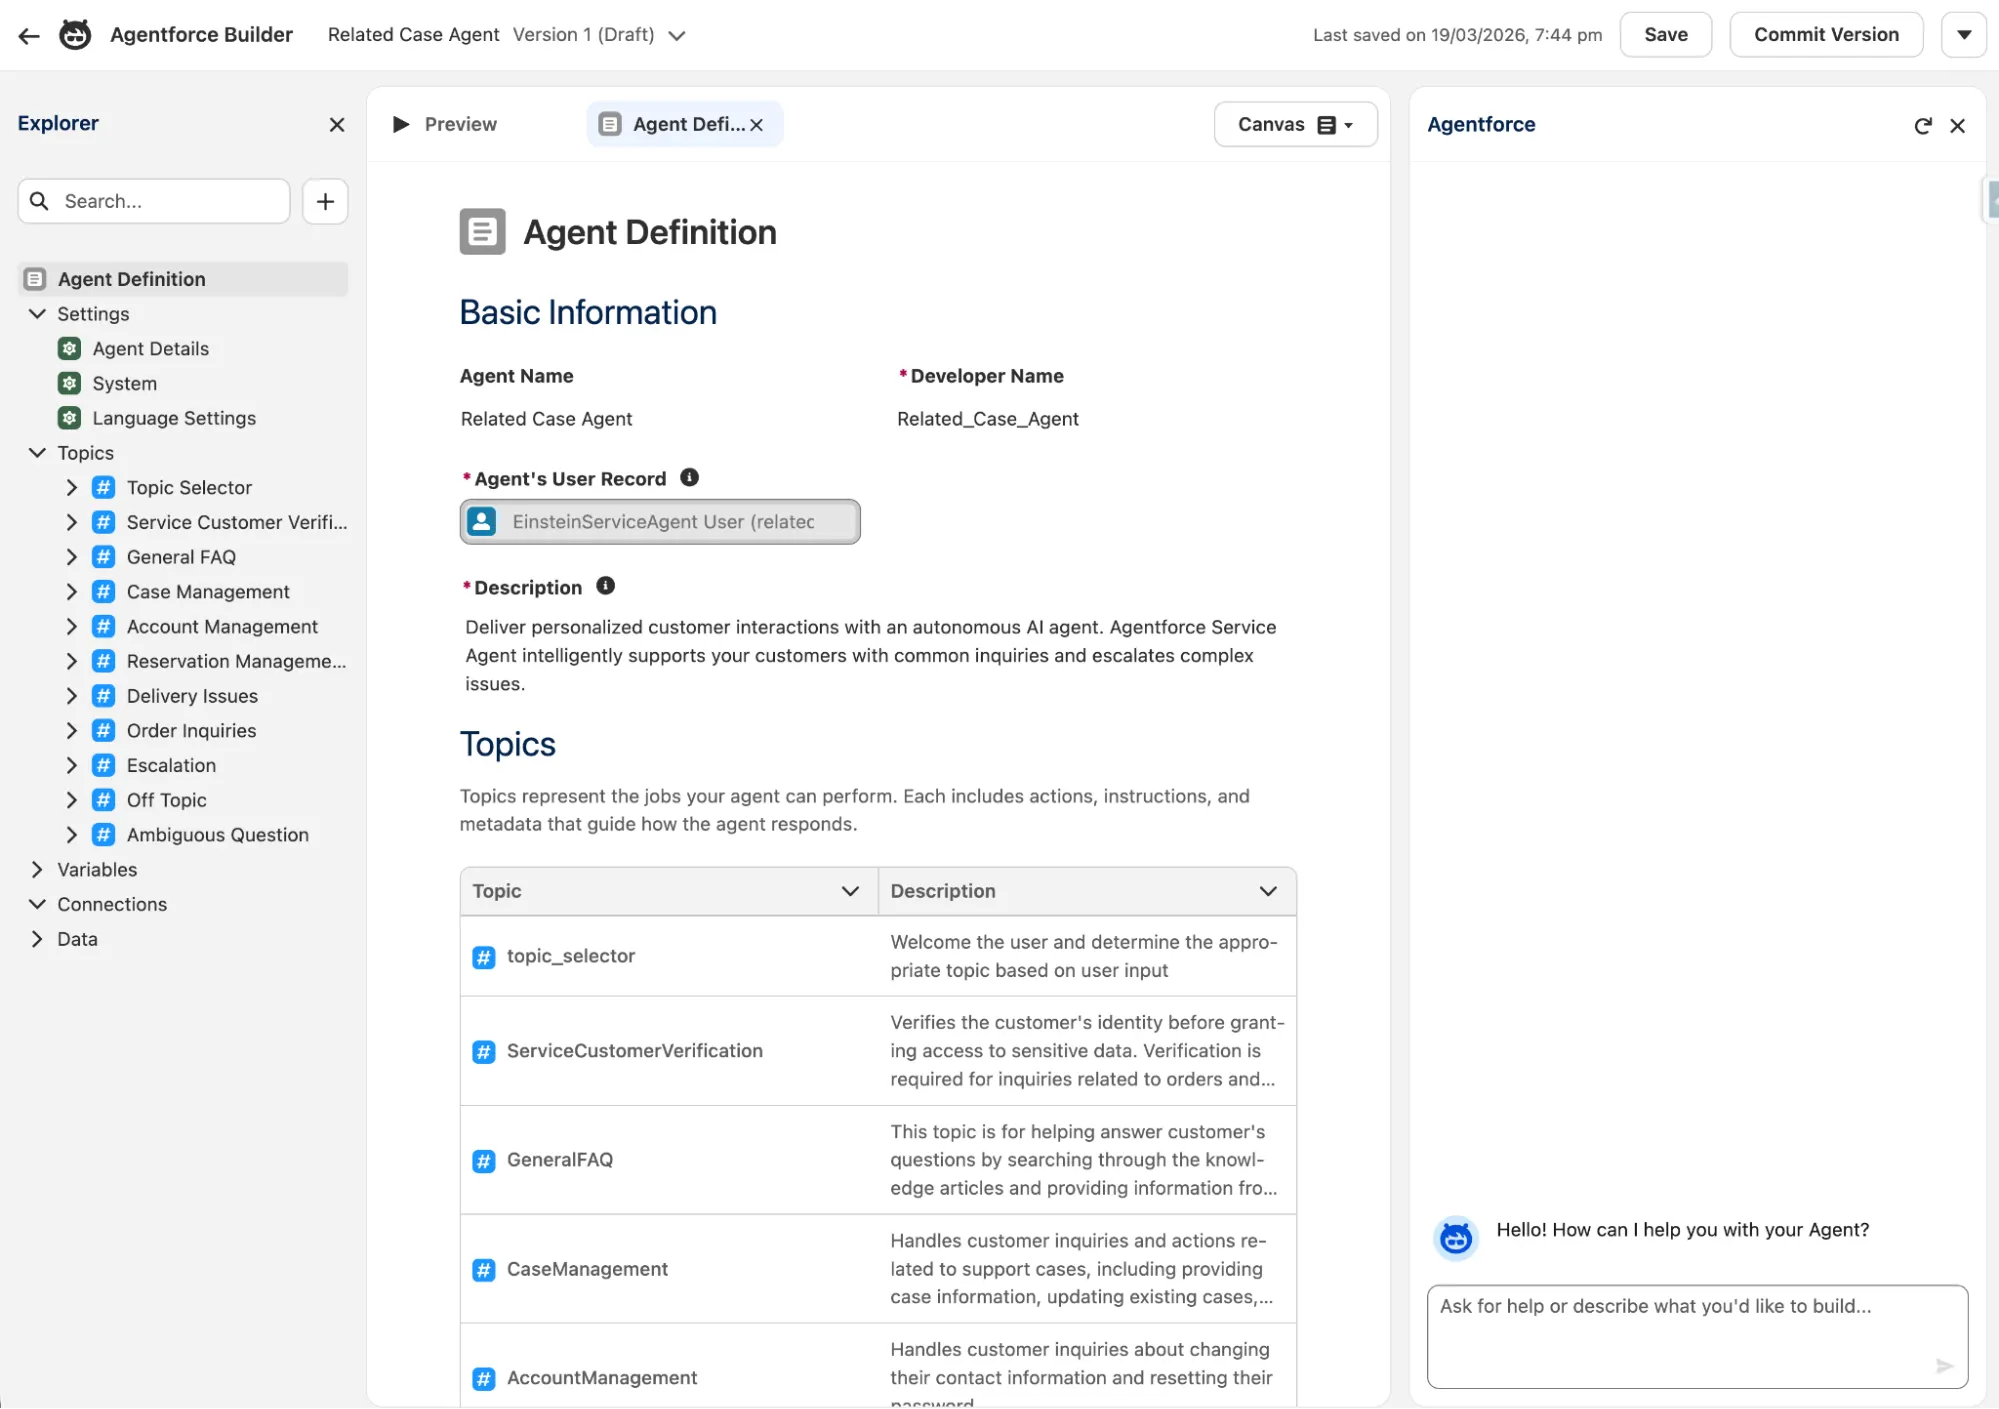
If you’re familiar (at all) with Visual Studio Code or another IDE, you may notice a bit of a visual similarity. In the left-side panel, you have an Explorer that shows the different ‘files’ that make up your Agent. These are grouped into Settings, Topics, Variables, Connections, and Data. The middle section is your preview panel where you can see what the file (either in Canvas View or Script View) contains, or preview the agent as a whole. Then, on the right, there’s your AI agent assistant – an AI who helps you build AI!
Let’s expand the Topic Selector topic. This gives a great, simple example of how a Topic is used in an agent. You can see the Topic’s name (Topic Selector), description (Welcome the user and determine the appropriate topic…), instructions (Select the best tool based on…), and actions (in this case, all pushing to other Topics).
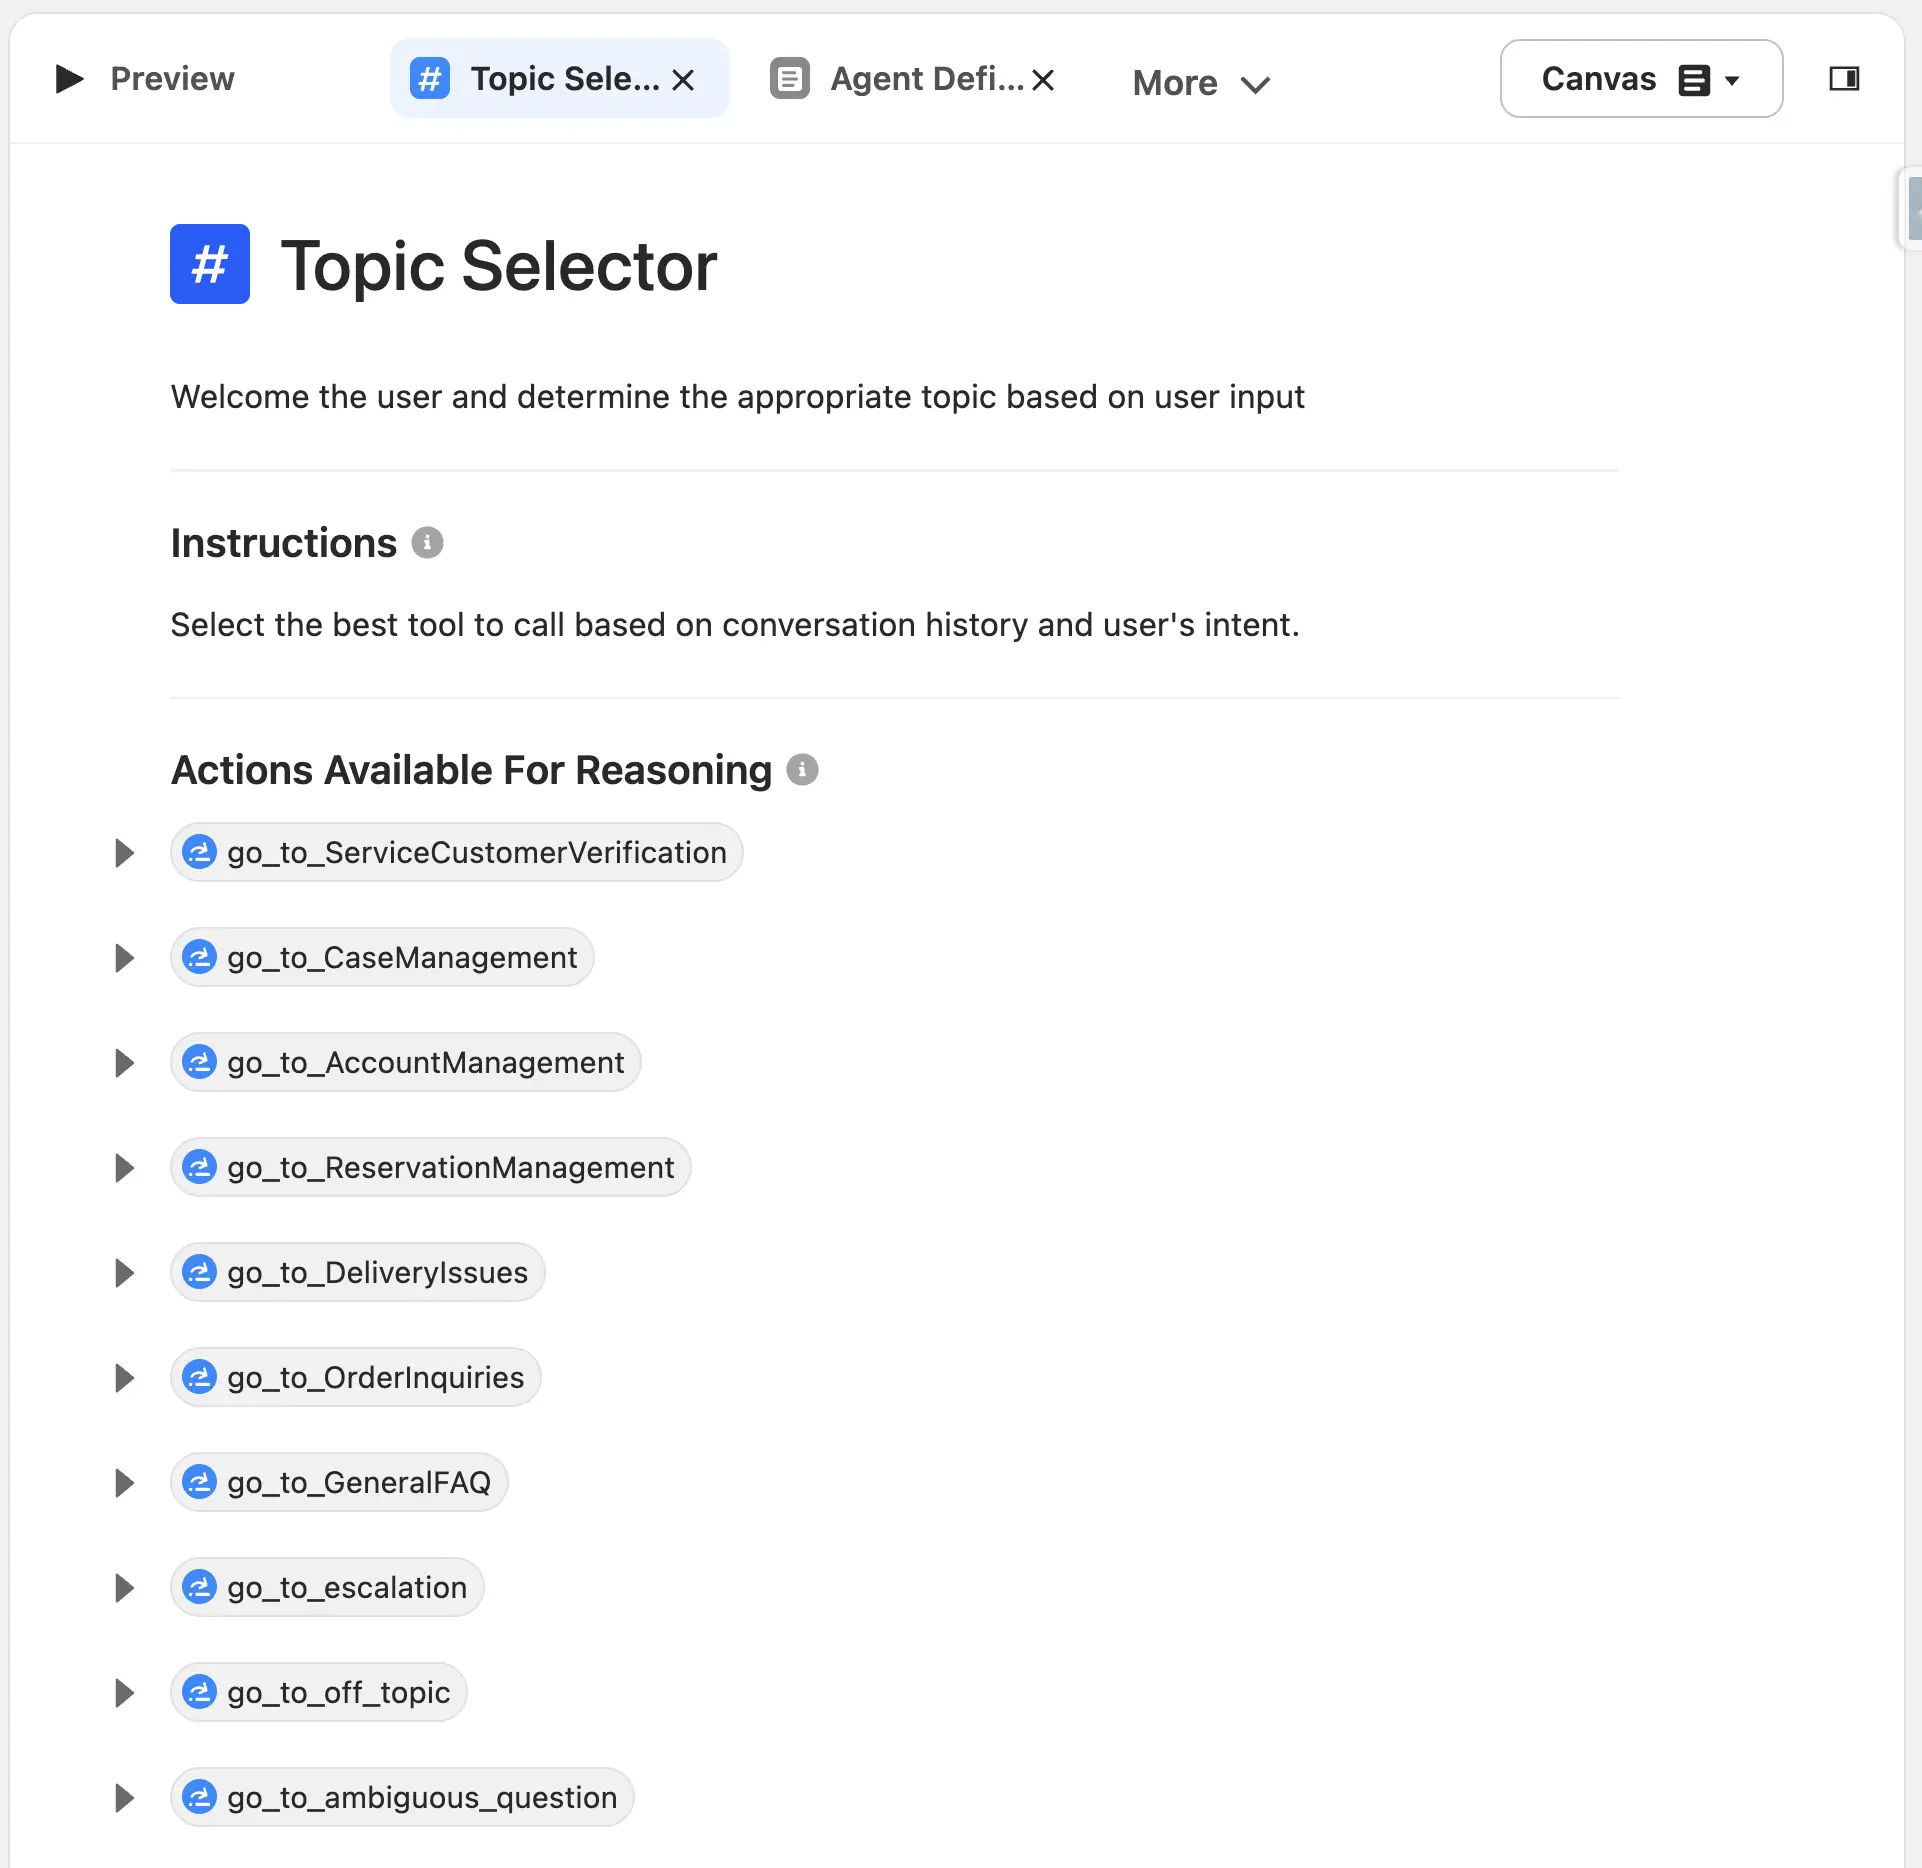
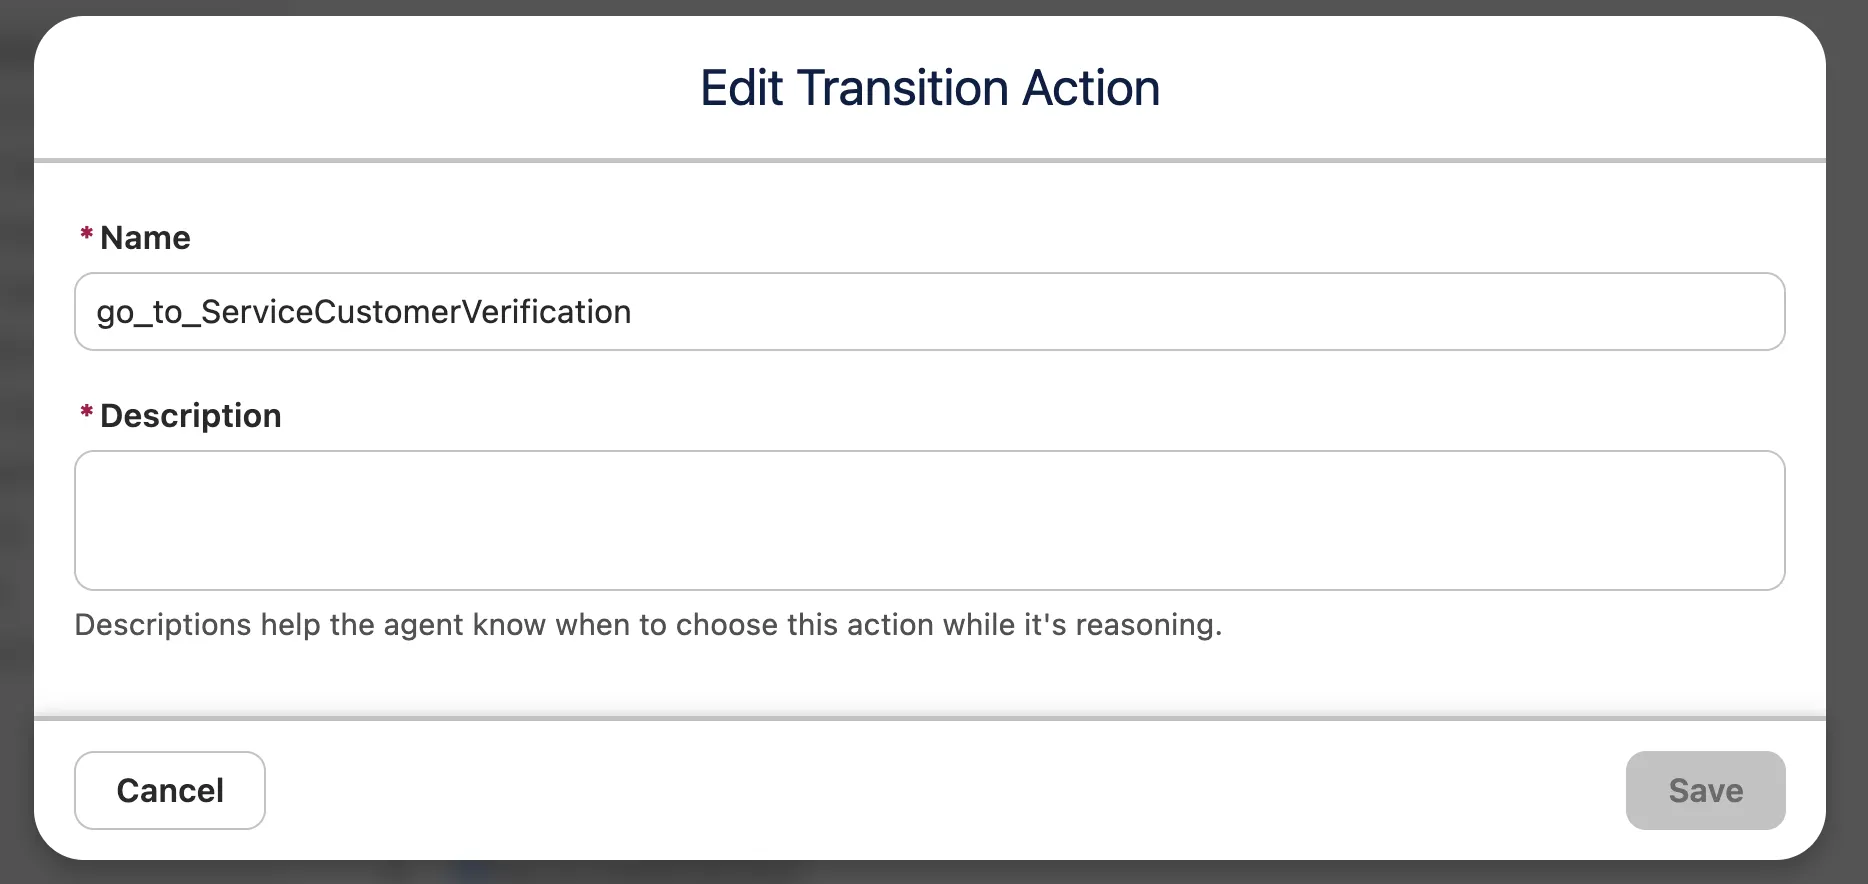
If you click into one of the actions, you can give the individual action a more detailed description. The benefit of this is to give the reasoning engine additional context so that it is more likely to choose the right decision. The template did not populate the Description fields, but they are required if you make changes.
The Topics that come out of the box with this template are not super valuable to us, so we can remove them. Feel free to keep the Topic Selector, Off Topic, and Ambiguous Question Topics in there. You can delete Topics by clicking on the three dots, then Delete, then confirm the deletion on the pop-up modal.

When you make changes to your agent, you’ll notice they’re temporary and can be reversed. This is denoted by the red struck-out text and the reverse arrow icon next to it. Make sure you click Save at the top-right of the page to apply the changes.
If you’ve followed my directions to the T, you’ll have noticed something else changed upon hitting Save – the Topic Selector Topic now has red text and a red cross icon! This is because that Topic referenced some of those that we removed.
Open the Topic Selector up and remove the references to those Topics that we just deleted. Once these are removed, Save again to clear the errors, and we can proceed:
- go_to_ServiceCustomerVerification
- go_to_CaseManagement
- go_to_AccountManagement
- go_to_ReservationManagement
- go_to_DeliveryIssues
- go_to_OrderInquiries
- go_to_GeneralFAQ
- go_to_escalation
Next up, you’ll want to add the Topic and Action. To keep it simple, you can consider a Topic as the area of expertise that this agent has, and an Action as a tool that it has to execute on a specific goal related to the Topic. You can learn more about Topics and Actions here.
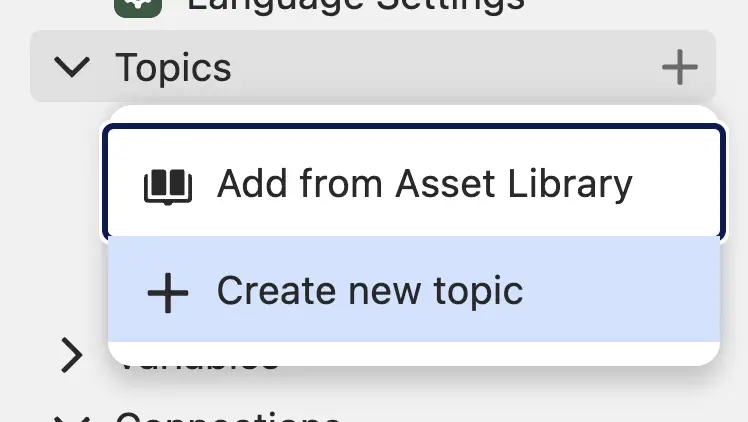
For now, you’ll want to start by creating a new Topic.
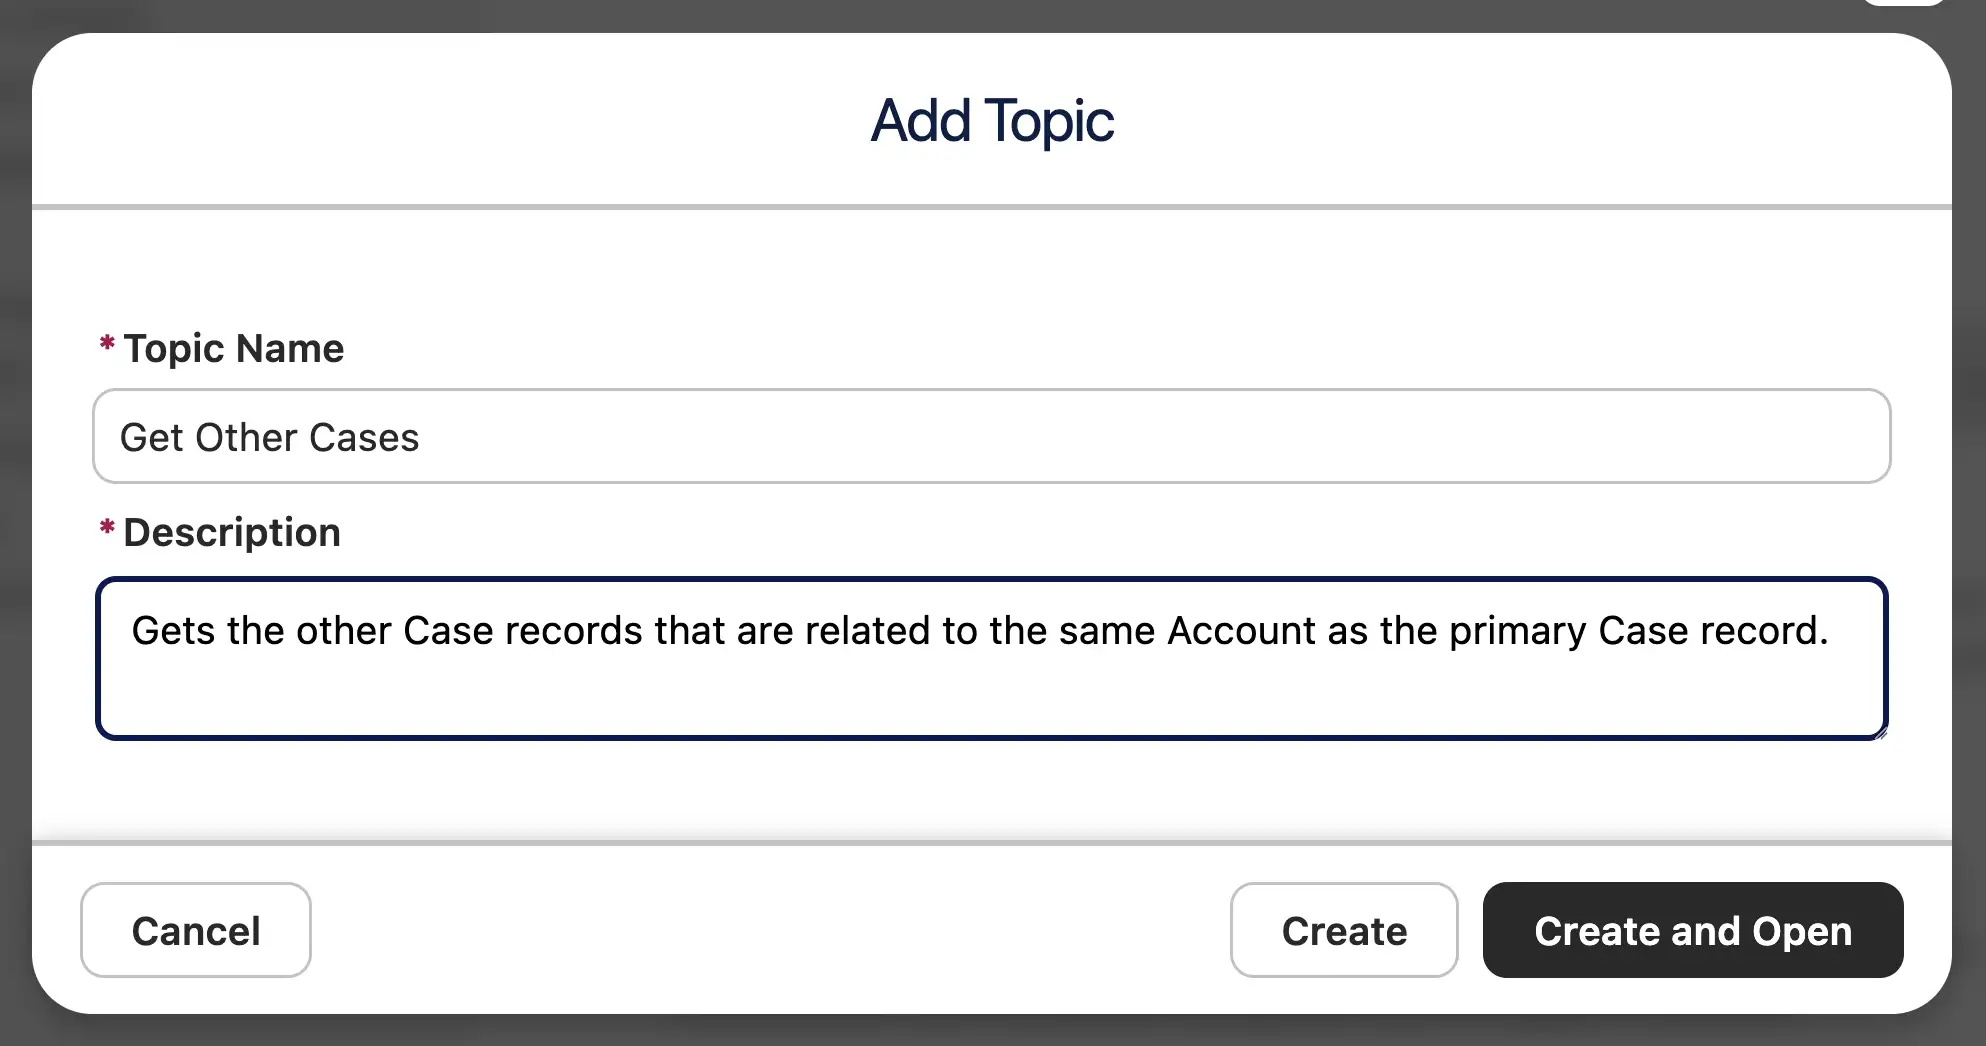
Give it the name ‘Get Other Cases’, and a Description of ‘Gets the other Case records that are related to the same Account as the primary Case record’.
Once your Topic is created, you need to give it an Action. To do this, you’re going to use a Flow as a Custom Action. Head to the Actions Available for Reasoning section and click to create a custom action.
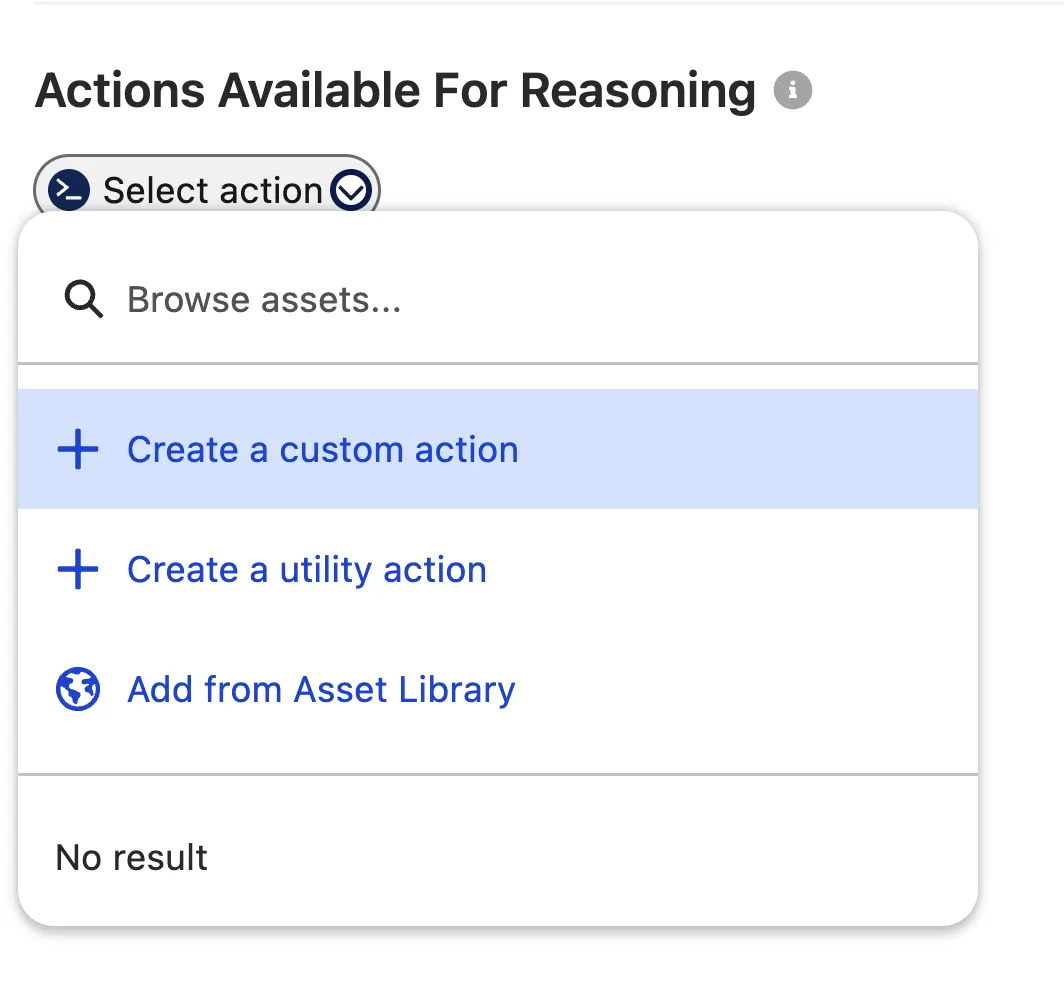
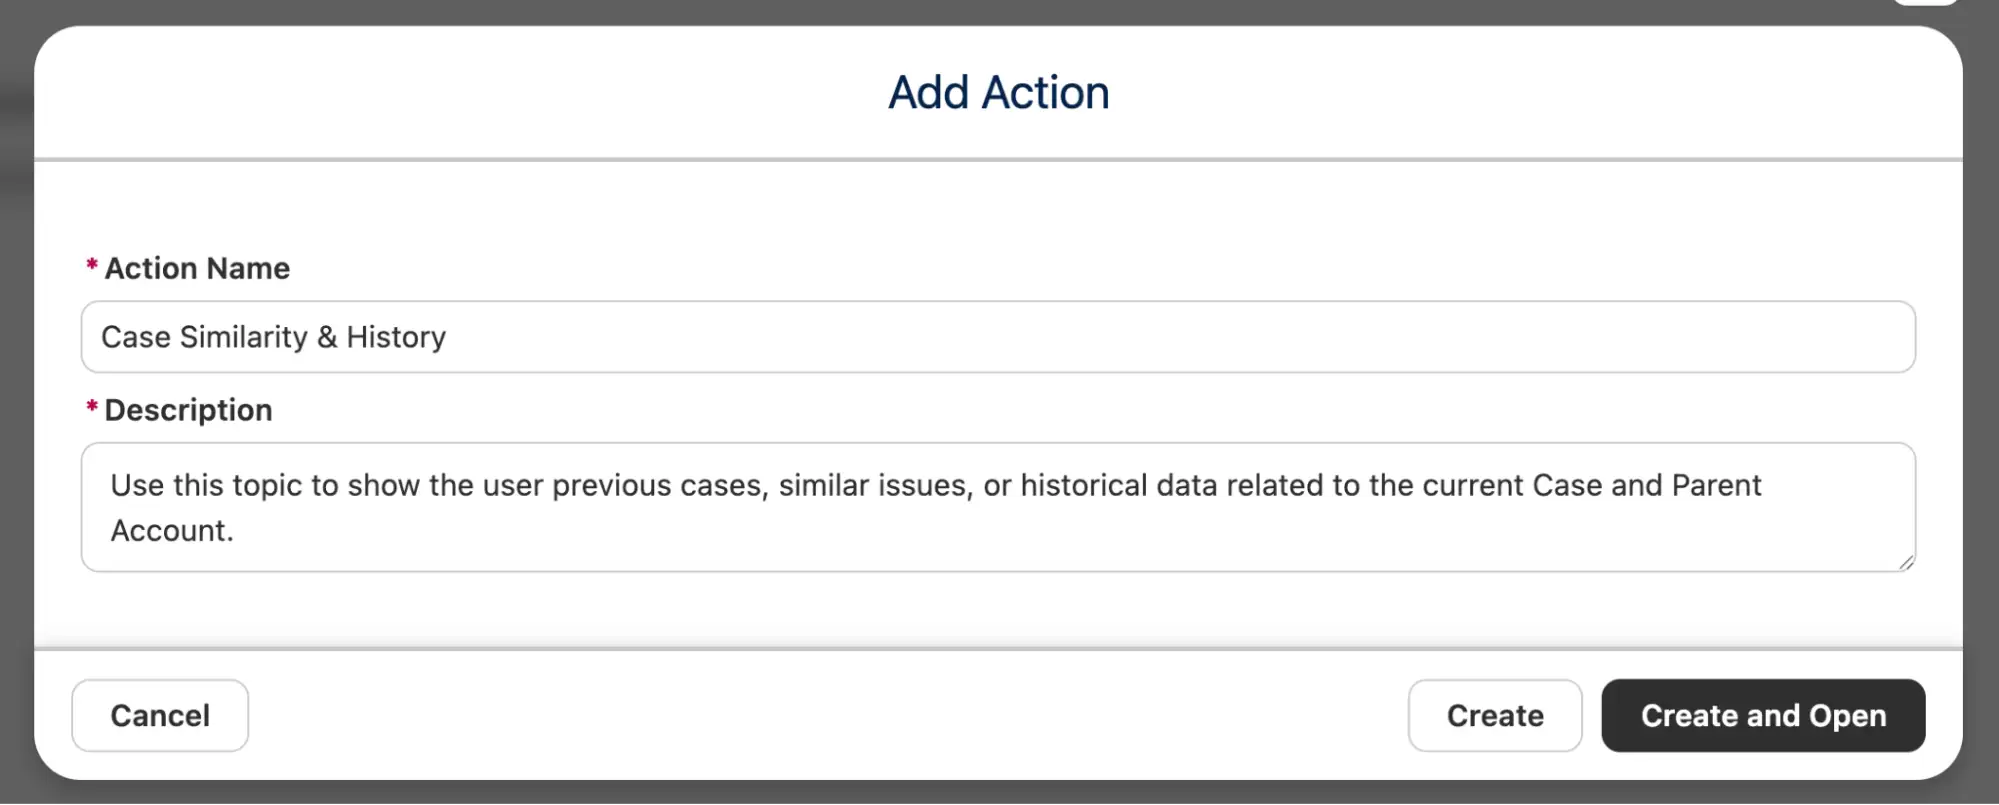
Give it a name of ‘Case Similarity & History’, and a Description of ‘Use this topic to show the user previous cases, similar issues, or historical data related to the current Case and Parent Account’. Click Create and Open.
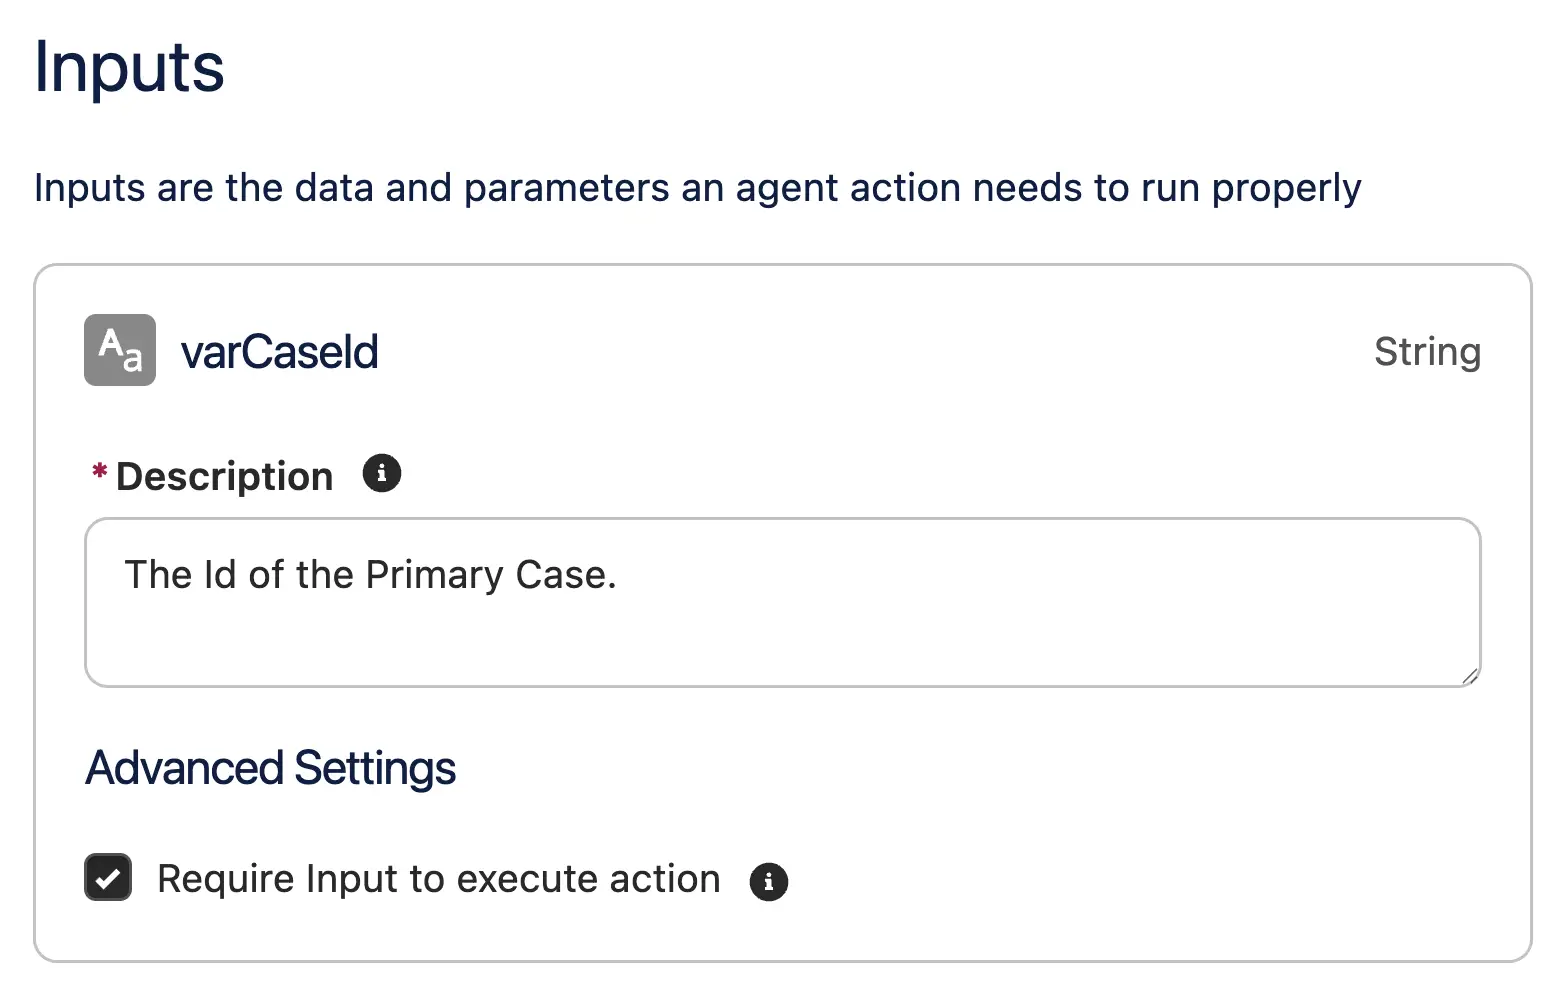
Now you need to specify what type of Action we are giving the agent. For this example, we’re going to use a simple Flex Prompt called “Analyze Related Cases”, which you can build for yourself by following the steps in this article. If you’d rather build your own, ultimately the Flex Template needs to call a Template-Triggered Flow that gets the details of the original Case in one variable, all other Cases related to the same Account in another.
It will then output this information to the prompt instructions, which is fed back to the Flex Template. The Flex Template takes all of this information and determines if there is any overlap between the Primary Case and any other Cases related to the same Account.
The Flex Template will receive a single input variable – the Id of the Primary Case.
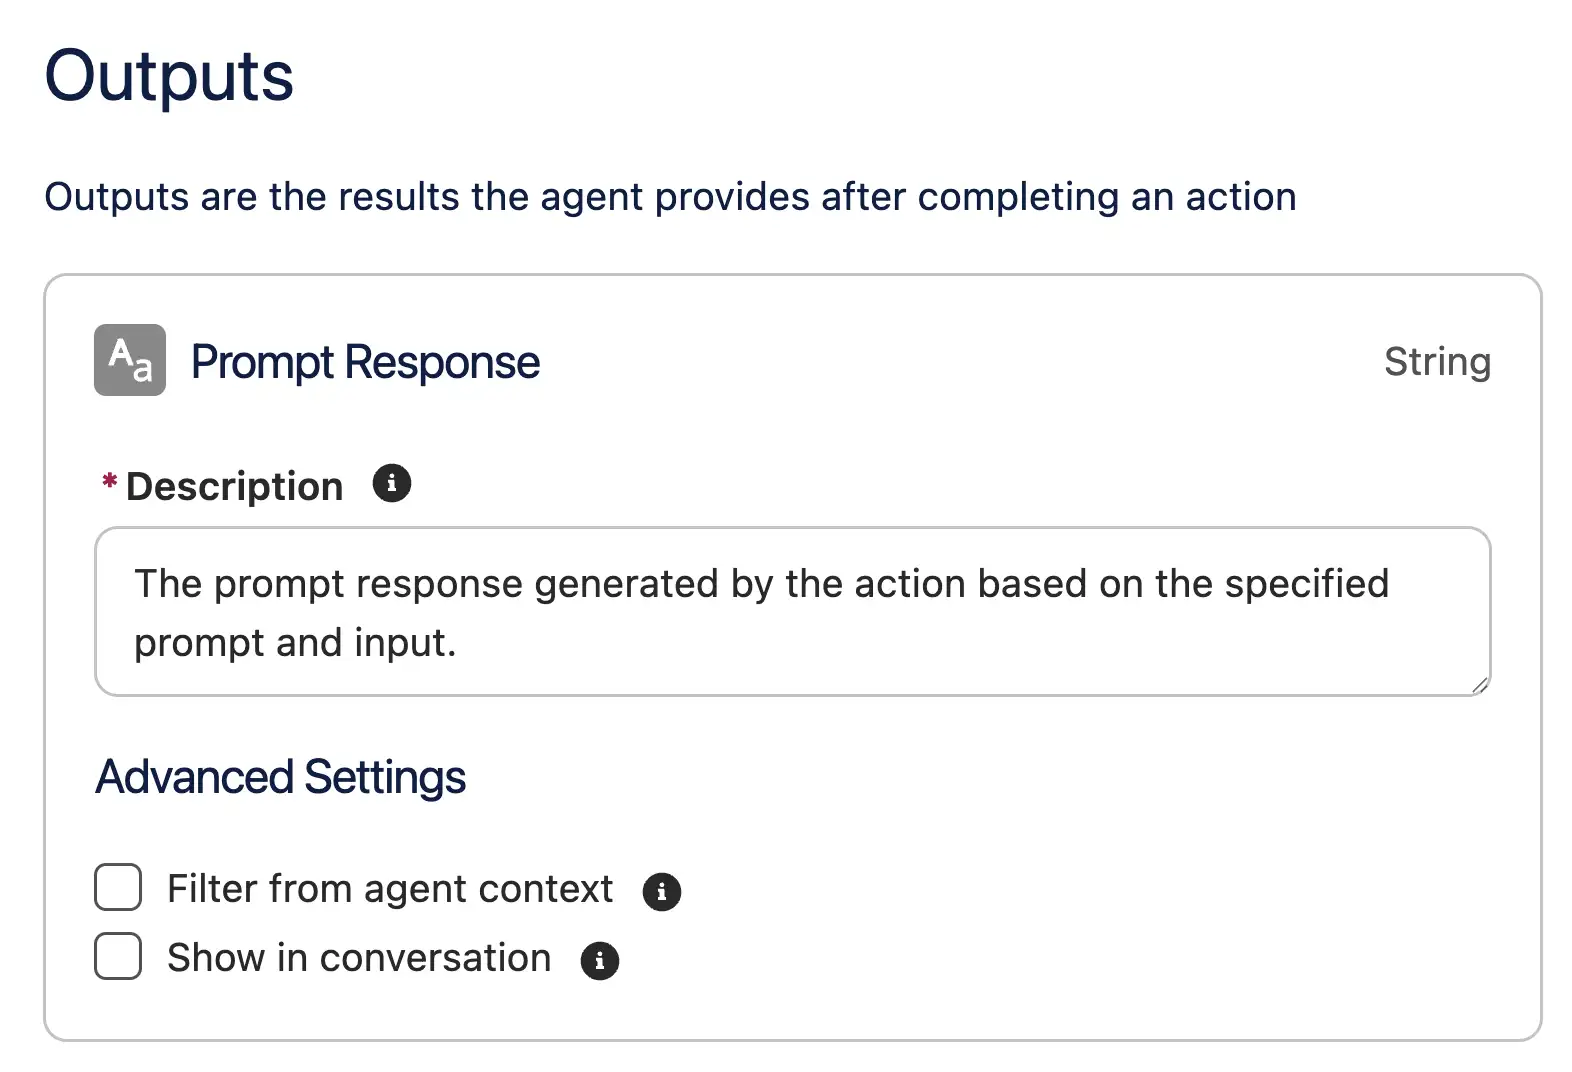
The Output will be a simple Prompt Response, which will explain whether any overlapping Case records have been identified or not.
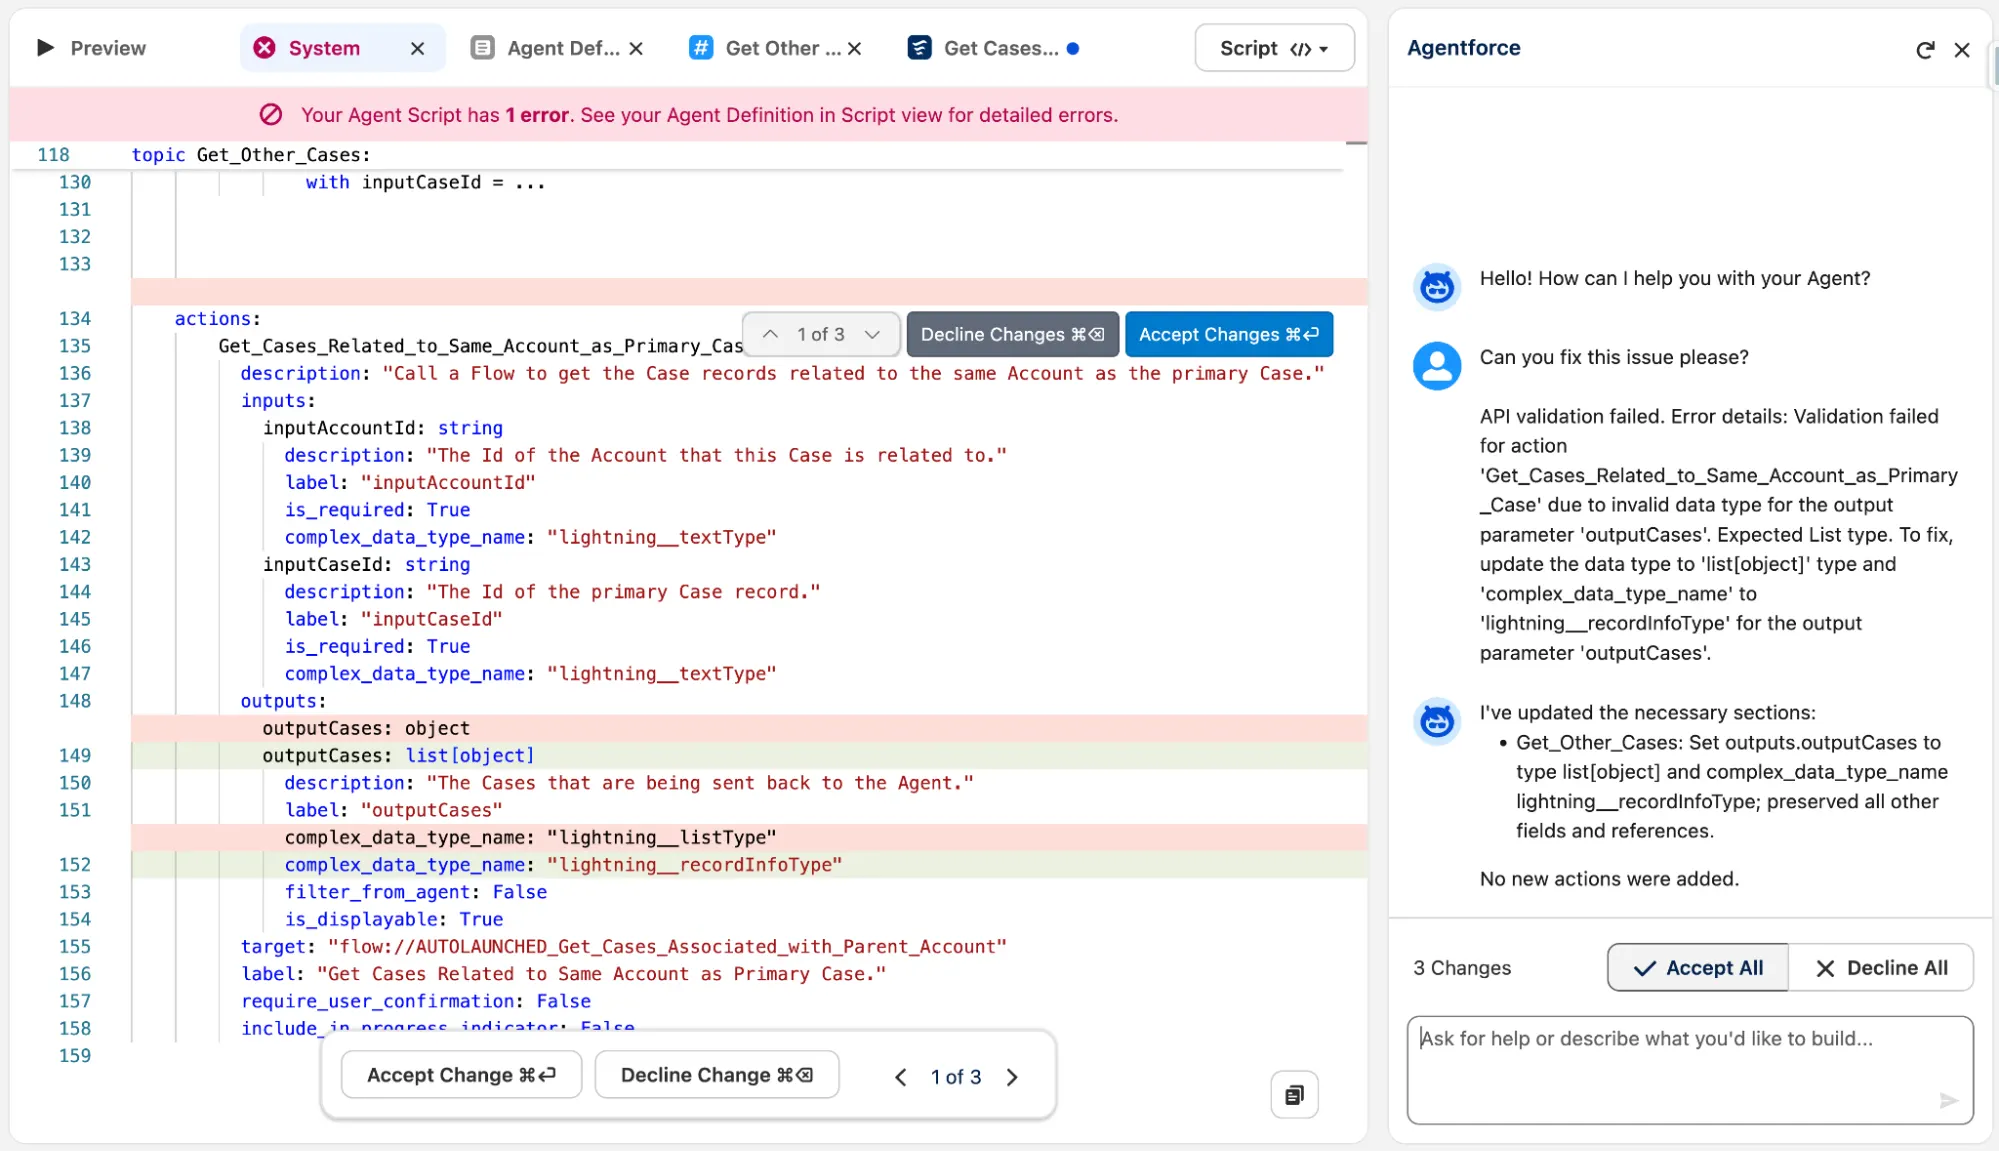
Once this is done, double-check for any errors in your agent. Occasionally, while building simple Agents like this, I’ve run into an error or two. If you do see an error pop up, you can switch over to Agent Script mode by clicking on the Canvas button in the top-right and selecting Script.
Then, mouse over the red underlined text to get additional information. The screenshot below is an example of a similar error that I encountered on a similar agent.
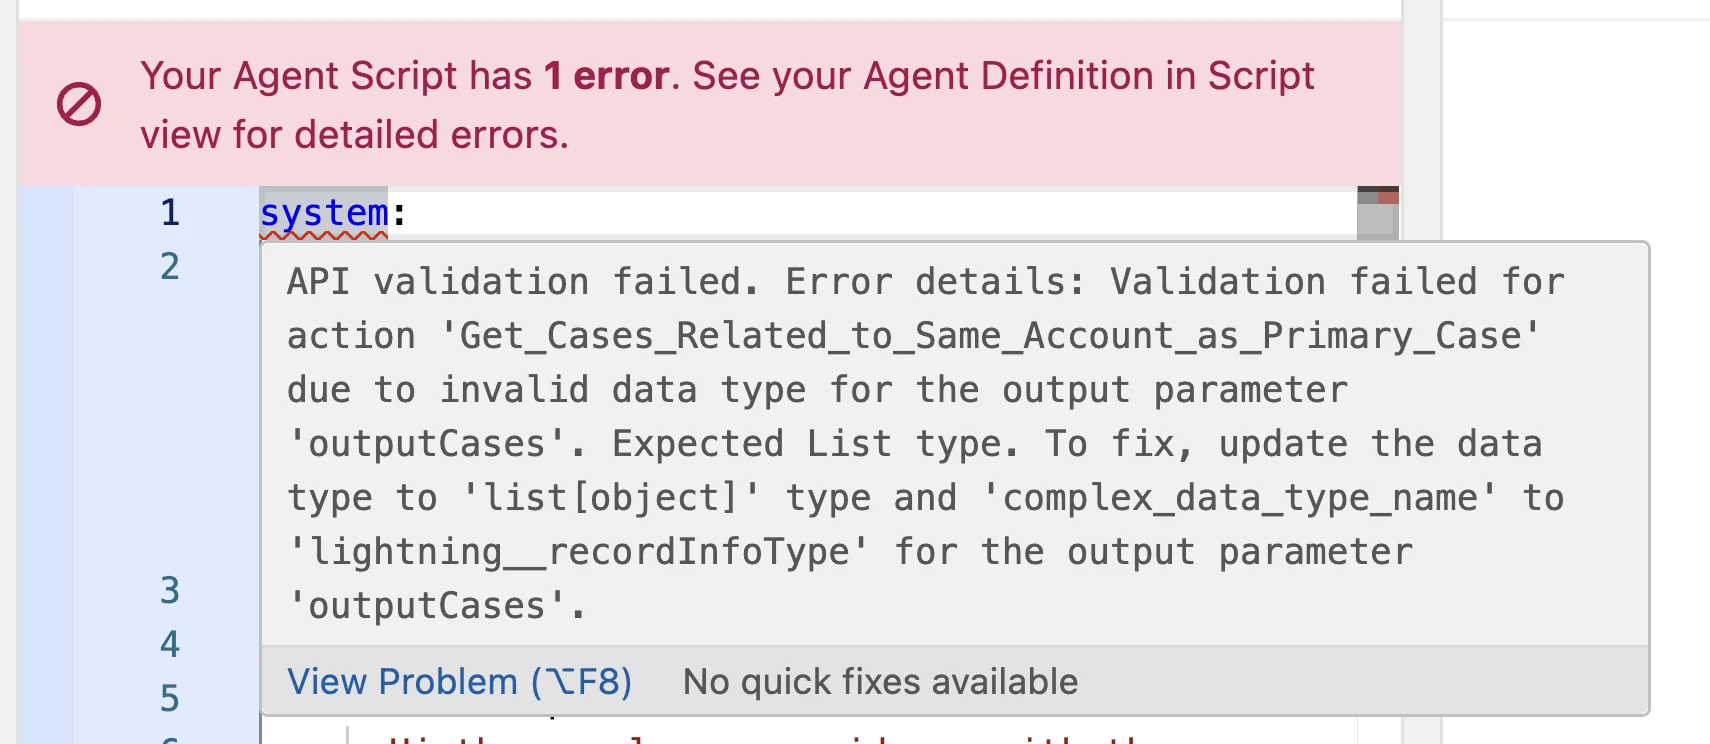
If you’re confident enough to figure out the error yourself, go for it! If you’re not as confident, however, you can copy and paste the error into the Agentforce assistant on the right to get some help. You may need to expand the right sidebar to reveal this assistant if you’ve collapsed it.
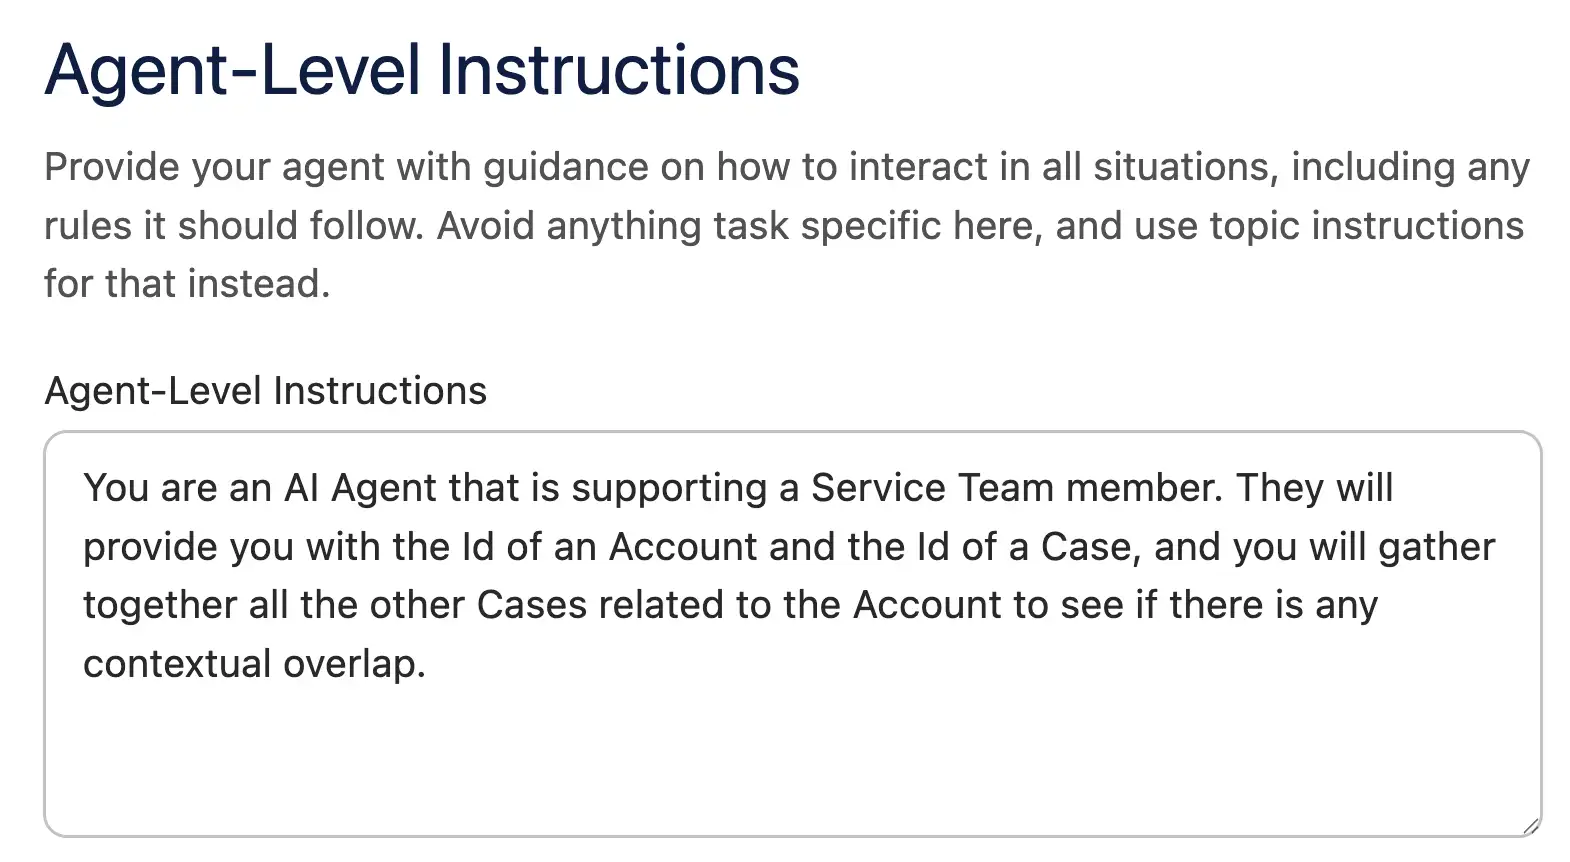
Once you’ve debugged any errors, it’s time to add the final touches to your agent. If you switched to Script view above, switch back to Canvas mode now. Head over to the System tab and add some Agent-Level Instructions. I used the following:
You are an AI Agent that is supporting a Service Team member. They will provide you with the Id of a Case, and you will gather together all the other Cases related to the Account to see if there is any contextual overlap.
Next, make sure you provide a Welcome Message and an Error Message. I used the following:
Hi there, please provide me with the Case Id that you want me to assess for contextual overlap.
Sorry, I've run into a problem.
Don’t forget to Save your agent one last time, then it’s time to begin testing!
Testing Your Agent
Remembering the context of the agent, we want to pass in a Case Id, and have it try to identify if there are any Cases related to the same Account that may be related to the initial Case.
To do this, I set up two Cases under the same Account that both referenced issues with “Unit GC1040, Req Number 835735”. I figured this should be enough for the agent to identify a similarity based on how it was constructed. You can set similar data up yourself.
To test the agent, head to the Preview tab with one of your test Case Ids copied to your clipboard.
The Preview window shows you two important things – on the left, you can see what the agent experience will look like for the end user. On the right, you can see inside the ‘brain’ of the agent – this will show you what steps were taken, and you can click in to see more information about the inputs, outputs, and reasoning.
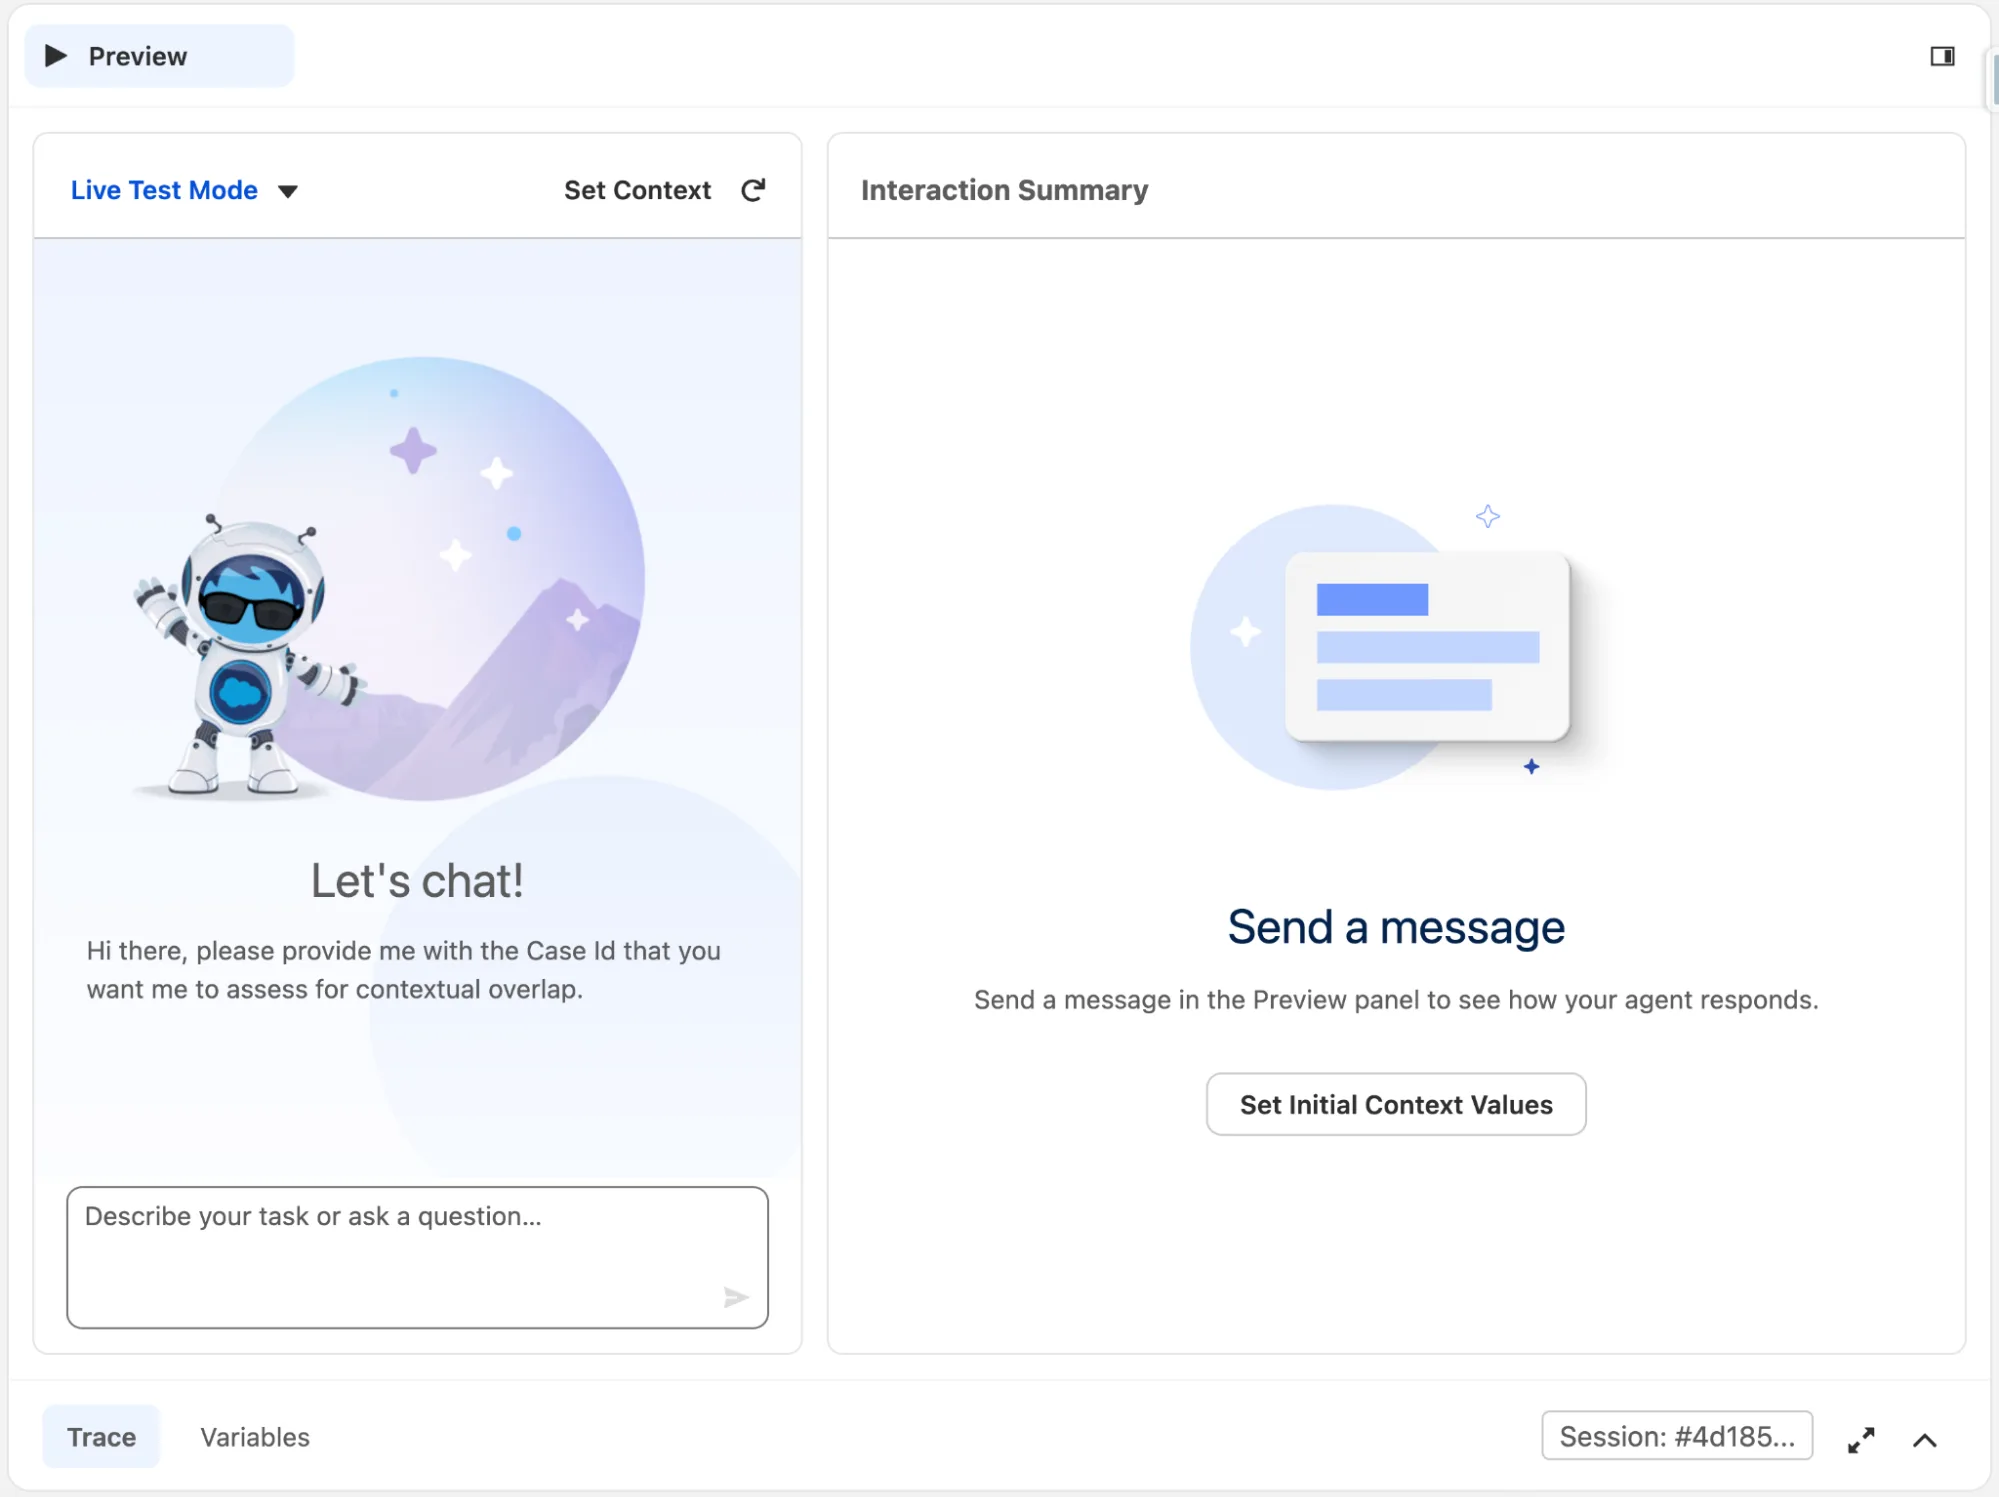
We’ve over-simplified this agent for demonstration purposes, and you can see this in the chat window when the agent asks simply for a Case Id. Obviously, this is not a normal conversation starter for a human or an agent, but it works for now.
To test your agent, paste in the copied Case Id and send it to the agent. After it thinks for a bit, you should see it begin to reason and eventually respond. The Interaction Summary on the right-side panel will update as well, showing how it got to a solution.
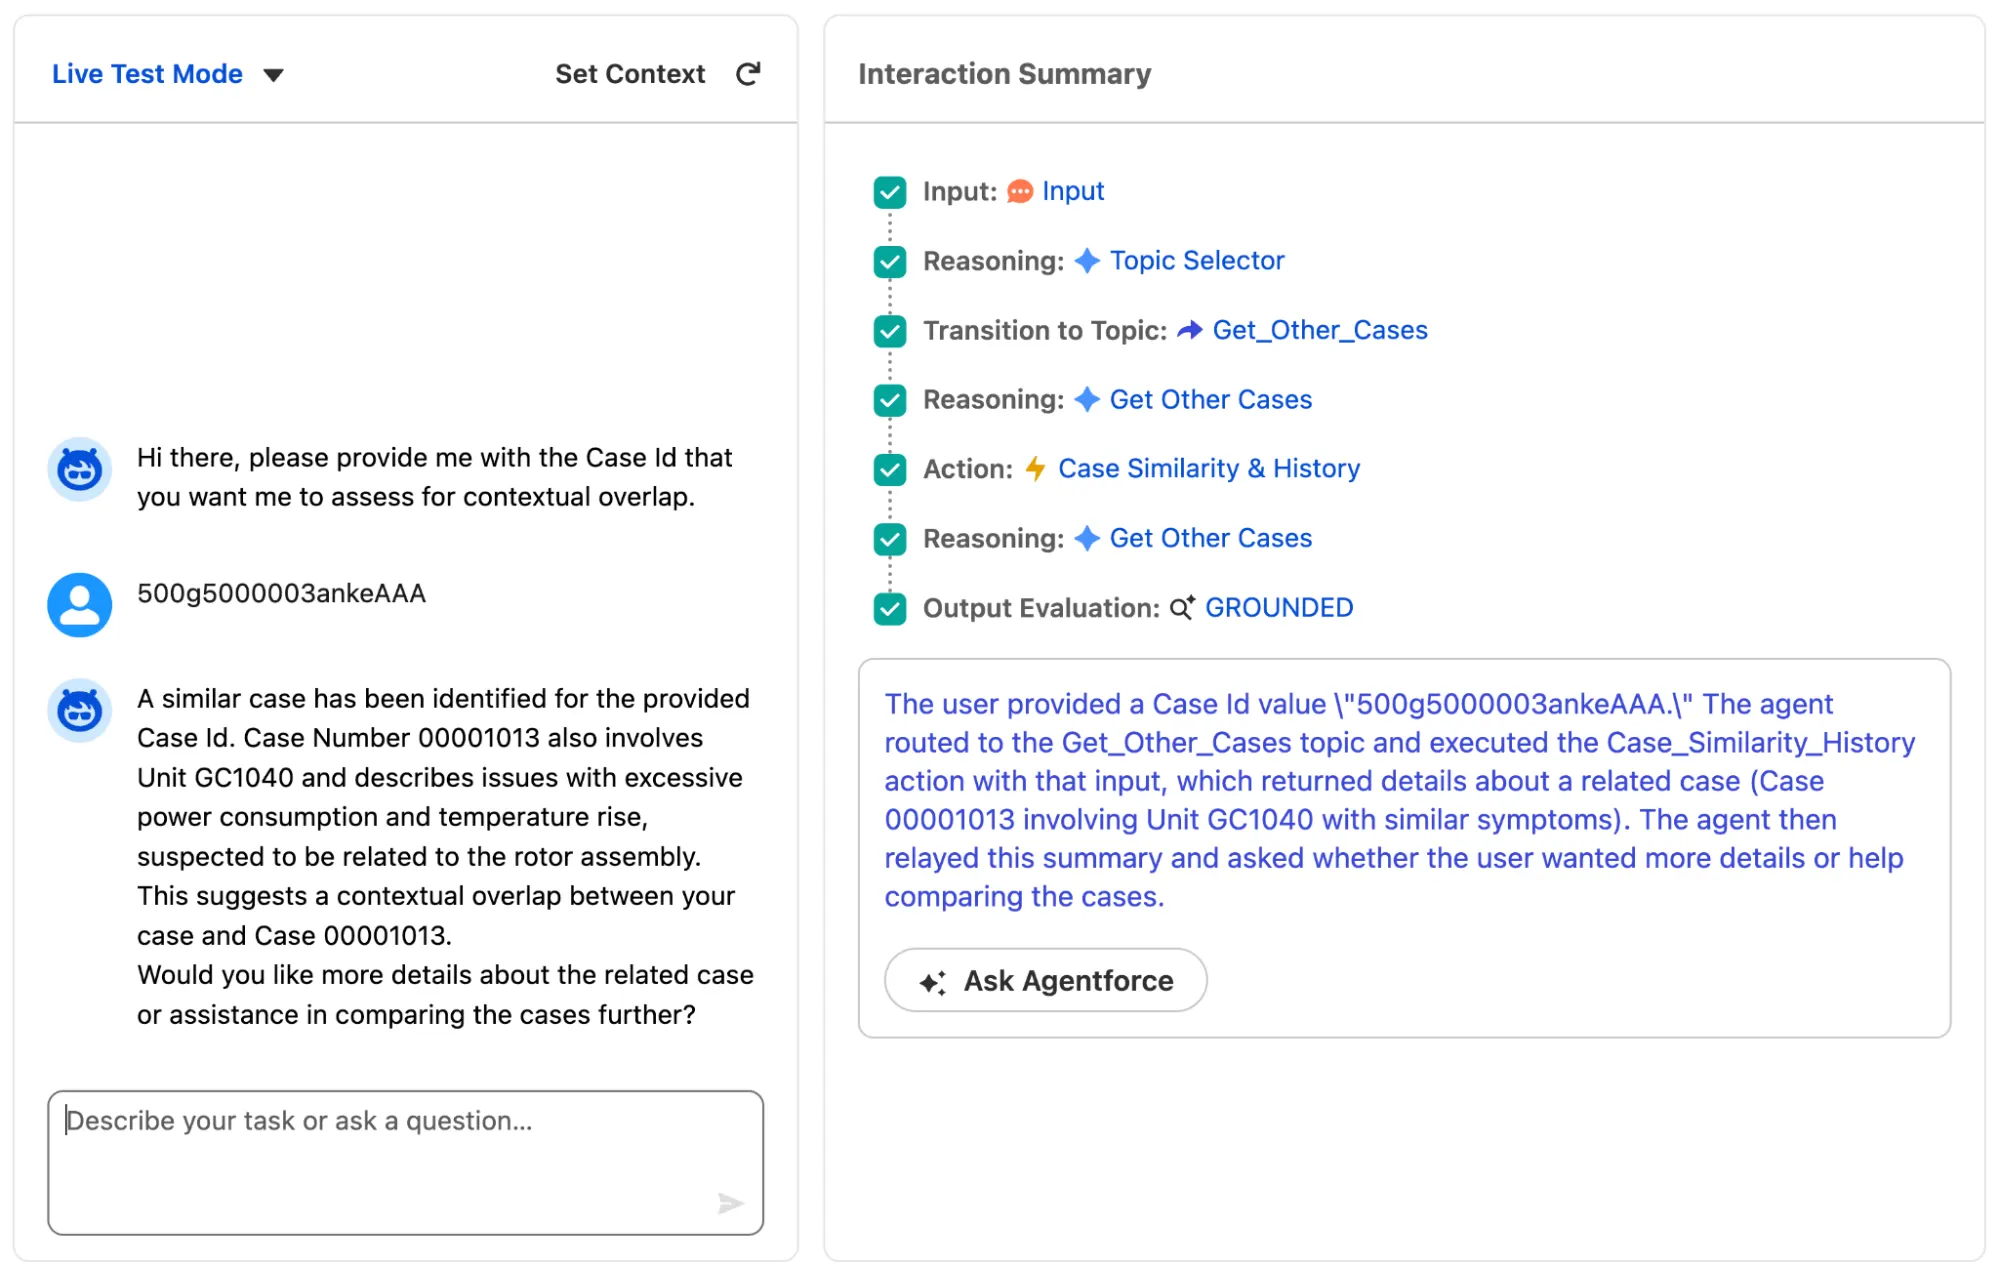
In my testing above, you can see that it has successfully identified the correct Topic (Get Other Cases), then called the correct Action from the Topic (Case Similarity & History). The output that is sent in the chat window confirms that the result is what I was expecting – it has successfully identified the other test Case based on the details in the Description.
For a bit more information, you can click into each step in the Interaction Summary. For example, by clicking into the Action step, I can see the input and output JSON values. They were as follows:
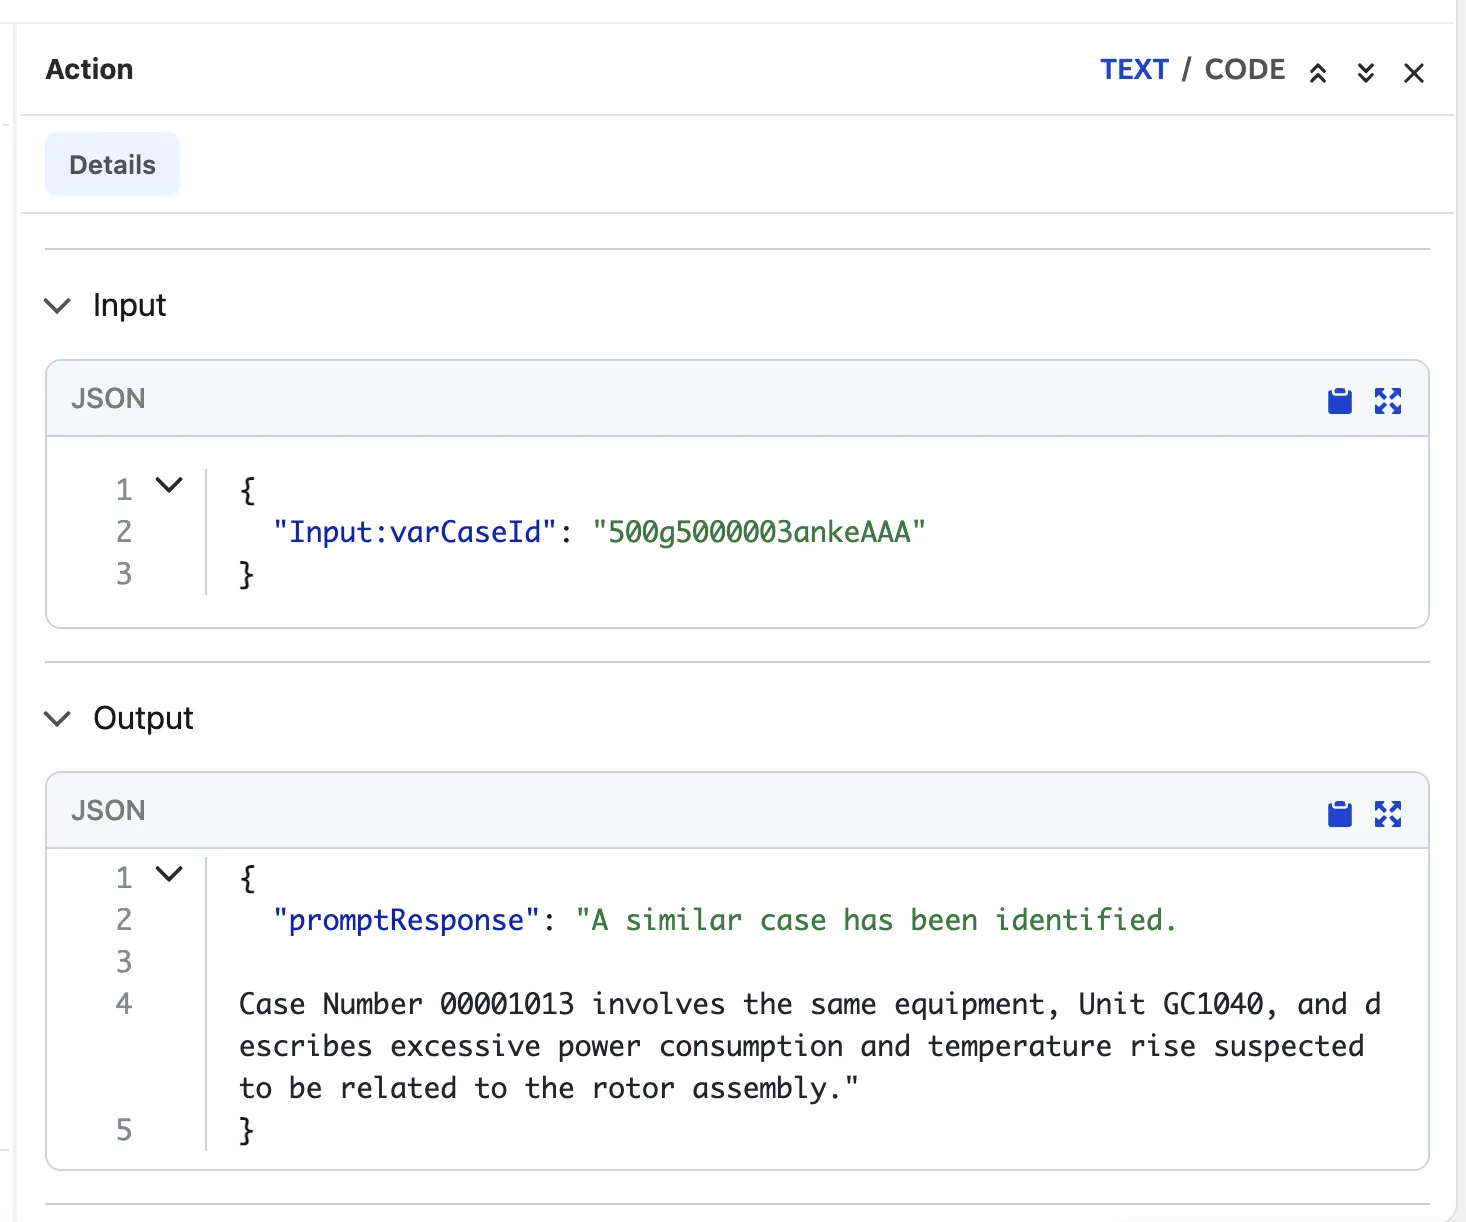
This shows that the value I gave to the agent was then passed on to the Topic, then the Action. The Flex Template ran and correctly identified the related Cases, and figured out that this particular Case was related due to the mention of Unit GC1040, as I assumed it would.
This agent is performing as expected now! At this point, I should continue with some more robust testing before sending it live, but that’s a topic for another article.
Summary
While the above example was relatively simple, this miniseries of articles was designed to provide you with some general information about building agents and using many of the tools that come along with them. You’ve learned about Flex Templates, Template-Triggered Flows, and, of course, building agents.
With that all done and dusted, I’m curious to learn how you can see an agentic workforce working for your business? How do you plan on or think you could implement an agent to assist your human workforce?
