
There’s no denying that the role of the Salesforce Admin is changing, but that’s nothing to be afraid of! Neither is the Salesforce CLI nor Visual Studio Code. If these tools are new to you and seem a bit code-heavy, the goal of this article is to give you everything you need to begin thriving with Visual Studio Code and Salesforce CLI.
Leave your caution at the door; it’s time to dive in and learn the basics of Salesforce CLI and Visual Studio Code!
What Is the Salesforce CLI?
Putting it simply, the Salesforce CLI (Command Line Interface) is a powerful tool that you can install on your local computer, empowering you to interact with your Salesforce org through your terminal.
It is used to create and work with Salesforce projects on a local machine, which can then be pushed into a code repository like GitHub or BitBucket. The CLI essentially gives your computer the ability to work with Salesforce metadata files and connect to Salesforce orgs for deployment, retrieval, testing, and other functions.
The CLI itself runs in a terminal, meaning it isn’t so friendly to admins by itself. That’s where the next tool comes in to make things much easier.
What Is Visual Studio Code?
Visual Studio Code is Microsoft’s free source code editor, one of the most popular on the planet. It’s open source, available on all major platforms, and even has a web version to save you from needing to download it.
That said, in this article, I’ll be guiding you through how to access the downloadable one for your computer.
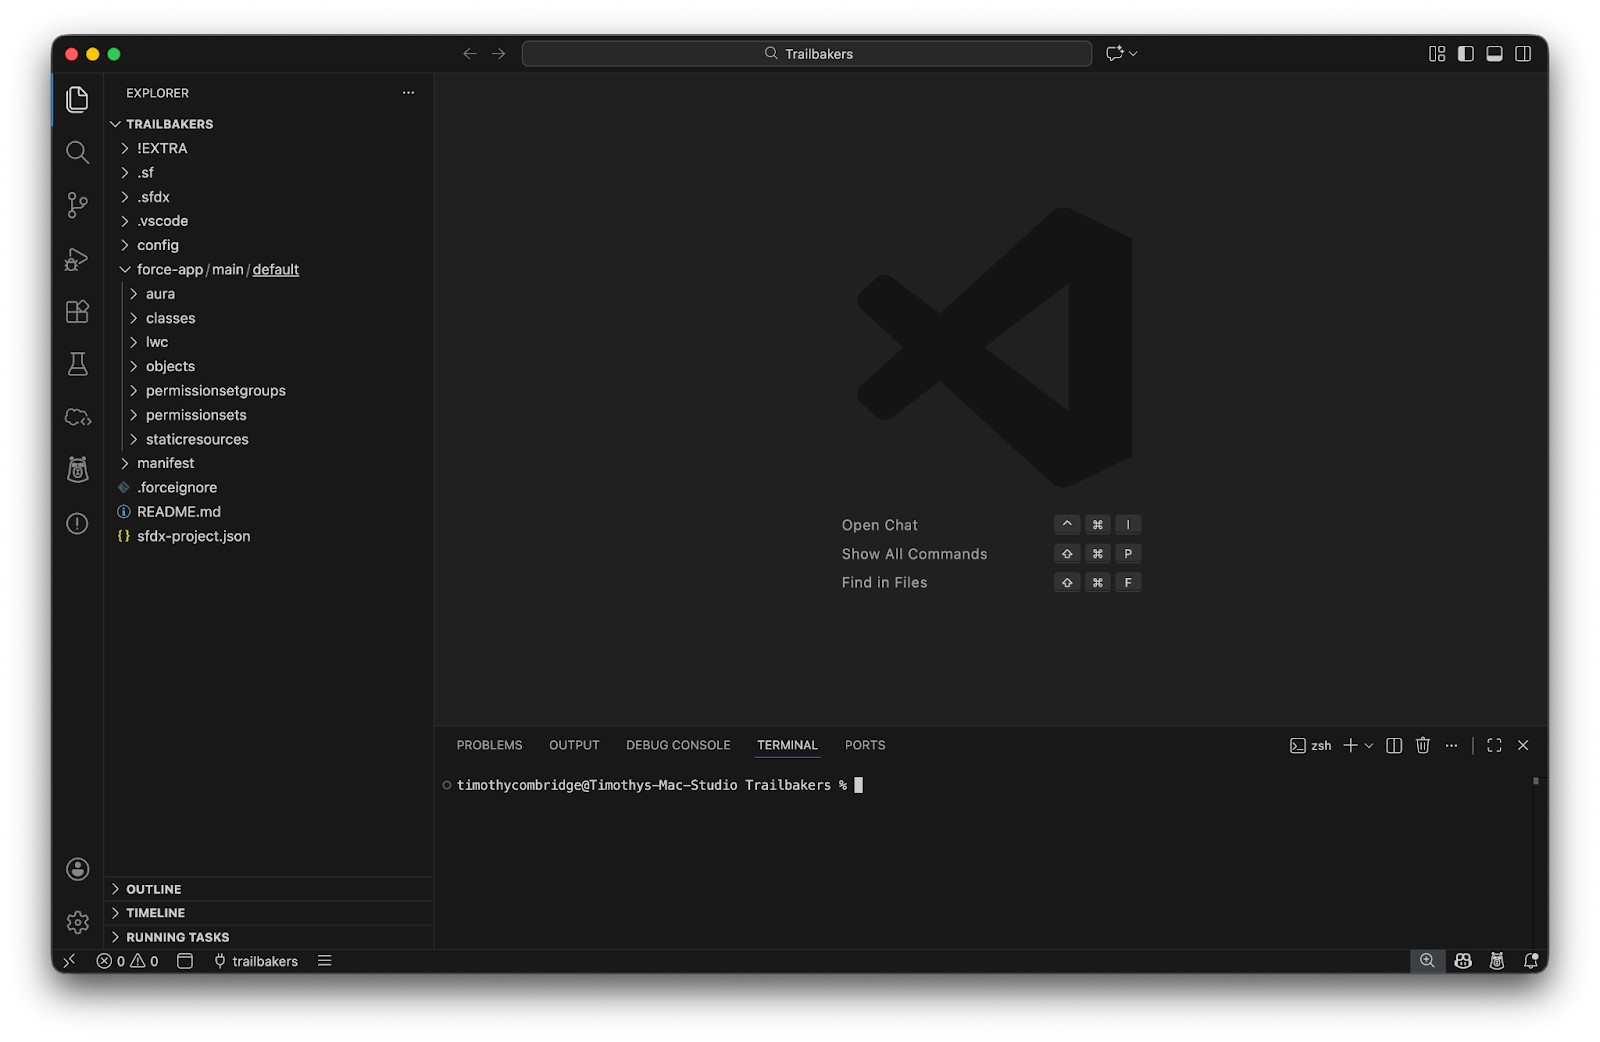
You’ll notice in the above screenshot that Visual Studio Code has a built-in terminal along the bottom, but more importantly, it has a folder view in the left-side panel. This allows you to visually see your folder structure, metadata, and then open up and edit each file in the main panel.
Installing Visual Studio Code
The best way to install Visual Studio Code is by acquiring it from the official website – here’s a link to the landing page. Visual Studio Code is available for Windows (x64 and ARM), macOS (Intel and Apple Silicon), and Linux (x64, ARM), so no one is left out!
Depending on your operating system, there are different ways to install the tool. Generally speaking, though, it should be as simple as downloading from the official website and running the installer.
If you’ve installed it correctly on your system, you should be able to open Visual Studio Code and see the Welcome tab as per the earlier section.
Installing Salesforce CLI
Similar to Visual Studio Code, there is an official page that you should download the installer from, which you can access here.
There will be a slightly different installation method depending on your operating system, and Salesforce has kindly pulled a guide together that explains how to do it for each one that is supported.
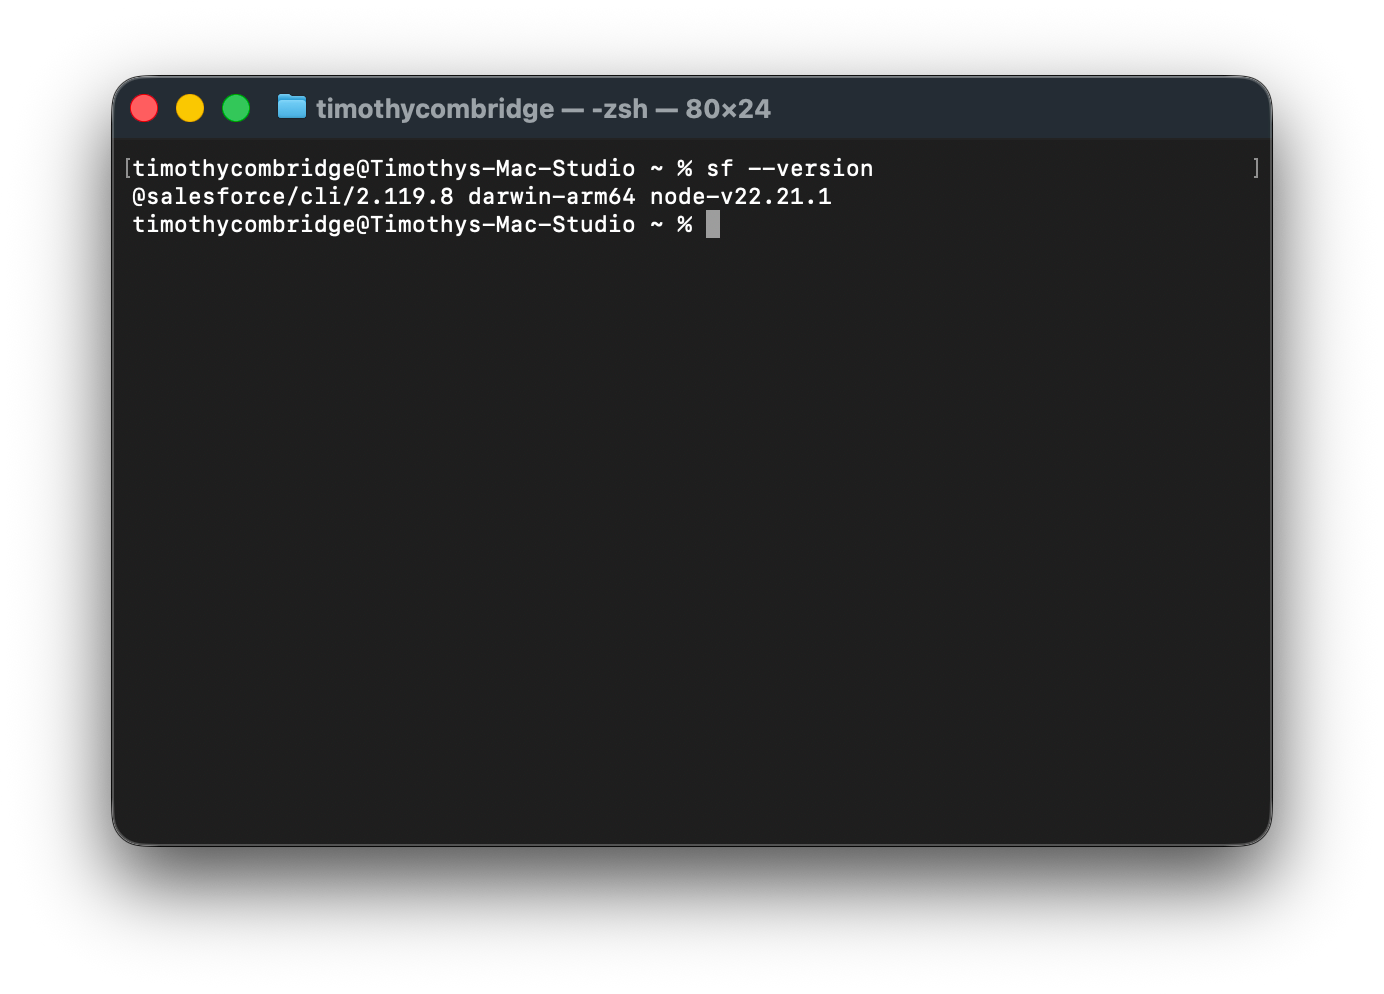
Once complete, you should run the sf --version command in your terminal to confirm that everything is successfully installed.
Installing the Salesforce Extension Pack for Visual Studio Code
Salesforce has provided a great installation guide that you can refer to, but I’ve simplified it below.
Visual Studio Code alone doesn’t have the context or tools required to work efficiently with Salesforce. This is why Salesforce has published the Salesforce Extension Pack and Salesforce Extension Pack (Expanded) bundles to the Visual Studio Code Marketplace. To install one of these extensions, head to the extensions tab in Visual Studio Code and search for “Salesforce Extension Pack”.
You’ll see the popular extension available with the Salesforce developer name underneath it. Click the Install button, and it will install all the extensions within the bundle. If you are installing any other third-party Salesforce extensions, make sure to double-check the publisher to confirm you trust what you’re downloading.

These packs are maintained and supported by Salesforce itself, so you don’t need to worry about the security of the contributors or if the packages will continue to work or not.
Creating a Salesforce Project
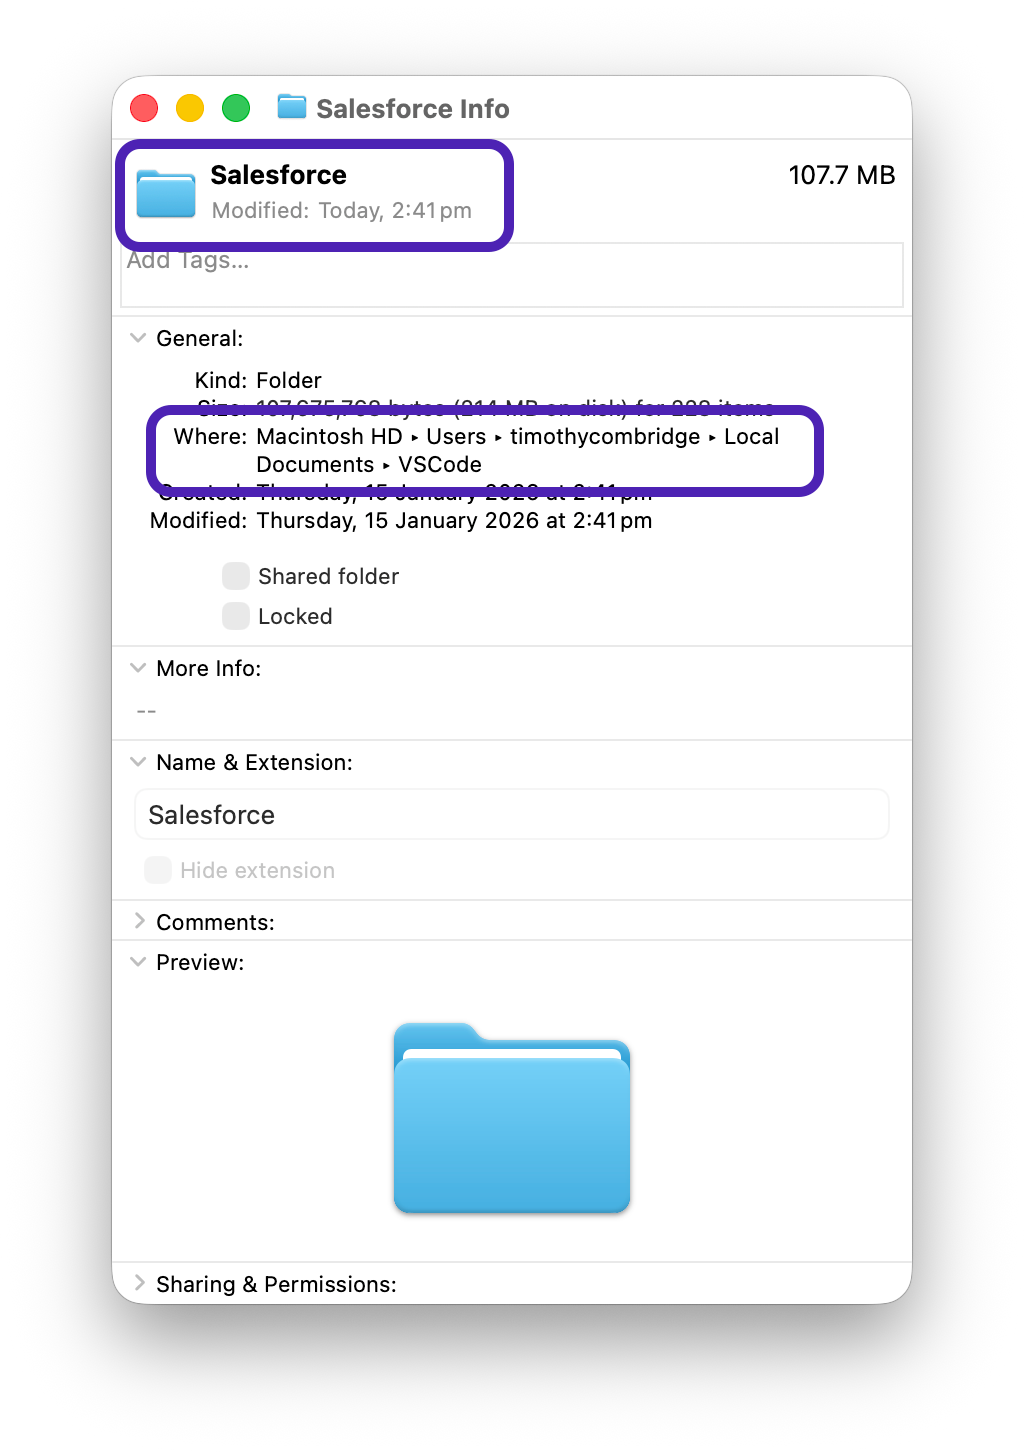
Before we go ahead and create a new Salesforce project, we’re going to set up a folder on your computer that will house all your Salesforce projects going forward. Find a spot on your computer that makes sense and create a folder using a naming convention that makes sense to you.
For me, I’ve got a folder in my local user directory called Local Documents (which is called that because it doesn’t sync to any cloud storage of any kind), and in that is a folder called VSCode. Within the VSCode folder is a folder called Salesforce. This is where my Salesforce projects go. You don’t need to follow this exact same pattern, but it’s a good idea to dedicate a folder to your Salesforce projects.
Great! Now that you’ve got a spot to put all your Salesforce projects, let’s create one.
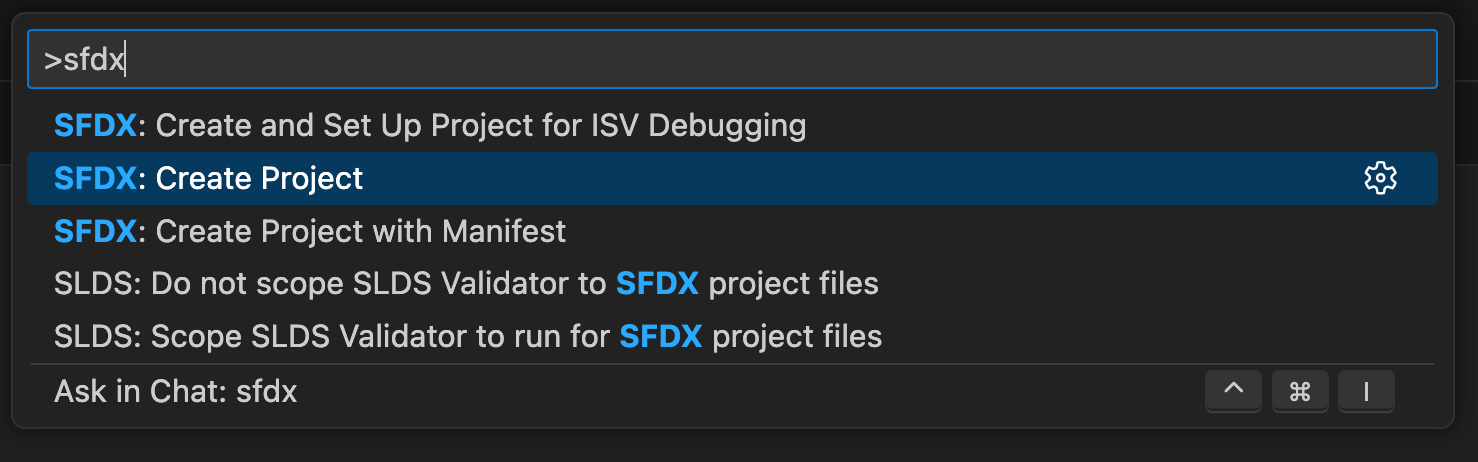
Within Visual Studio Code, open the Command Palette. To achieve this, you should get into the habit of using the keyboard shortcut – it will become one of the most valuable things you learn when working with Agentforce Vibes.
For macOS users, that’s ⌘ + Shift + P, and for Windows and Linux users, it is CTRL + Shift + P.
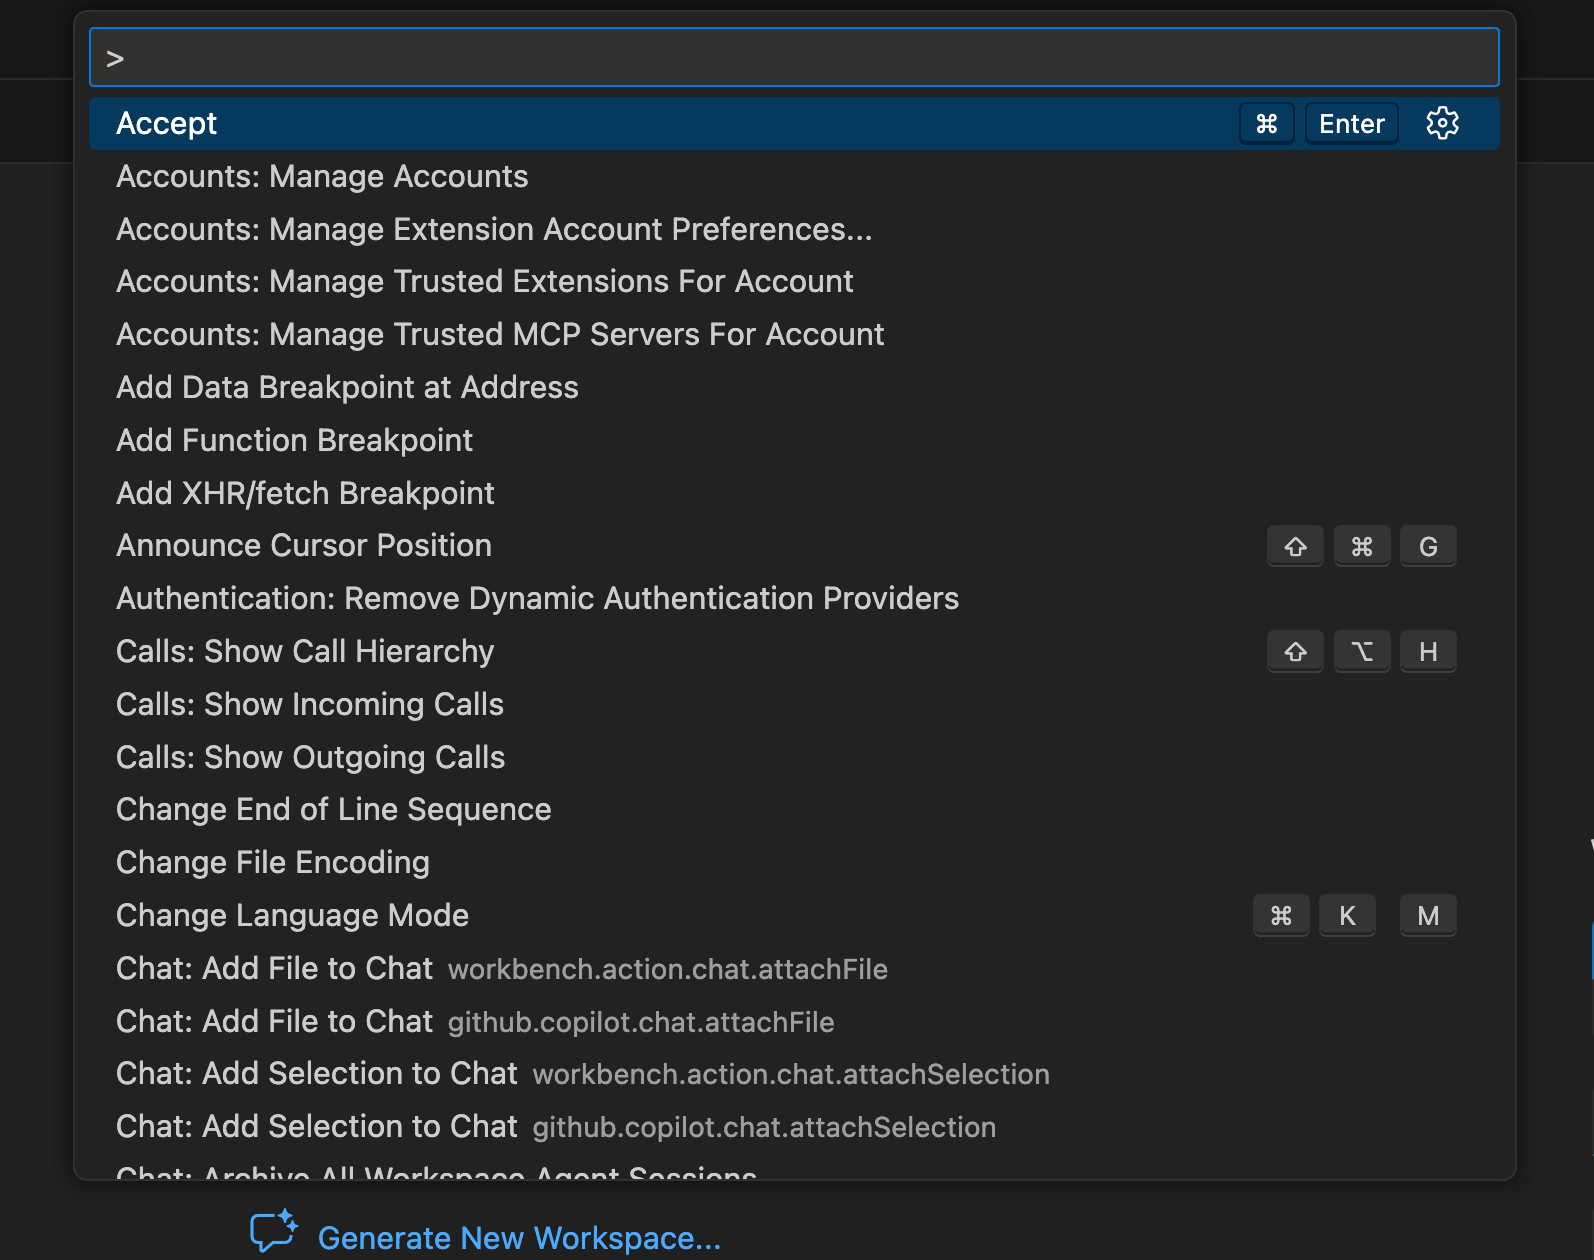
Simply put, this is the central command hub of Visual Studio Code, and where we’re going to input the command to create the Salesforce Project. Type sfdx, and select the Create New Project option.
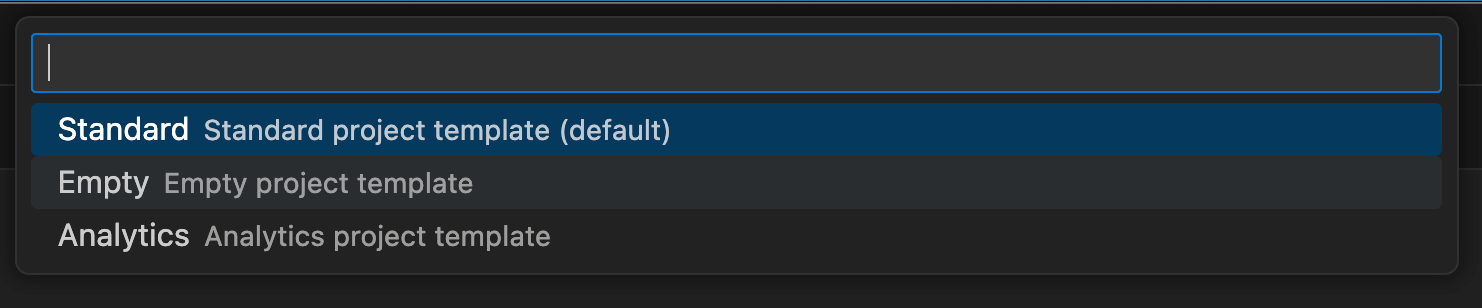
For the template, we’re going to select Standard because we want a Project that begins with no metadata in it whatsoever, but includes important project files.
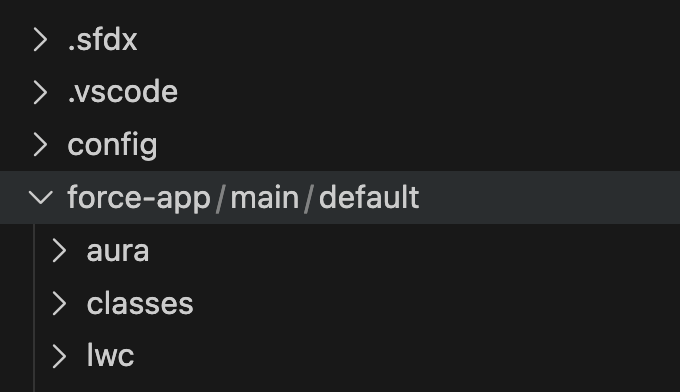
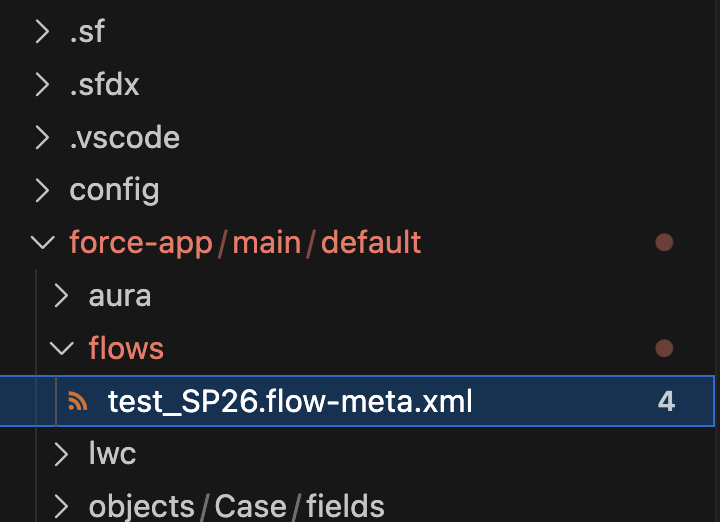
Once this is done, you’ll see a folder structure set up in the left-side panel, which contains a force folder. If you expand this, you’ll see it automatically expands to force / main / default. This is where all of your metadata will sit, in various subfolders (you won’t see the subfolders until you retrieve metadata from an org, or create them manually).
Salesforce CLI’s History
Salesforce CLI has experienced changes and shifts over the years before it became the tool it is today. From the Force.com CLI to 2017’s SFDX transformation to the consolidation era beginning in 2021 (i.e., the SF CLI era). This is why, as you discover more and more about using this tool, other historic articles may reference sfdx commands or something else entirely.
The reason for the sf shift was primarily driven by the rapid acquisitions that Salesforce was making, and the fact that each tool came with its own CLI. Developers were getting fed up with having to use and learn multiple tools, so the Salesforce team took this as enough of a reason to build a new, universal CLI for every Salesforce tool.
While building this tool, Salesforce also took the time to simplify the syntax, leading to a much simpler command structure. For example:
- Legacy:
sfdx force:source:deploy - Modern:
sf project deploy start
The newer commands are shorter and follow a more logical pattern (i.e., noun, then verb).
Most of the older sfdx commands still work, but Salesforce’s recommendation (and mine as well) is not to use or learn those commands and focus instead on the newer sf command set to keep things simple.
Important Commands You Should Know
On the topic of sf commands, there are a few that you should learn early, as you’ll likely find yourself using them a lot.
To make things easier, Salesforce has broken down the CLI commands into a number of command sets. This will help you significantly when it comes to learning and working with the different commands.
For example, when you’re working with an org (i.e., authenticating a new org, checking which orgs are currently connected to your CLI, or managing scratch orgs), you’ll use the org commands.
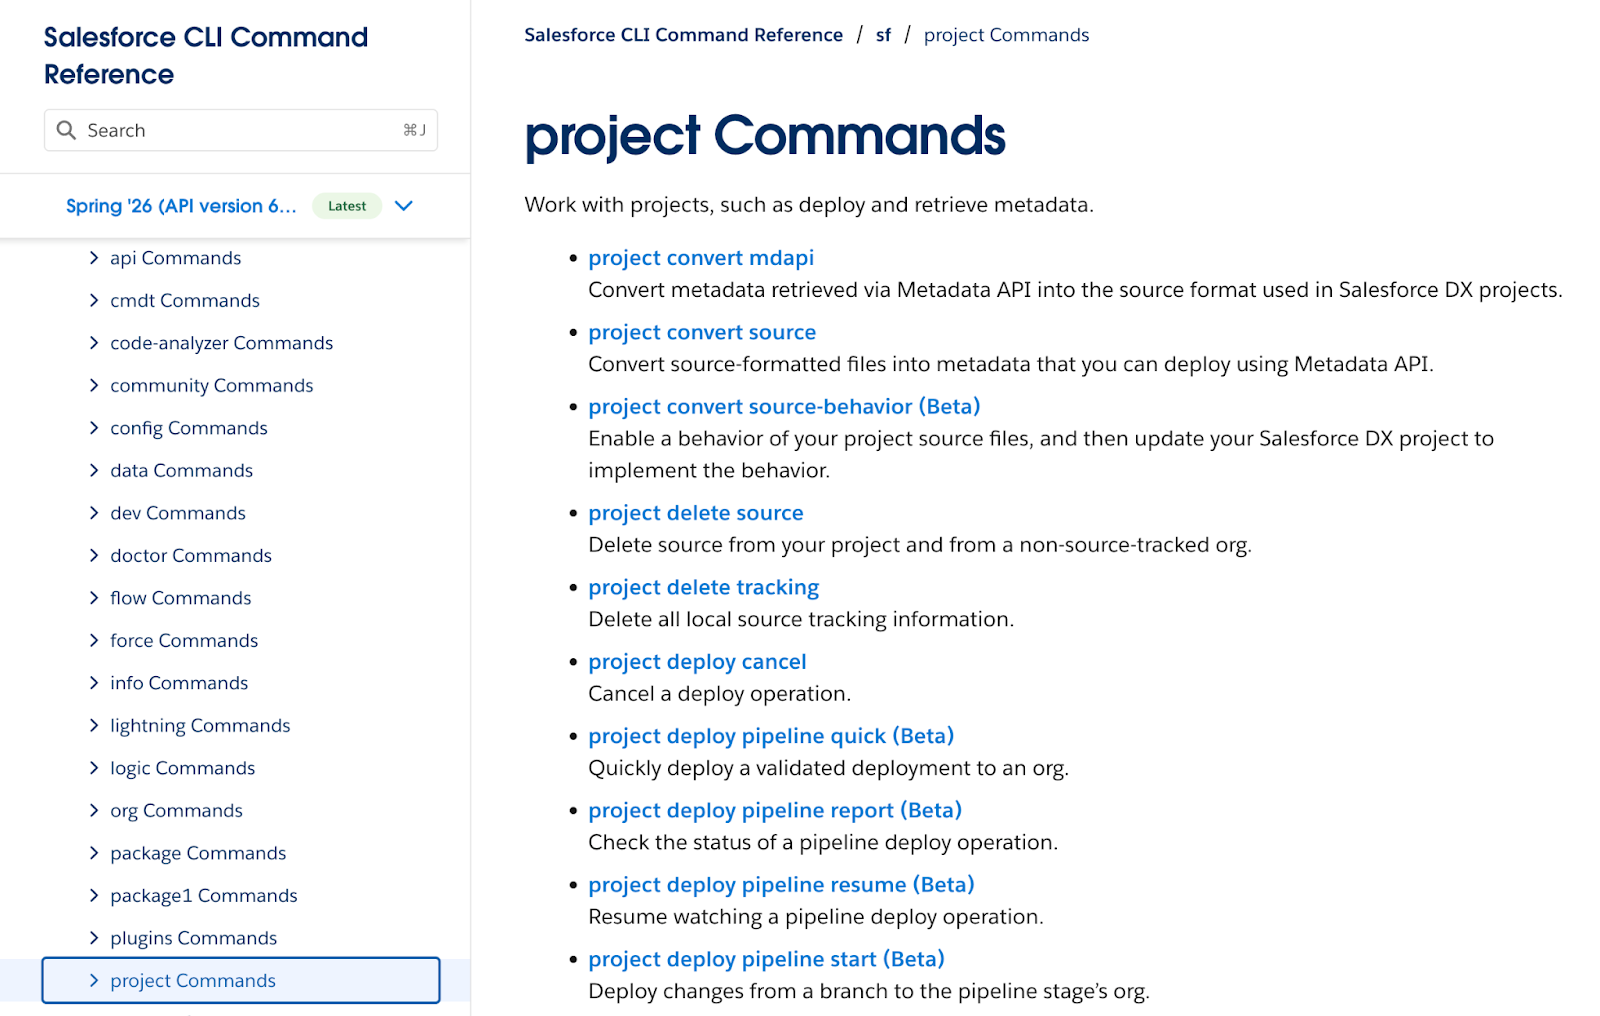
When you’re looking to do something relating to your current project (i.e., retrieve or deploy metadata to or from an org, generate a project manifest, or manage your pipeline), you’ll use the project commands. Both of these command sets are linked at the bottom of this article.
Org: Authenticate a Salesforce Org
Because the CLI runs locally on your computer, you need to connect it to the Salesforce org that you want to work with. Think about how you access Salesforce today. You’d access your web browser of choice (like Google Chrome), go to the login page, and punch in your credentials.
Salesforce validates those credentials, giving you (your browser) access to the org. It’s the same sort of thing with the CLI – it needs to be granted permission to access Salesforce before you can do anything.
The command you’ll use to do this is a variant of the following: sf org login web --alias myOrg --browser chrome --instance-url
https://secretdomain.my.salesforce.com/
Let’s break this command down piece by piece. First, we have sf org – this tells your terminal that you want to access the Salesforce CLI (sf) and tells the CLI that you want to specifically access the org command set.
Next is login web, which is the command used to tell the Salesforce CLI that you want to use the web browser to log in and authenticate your org command.
Next are all the additional parameters, which give that command some context.First, we have –alias myOrg, which allows me to give my org a nickname for use in my projects. This saves me a lot of time when referencing the org, as I only need to type ‘myOrg’ rather than the entire username that I authenticated with.
--browser chrome tells the CLI that I want to use Google Chrome to authenticate. The reason that I personally add this is that I keep Safari as my default browser, but perform a majority of my Salesforce work in Chrome. You can remove this from your command if your default browser is the one you want to use for the authentication.
Running this command will open your browser of choice to your org’s login page. From there, you can log in and choose to give the CLI access to your org through your user. Once done, you can close the page and confirm that it worked by running the next command.
Org: Display Org List
Once you’ve got one or more orgs connected to your CLI, you can use the following command to get a quick table of details from those orgs: sf org list.
Just like the earlier command, sf tells your terminal that you want to access the Salesforce CLI, and org tells the CLI that you wish to use the org command set. Finally, list is the command that you can use to display a list of the orgs that you have connected to and authenticated with your CLI at that point in time.
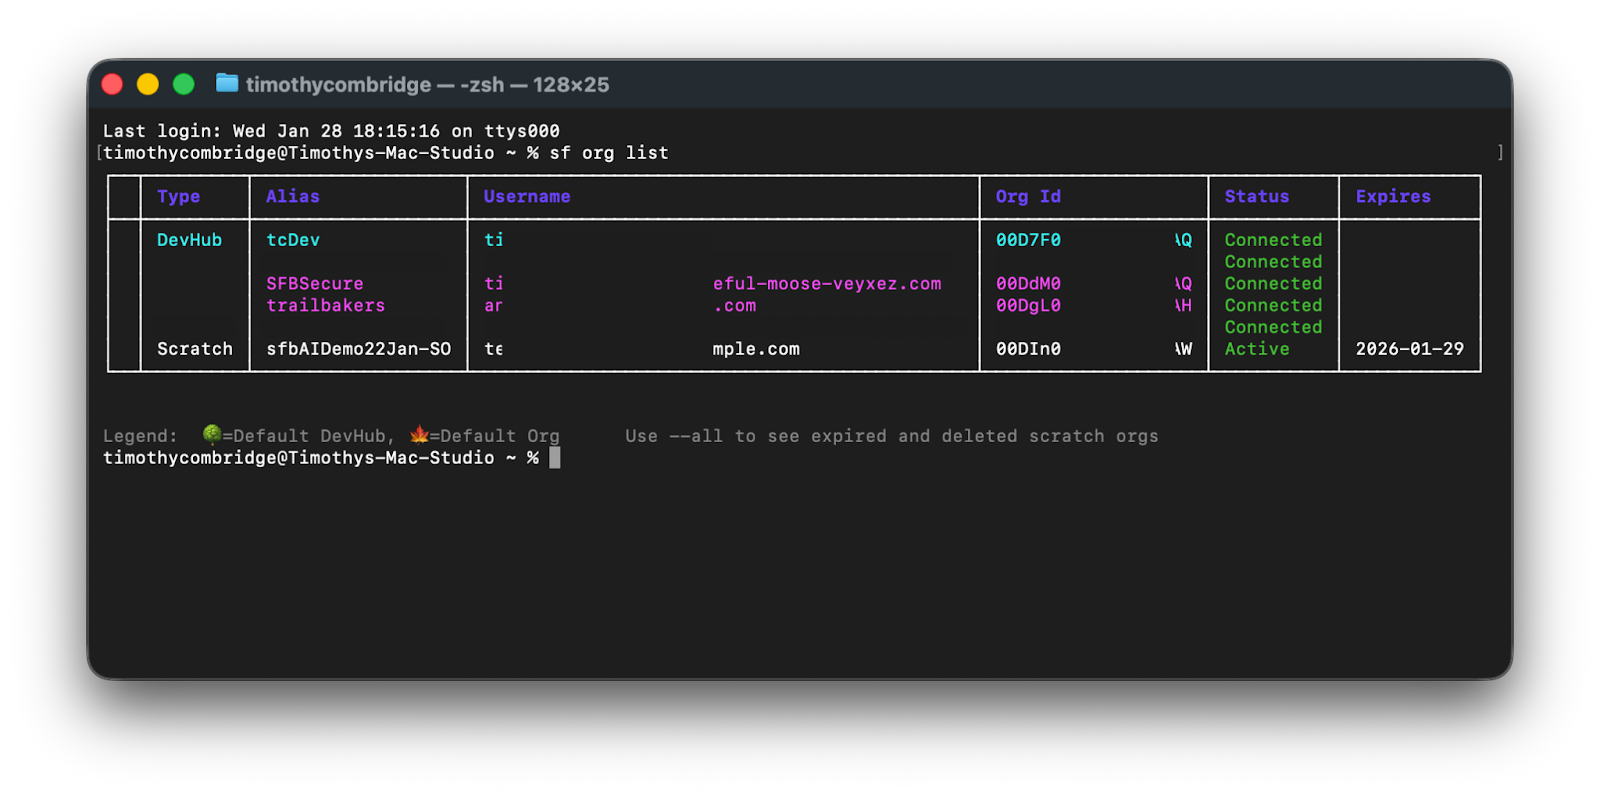
It will return a list showing the type of org it is (DevHub, Scratch, Sandbox, etc.), the alias that you have assigned (if you’ve assigned one), the username that is connected, the org Id, Status of the org, and if the org has an expiry date, it will be displayed in the far right column.
Project: Retrieve
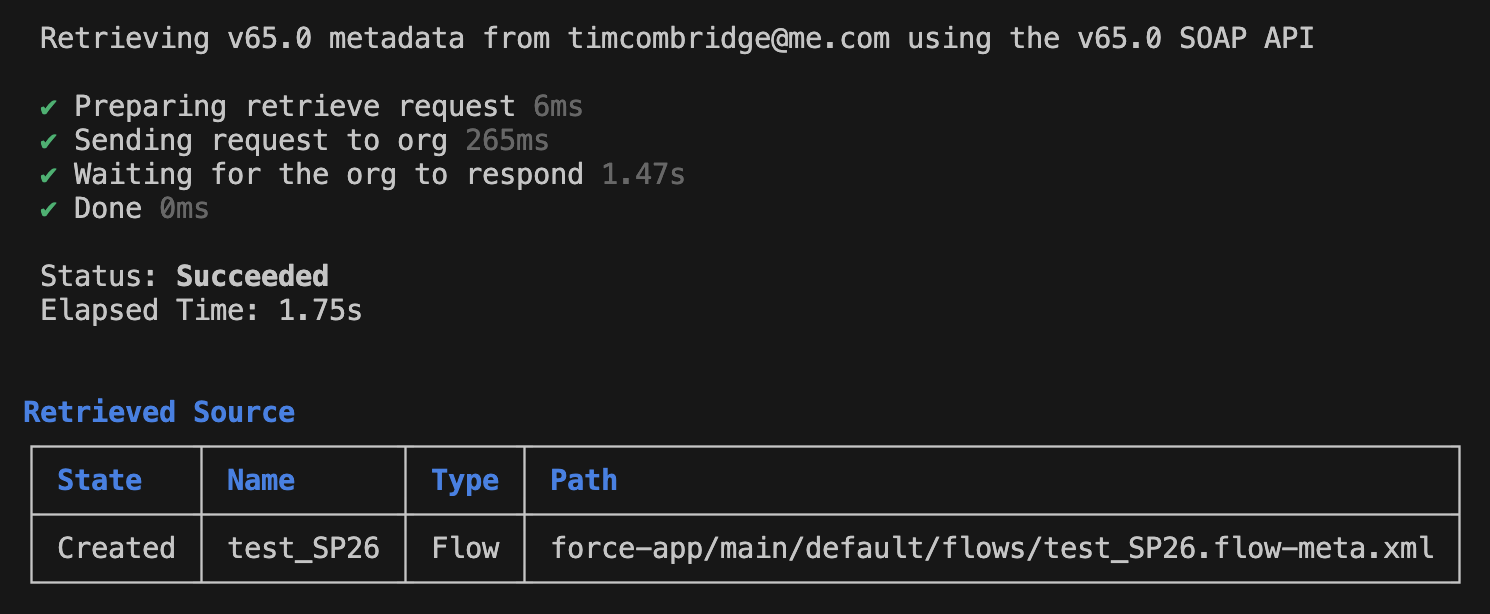
Now that you’ve connected your org, it’s time to start working! If you want to modify something that is in your org, or you wish to pull something from one environment to another, you’ll need to start by using the following command: sf project retrieve start --metadata Flow:My_Flow --target-org myDevOrg.
Once again, we are starting with sf which tells the terminal to use the Salesforce CLI. Then we use project to tell the CLI we want to use the project command set. retrieve start is the specific command that tells CLI to pull metadata from an org.
--metadata Flow:My_Flow gives context to the retrieve start command by telling it that we want to pull a specific piece of metadata. The specific type of metadata that we want is a Flow, and the API name of that Flow is My_Flow.
Finally, --target-org myDevOrg tells the CLI to pull it from the org with the alias ‘myDevOrg’. Running this command will begin a process that pulls the metadata directly from your org and creates a matching XML file in your left-side explorer panel.
Project: Deploy
When it comes time to push your metadata into a target org, you can use the deploy command: sf project deploy start --source-dir force-app/main/default --target-org myDevOrg.
Once again, sf tells the terminal that you want to access Salesforce CLI and project tells CLI that you want to use the project command set. deploy start is the command that tells the CLI that you want to push some metadata into a Salesforce org.
The --source-dir parameter tells the CLI which folder (directory) you wish to deploy. In the example, I’ve told it to basically deploy everything inside my project’s default folder (all Flows, Custom Objects, etc). You can be more specific if needed.
Instead of using --source-dir to specify a directory, you could instead specify a type of metadata, and optionally specify the exact metadata that you wish to deploy. So you could swap out --source-dir force-app/main/default with --metadata ApexClass to push all the Apex Classes, or --metadata Flow:My_Flow to push a single Flow.
Finally, --target-org myDevOrg tells it which org I want to push that metadata into (specifically, the org with the alias myDevOrg).
Requesting Help
We all need some help, guidance, or even a refresher from time to time. Say you’re about to run a deployment, but you’ve forgotten what the parameter is that allows you to specify a manifest.
All you need to do is construct the rest of your command, and add --help to the end, and Salesforce will offer up some suggestions as to what you may be looking for. The screenshot below shows you this exact example.
The command I ran was: sf project deploy start --target-org myDevOrg --help
The --help part told the Salesforce CLI that I need some assistance with my command. What better assistance than to basically print the entire project command documentation directly into my terminal! You may want to zoom in on this next screenshot to see more of the details that it provided.
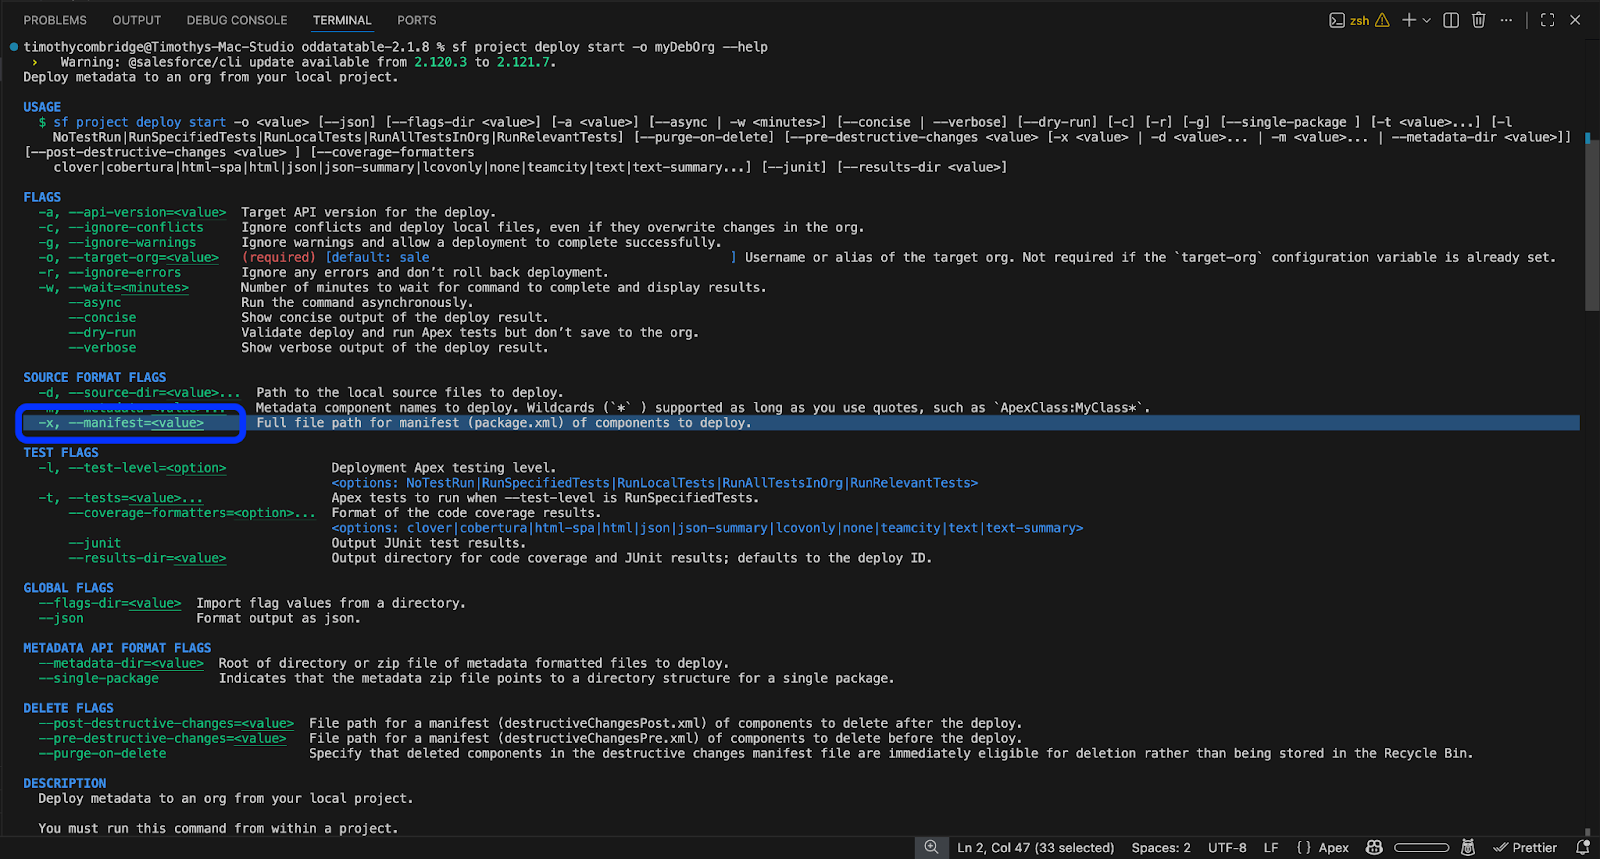
The --help parameter is available almost anywhere in the Salesforce CLI, as long as your command starts with sf and anything between the sf and --help is a legitimate command; it will be able to give you some contextual guidance. If you try it and it doesn’t work, remove the last part of your command and try again (you may have already made a mistake earlier and just not realized it yet)
Salesforce makes this a bit easier by trying to figure out what you’re looking for. For example, I used a bad command with the --help parameter, and it offered me a few suggestions.
I used sf deploy start --help, and as you know, the correct command is sf project deploy start, so it asked me if that’s what I meant.

Final Thoughts
The Salesforce CLI will become one of the most powerful tools in your arsenal if you learn how to use it. It is a powerful tool that looks a bit daunting at first, but once you get comfortable with it, you’ll find you save a lot of time doing things that currently take ages, and that’s before you leverage the power of Agentforce Vibes!
Where can you see the Salesforce CLI saving you time in your workflow? Have you been using it already and finding value in some way? Let us know in the comments!