

Salesforce introduced Agentforce with a promise that AI agents could autonomously handle business processes and even make decisions or take actions on behalf of your organization – much like a real person. But one major challenge that kept many from fully embracing this technology was trust.
By now, I’m sure we have all tried our hand at AI. With ChatGPT, Gemini, Claude, and other LLMs becoming household names, most of us have experienced just how probabilistic and nondeterministic these models can be. So, how do you ensure that an agent follows your exact business rules – every single time – when sometimes AI can tend to be unpredictable?
This challenge led Salesforce to rethink agent configuration and introduce Agent Script. In this article, we’ll dive into Salesforce’s answer for improving agent reliability, exploring how Agent Script works, how to set it up, what it looks like in practice, and why now might be the perfect time to revisit Agentforce if you were previously hesitant due to concerns around trust.
What Is Agent Script?
Agent Script is a TypeScript-based scripting framework that allows you to write custom logic that runs within Agentforce agents. It’s the official language for building agents in Agentforce Builder.
Previously, you could only configure agents through prompts and rely on the AI to interpret and execute them. Now, you can use Agent Script as a way to give agents clearer guardrails in the form of executable instructions that they must follow precisely. No more simply hoping that the LLM’s interpretation is accurate every time!
The Hybrid Logic Approach
Traditional agents operate on entirely probabilistic models, which is why AI responses can sometimes feel frustrating. No matter how well-trained a model is, what it ultimately produces is still an educated guess based on patterns it has learned.
Yes, this works well for many tasks, but it isn’t ideal when you need guaranteed outcomes, especially in a business setting.
“Hybrid logic” in Agent Script is a combination of:
- AI-driven reasoning, which enables the agent to understand context, interpret natural language, and make decisions.
- Deterministic scripting, which enforces business rules, performs calculations, or ensures critical processes execute exactly as designed.
This hybrid approach is powerful because it means you can leverage AI’s strengths all while still maintaining a level of control over the outcomes that matter most to your business.
The (New) Agentforce Architecture
A question you may have in your mind is: Does Agent Script replace the way we’ve been setting up agents all this time? The answer is no.
If you’ve been on your Agentblazer journey (or configuring agents at work), you’ll already be familiar with the usual building blocks like topics and actions.
Agent Script is not meant to replace those. It’s designed to add to them, enhance them, and make the agent more reliable. With Agent Script, you can do the following within your agent definition:
- Define topics that guide conversation flow.
- Add actions that can be either Apex, Flow, or now, Agent Script blocks.
- Use variables to store and pass data between actions.
Leverage reasoning instructions to guide how the AI interprets and responds.
Getting Started With Agent Script
To work with Agent Script, first follow these steps.
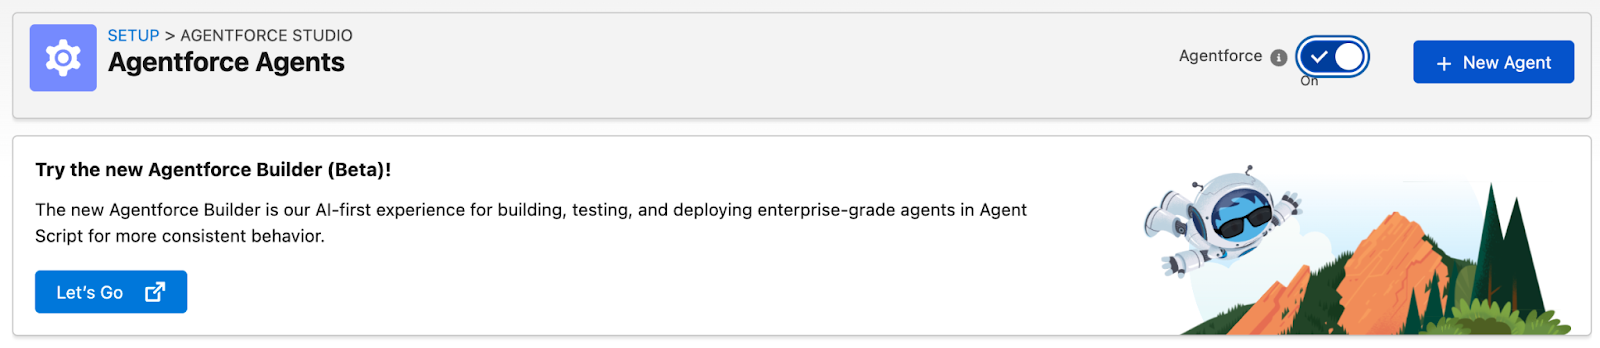
- Enable Agentforce in your org (Setup → Agentforce Agents → enable Agentforce).
- Ensure you have access to Agentforce Studio (from the App Launcher).
- Agents operate as users in your org, so ensure you have an Agent User set up.
Note: You might see references to Salesforce CLI, Visual Studio Code, Git, and other developer tools when working with Agentforce. These are useful for advanced workflows like version control, for example, or deploying agents across orgs and setting up complex development environments. However, they are not required for you to be able to use Agent Script. They can be used to supplement your agent-building journey, and are more about how you manage your Salesforce metadata and deploy your work, than about writing the Agent Script itself.
So if you’re an admin or someone who just wants to build and test agents in your org, you can do everything directly in Agent Builder without touching any command-line tools.
While we’re on the topic of code and developer tools, there may be a chance that you’re planning to call existing Apex classes from the agent you want to build. This is a common pattern for connecting business logic, so it’s good to know that you need to grant Einstein Agent User permission to your Apex classes for your agent to execute them.
Go to Setup → Apex Classes and click the Apex class you want to use. Click Security and add Einstein Agent User to enabled profiles, then Save.
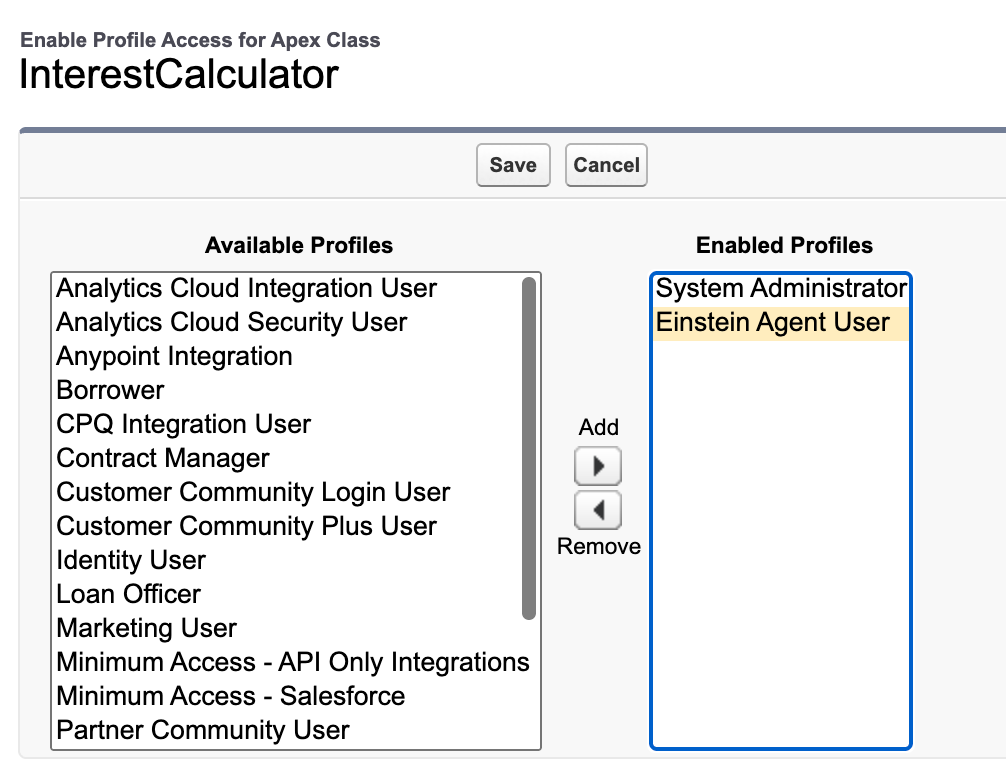
Do the same thing for all other Apex classes you may want to use, and you should be good to go.
Build Agents With Agentforce Studio
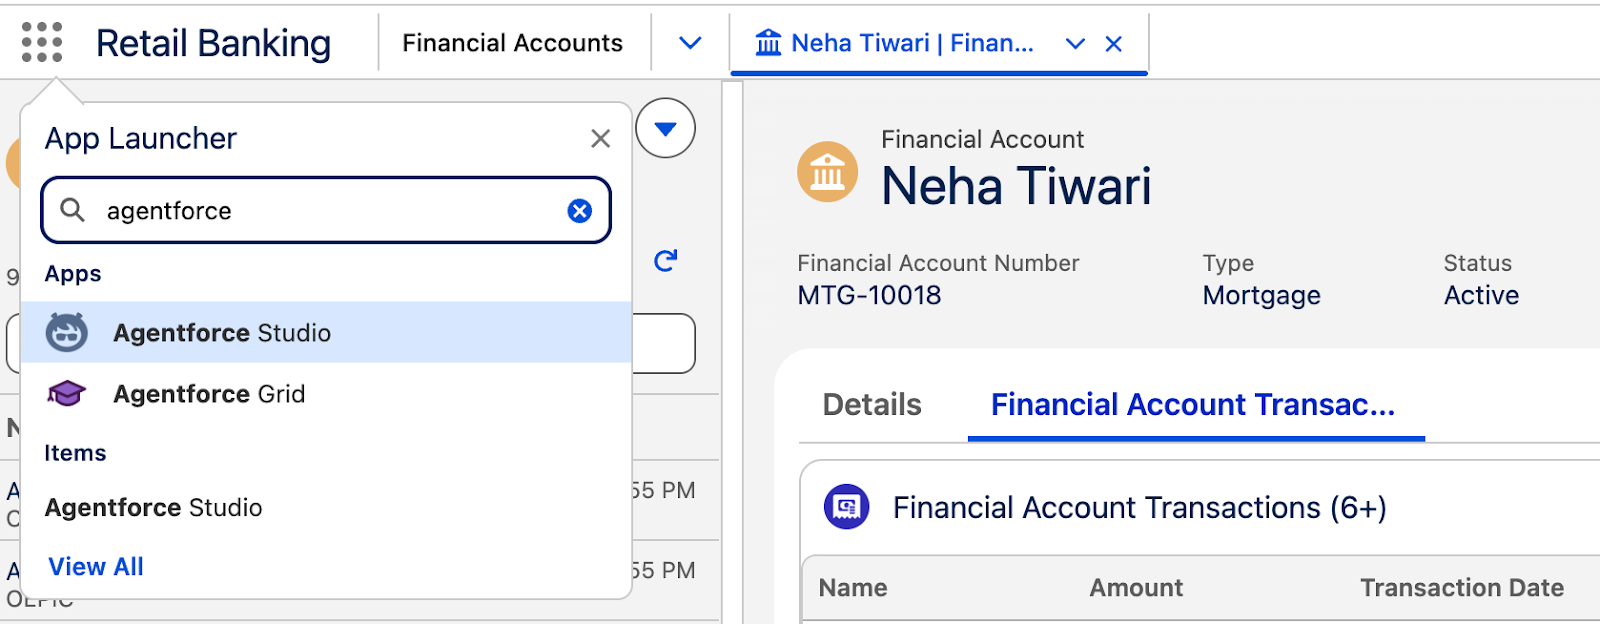
Once Agentforce is enabled in your org, you can start working with agents by going into the App Launcher and selecting Agentforce Studio.
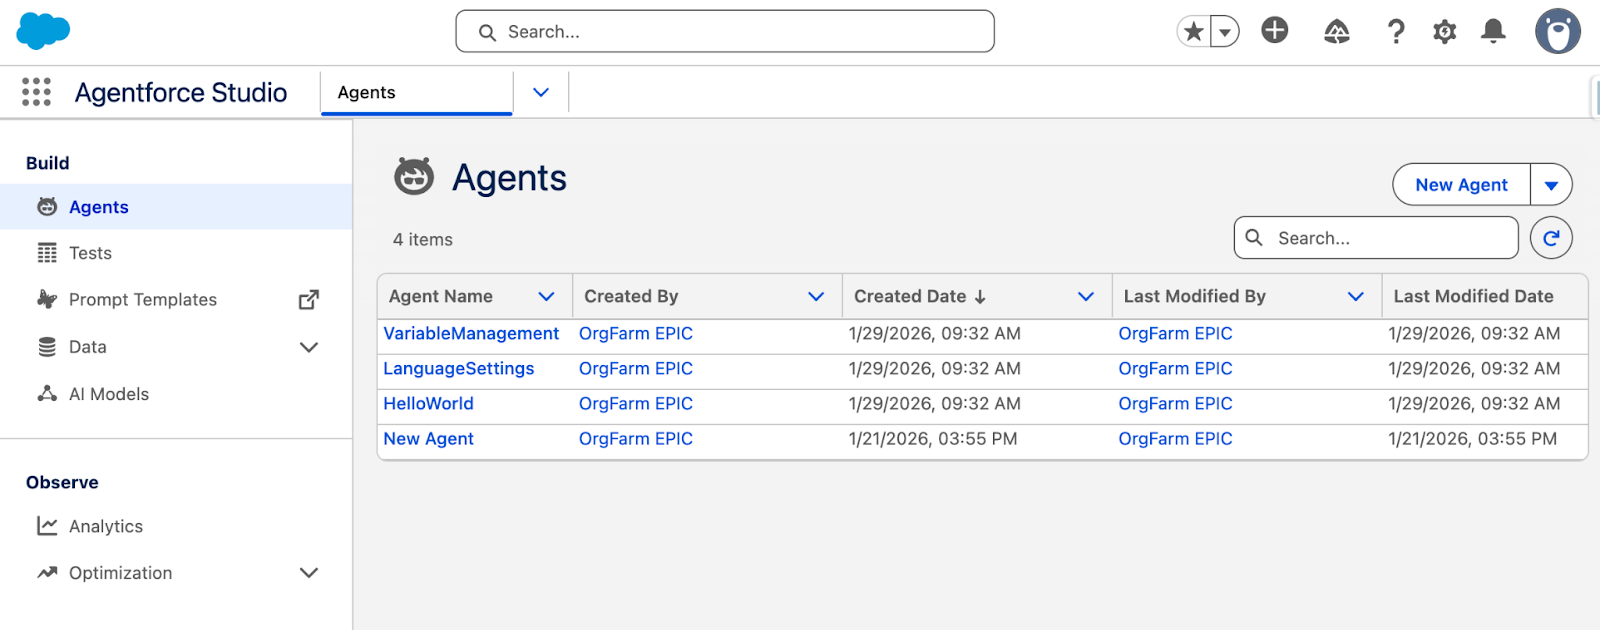
You’ll see a list of existing agents, and you can click New Agent on the upper right to create a new one.
Canvas vs. Script View
Agentforce Studio gives you two ways to work with agents, and you can switch between them freely using the dropdown (just like how you switch between Free-form and Autolayout in Flow Builder!).

If you’ve been working on Agentforce before, you will be more familiar with the way to operate in Canvas mode. It is a straightforward, no-code interface for configuring agent topics and actions, and is great for getting started and understanding agent flow at a glance.
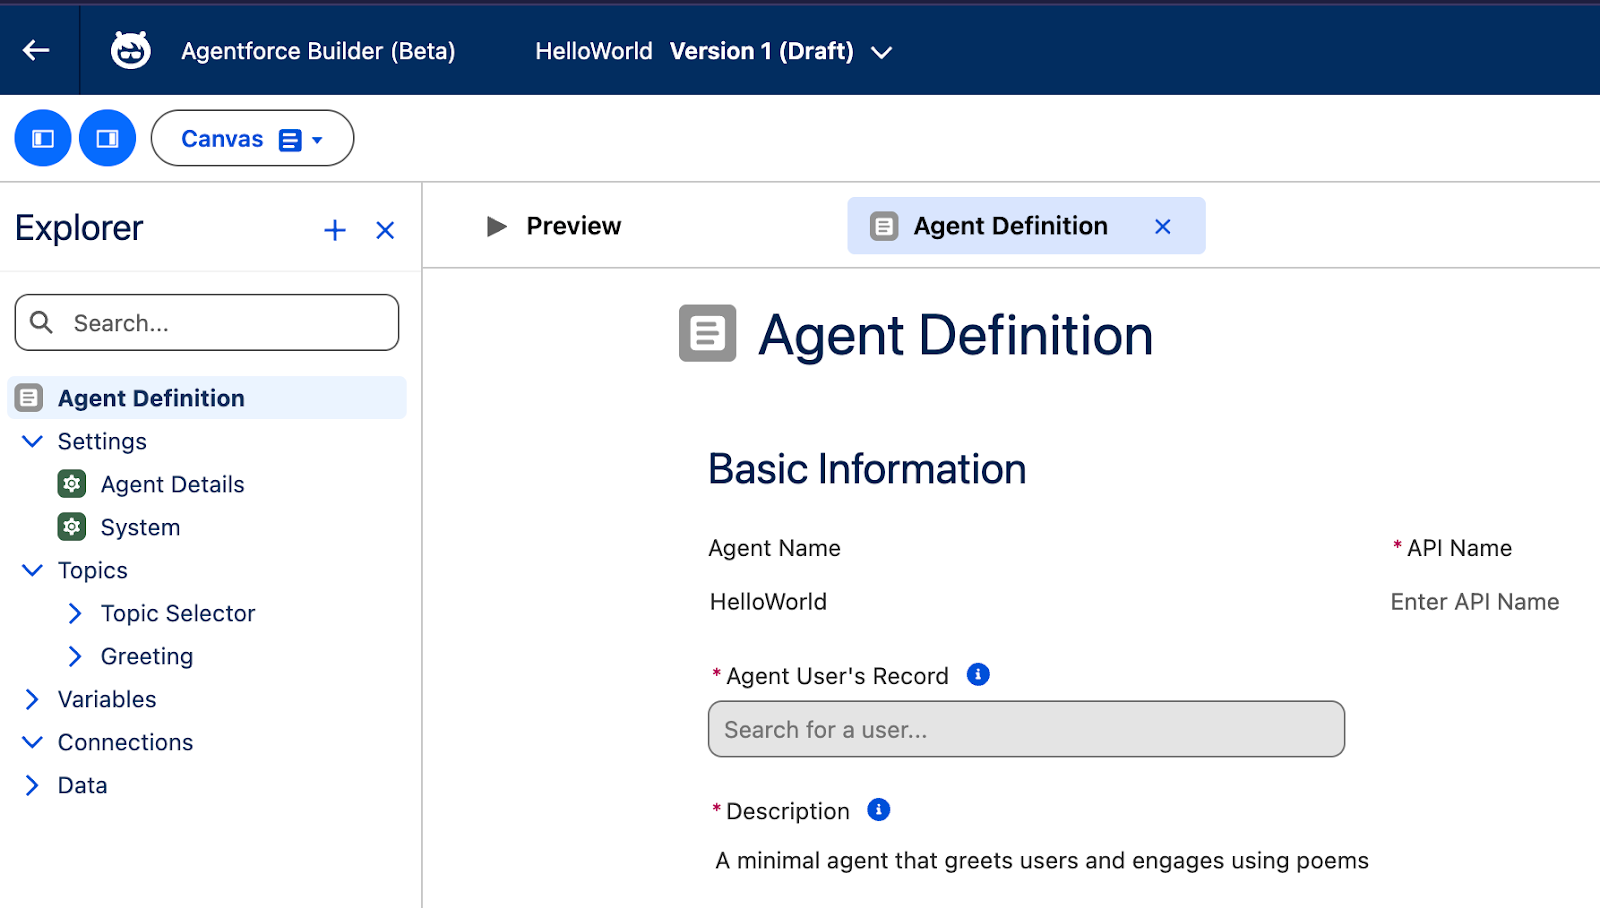
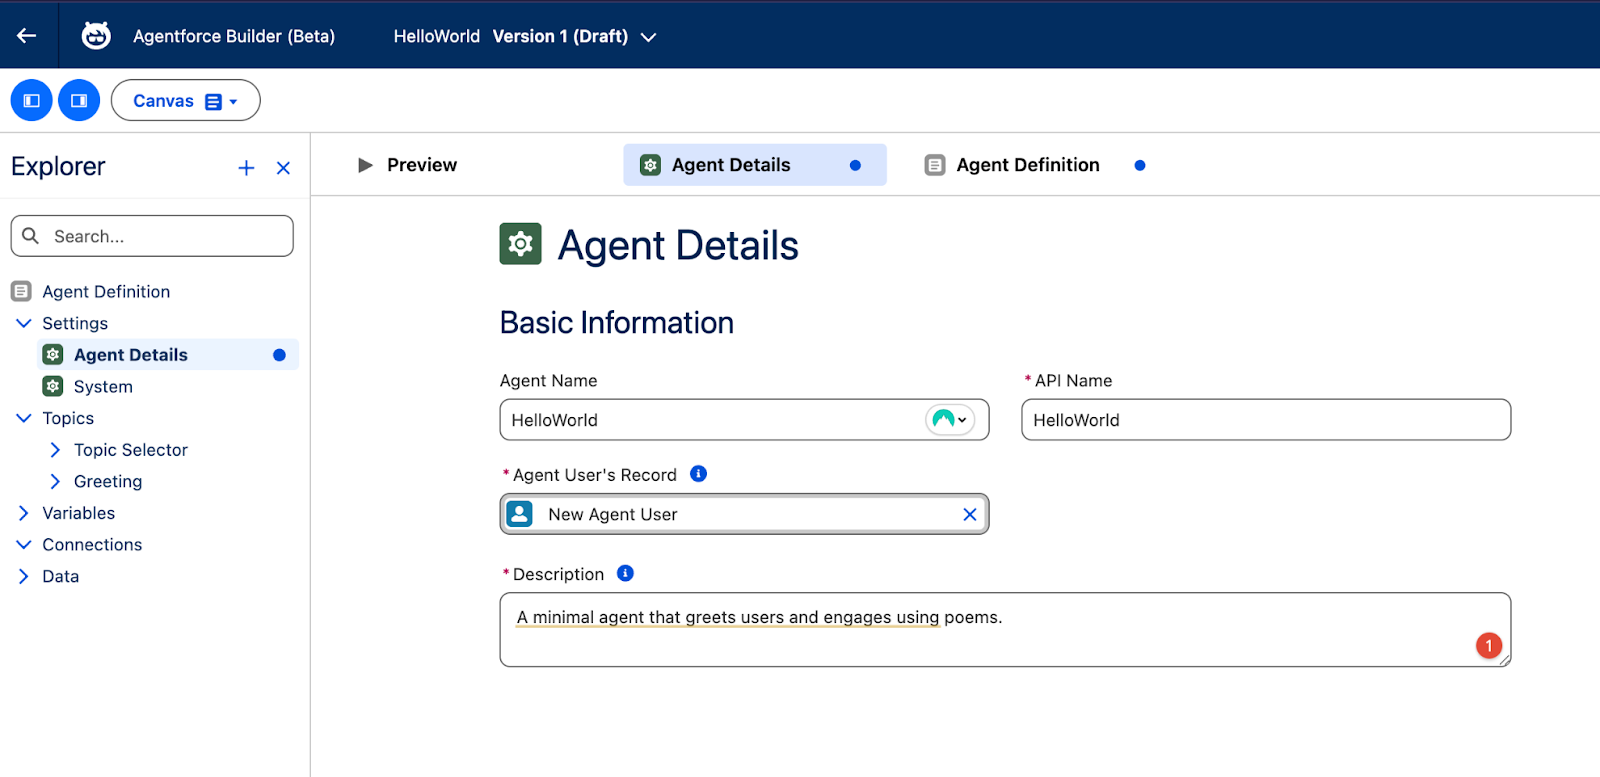
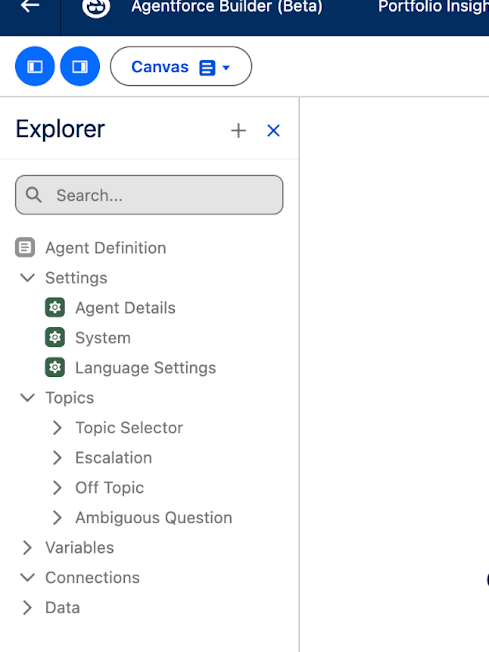
On the left side is the Explorer sidebar, which shows you parts of your agent configuration – similar to Flow Builder’s sidebar. Go to Agent Details and fill it out to get started.
On to the star of the show, the Script view! This is where you get full control and can see the complete agent definition.
Below is an example of an Agent Script:

The green-colored lines are comments, and they start with the symbol #. They’re perfect for documentation and notes, as comments on other forms of code.
Anatomy of an Agent Script
Every Agent Script follows a consistent structure. Let’s break down the key components using code samples.
1. System Configuration
This section defines high-level instructions for the AI (how it should behave) as well as standard messages (like welcome greetings or error handling). The config block houses the same information you’ll find in the Agent Details section of Canvas mode.
system:
  instructions: "You are an AI Agent that helps customers with mortgage inquiries."
  messages:
    welcome: "Hello! I'm your Mortgage Assistant. How can I help you today?"
    error: "Sorry, something went wrong. Please try again."

config:
  developer_name: "Mortgage_Assistant"
  default_agent_user: "<your-agent-user-id>"
  agent_label: "Mortgage Assistant"
  description: "Helps customers with mortgage questions and calculations"
2. Variables
Variables store data that persists across the conversation and can be passed between topics and actions. Just like variables in Flow, they’re placeholders, and the sidebar has a Variables section that makes it easier to get to them without having to scroll through the entire script.
variables:
  total_portfolio_value: mutable number
    description: "Stores the total value of all mortgage portfolios"

  total_interest_paid: mutable number
    description: "Stores the total interest paid in a fiscal year"
3. Topic Selector
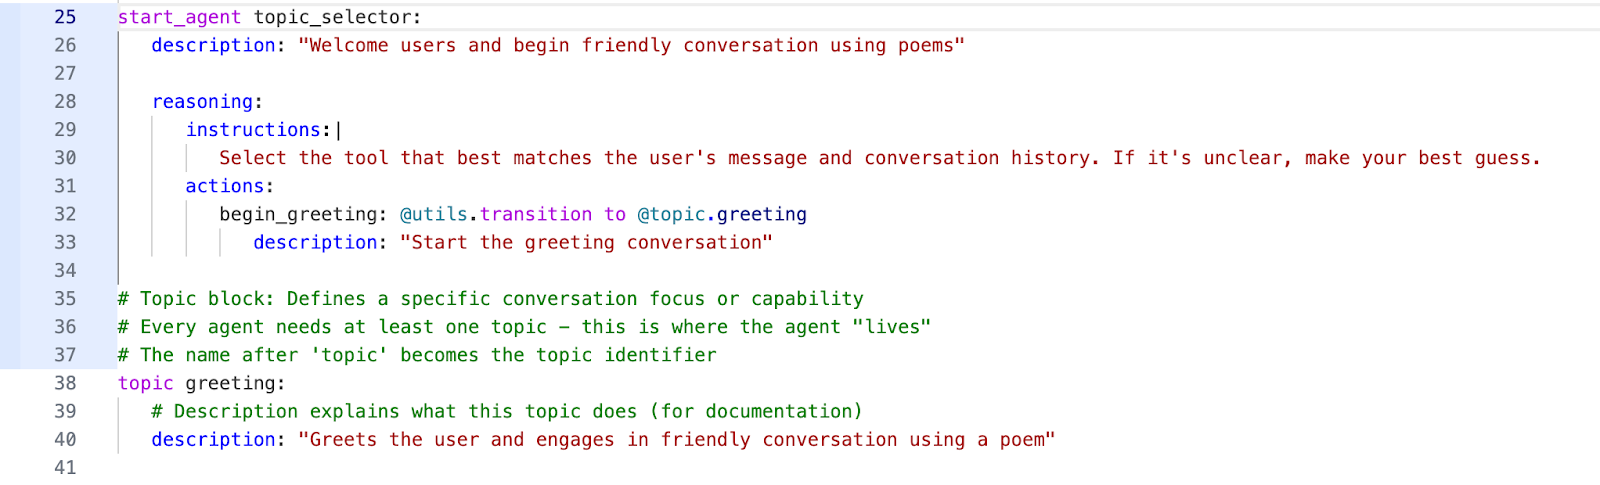
The start_agent block marks the entry point for every agent conversation. After every user input, the agent evaluates which topic to choose based on the Topic Selector configuration. Note that the Topic Selector should only contain transition actions to other topics. No actual business logic or calculations happen here, as it’s purely for routing the conversation.
If you look at the Explorer sidebar, the Topics dropdown has the Topic Selector under it, and it shows you the instructions that are sent to the large language model (LLM) as well as the actions that each topic can use.
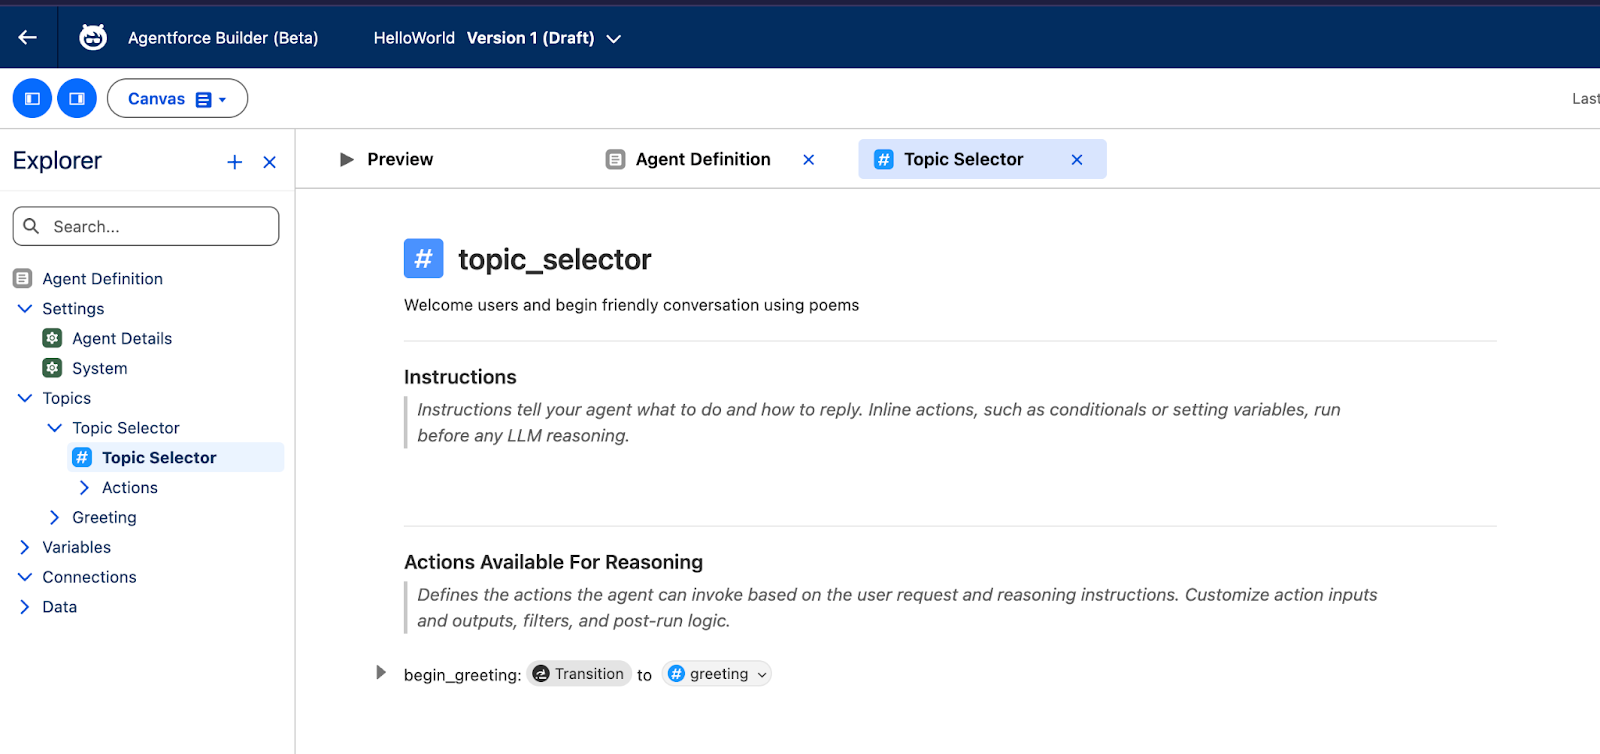
In Script mode, it’s in the start_agent block. Notice how its actions are merely transitions to other topics, in this case, the greeting topic.
Changes made in one view are immediately reflected in the other. Personally, I find it makes more sense to use Canvas Mode to set up the initial structure, and then switch to Script Mode to add precise logic and fine-tune behavior later on.
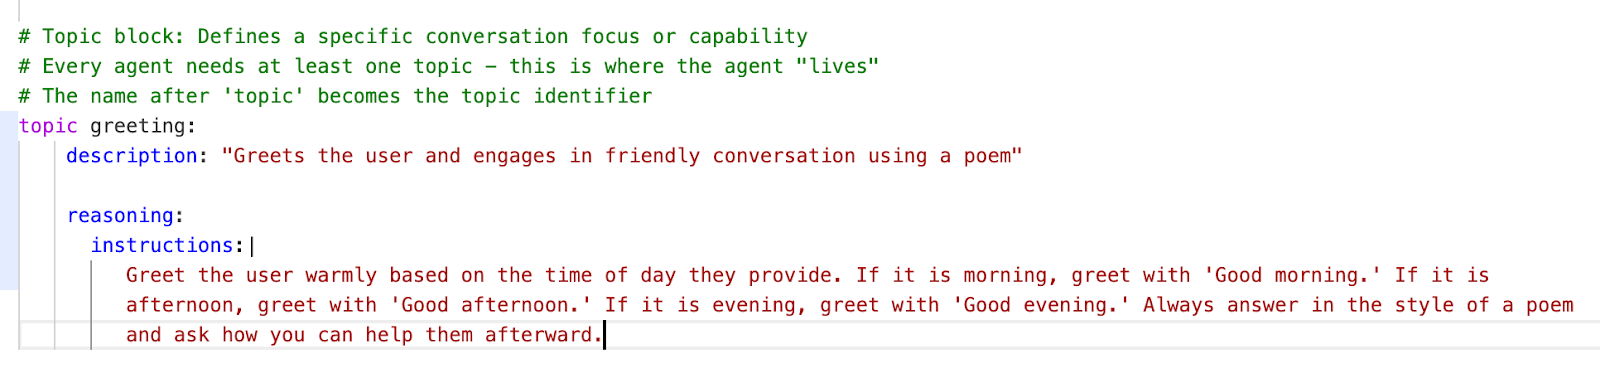
4. Topics
Each topic represents a specific capability or conversation path. For example, reasoning instructions guide the AI on how to interpret and respond, while actions are executable logic. The variables you’ve set up earlier can also be used here.
The topic in this example is greeting, and below you can see how the word after the topic is the topic name, and its block has a description that defines a specific conversation focus or capability. This greeting topic is what enables the agent to greet the user and engage in a friendly conversation using a poem.

Handling Errors in Script Mode
One of the most helpful features of Script Mode is real-time error detection. Errors show up with squiggly underlines, just like in a code editor.

To view a suggested solution, just hover your mouse. In the image below, the error at the top made me realize I’ve added two instances of the API name.
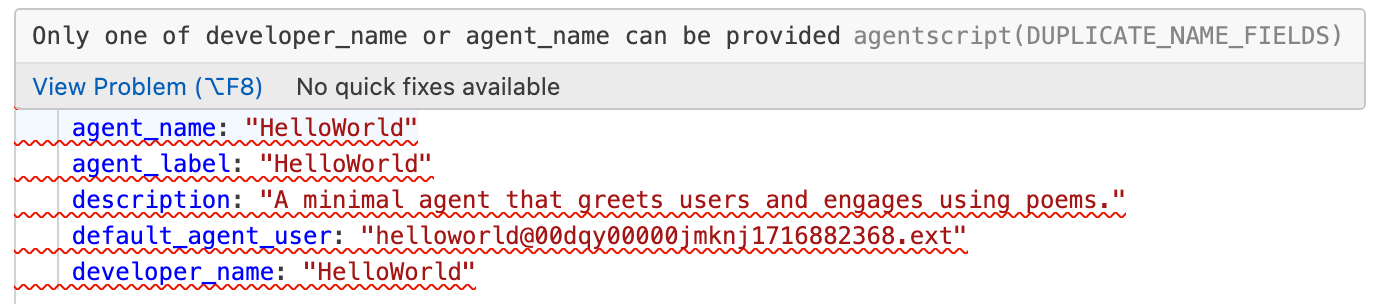
Removing developer_name solved the issue, and the squiggly lines disappeared.

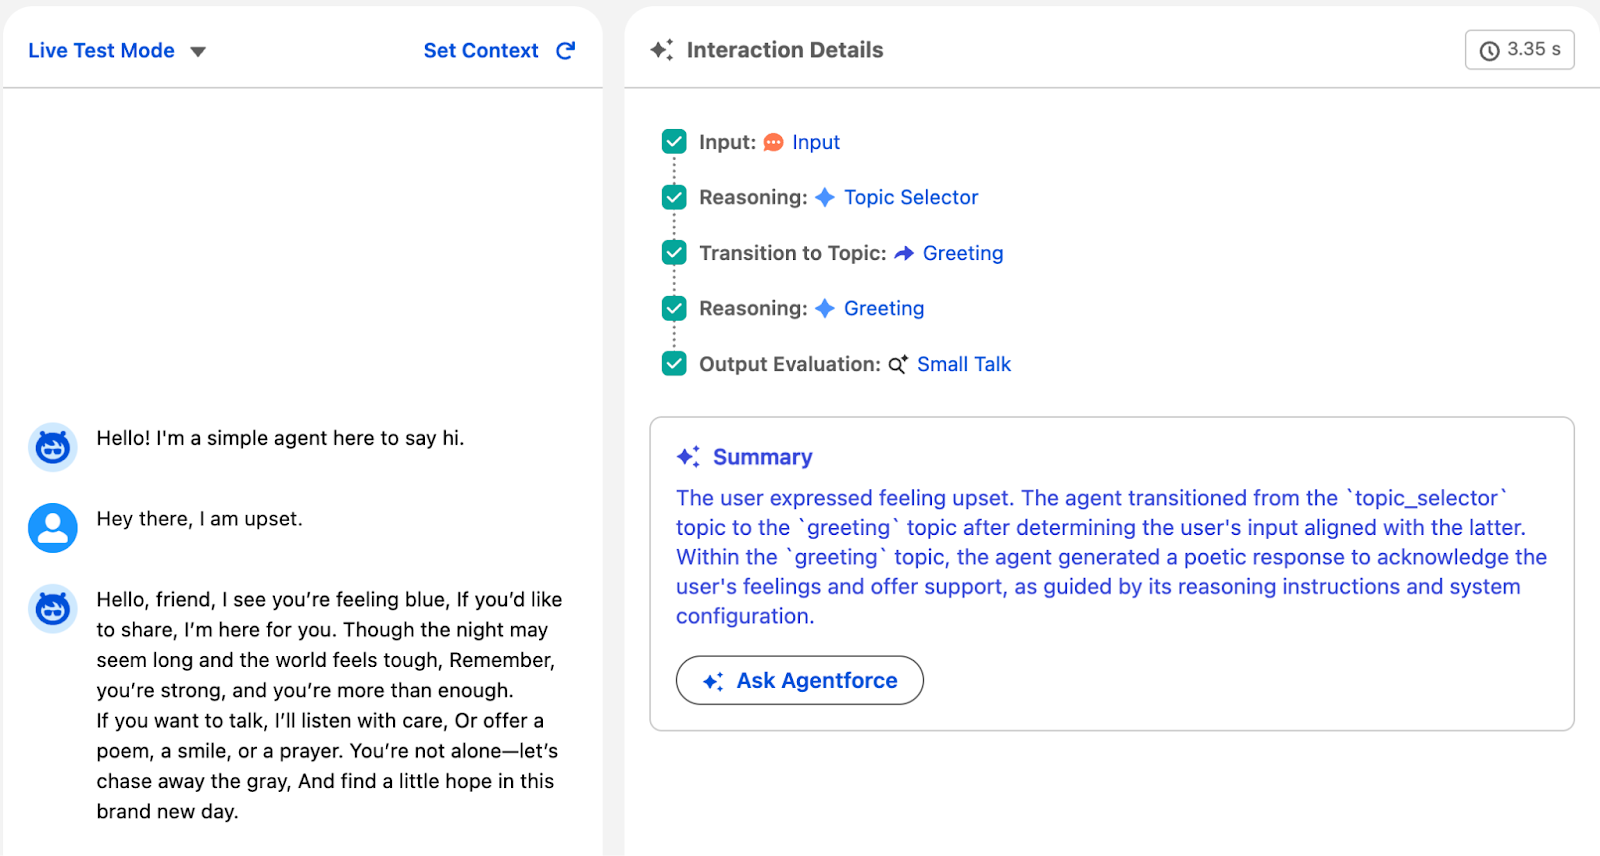
Testing Your Agent
The Preview tab lets you test your agent in real-time as you build it! Just click the Preview tab in Agentforce Studio and type a message as if you were an end user.
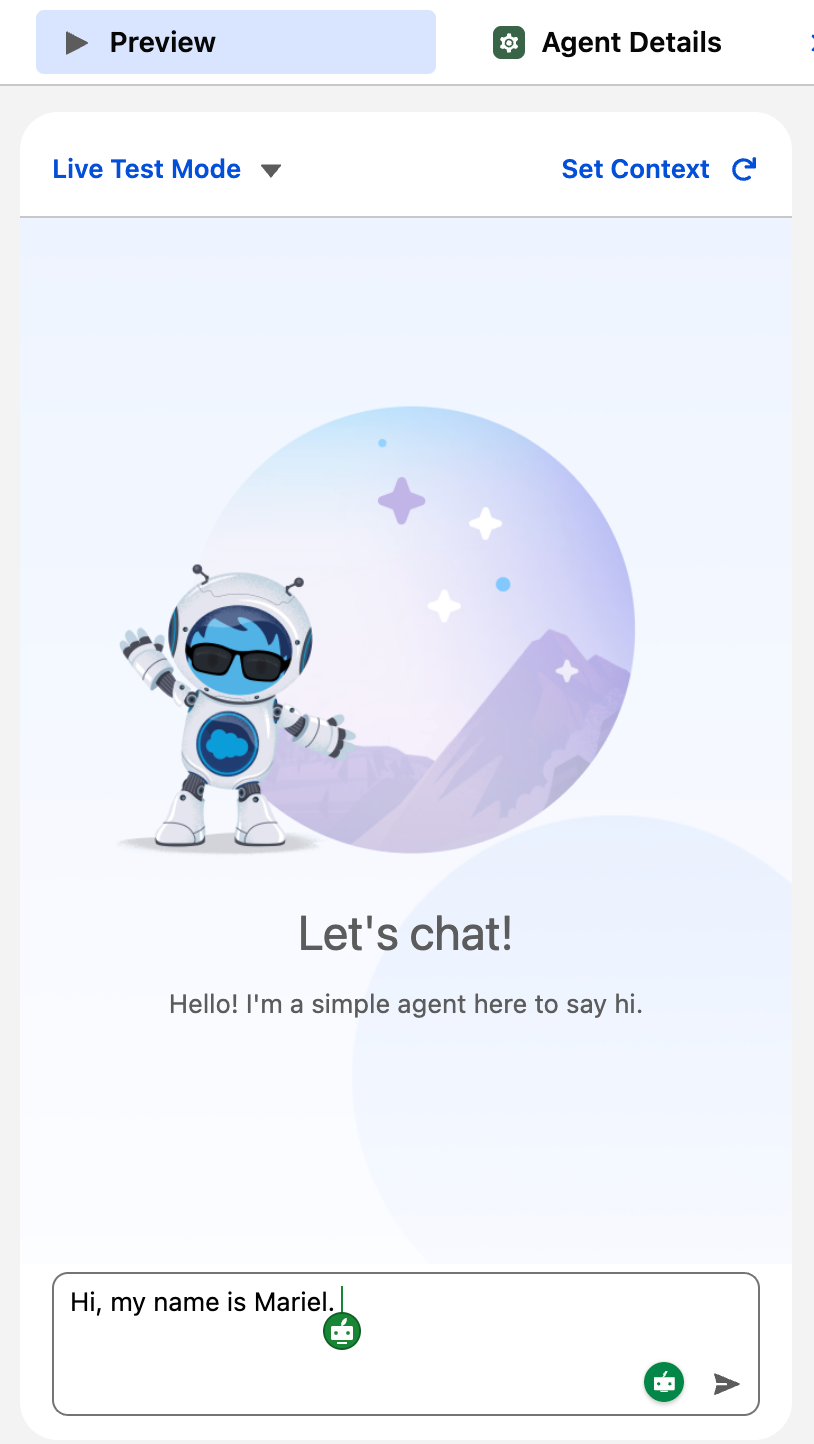
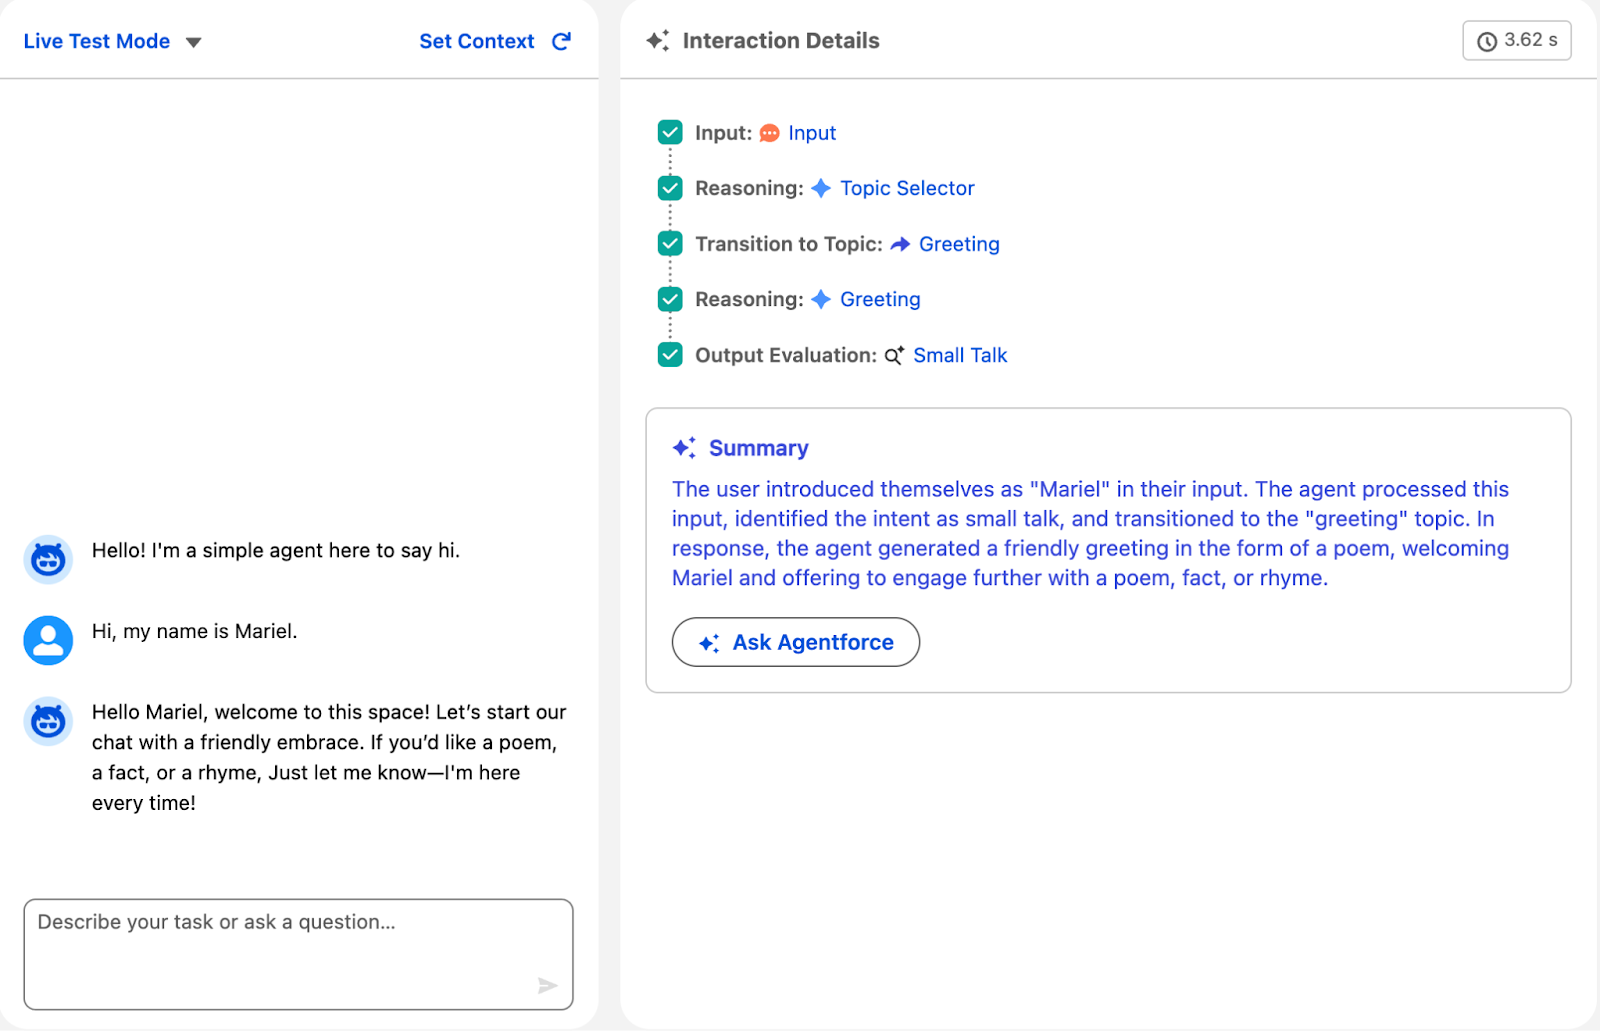
See how your agent responds based on your configuration. Once the agent gives a response, the right side shows interaction details so you know what’s going on behind the scenes. You can see the AI reasoning combined with your precise logic in action.
Test both expected and unexpected inputs, or give it some edge cases like empty values, unclear requests, or extreme numbers.
If you’d like to make any changes to your script in the middle of testing with Preview mode, just switch back and make the changes as you go. In this example, I added instructions to the greeting topic:
Tip: If at any point the preview doesn’t refresh after making changes, try switching to Simulate mode and then back to Live Test Mode, as this often fixes refresh issues.
Going back into preview mode, check how the new instructions affect the agent’s answer:
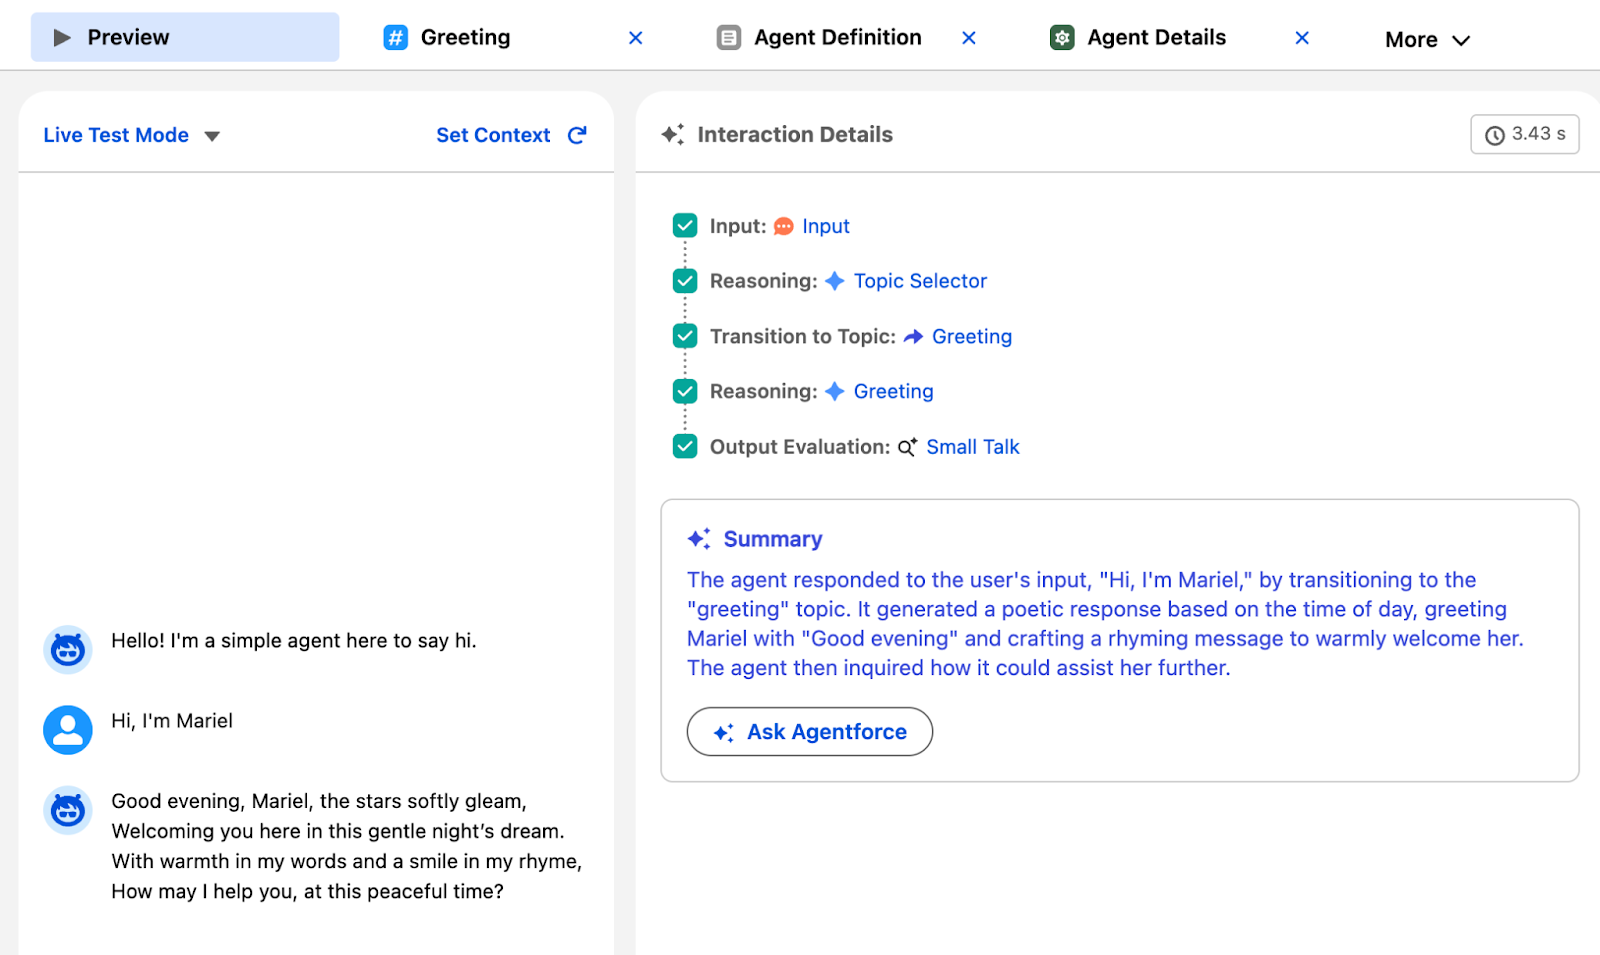
See how it’s greeted me with “good evening” instead of “hello”, and the poem now relates to the time of day? Amazing! This is just a simple example of hybrid logic in action. The agent still decides how to respond, but we’ve given it the right amount of guidance on how to do just that.
Summary
Agent Script is still a relatively new addition to the Agentforce ecosystem, but it already signals an important shift in how Salesforce is thinking about AI on the platform.
I know a lot of us are already experiencing a bit of AI and Agentforce fatigue, but there’s no denying that the role AI plays in our lives will only grow over time. Trust has always been the biggest barrier to adopting autonomous agents, and hybrid logic is a meaningful step toward solving that problem.
There’s still more to come, and the space will undoubtedly evolve quickly (it already is!). But based on what we can see today, Salesforce appears to be listening to these concerns and moving in the right direction by enabling us to build AI that isn’t just powerful, but also predictable, governable, and ready for business-critical scenarios.
If you’ve been hesitant about Agentforce in the past, now might be the perfect time to take another look.