Ever since its inception, Salesforce Flow has piqued the interest of Salesforce professionals across all industries and levels of experience. Thanks to its intuitive UI and versatility, it can unlock a new realm of possibilities when it comes to declarative automations on the Salesforce platform. Today, this tool sits at the front and center of Salesforce automations, with more features and capabilities being added with each release – don’t believe it? Check out our Summer ‘25 round-up and see for yourself.
In this post, we’ll navigate through a few common use cases that are ideal to get you started on your journey with Salesforce Flow, while resolving business needs that most Salesforce customers face.
New to Salesforce Flow?
If you have used Workflow Rules and Process Builder in the past, transitioning to using Salesforce Flows may not be as difficult as you think. Previous declarative automations you have built can be transitioned to Flow, and now you have more options and more control that were just not possible in the past. To familiarize yourself with the elements, terminology, and types of Flows, check out our cheatsheet before you start building.
Regardless of the type of process or use case that you will be implementing, everything will happen with Flow Builder, right within the Salesforce UI. Similar to other builders you may be familiar with across the platform, Flow Builder allows you to tailor your automation with clicks and building blocks. There are also quite a few additional capabilities available, such as various types of resources, entry criteria, or even when the automation should execute for record creation or update. All in all, the available options will differ slightly based on the type of flow you will be creating.

Use Cases to Get Started With
While there are virtually infinite varieties of use cases you or your stakeholders could come up with that can be accomplished within Flow Builder, let’s go through five common ones that most Salesforce admins have likely already bumped into.
Email, In-App, or Slack Notifications
How many times have you been asked to ensure that a Salesforce user is notified when something happens in Salesforce? Probably too many to count.
Receiving notifications when an action is pending for them is something users generally appreciate, rather than them having to proactively keep checking if the ball is in their court. On another note, there are also users who would rather be notified only when certain milestones are achieved, rather than having their inboxes flooded with notifications. There are many preferences when it comes to notifications, and luckily, Flows can account for all of them.
A fairly simple use case is notifying managers when someone on their team just closed a big deal – now that’s a reason for celebration! When creating the flow, this would be a record-triggered one, which will be set to fire when an Opportunity’s Stage is changed to Closed Won. Even if you choose to send an email or a push notification, the flow should be optimized for Actions and Related Records (after-save).
In this example, based on Opportunity Amount, I chose to either send an email or a bell notification, but that’s based on what the requirement asks for. When sending emails from Flow, you can use the updated Send Email out-of-the-box action, where you can directly set the recipients, subject, and body of the email without needing an email template, unless you choose to use one.

When sending a bell notification on the other hand, the custom notification type should already exist, and it has to be retrieved within the flow with a Get Records element rather than hardcoding its Id within the action. Custom notification types help you define if the notification should be sent to either Desktop, Mobile, or both. Additionally, the Recipient Ids (which can contain one or more Ids) have to be defined as a collection variable of type text, as required by the out-of-the-box Send Notification action.
If your organization is using Slack, and Slack is the preferred option, there are also a couple of ways to send notifications from Slack. One of them is to use the readily available Send Slack Message action and set the parameters according to your preferences. Note that, as highlighted by the orange banner below, this option should be executed in an asynchronous path within the flow.

The other option for Slack is to create a custom Slack notification type, which will be available to choose as an Action in the Notifications folder when adding the Action element to your flow. The Record Id and Recipient Ids have to be set, and similar to the custom notification type for Salesforce Desktop and Mobile, the Recipient Ids should be stored in a collection variable. A bonus of this approach is that within the notification, you can pre-set buttons which will be surfaced in Slack, but you have to set a generic message and title that will be used.

Custom Guided Experiences
Since the very beginning of Flows, one thing that Visual Workflows at the time brought to the table was the possibility for admins to create interactive experiences for data collection using the drag-and-drop interface of Flow Designer. This was not an option within Workflow Rules and Process Builder, and required a developer’s help to achieve prior to Screen Flows’ existence.

Fast forward to today, Screen Flows can be used for a wide variety of use cases, including highly customizable intake forms, guided step-by-step experiences with progress bars, or even just displaying information in a more user-friendly format. On top of this, Salesforce has made it a priority over the past few releases to completely transform the screen flow experience by introducing reactivity into the mix, with Screen Actions being one of the newer additions.
Creating Contacts on existing Accounts can be one of those time-consuming tasks that the Sales team could end up spending several minutes on, which could be better used elsewhere. Out of the box, creating Contacts can be done through a few different ways, including global actions, navigating to the Contacts tab and clicking the New button, or navigating to the Account and creating them from there, and so on.
While all of these are feasible options, you only have limited control over them, and that’s where a Screen Flow can come in handy. A Screen Flow can be called from a quick action from the Account, let’s say, but you can also choose to expose it directly on Lightning Pages, be it a Record Page or even the Homepage.
The example below showcases this simple Screen Flow, which you can start with for Contact creation, but taken one step further with the new Screen Actions. This way, if a Sales Representative chooses an Account, the existing Contacts are automatically surfaced for them to see what other Contacts already exist, and ensure, even before they click any button, that mandatory fields are completed. Of course, the same approach can be applied to other Salesforce objects, use cases, and even customized in such a way to include duplicate checks if desired.
Fast Field Updates on the Triggering Record
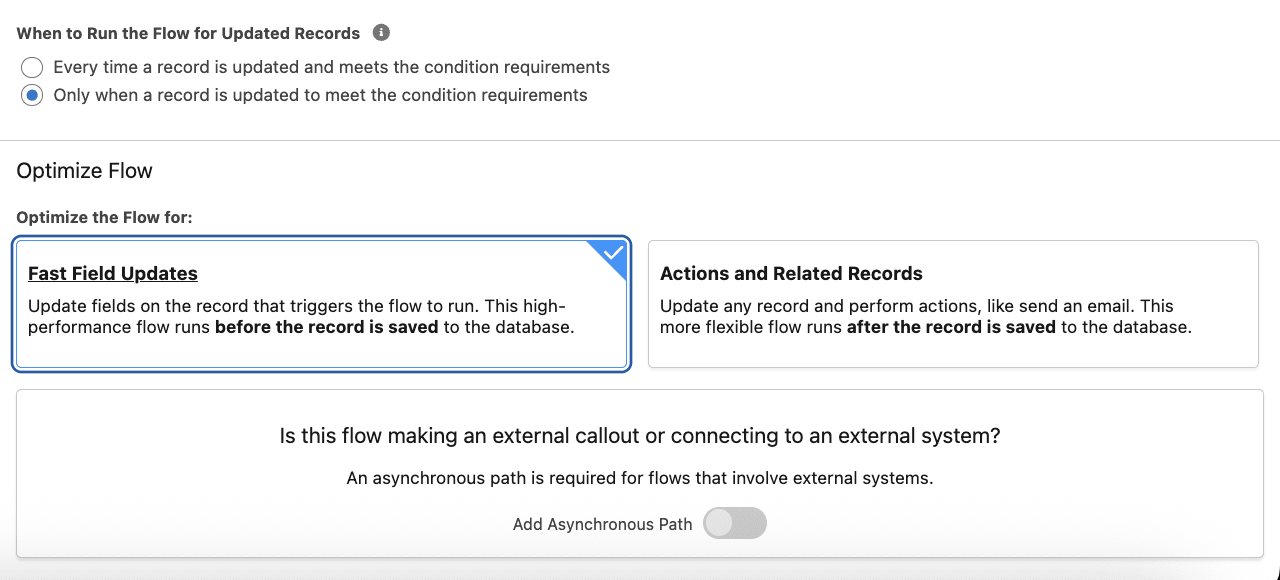
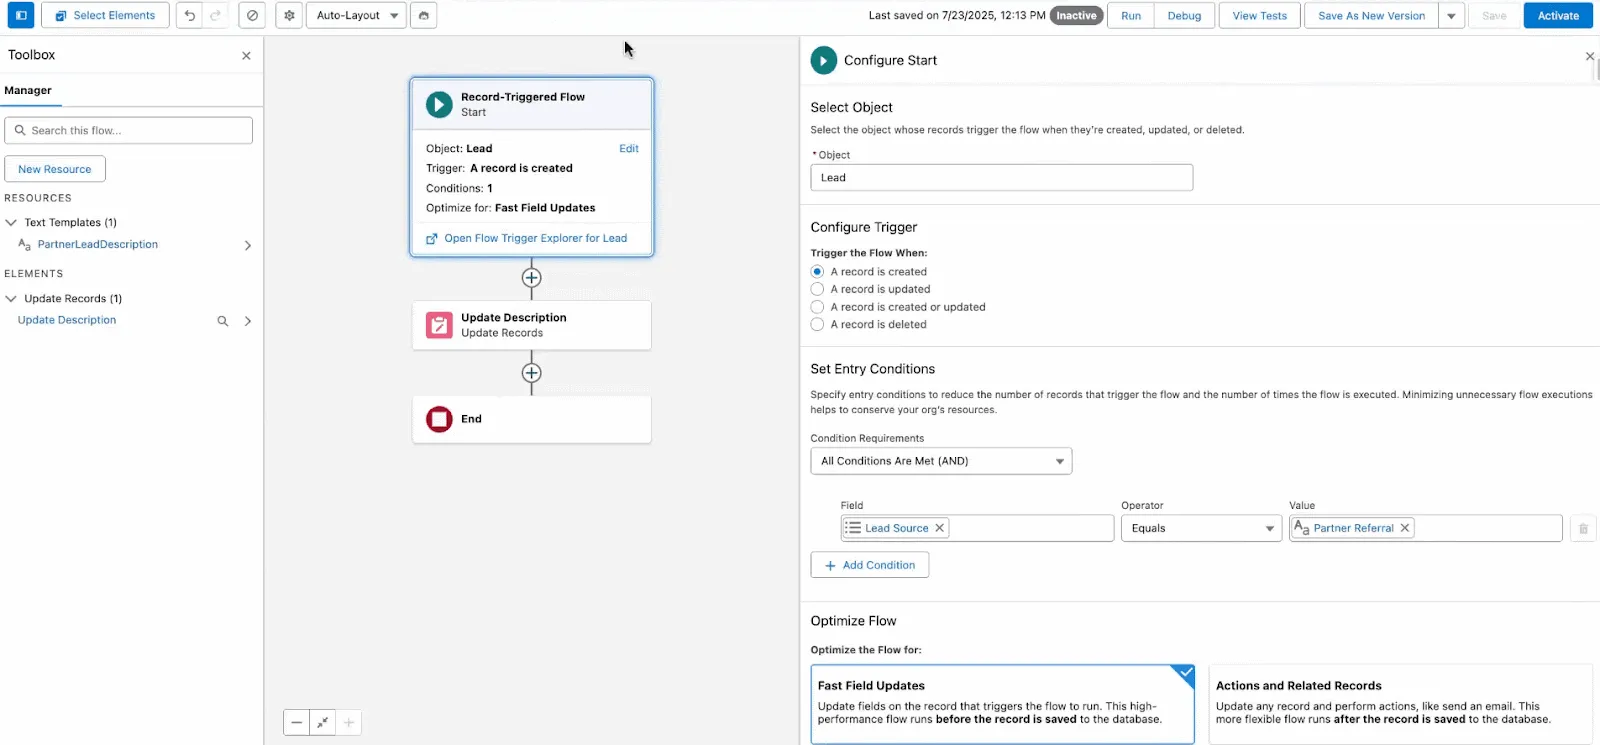
Another capability that flows unlock, that was not available with Workflow Rules and Process Builder, is the ability to define if record-triggered automations run before or after the record is saved. As you’ve seen in the notifications example above, that flow was optimized for Actions and Related Records, offering more flexibility in terms of actions as well as integrations if needed. On the other hand, if you’re looking to update the same record that initially triggered the flow with default values, or formula calculations based on other fields, Fast Field Updates is the option to go for here. In the order of execution, this flow will execute way before the record is committed to the database, and until this flow option, this was only achievable with Apex.
In this example, when a Partner Referral Lead is created, the standard Description field should be updated with instructions for the Business Development Representative who will pick it up to further quality it. Within Flow Builder, this translates into a record-triggered flow, which will start when a Lead with the Lead Source ‘Partner Referral’ is created. A Text Template resource, formatted as plain text, is used to store the instructions, which will then be updated on the Lead before the record is saved.
Once you become more familiar with Salesforce Flows, you can also take a look at the Einstein for Flow capabilities, including having Einstein create a draft Flow based on your natural language instructions. Note that the flow may not be perfect, and prior to deploying it to a production environment, it’s paramount to review and correct it as needed to avoid any problems.

Keep in mind that, as you start creating multiple flows for one single object, you can make use of Flow Trigger Explorer to review them, but also define their trigger order when it comes to flows of executing in the same context.

Complex Validations
Surely every Salesforce professional out there has used validation rules on multiple occasions, be it to ensure fields are not left blank based on other field values, or generally that the input data meets certain criteria before being allowed to save a record. This is all feasible with validation rules in most cases, until there is a need to ensure that child records exist for or meet certain criteria. Until the Custom Error flow element, such an ask would also require custom Apex. Luckily, that is no longer the case!
When thinking about the most relatable use cases that the Custom Error Element can be used for within a flow, ensuring that an Opportunity Contact Role is added on the Opportunity has to be towards the top of the list, especially as Opportunity Owners know best with whom they are in Contact with. As you might know, if the Opportunity Contact Role added is marked as Primary, then the ContactId field on the Opportunity is populated. In this case, surely a validation rule would work, but what if you may or may not be looking for the Primary Contact?
In this scenario, the example flow below showcases a way for admins to declaratively ensure that at least one Opportunity Contact Role with the Role Executive Sponsor is added to the Opportunity if the amount is greater than $500K. If the desired Contact Role doesn’t exist, then the Custom Error Element will throw the pre-configured error. Within the element, you can add one or more error messages and choose to display them either at the field level or on the page. This option is great if more fields should be highlighted at the same time, but in this case, I just went with one error on the record page.

When trying it out, the error message will be displayed just like a validation rule one would be, when selected to be at the top of the page. The experience remains consistent, but possibilities are endless now, even without code.

Automations That Run on a Cadence
What if you had to ensure that certain information on multiple records is updated, however the information is not needed immediately? Developers may say that batch Apex is an option to consider, but as a Salesforce Admin, you should know that Salesforce Flow offers the option of Schedule-Triggered Flows, which can run once, daily, or weekly. They can be a feasible way to clean data once, or on a cadence. Use cases may vary from business to business, but they can include cleaning up older Lead records, deactivating Products, or the scenario we will go through below, updating a field on multiple records based on other related records.
While it may sound convoluted without naming the records, let’s take an Account Status as an example. If you were to ask your Sales team to update the status of the Accounts, would it happen? Couldn’t they spend that time focusing on selling and building customer relationships? In this case, let’s calculate the Account Status based on Opportunities.
The below example will run once a week, for all Customer Accounts, and determine their Status – if there is no Opportunity, then that Account will be marked as a Prospect. If there are Opportunities related to the Account and at least one of them was Closed Won in the past 180 days, then that Account will be flagged as a customer. And finally, if Opportunities exist but none of them is Closed Won (yet, hopefully!), then the Account Status will be Inactive. Surely, these picklist values may not be ideal for every business, but that’s the beauty of flows – you can pick and choose the criteria to cater to your teams’ needs!

Don’t forget about debugging the flow to ensure it works as expected, and also pay attention to the debug options – for Schedule-Triggered Flows, you can select if the flow will be run in rollback mode or not. If the option isn’t selected, then your data will be altered. As always, the debug panel will provide you with information about how each element was executed, and thanks to the new Debug Panel experience, you can extend the panel, expand or collapse each element’s details, and even search through the details. Additionally, it is always a good idea to review the considerations before creating the actual flow.

Final Thoughts
Finally, these five use cases are only meant to give you a glimpse into what is now possible with Salesforce Flow, and why having such a tool in your skillset matters. When it comes to automating processes, sending notifications, or just creating a more tailored experience on the Salesforce platform, flow is becoming non-negotiable. The next step after becoming familiar with Flow Builder in your developer edition or sandbox is to dive into best practices and what you could do to implement them, such as error handling with fault paths and flow testing.
Where are you on your flow journey? What are other use cases you would recommend for someone starting today? Let us know in the comments below!
