


Flow has solidified itself as the go-to automation tool that you can use to supercharge processes in your Salesforce org. However, there’s so much to know when it comes to Flow!
In this post, we’ll cover everything Salesforce Flow – including the types of Flows, elements, and resources. Plus, a handy cheat sheet (jump to the infographic) that you can print out, save to your desktop, or even have framed on your wall (I’m so honored that you’d do that!) to remind you of the building blocks of Salesforce Flow.
Types of Flows
Screen Flow
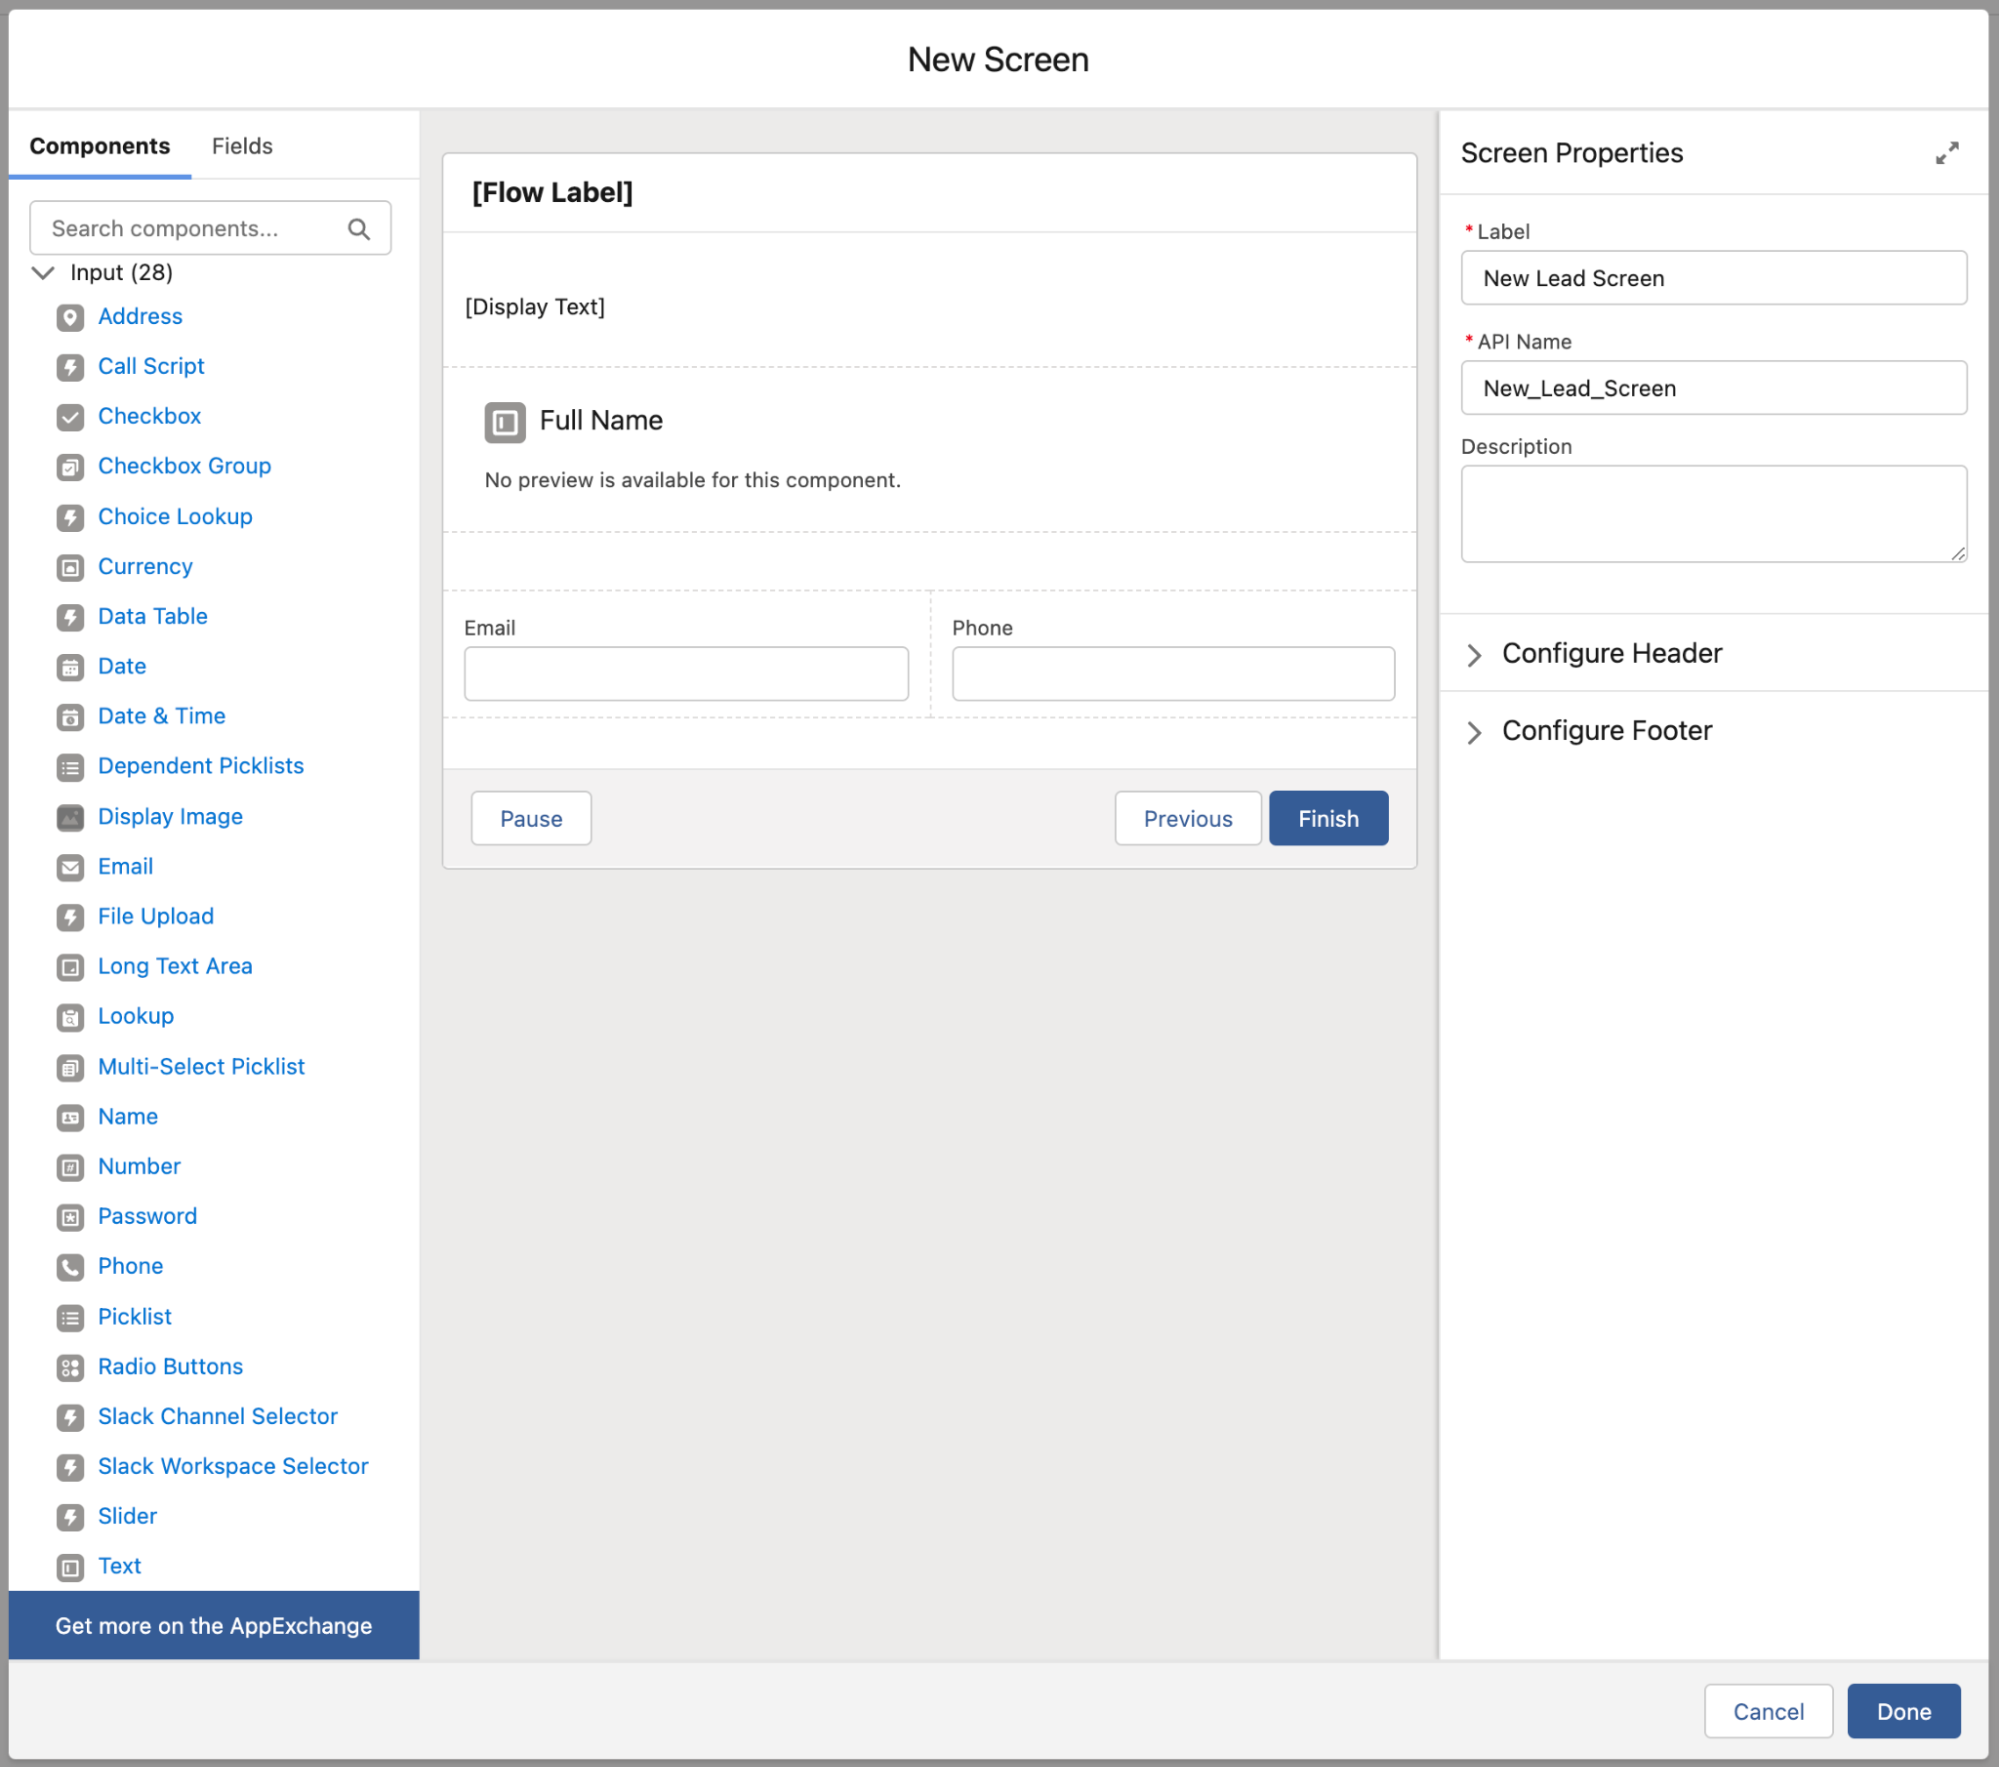
If your Flow needs to capture any form of user input (select from a list, click a button, enter some text, etc.), you’ll need to use a Screen Flow. You can use Screen Flows to guide users through a script or execute a multi-page form.

Unlike all other Flow types, Screen Flows run in the foreground rather than in the background, meaning these are the only flows that users will see in the UI.
Record-Triggered Flow
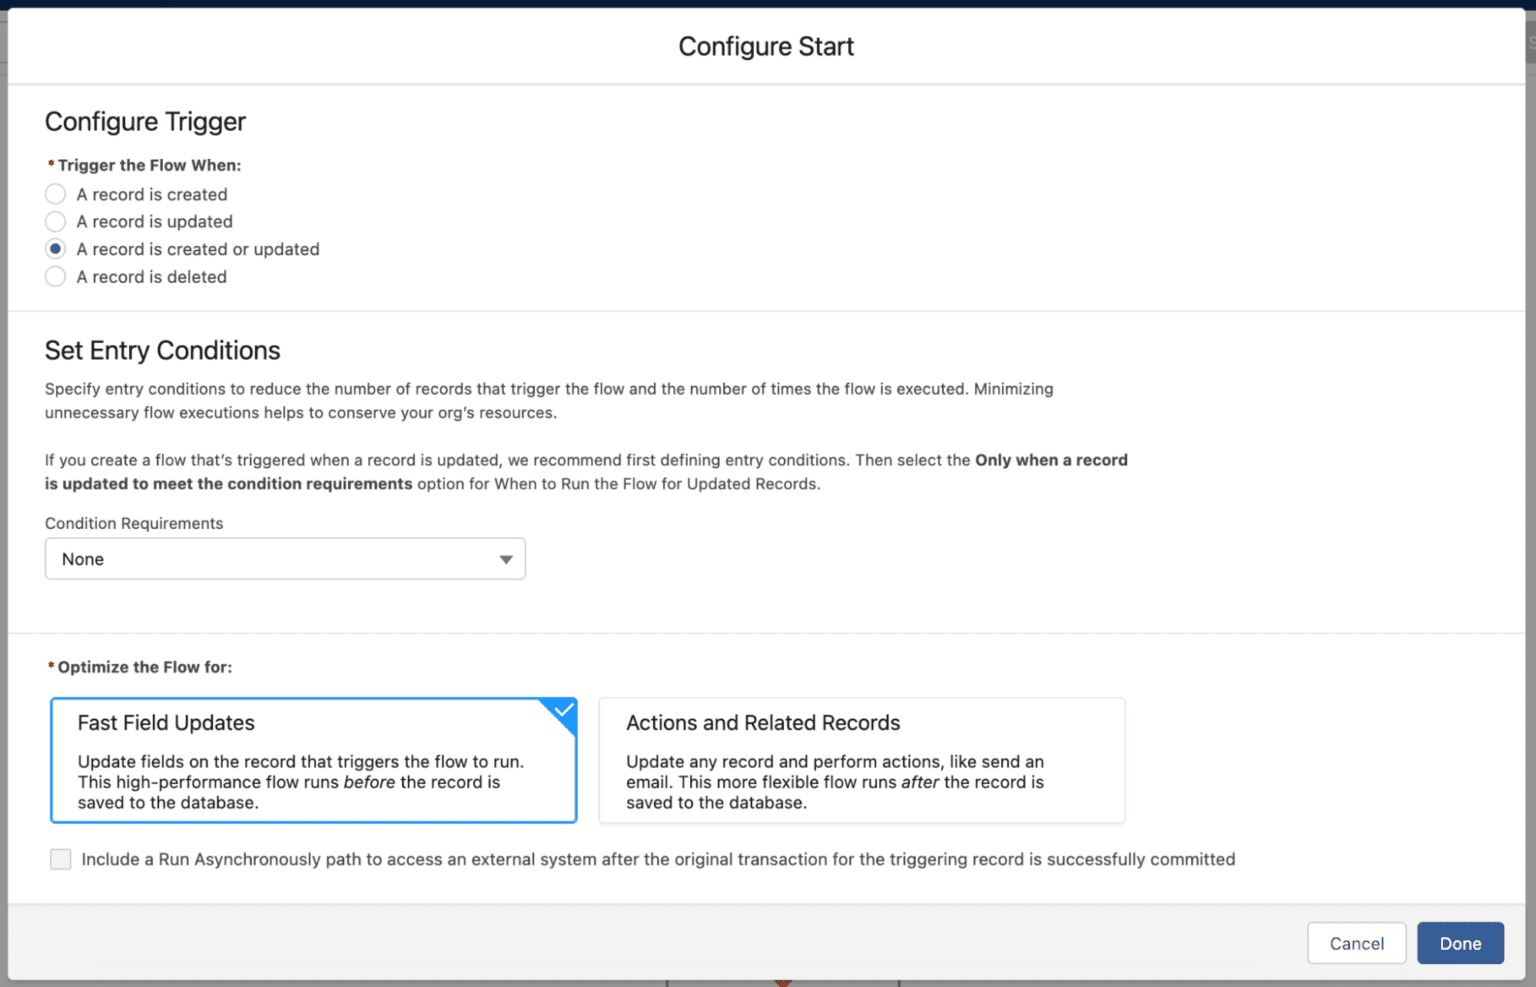
If business requirements dictate that a series of set actions should be performed every time a user does something in Salesforce, then a Record-Triggered Flow is required. Similar to Apex Triggers, Record-Triggered Flows execute a series of actions automatically when a record is created, updated, or deleted.

You can configure the ‘entry criteria’ to only execute the Flow when specific criteria are met to help regulate Governor Limits.
Record-Triggered Flows can be executed either before or after the record is saved, with before being used to make changes to the primary record, and after being used to make changes to other records or trigger secondary actions like sending emails.
Schedule-Triggered Flow
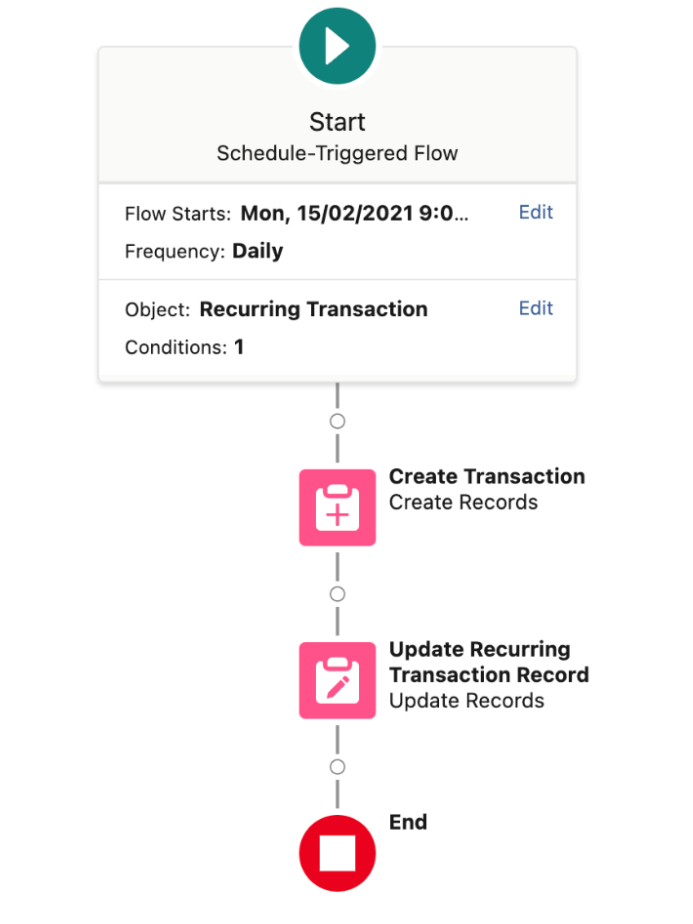
For automated actions that should occur on a frequent schedule, use Schedule-Triggered Flows. These can be set up to run either once off, every day, or every week as required, and are run separately for each record in the batch.
Platform Event-Triggered Flow
Similar to Record-Triggered Flow, Platform Event-Triggered Flow fires off a series of actions when a specified Platform Event Message is received. Instead of being triggered based on a record action, the Flow will subscribe to a Platform Event, and will only execute the actions when a message is received.

Autolaunched Flow
Autolaunched Flow is simply the set of actions that fire, but instead of being triggered (by either record action, platform event, or on a schedule), this set of actions only fires when it is called by something outside of the original Flow. For example, Apex, another Flow, Process Builder (historically – don’t use Process Builder now), or by REST API. It sits dormant until called by one of these other features.

Record-Triggered Orchestration
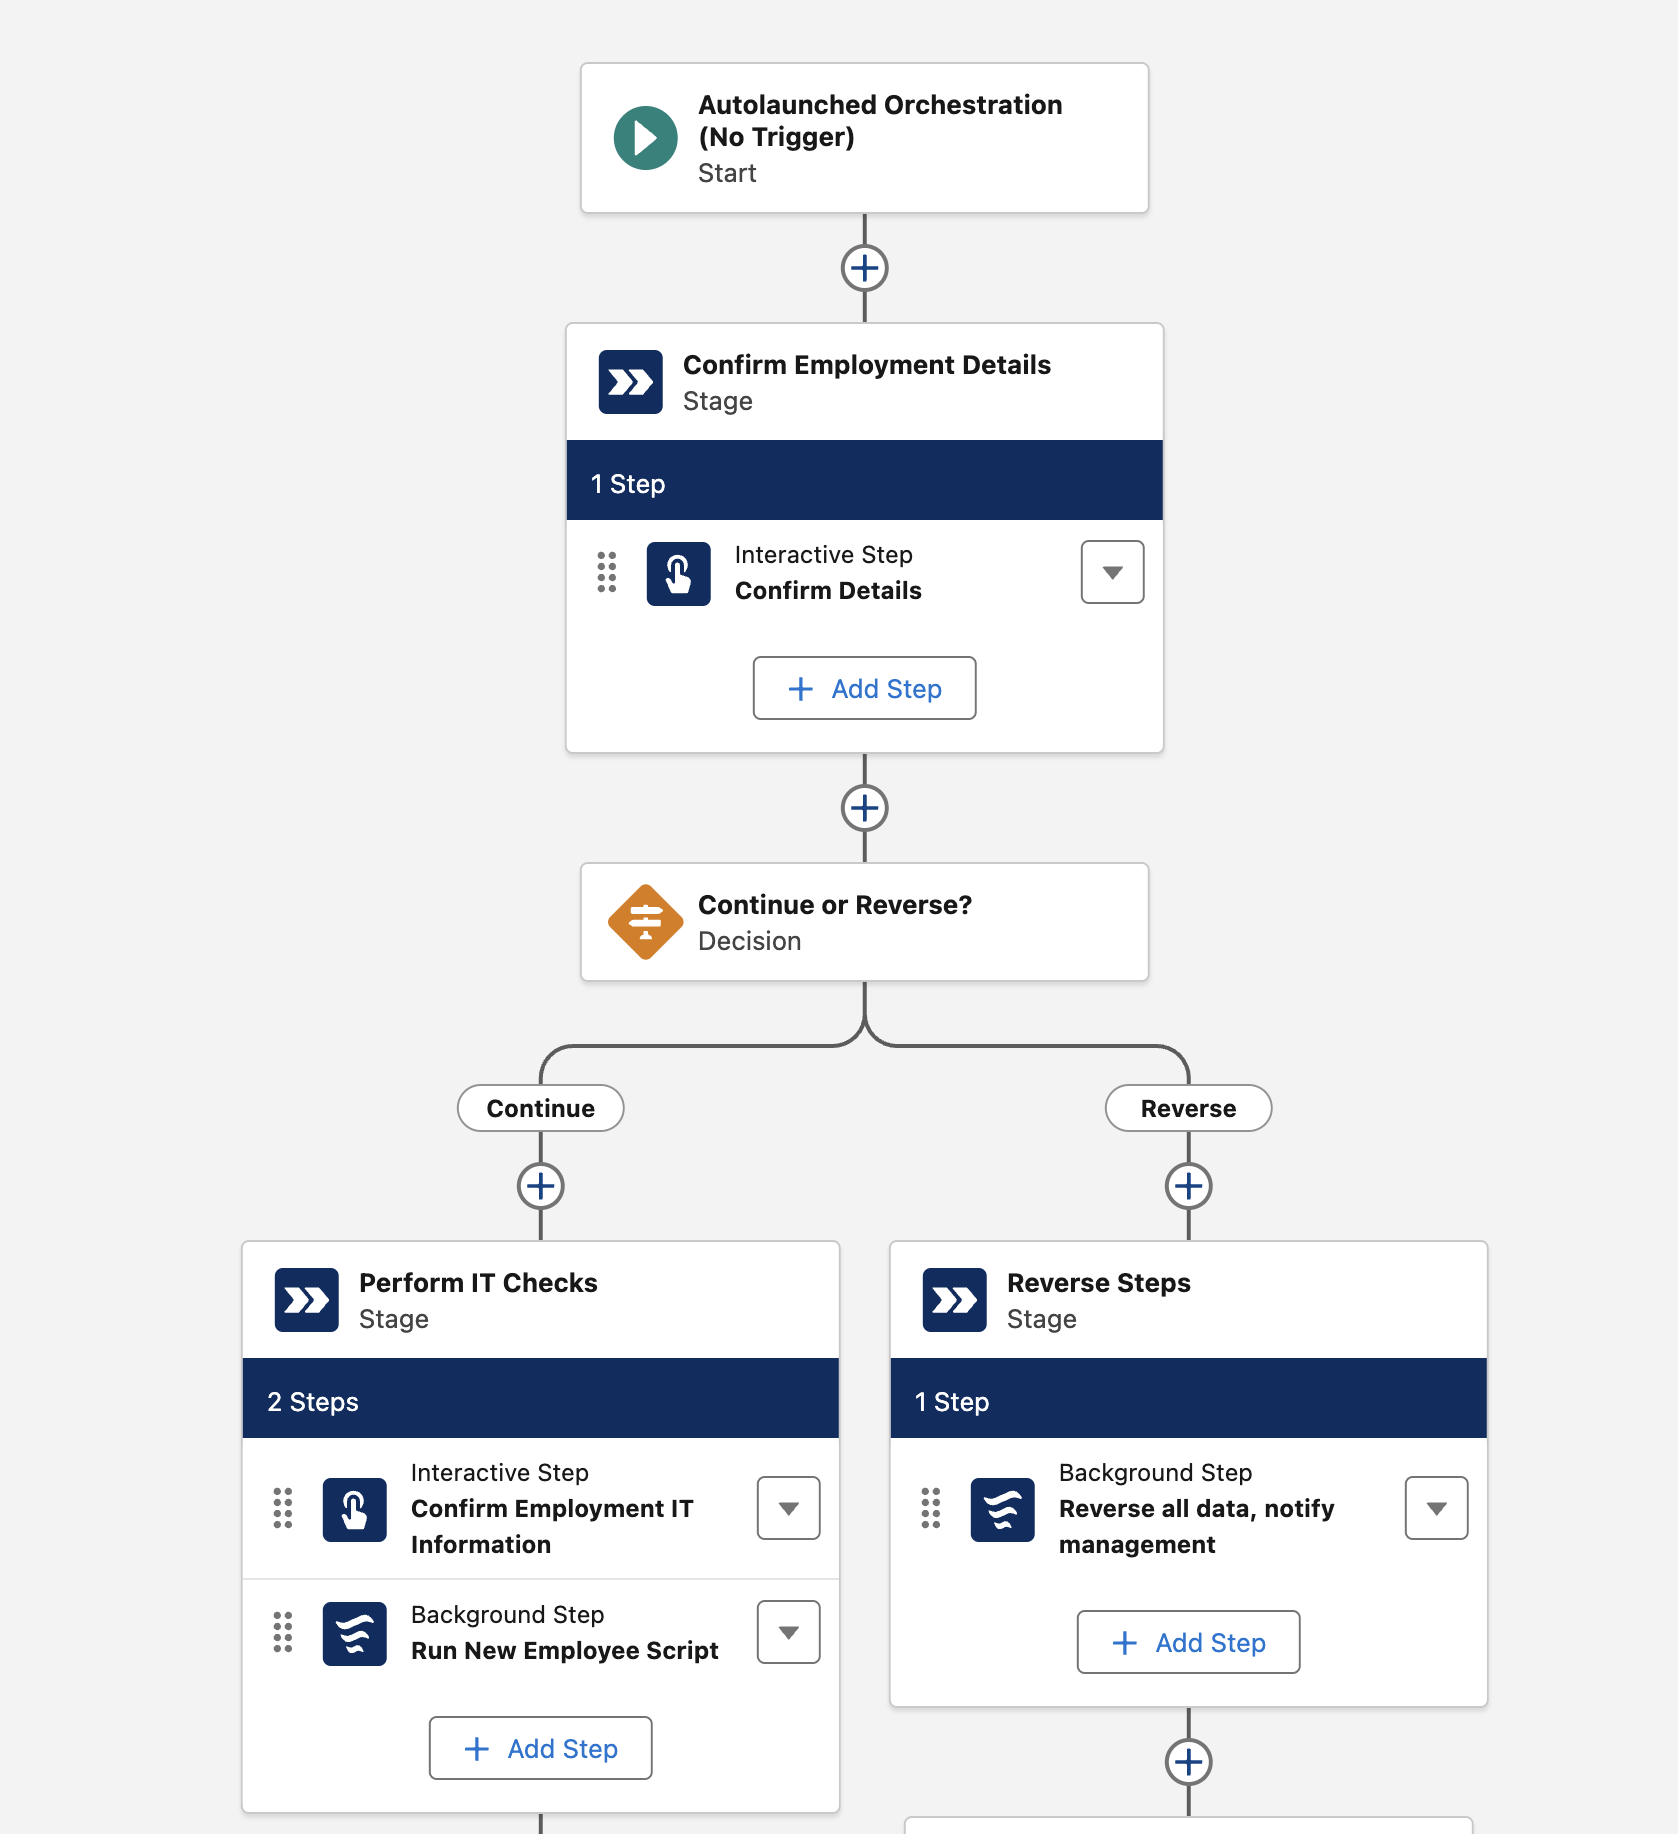
Requiring Flow Orchestrator, a Record-Triggered Orchestration Flow type triggers off a multi-step, multi-user Flow Orchestration when a record is created or edited. Orchestrations string together multiple Flows that can be assigned to multiple users in succession, similar to the way an approval process works.
Flow Approvals
The writing has been on the wall for Approval Processes ever since Salesforce dropped Flow Orchestrator and announced the end of Workflow Rules and Process Builder, and with the release of Flow Approvals the final remaining piece is an end-of-life announcement from Salesforce. Flow Approvals are here and have very quickly become one of the most powerful parts of the entire Flow suite.
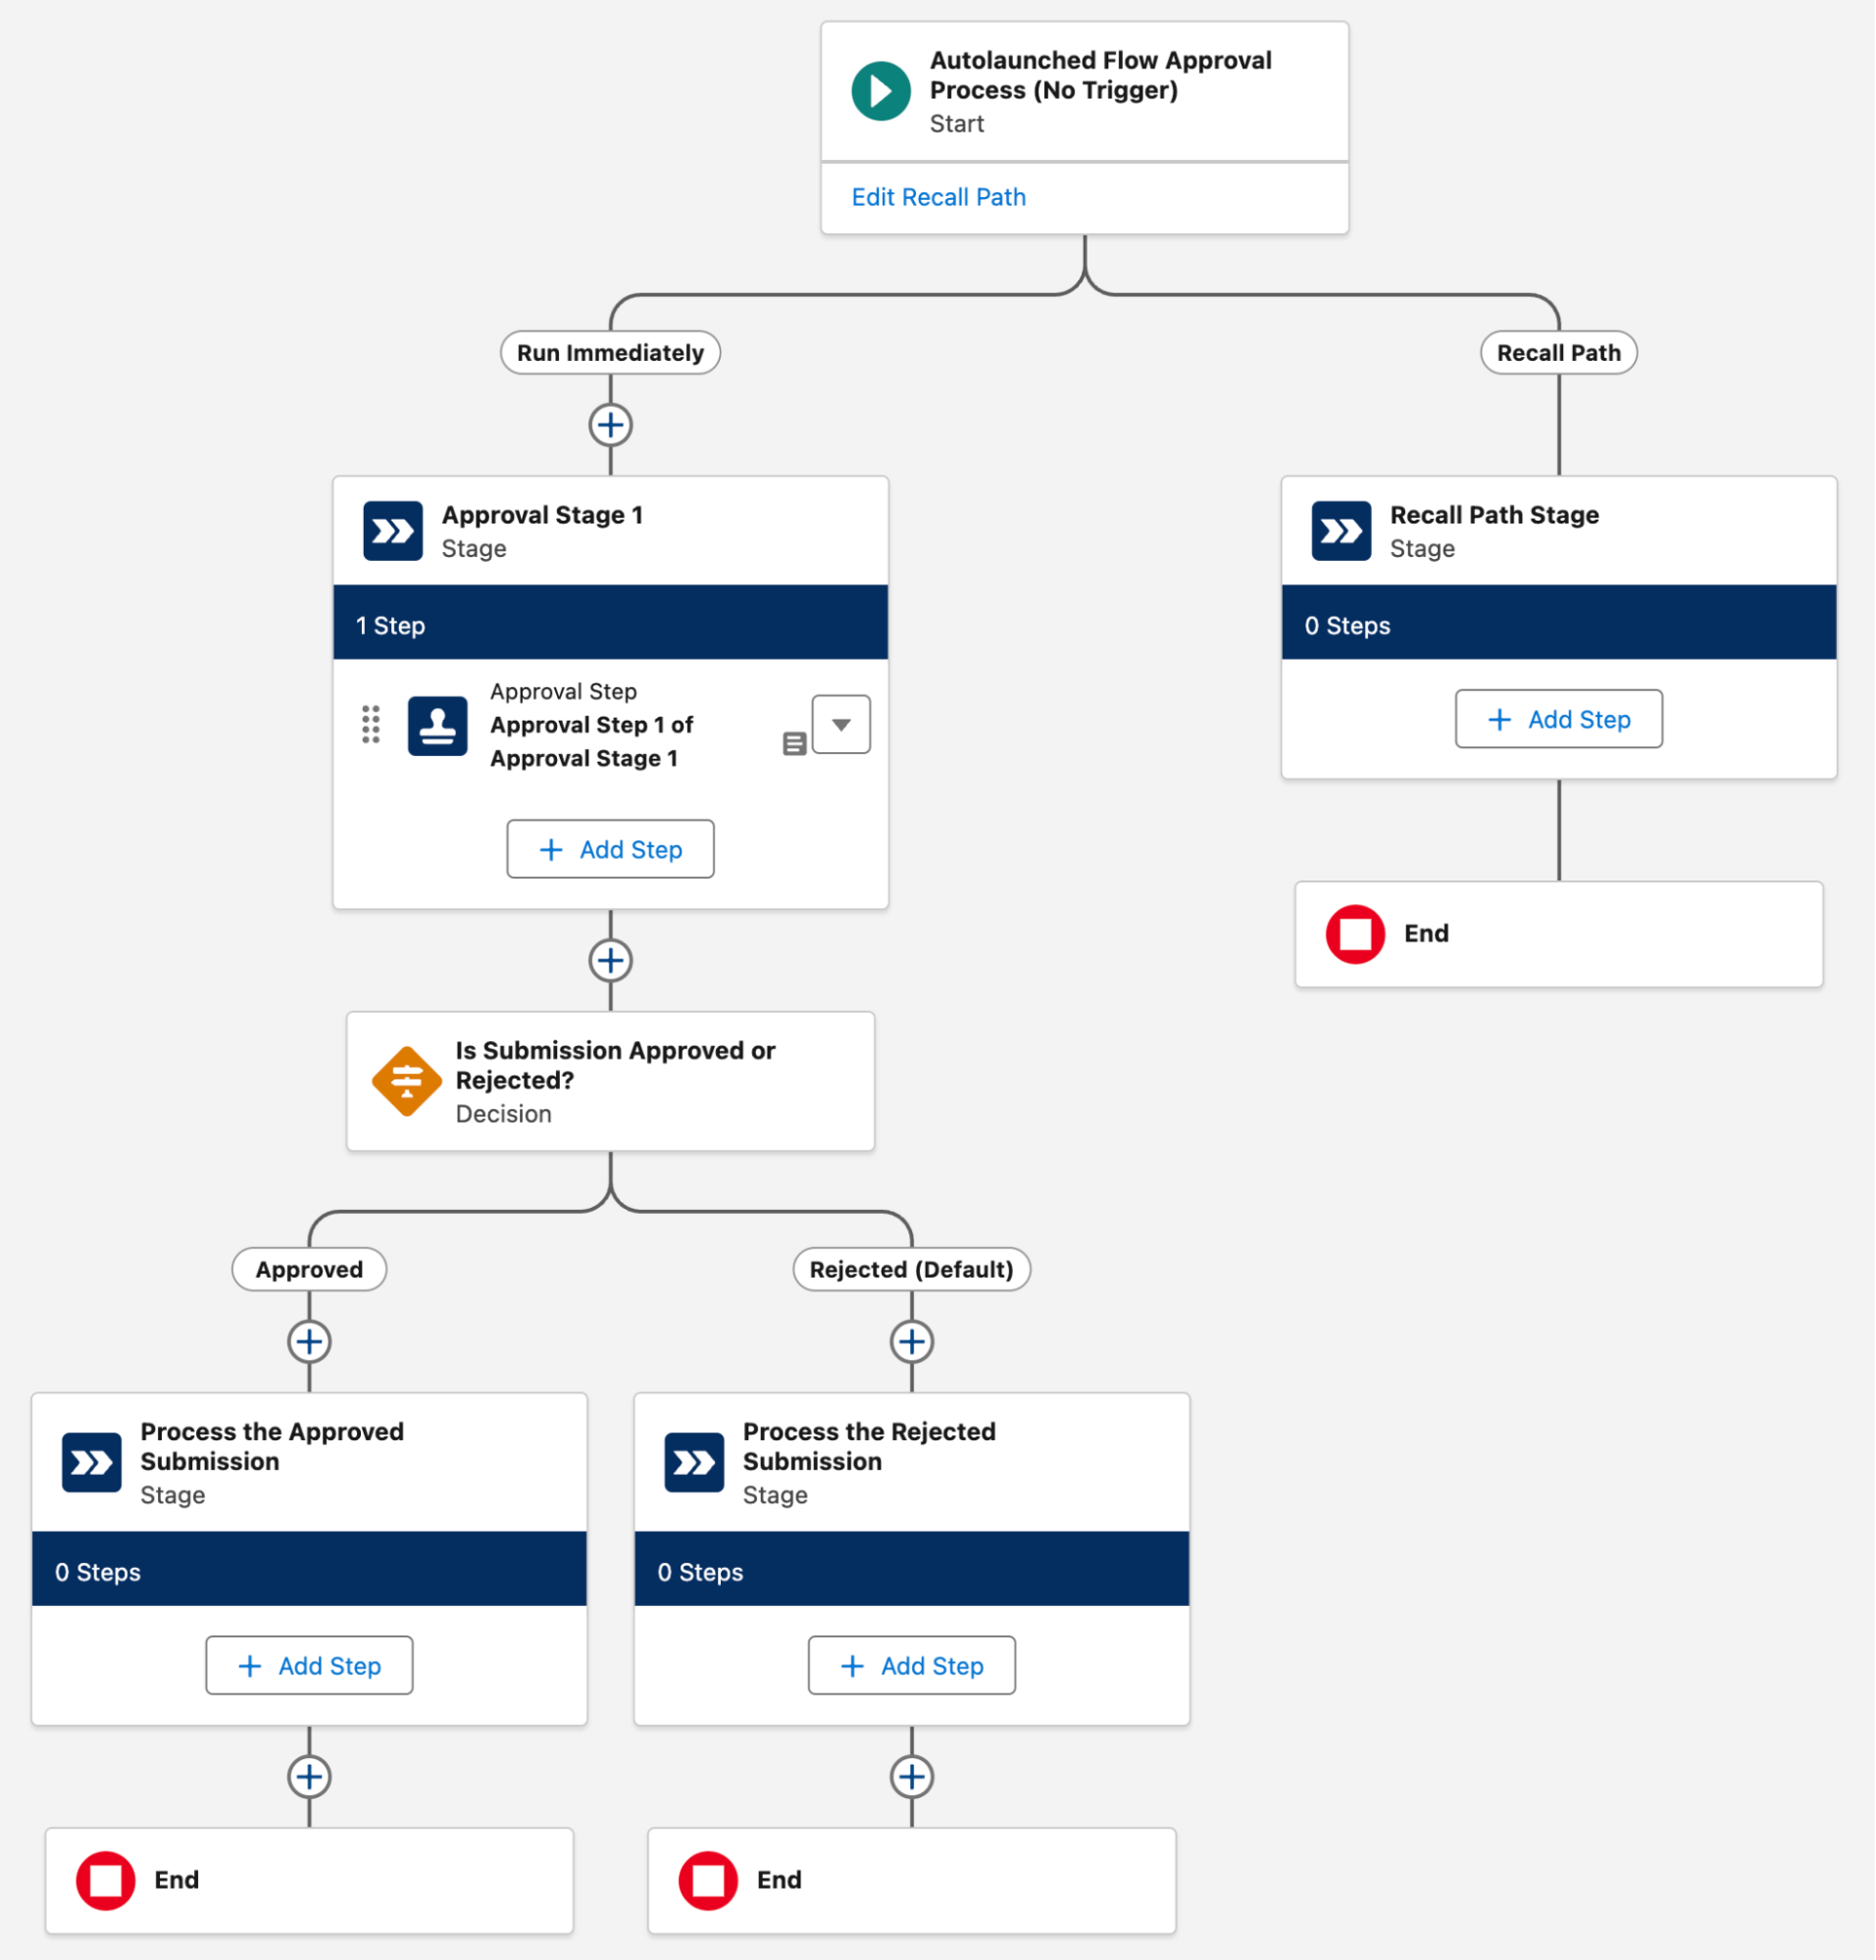
Similar to Orchestration Flows, Approval Flows are made up of Steps – Approval Steps and Background Steps. Approval Steps are Screen Flows that can be assigned to a specific user, and Background Steps are automatically triggered Flows that occur behind-the-scenes.
Elements
Logic
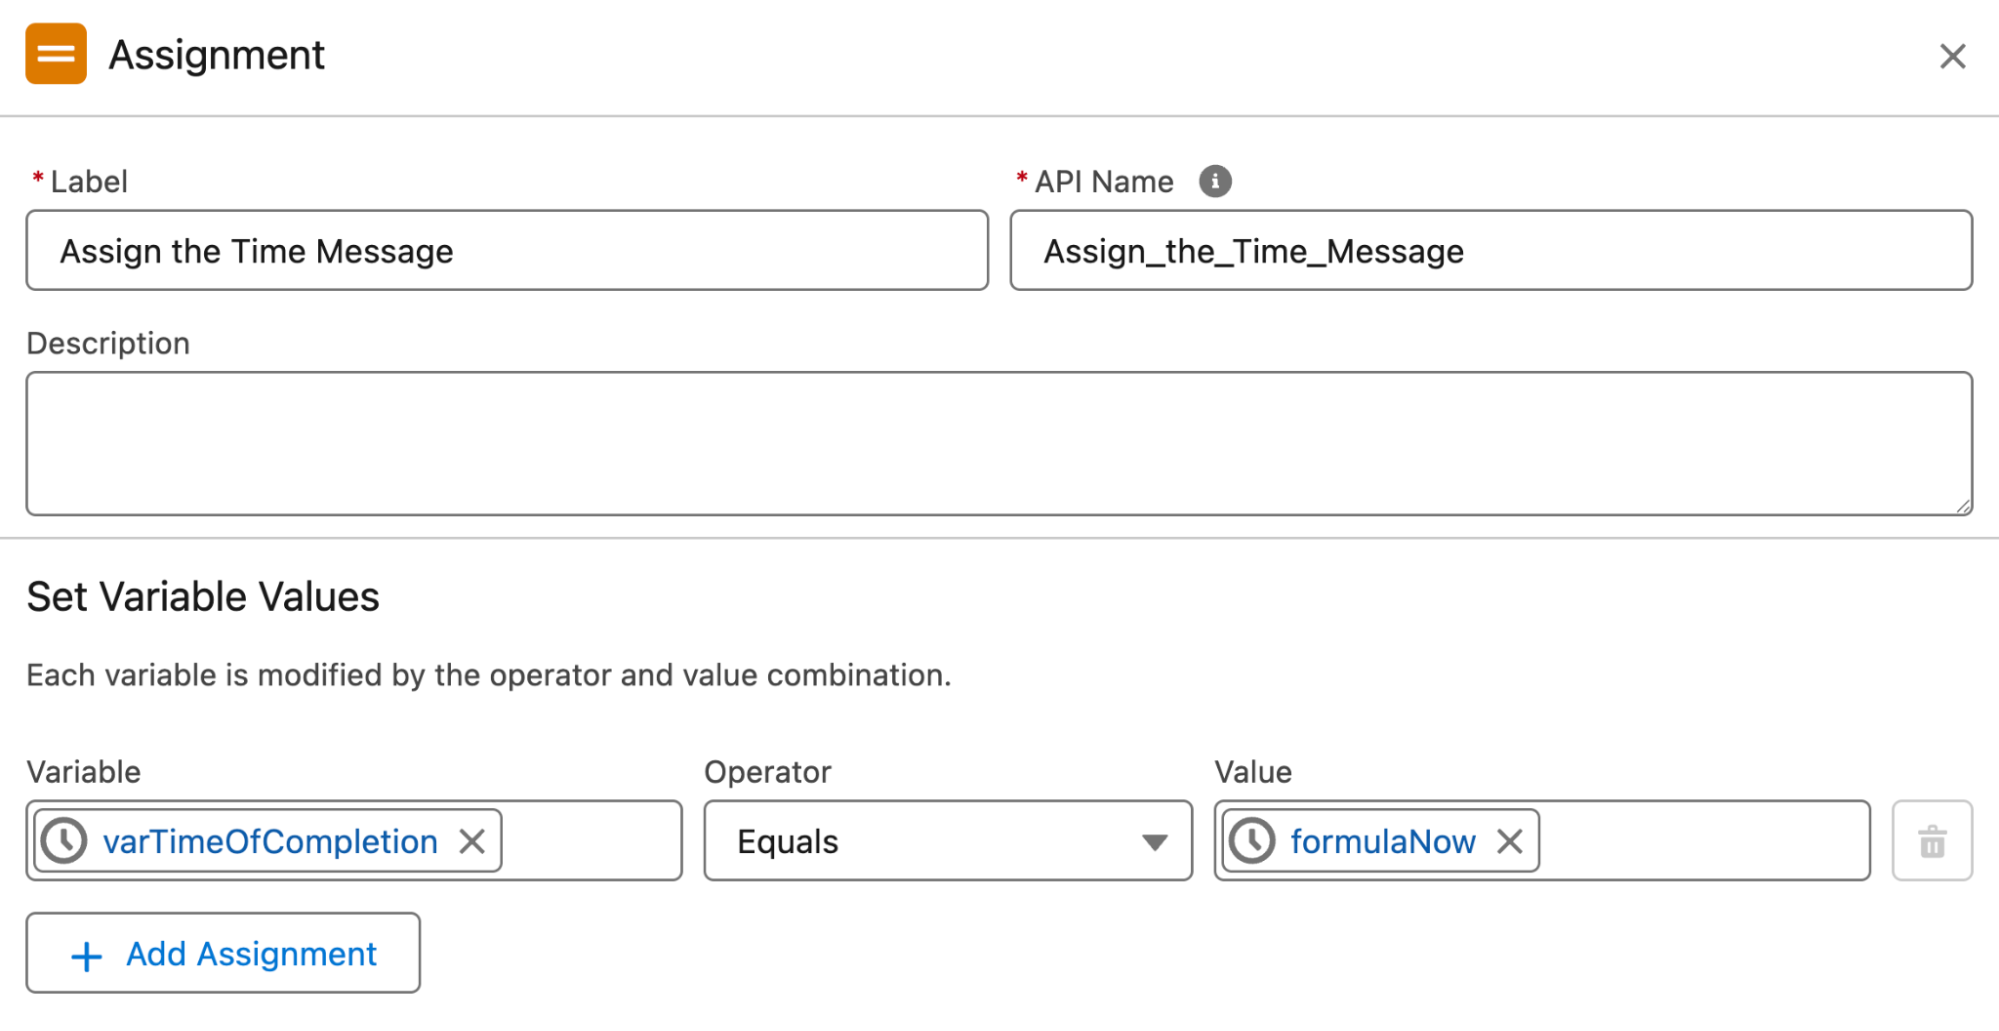
Assignment
Used to set the value of a variable inside a Flow. For example, if you wanted to set the value of an opportunity record variable’s Close Date to be a specific date, you would use an Assignment to do so.
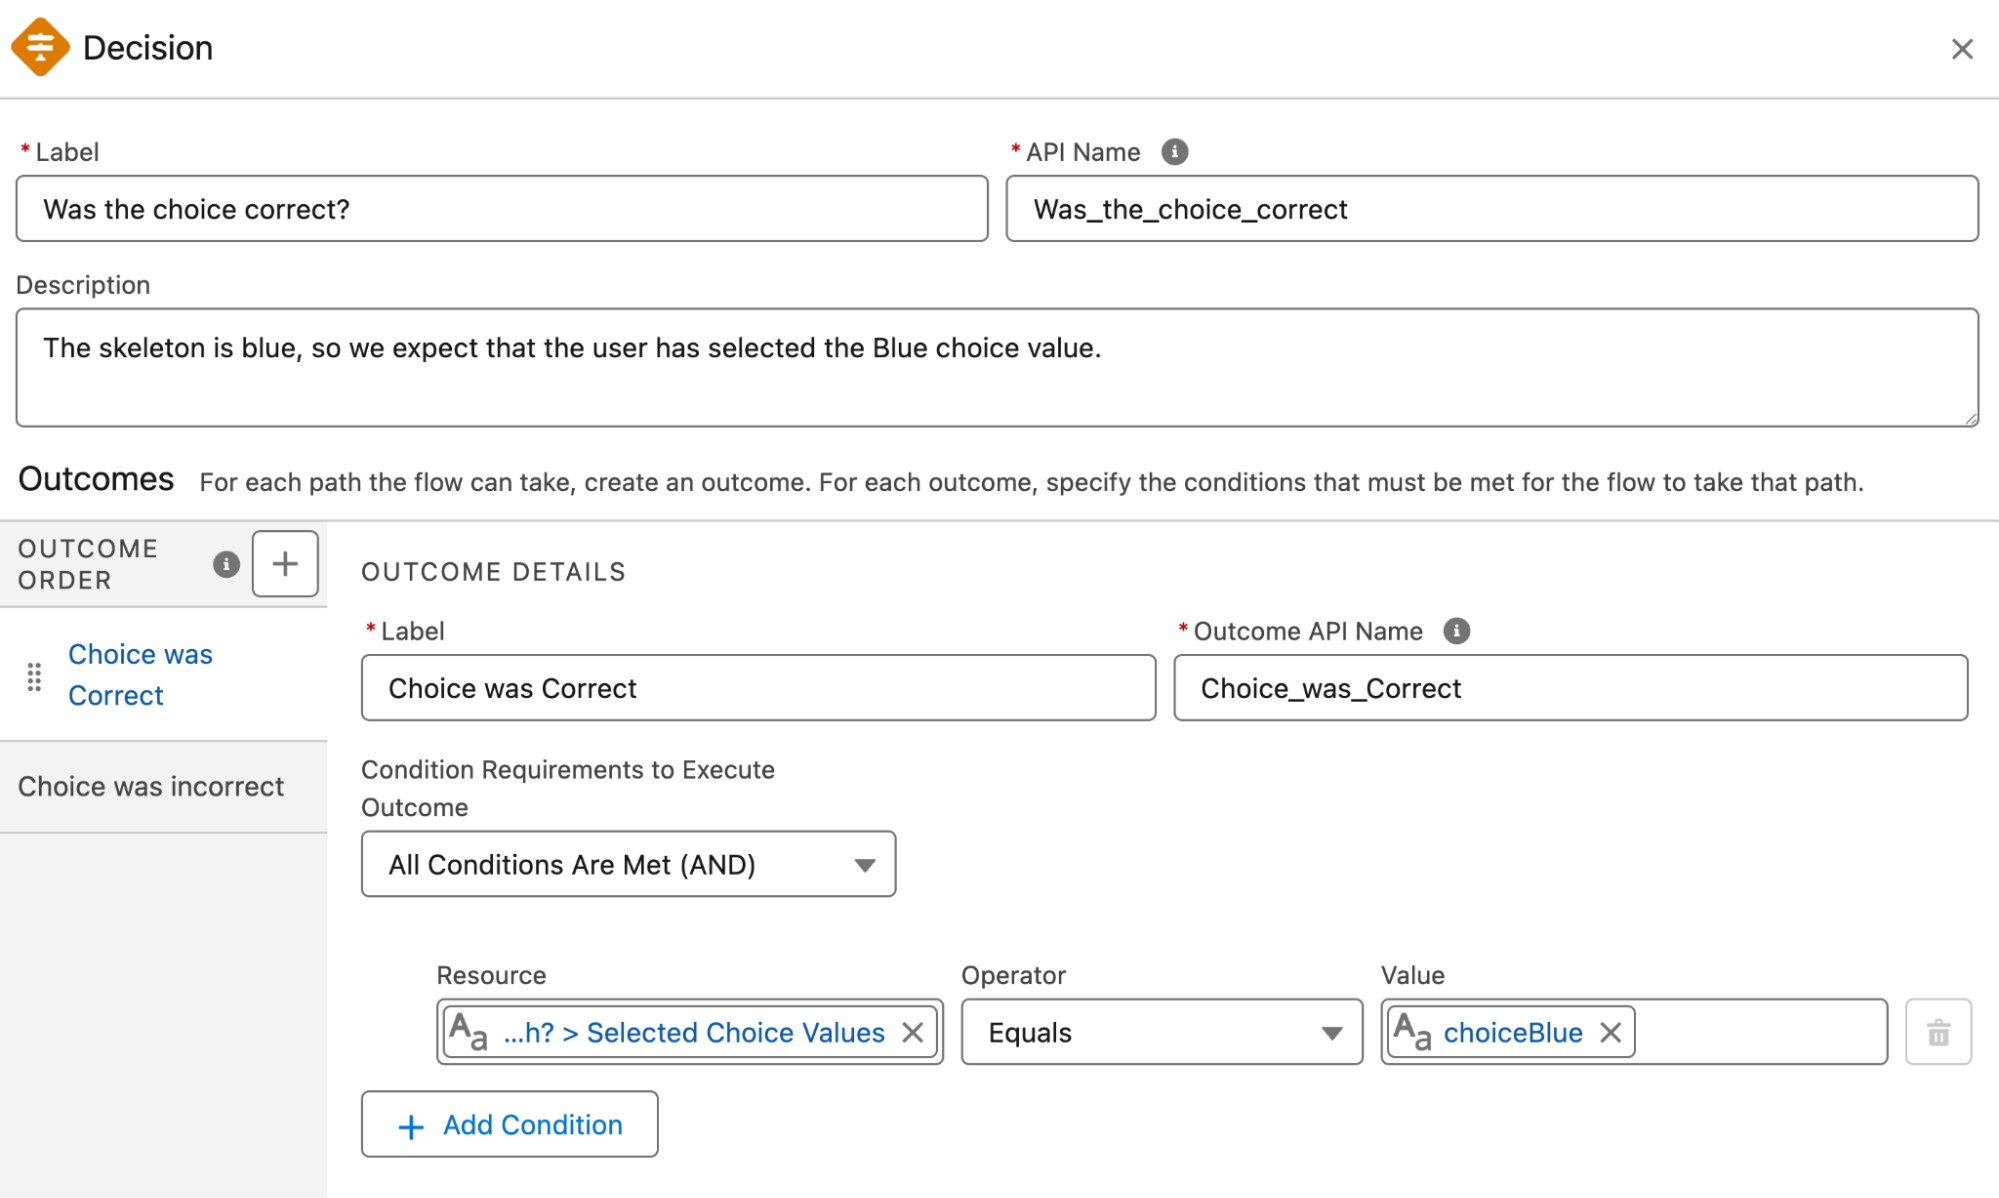
Decision
Used to separate different logical actions based on multiple sets of criteria and follows an if/then/else structure. For example, if you had a Record-Triggered Flow that handles “supplier” accounts differently than “customer” accounts, you could use a Decision element to split the two logic paths depending on the account type value of the record.
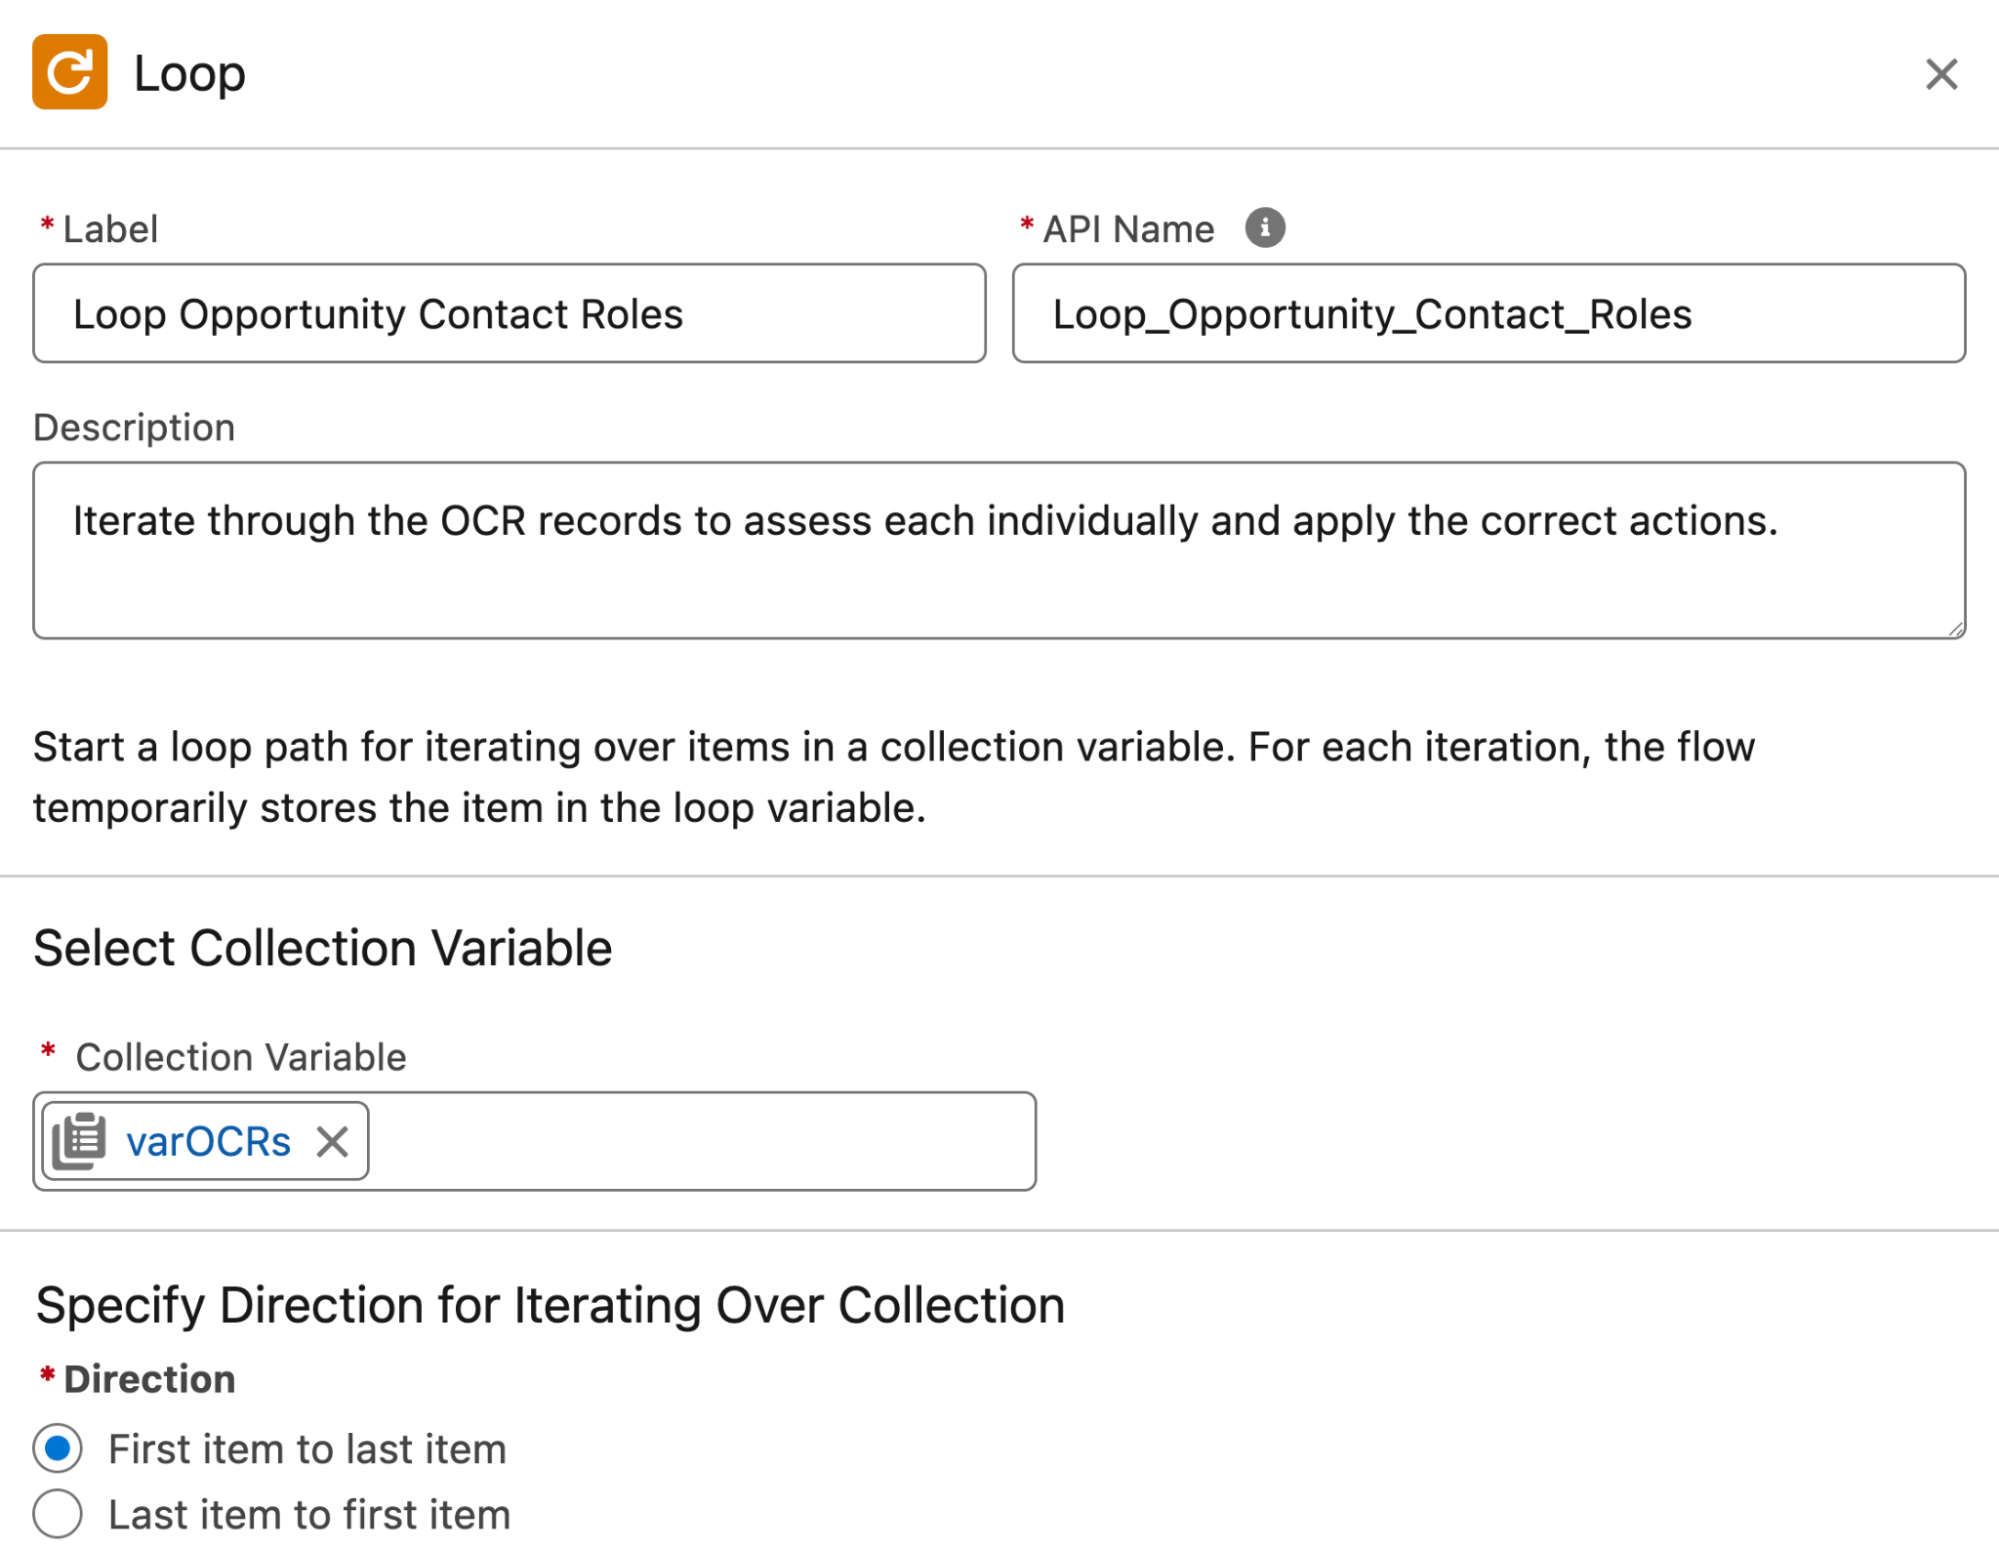
Loop
To perform a series of actions or checks against an entire collection of records or variables one by one, you should use a Loop. Simply specify the collection that you’d like to iterate over, and specify the actions within that loop.
For example, if you wanted to iterate through all opportunities related to an account and update them based on a “discount percentage” field that was set on the account, you could use a Loop.
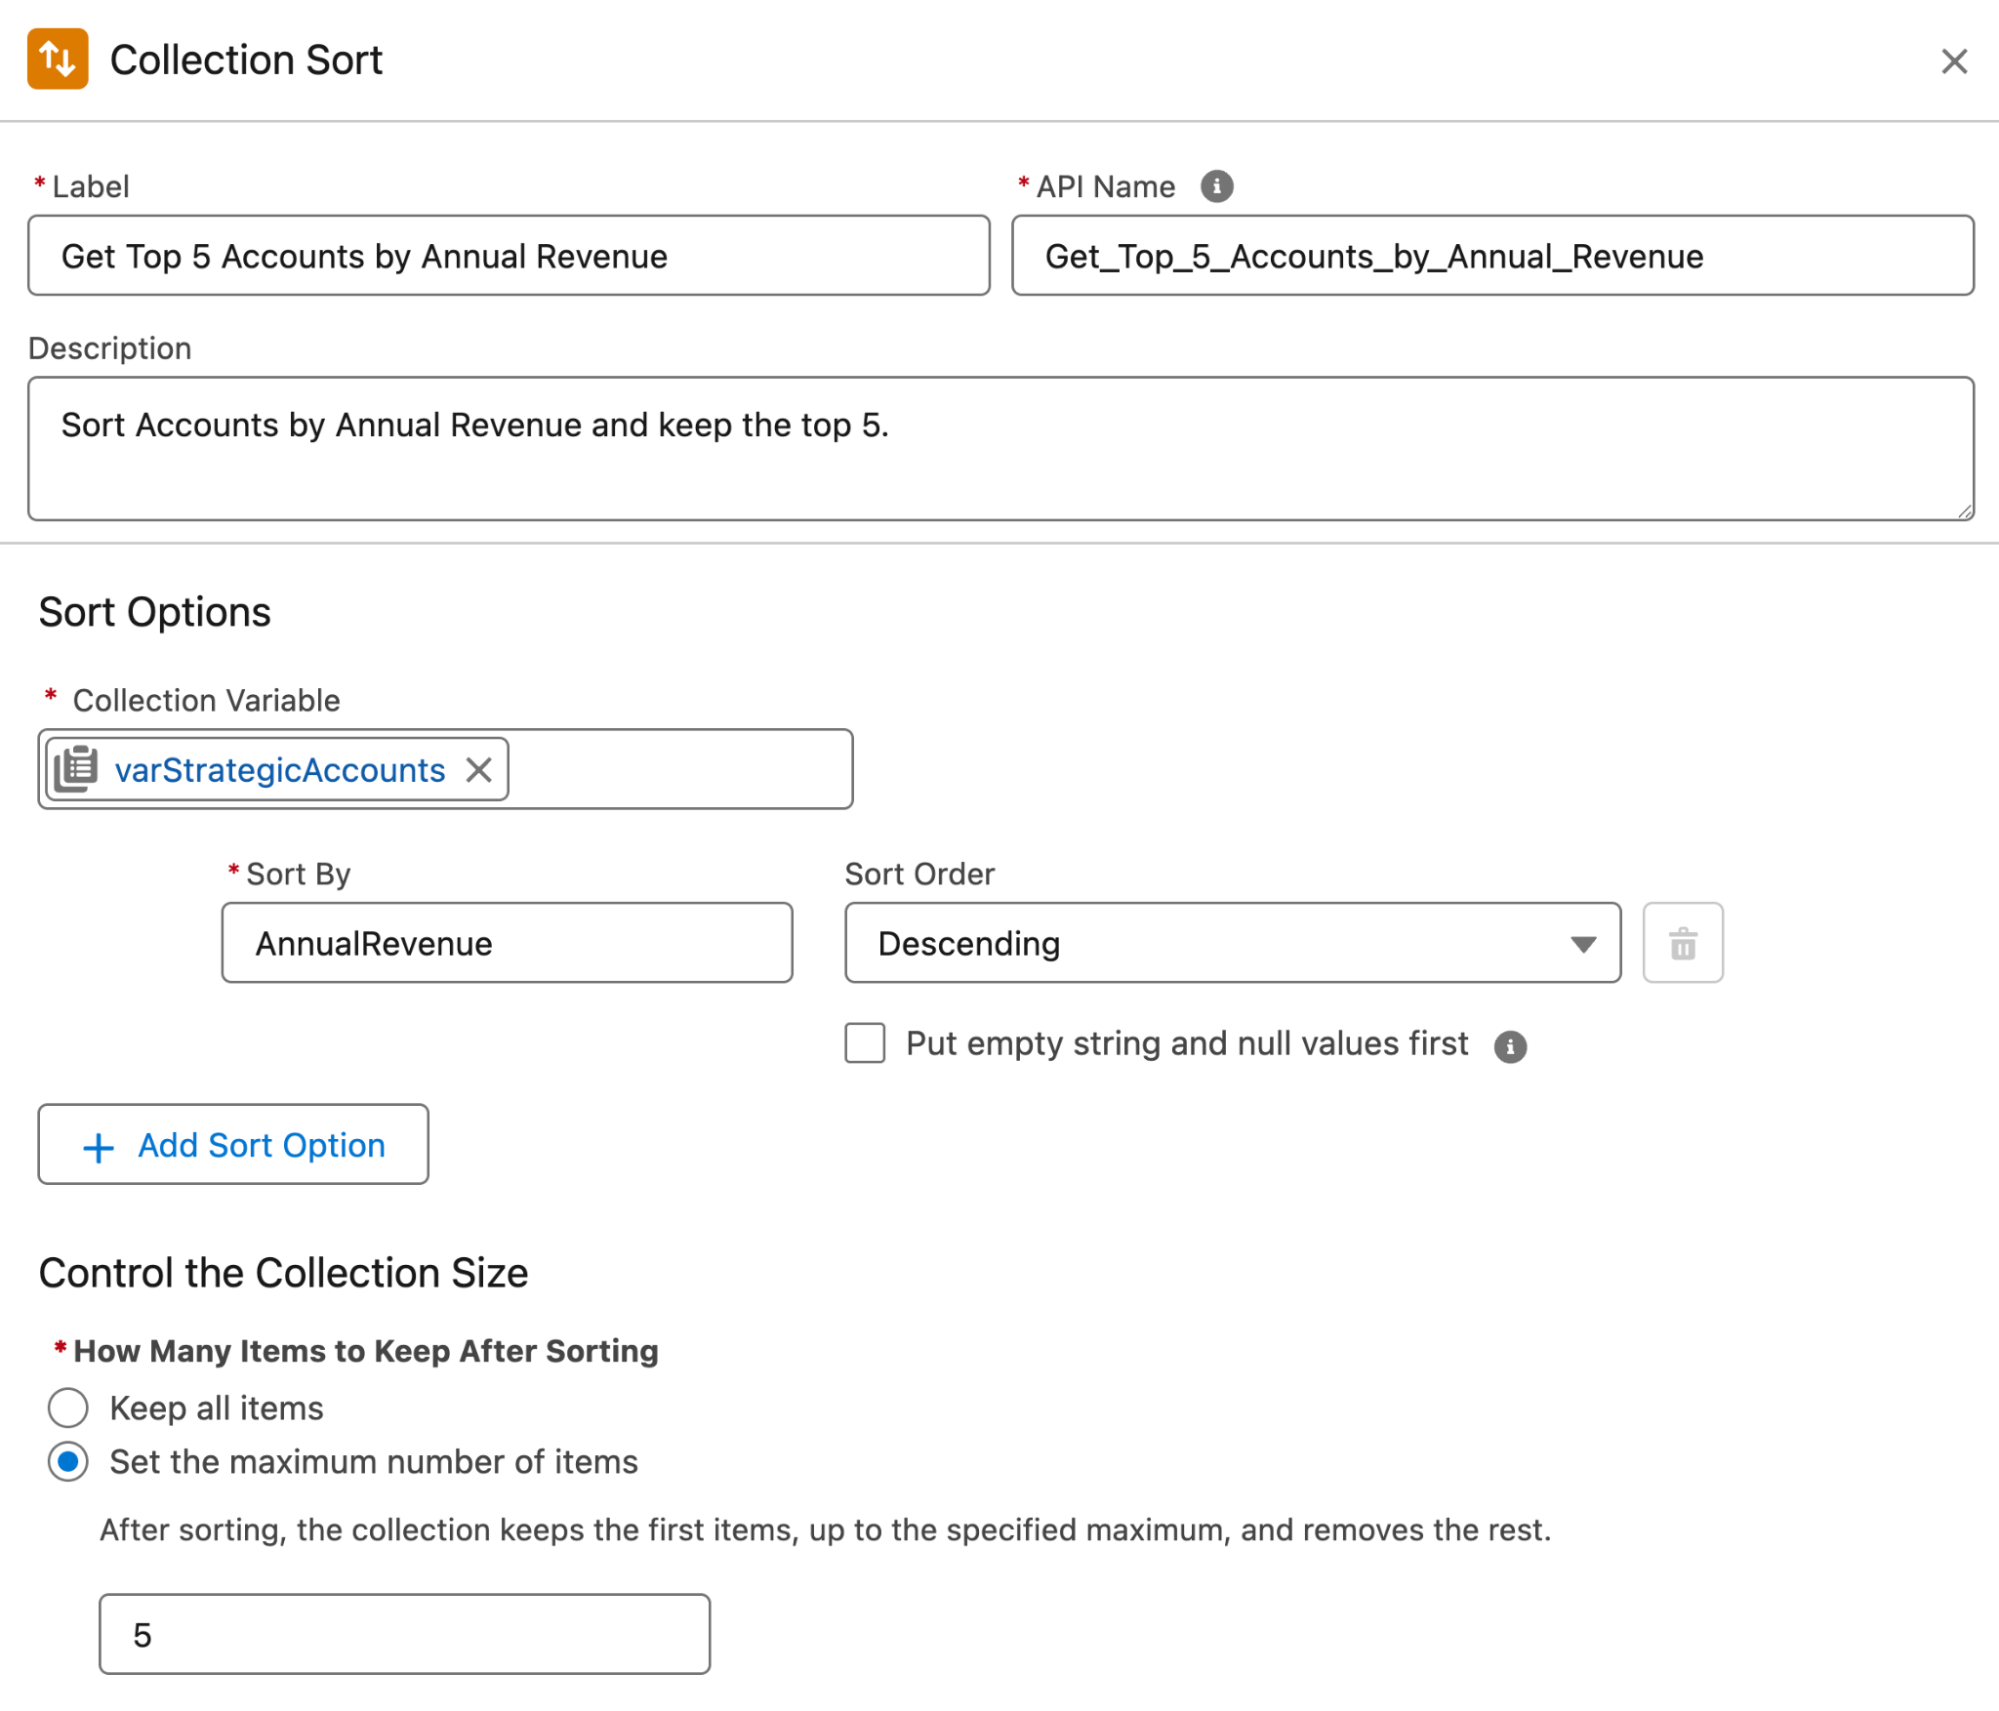
Collection Sort
To organize collections by a specified attribute or field, use a Collection Sort. The result will be a collection that has records organized from first to last by the criteria specified.
For example, you may want to sort a collection of account records by “lifetime value”. The result would be a Collection where the first record is the account with the highest lifetime value, the second is the account with the next highest, and so on.
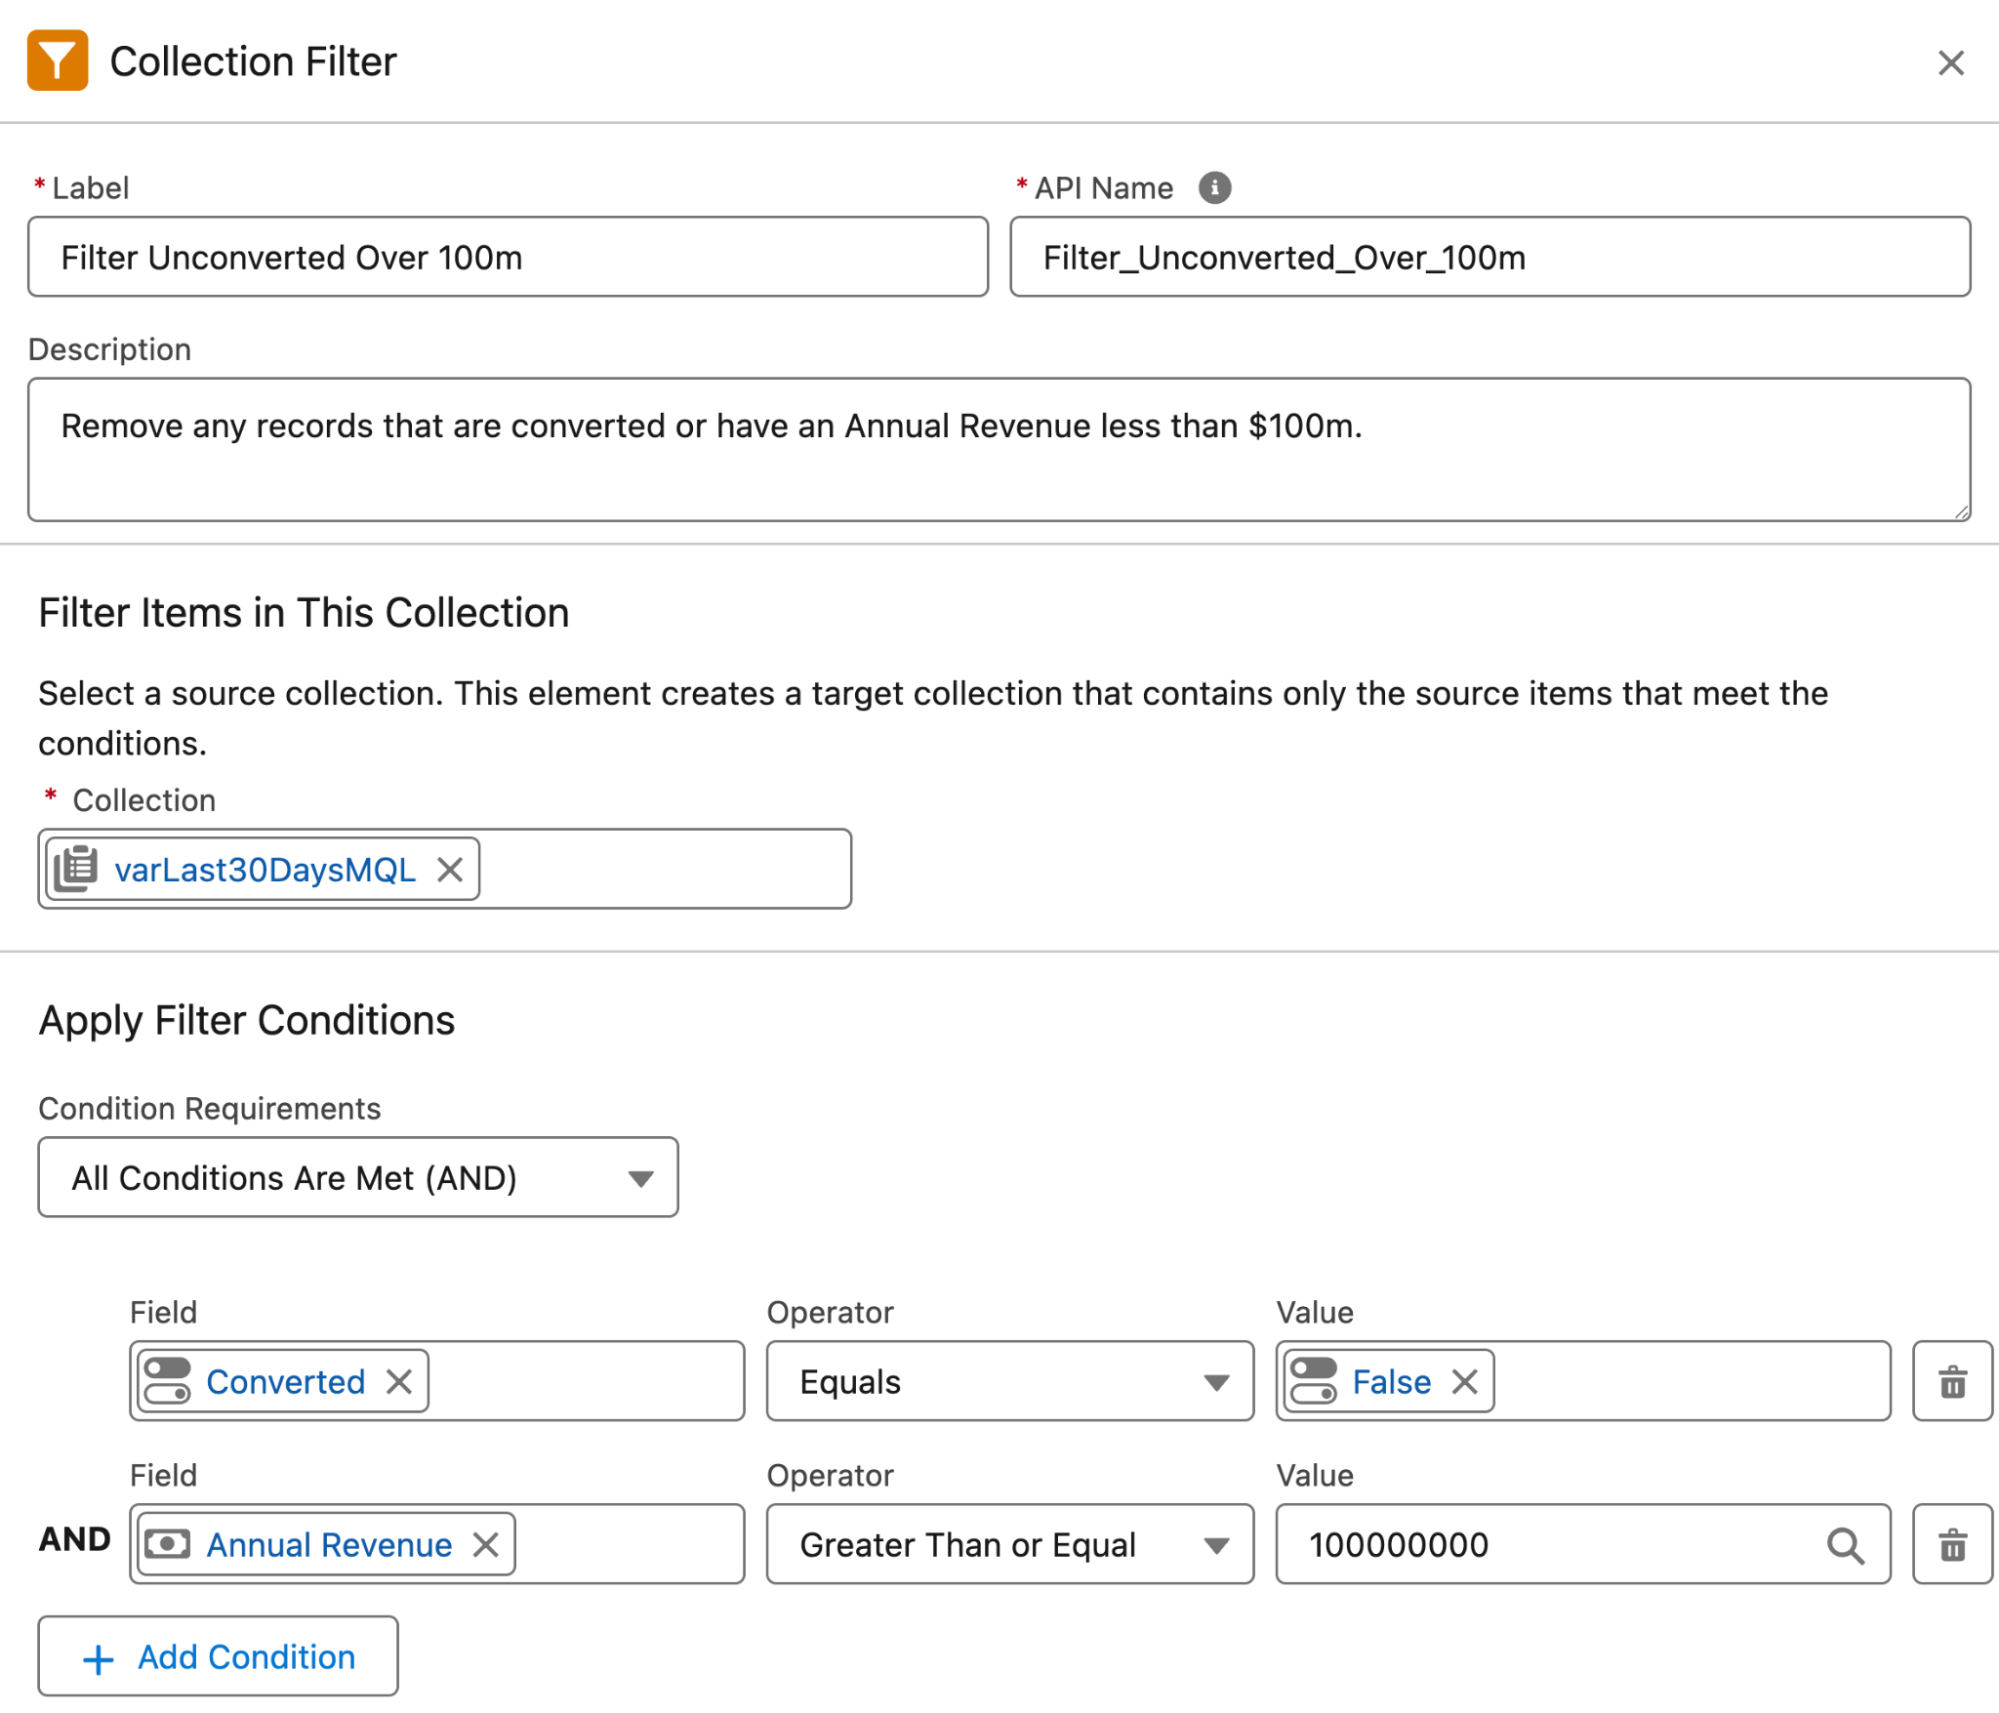
Collection Filter
Filter an existing collection by a specific attribute or field, with the result being a new collection that contains only the filtered variables.
For example, if you had a collection of accounts and wanted to create a new collection with accounts that have a lifetime value over $10M, you would use a Collection Filter as opposed to a new Get Records element to reduce the governor limit impact.
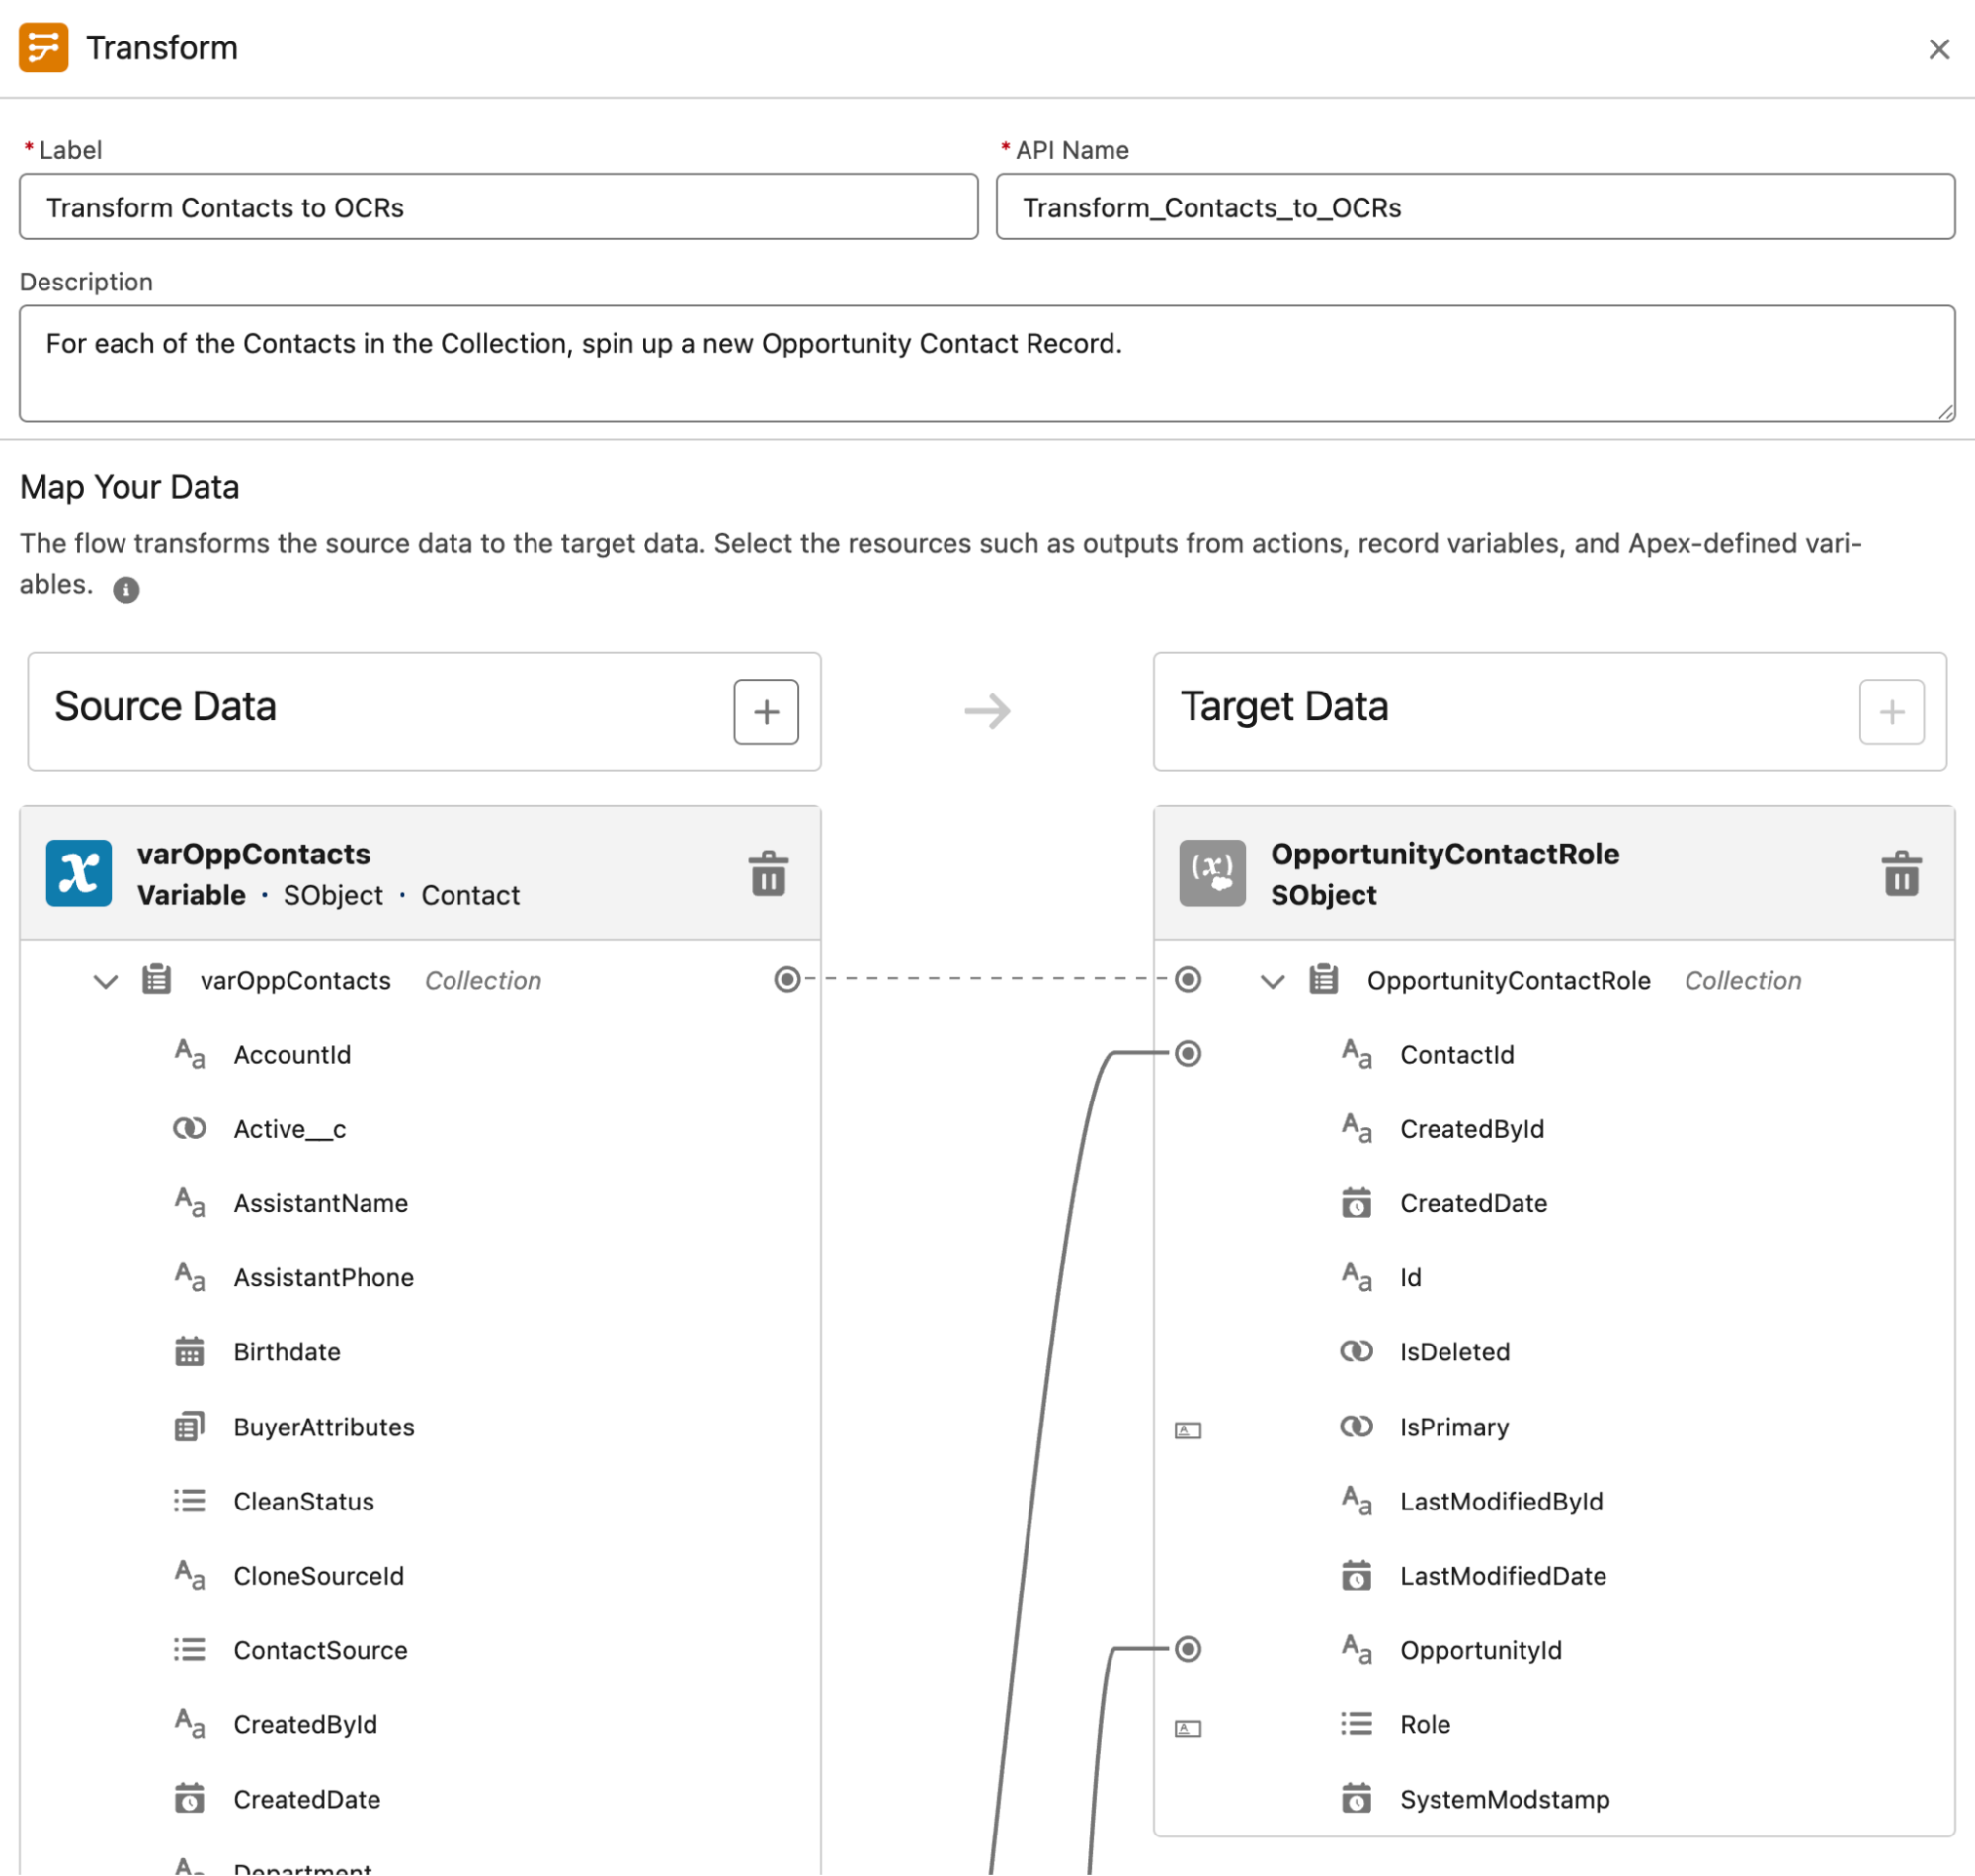
Transform
The Winter ‘24 release introduced the Transform element, which allows you to perform some very powerful processing of data in a single element. Simply put, this element allows users to automatically map field values from an existing record (or record Variable) to another and transform it along the way.
Let’s say you wanted to create a new case record when an opportunity is set to “Closed Won” – you could simply use the Transform element to map the fields across from the opportunity record to the new case Variable and use the Formula functionality to manipulate individual field mappings.
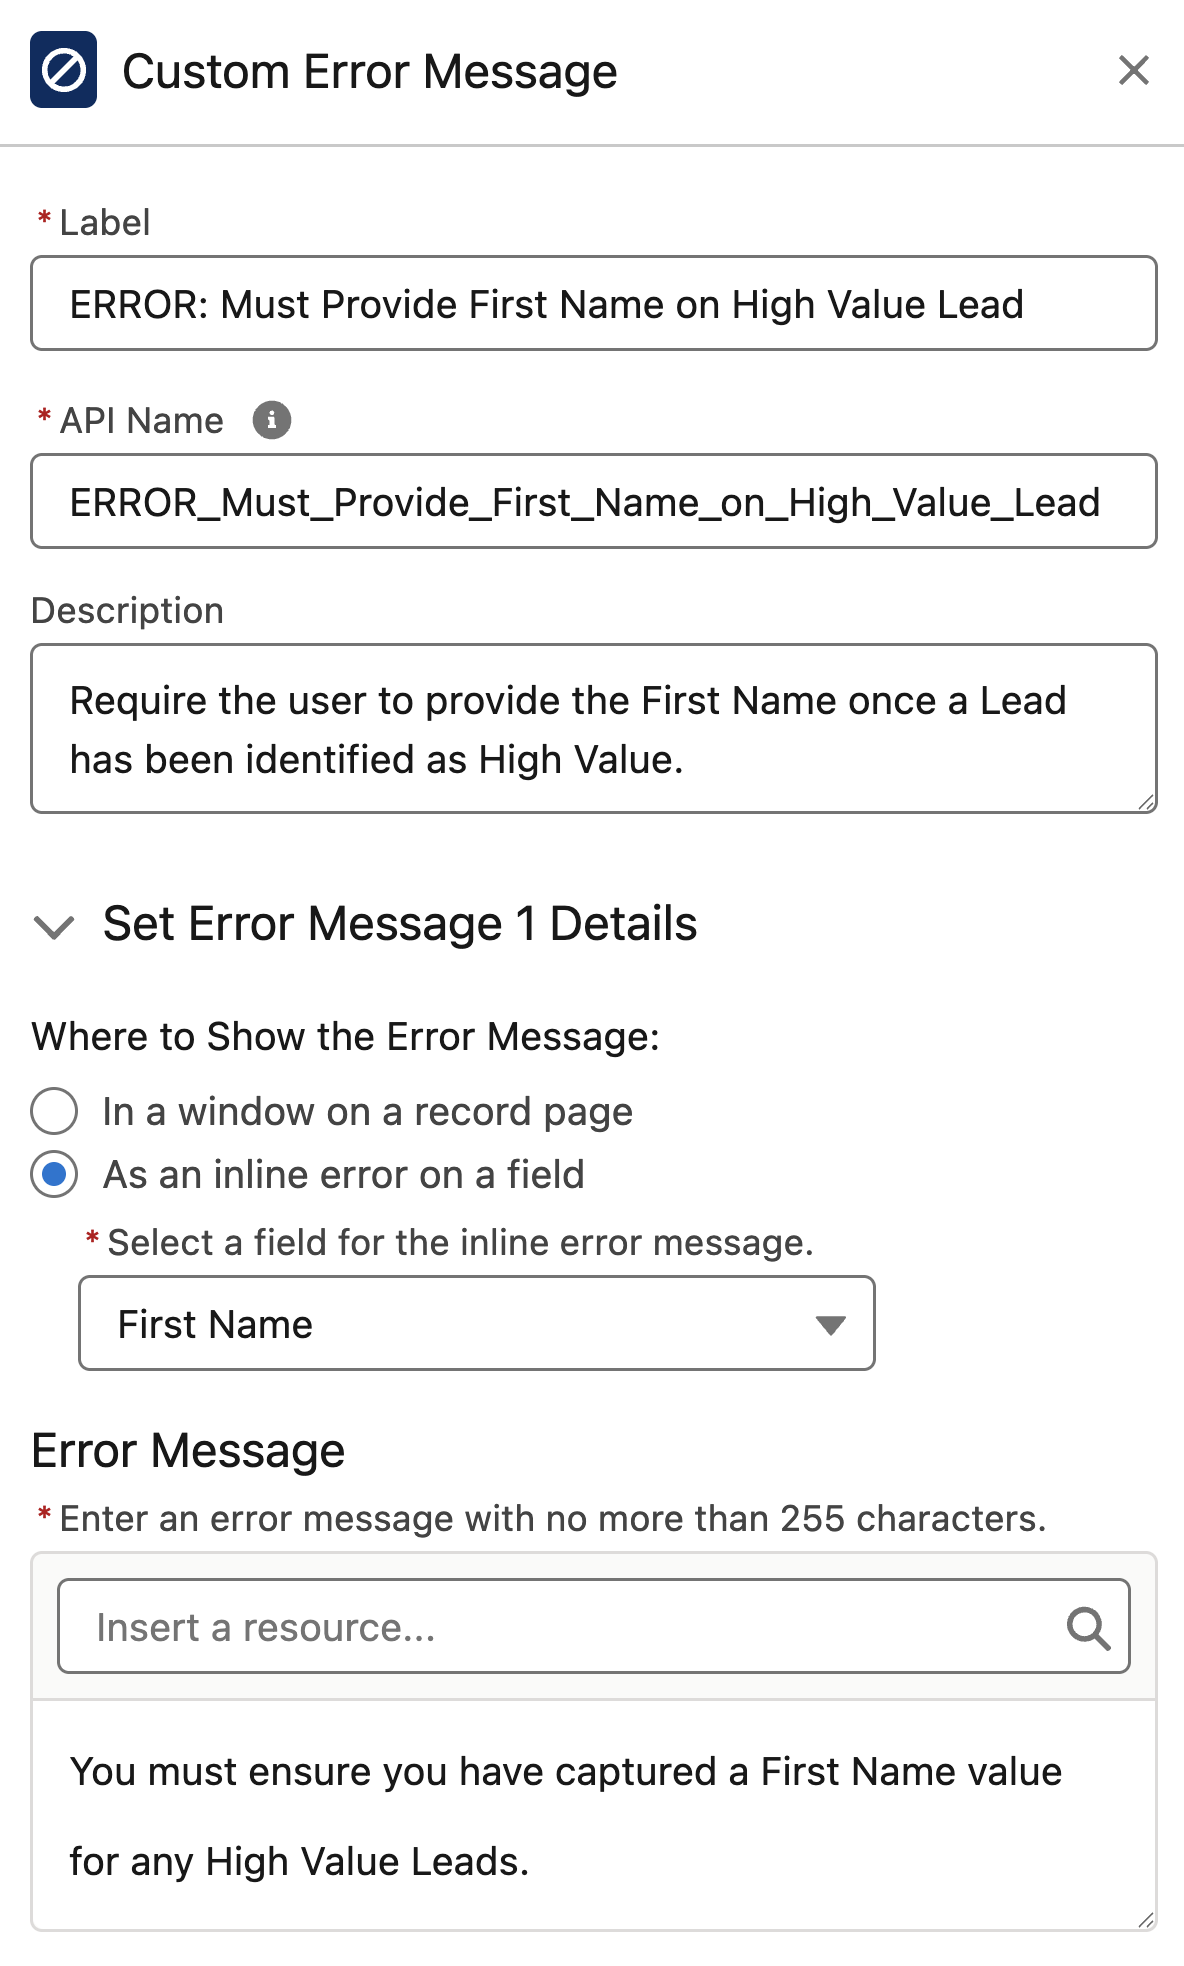
Custom Error
Gone are the days of the ‘An unexpected error has occurred’ message occurring off the back of a Flow. Flows can now display a customized error message when a fault path has been hit. In the example below, a Custom Error is being configured to display a message when the amount value is not populated.
Similar to a validation rule, the error message is shown either at the top of the page or inline with a specified field.
Data
Create Records
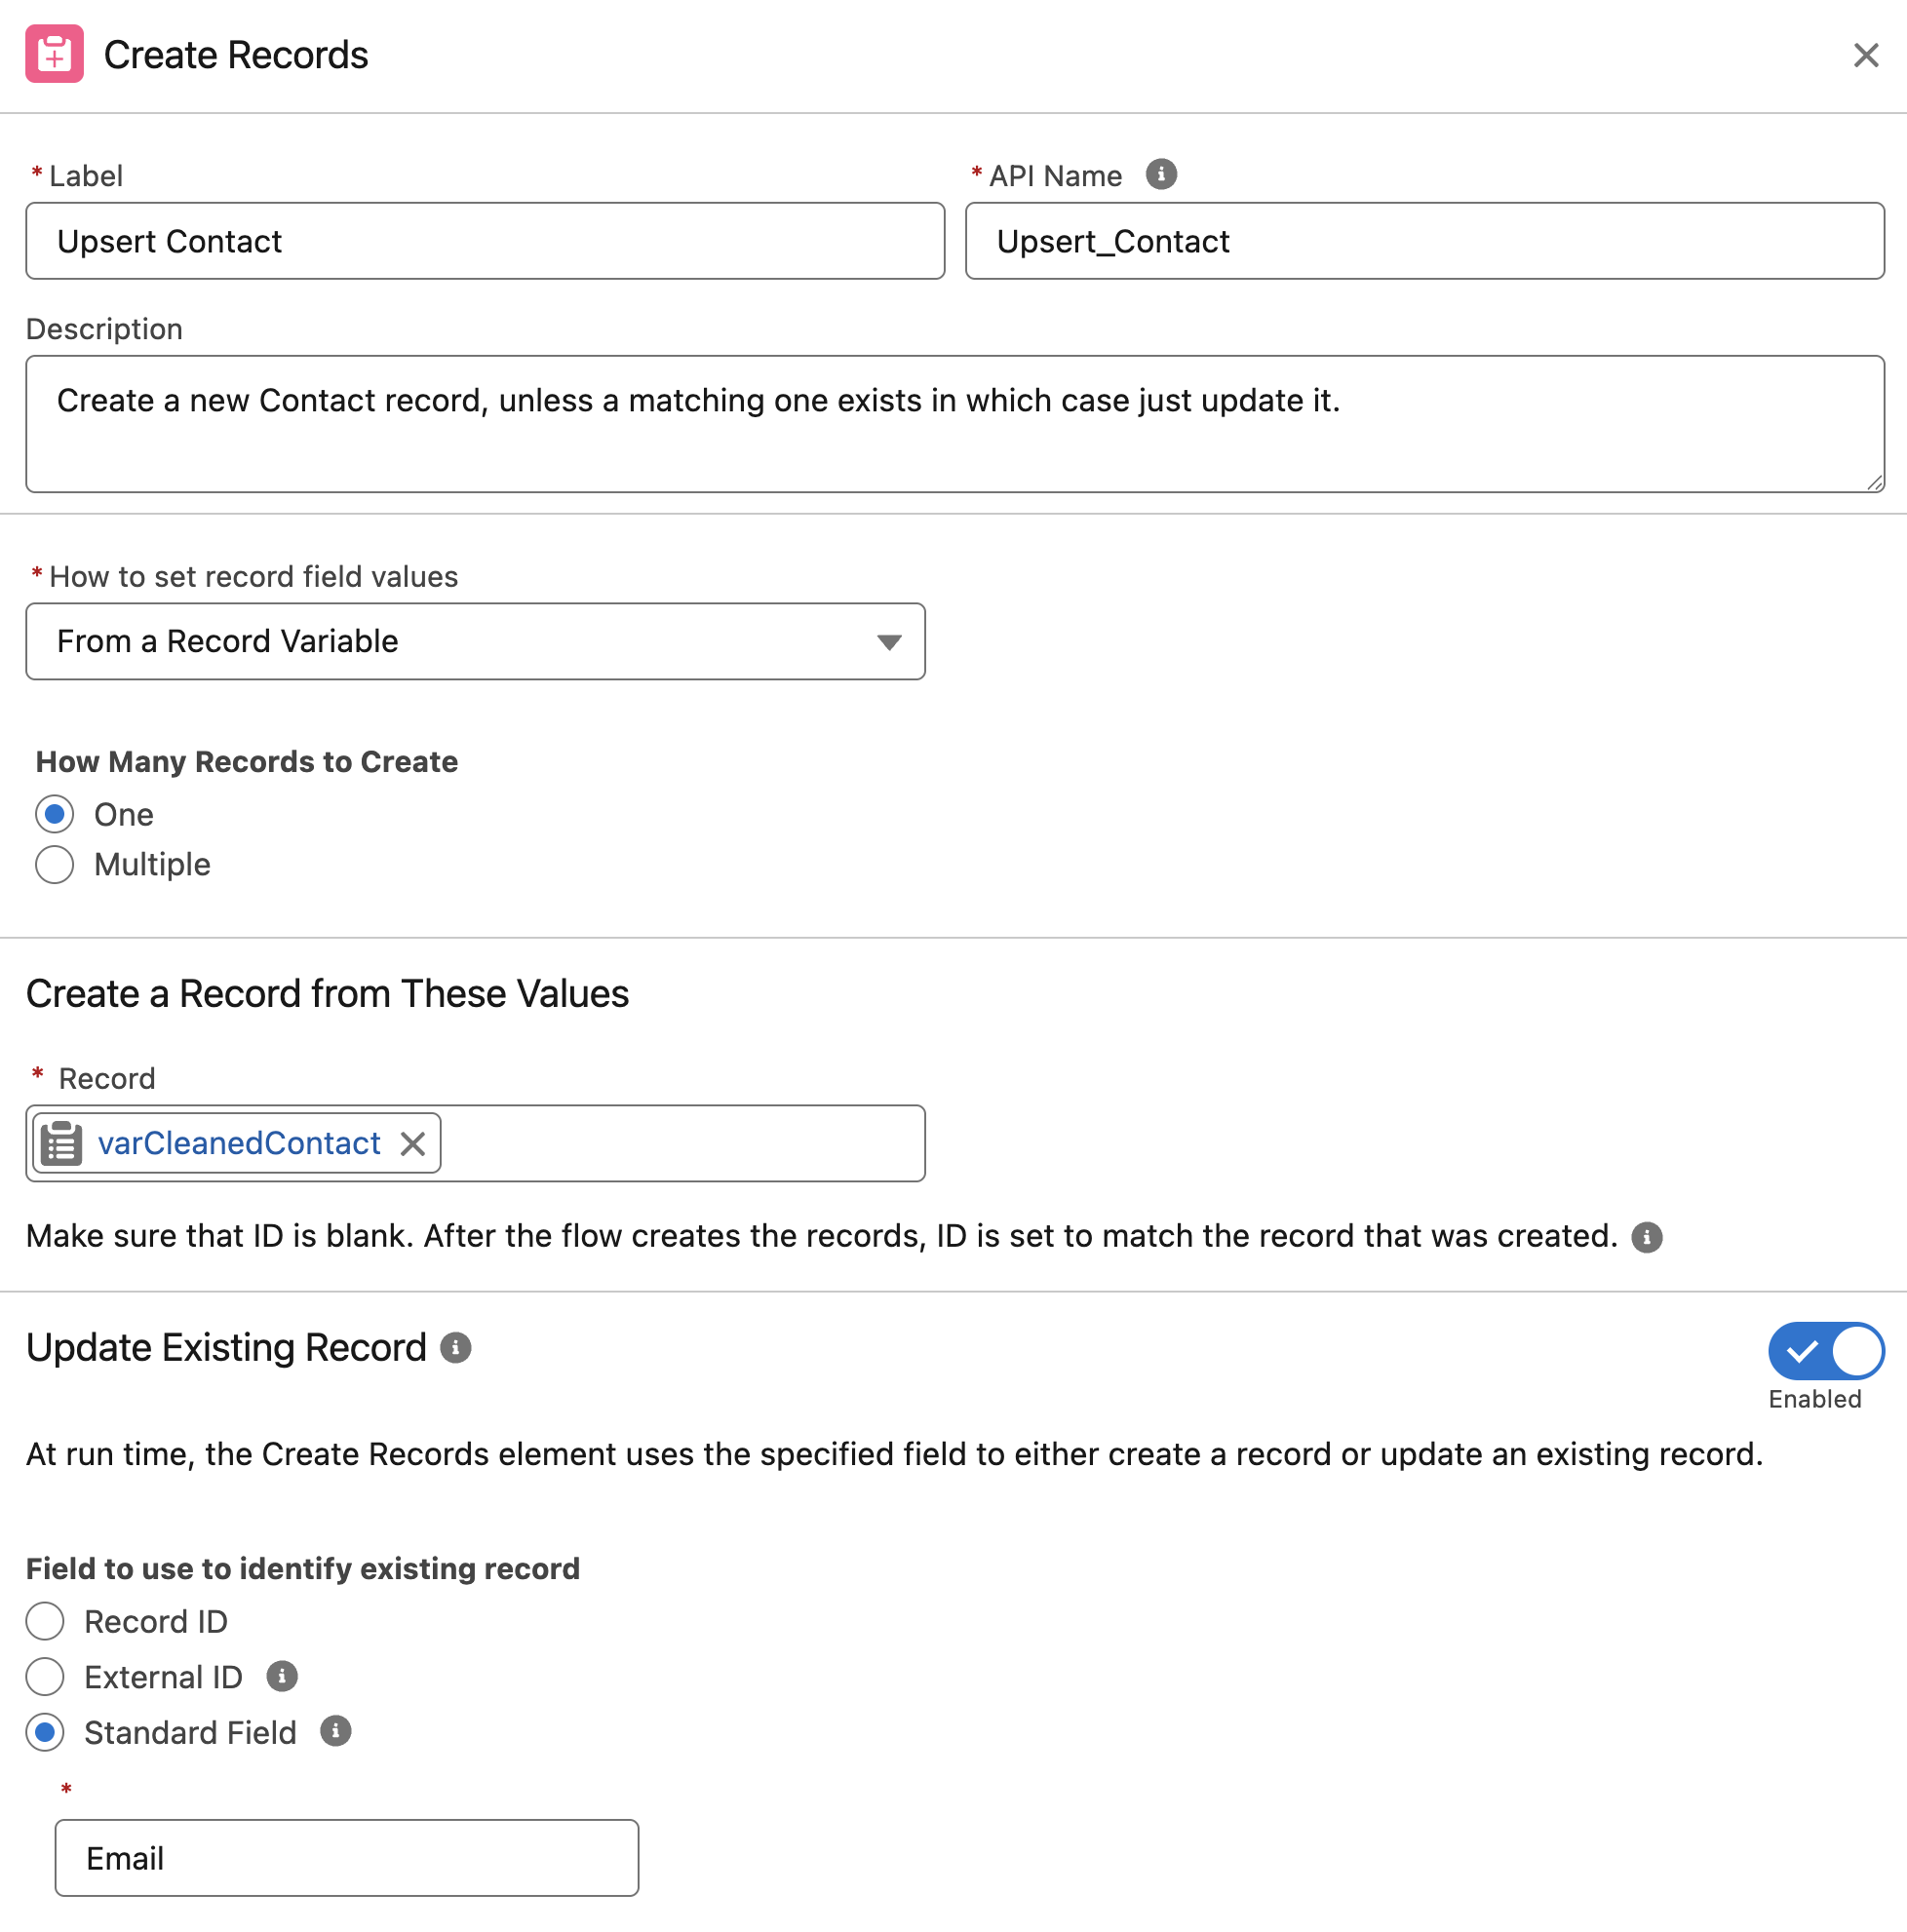
To insert one or multiple records into the Salesforce database, you will need to use a Create Records element.
The Create Records element has been enhanced to support an ‘upsert’ functionality. You can mark the ‘Update Existing Record’ checkbox at the bottom of the panel and set an identifier to allow an existing record to be updated instead of a new one created, if this is required for your use case.
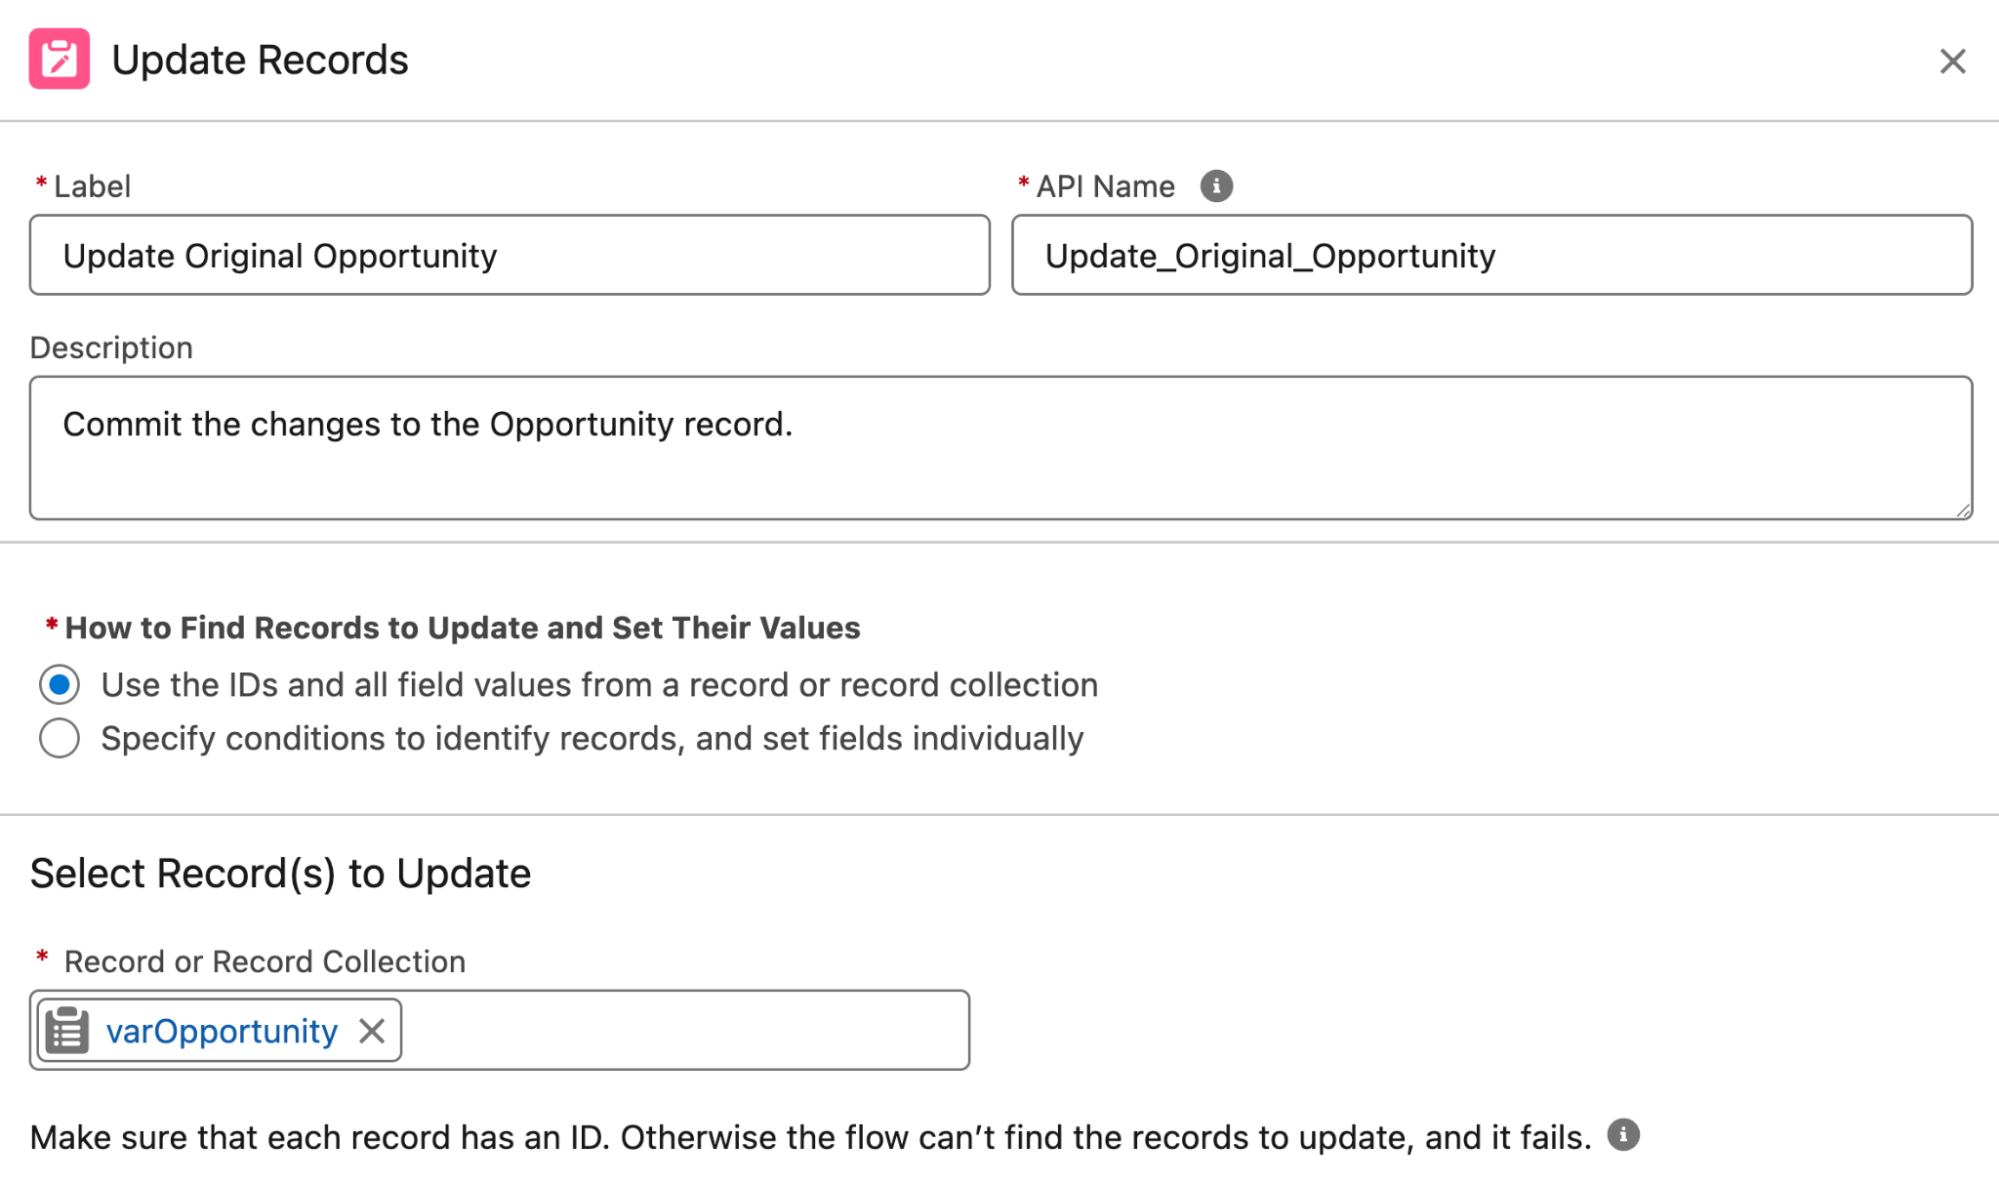
Update Records
When you want to make changes to records that already exist, you will need to use an Update Records element.
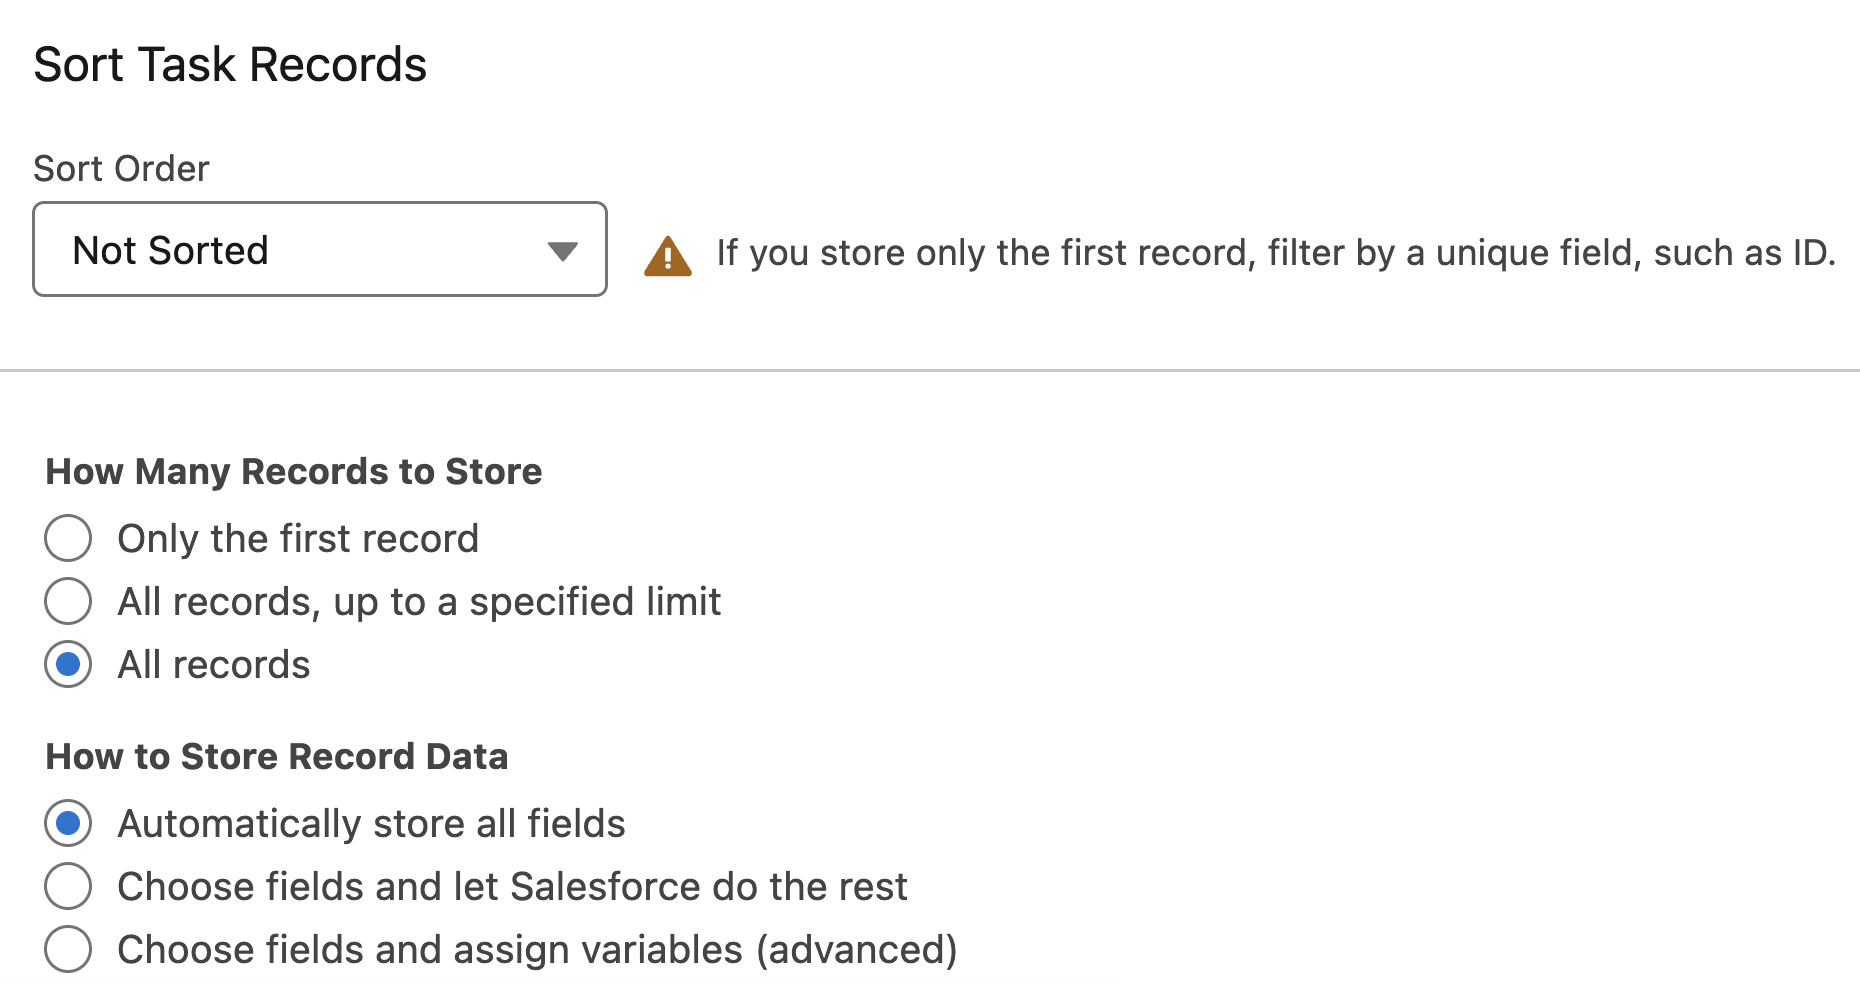
Get Records
To query the Salesforce database and pull records out, similar to a SOQL query, you will need to use a Get Records element.
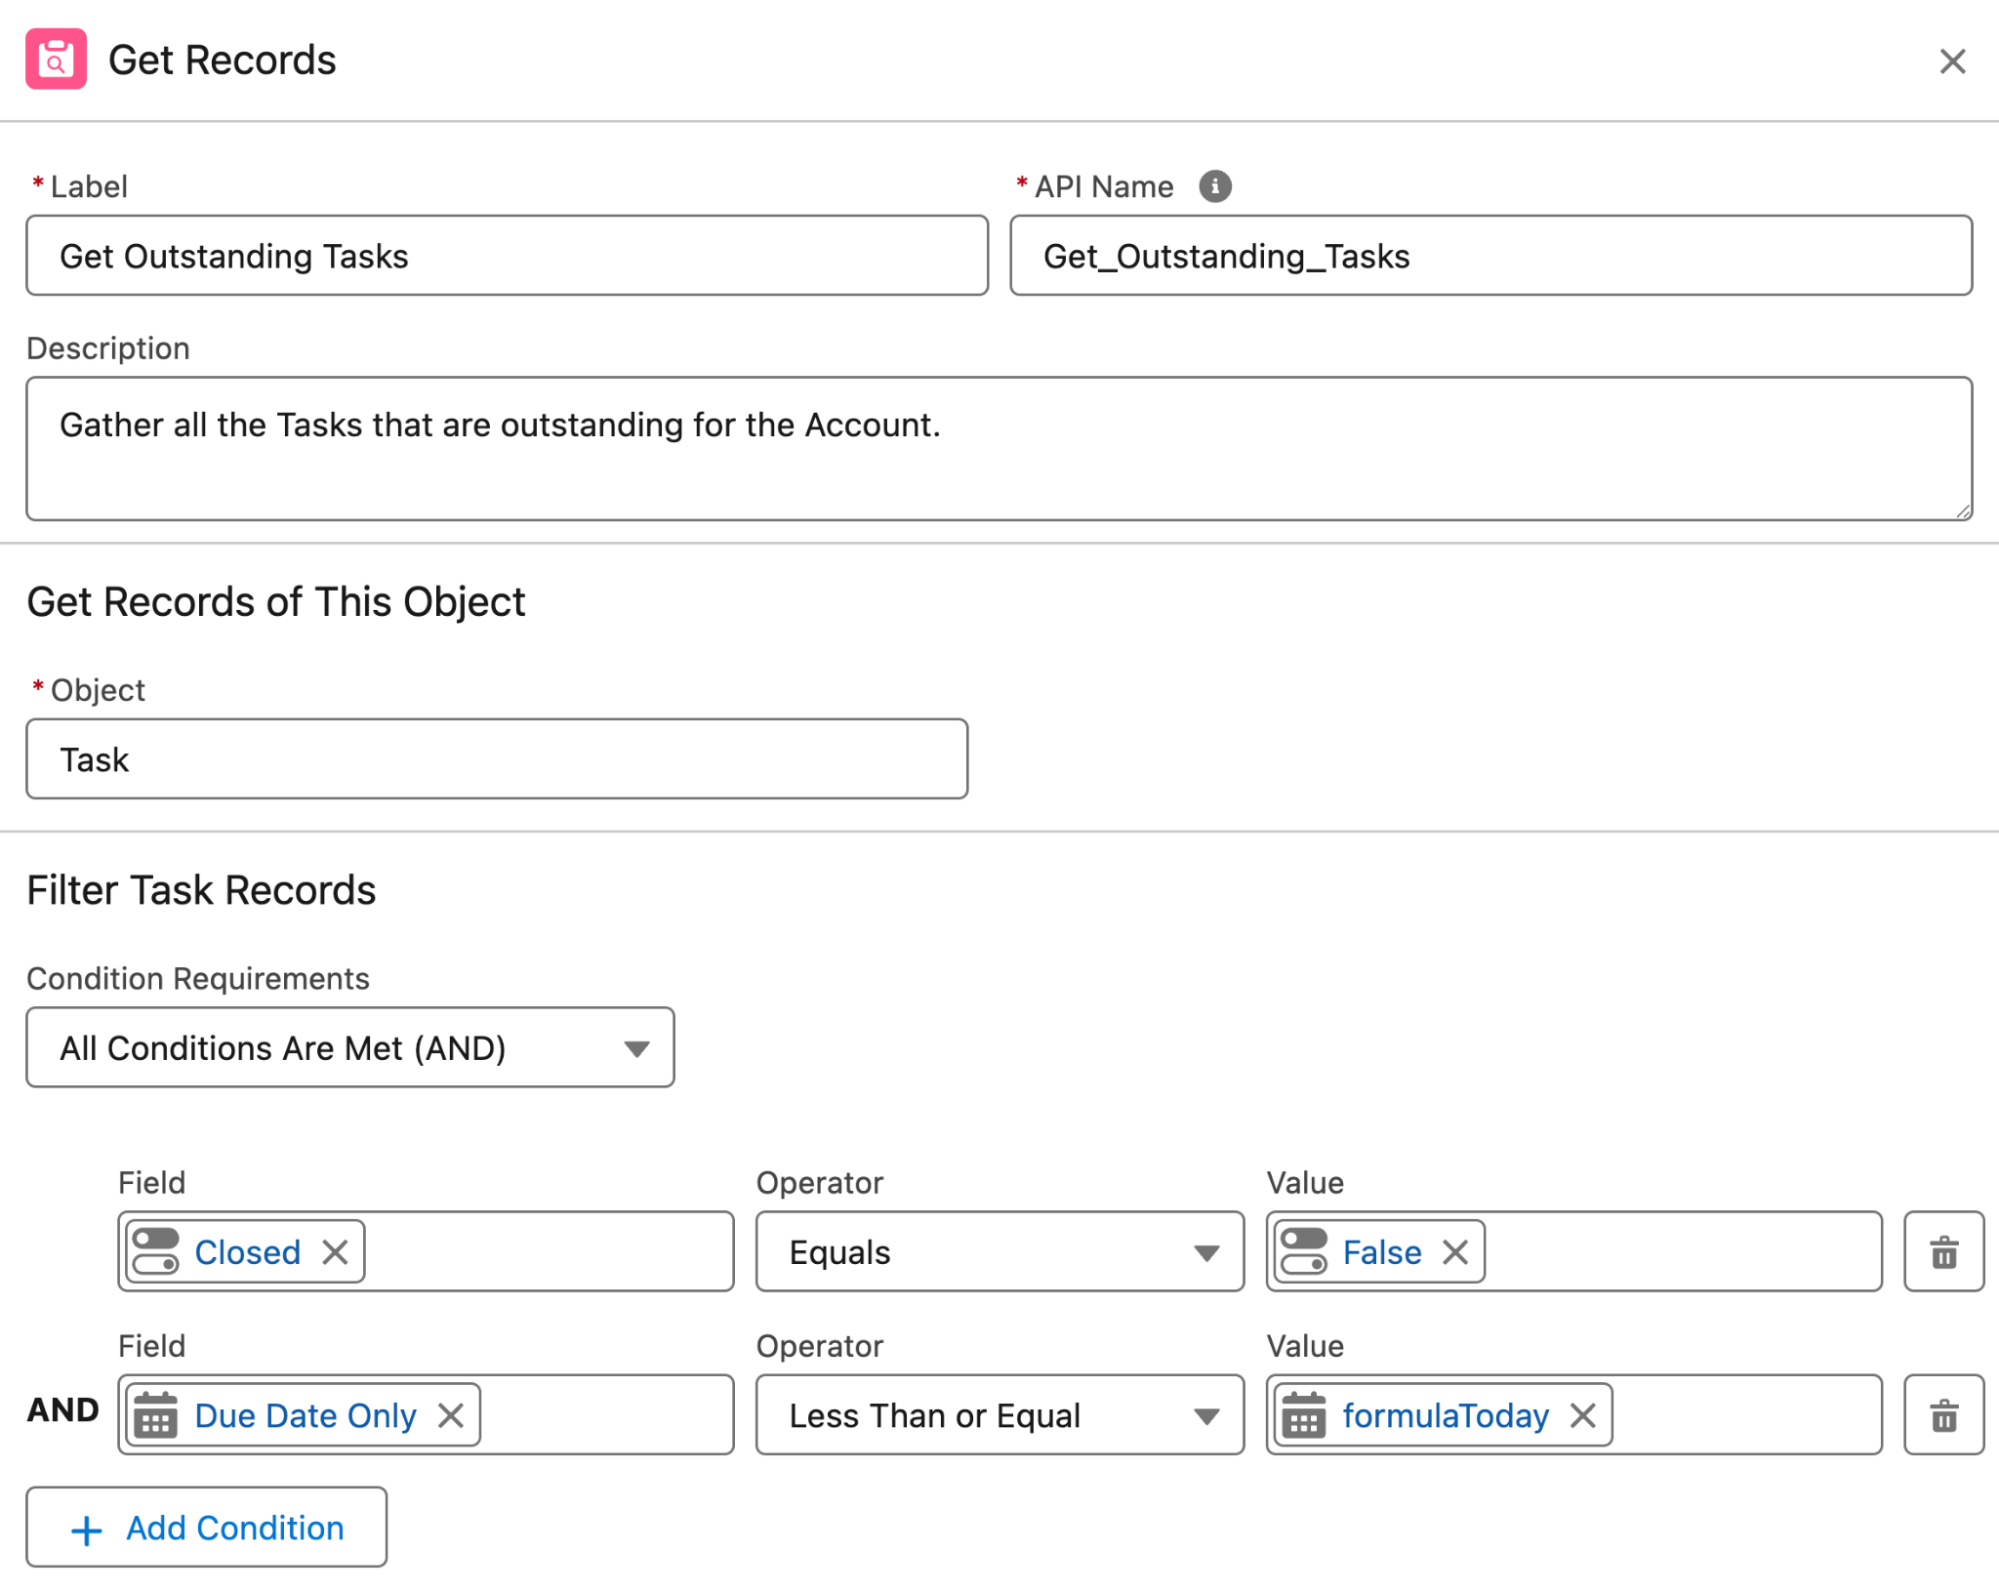
Once you’ve specified the conditions for the record or records you wish to get, you can then specify the Sort Order by field, if you wish to gather just one record or multiple, and how you want the data stored.
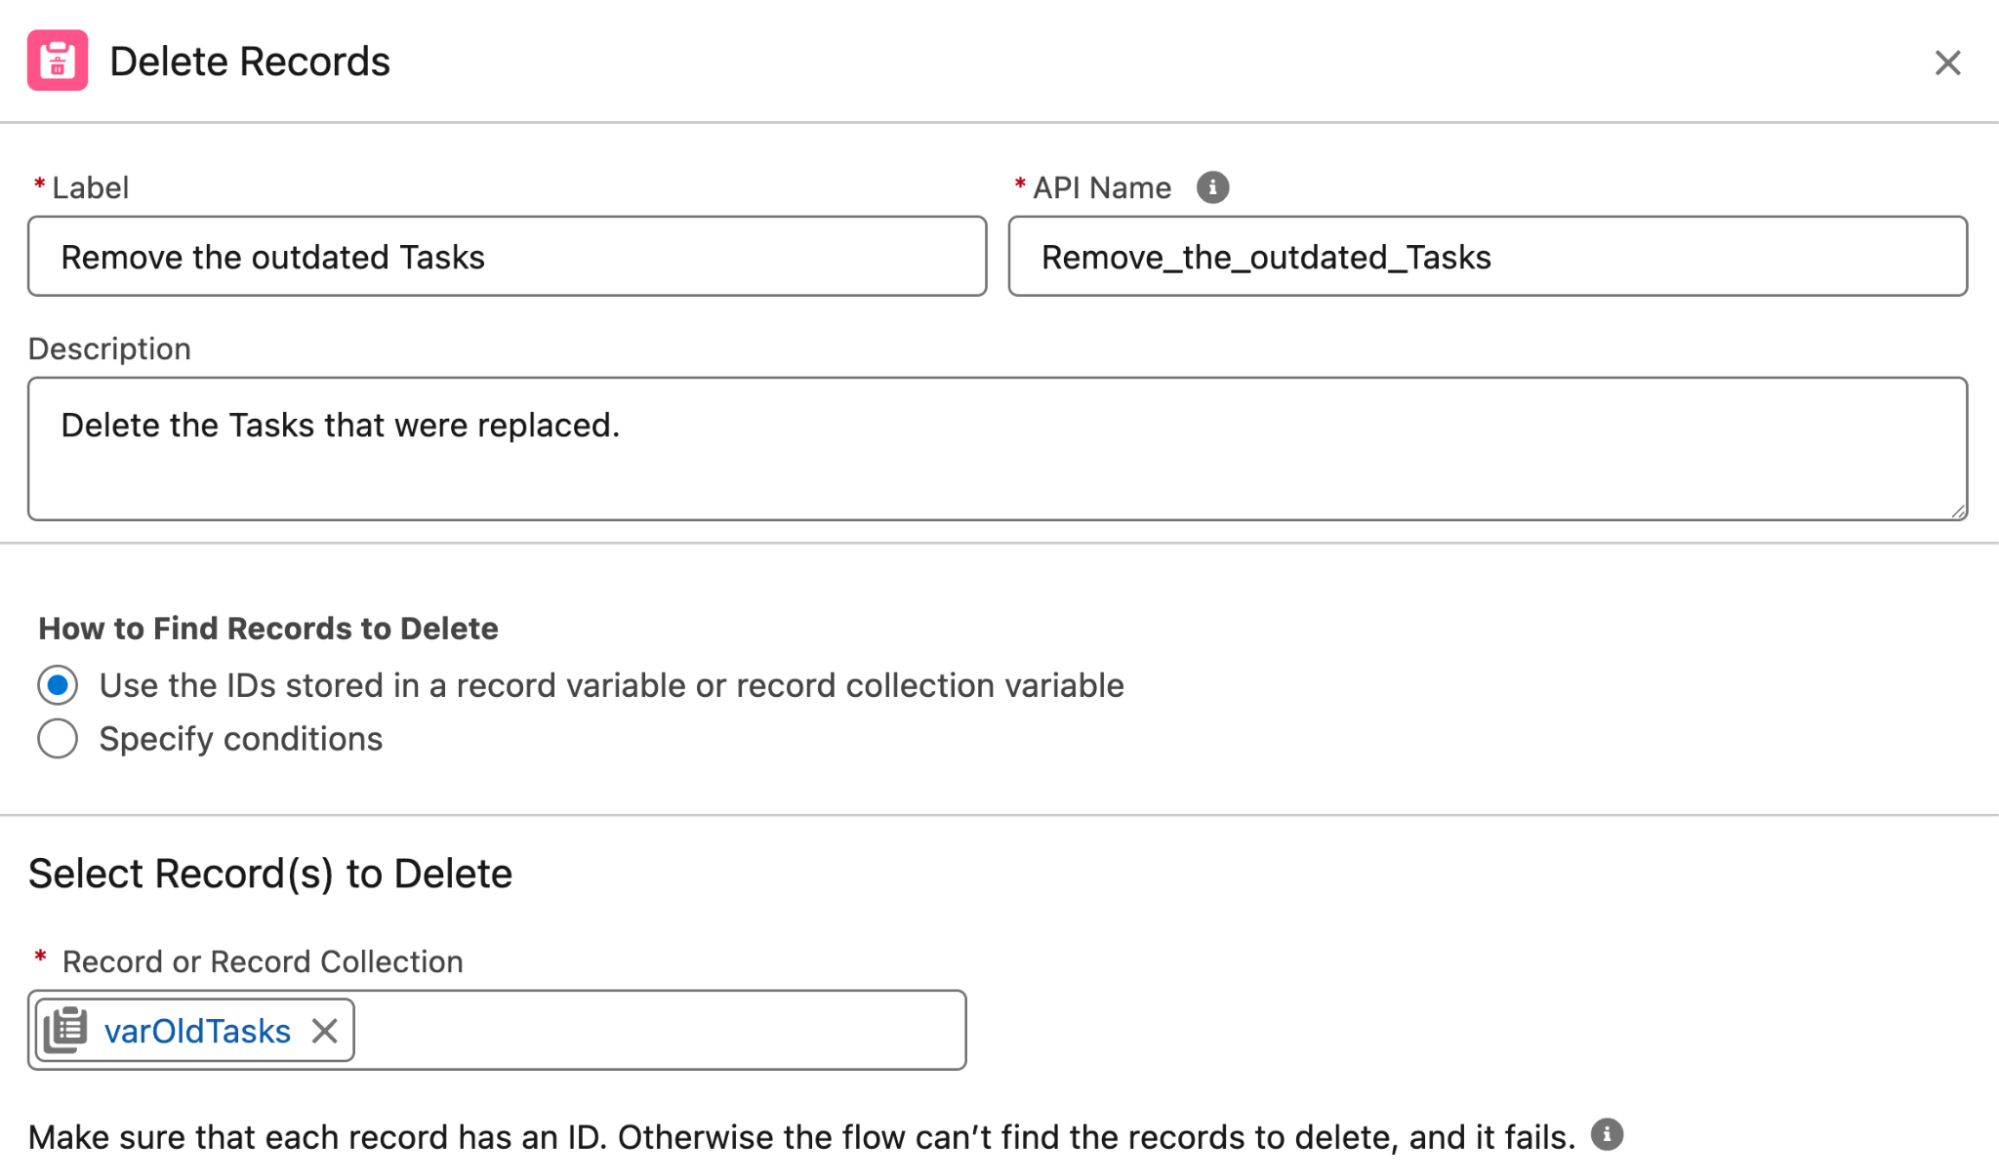
Delete Records
To remove records from the Salesforce database, you will need to use the Delete Records element.
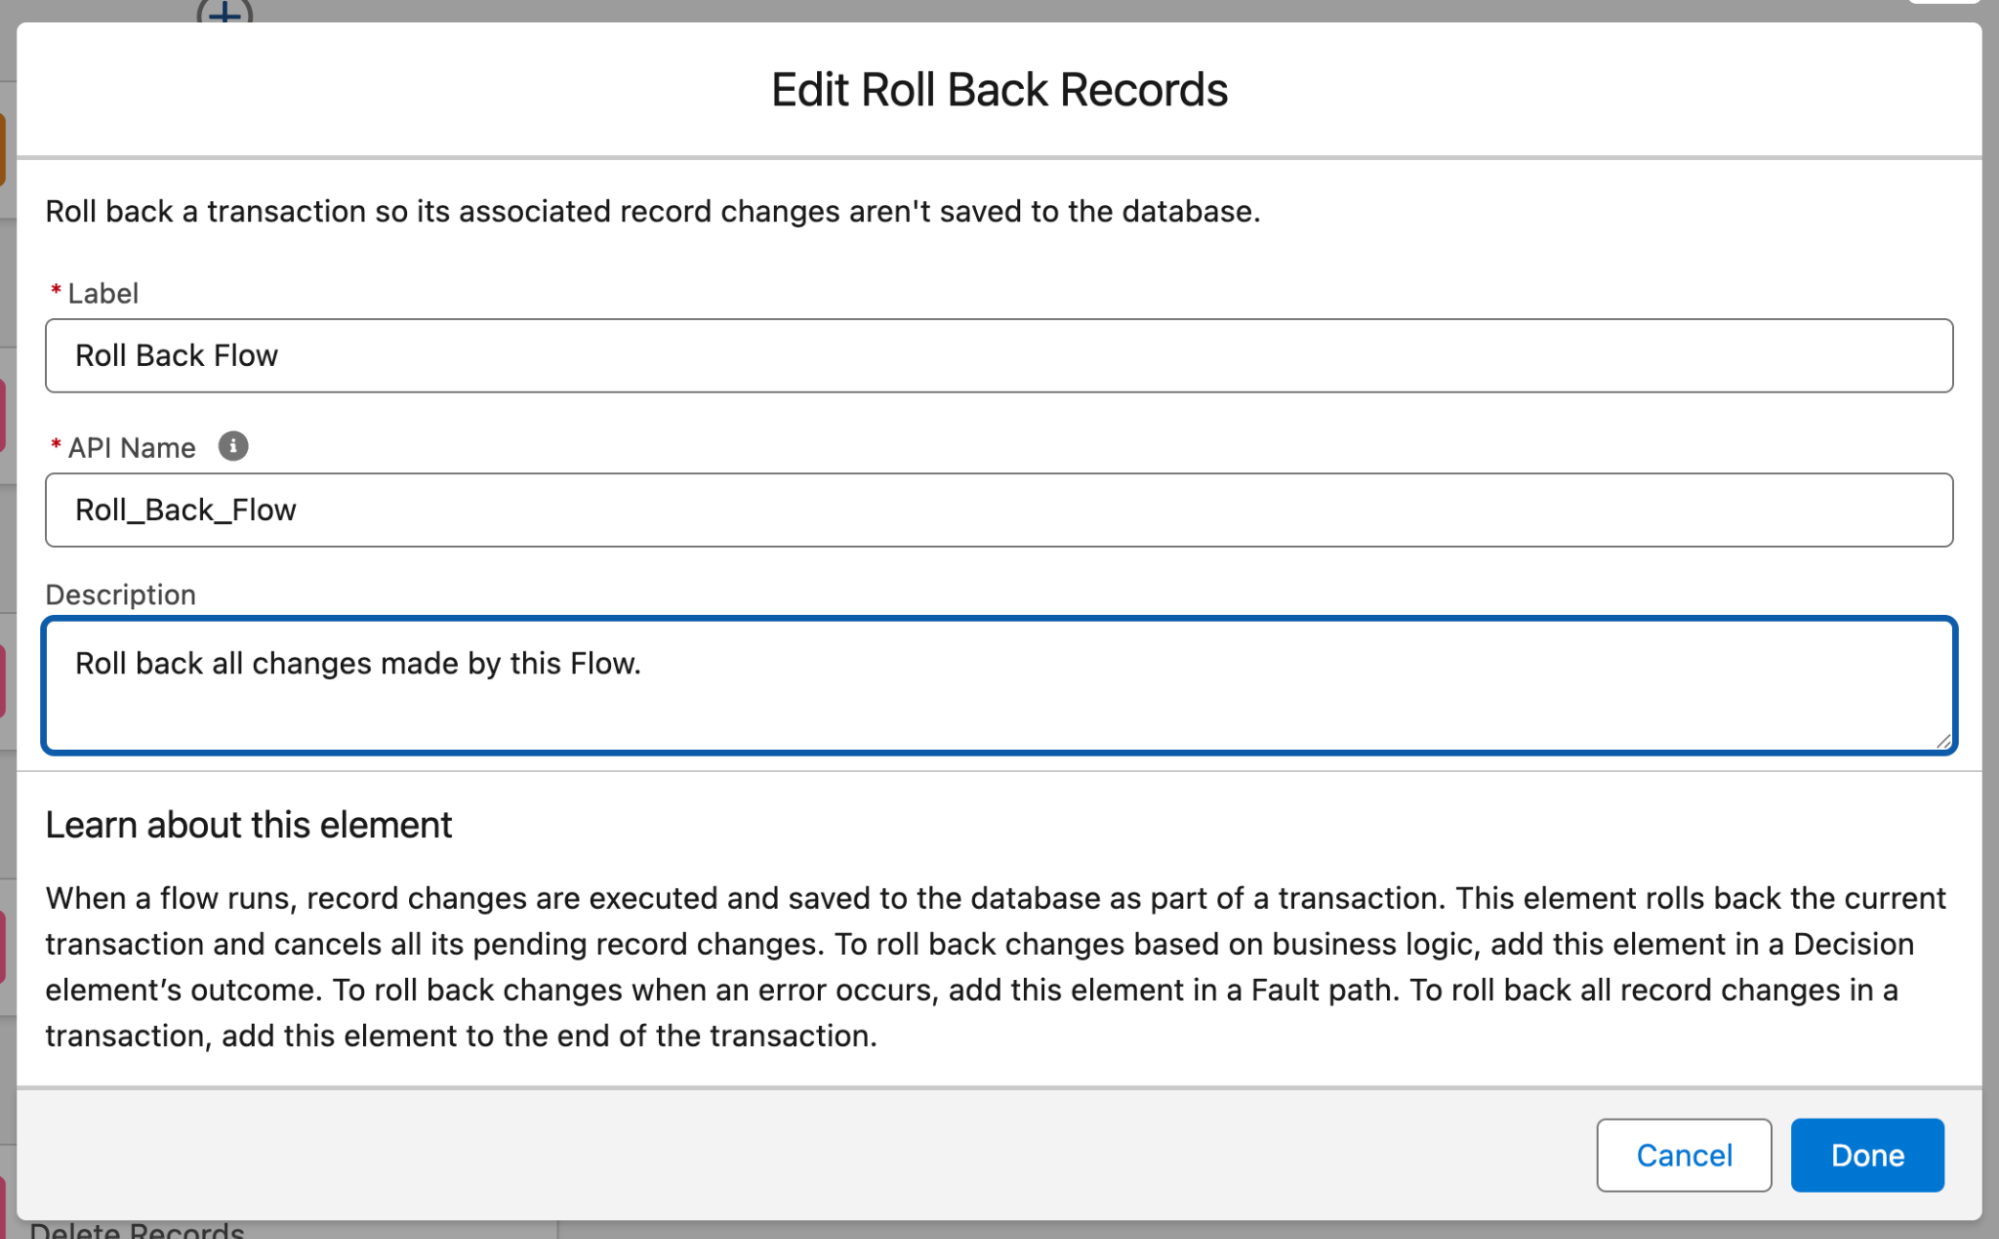
Roll Back Records
To roll back any pending record changes that occurred within a Flow (due to a Flow error or circumstances in which the entire action should be canceled), you can use a Roll Back Records element. This will cancel out any record changes that are due to be made to records in that transaction.
Interaction
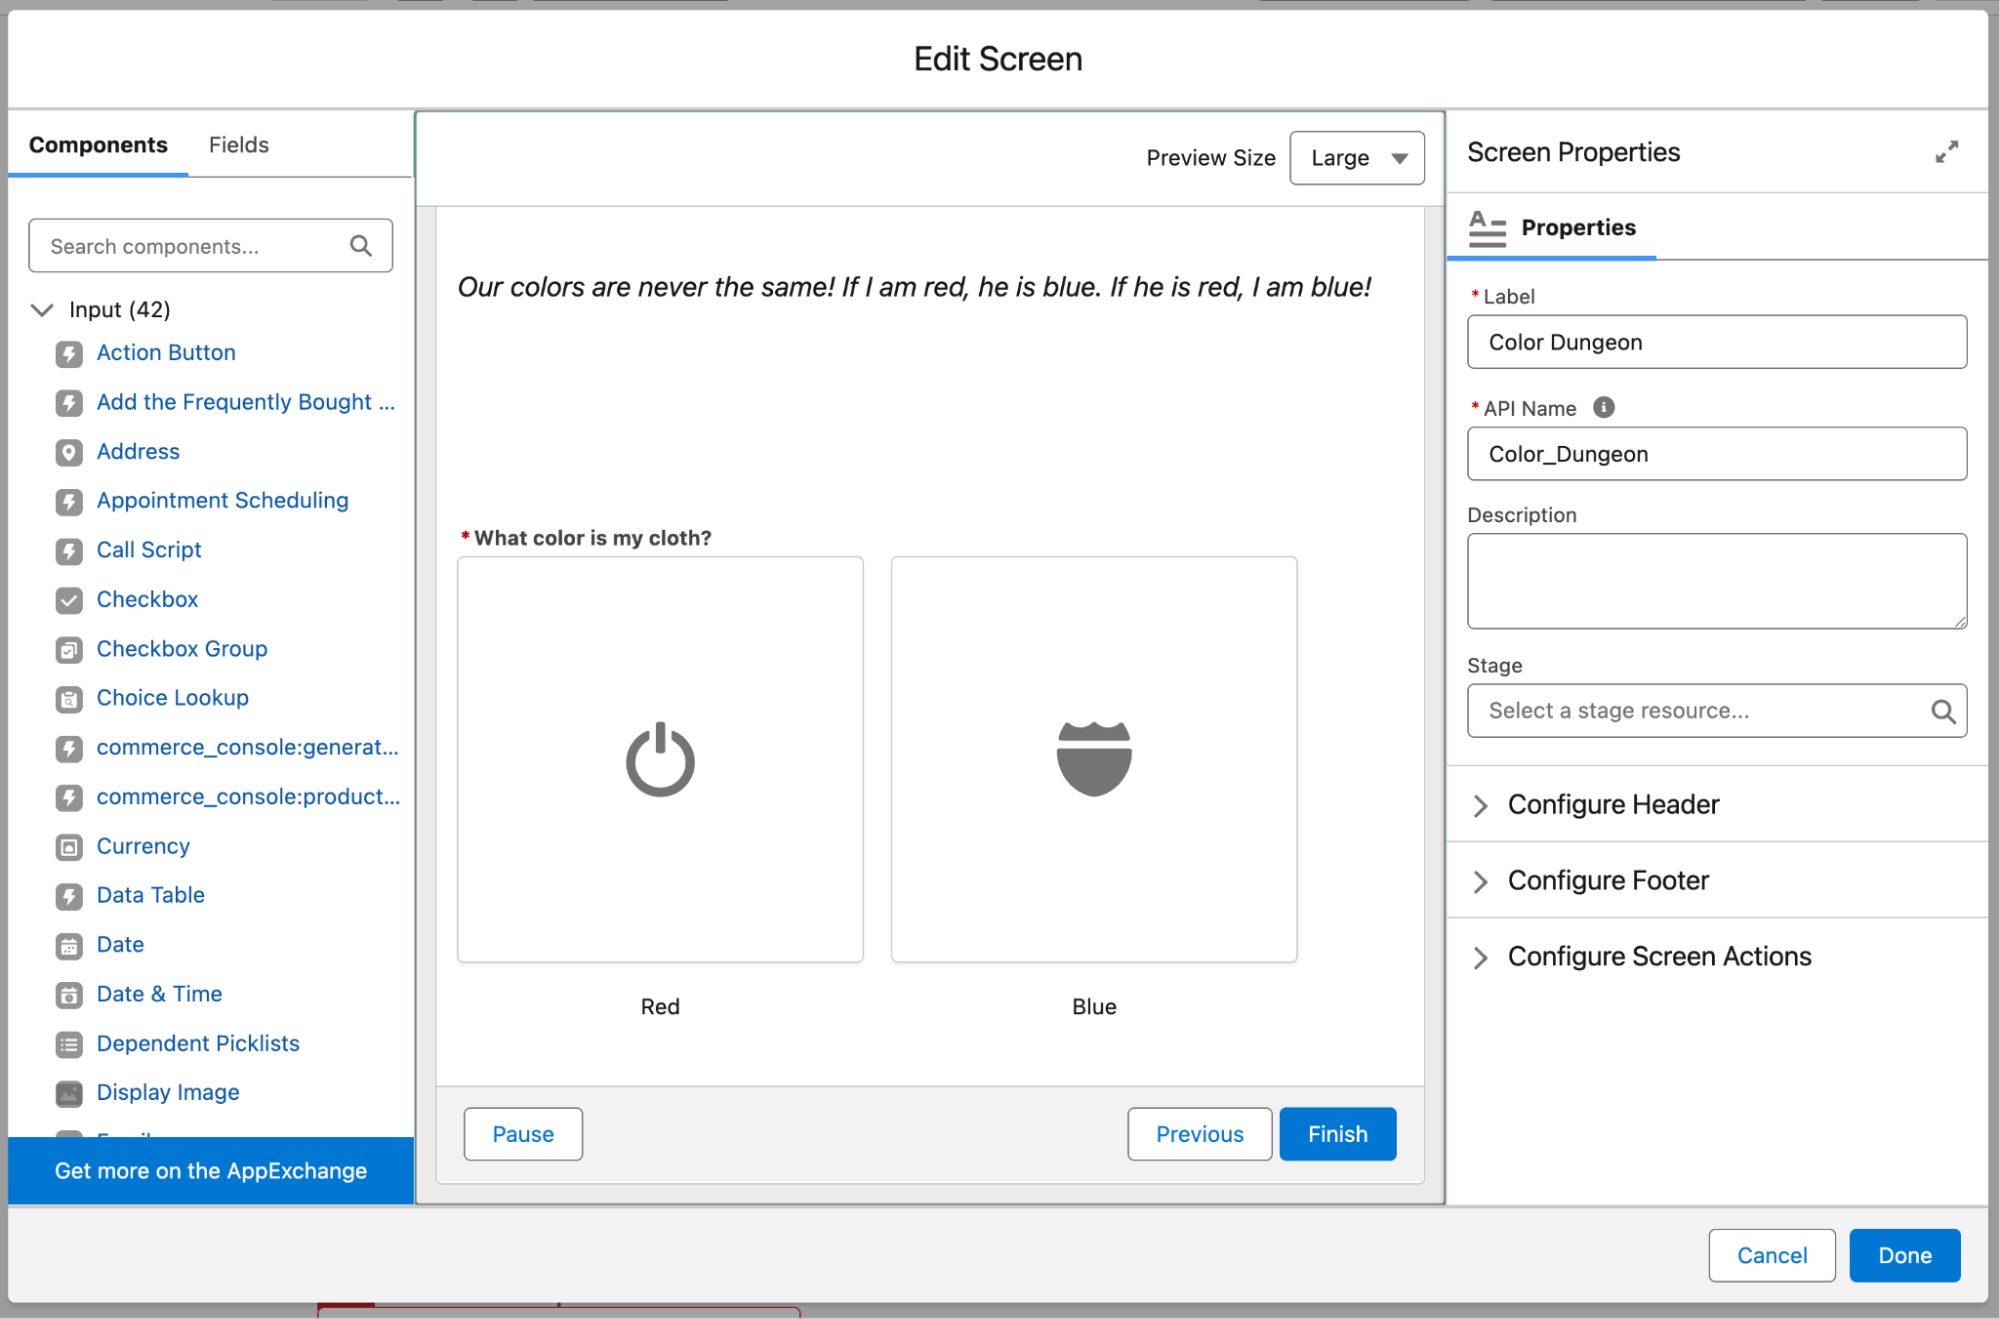
Screen
Screen elements are only available in Screen Flows and are used as a canvas to build the interface that your end users will be interacting with when using your Flow.
Flow screens are made up of standard and custom components that are used either to display information to your user (i.e, display text, display image) or allow them to input data into the system (i.e, text, URL, number, radio buttons). Custom components are built as Lightning Web Components and require LWC development knowledge, but there are some custom components available for access through the AppExchange and third-party open sources.
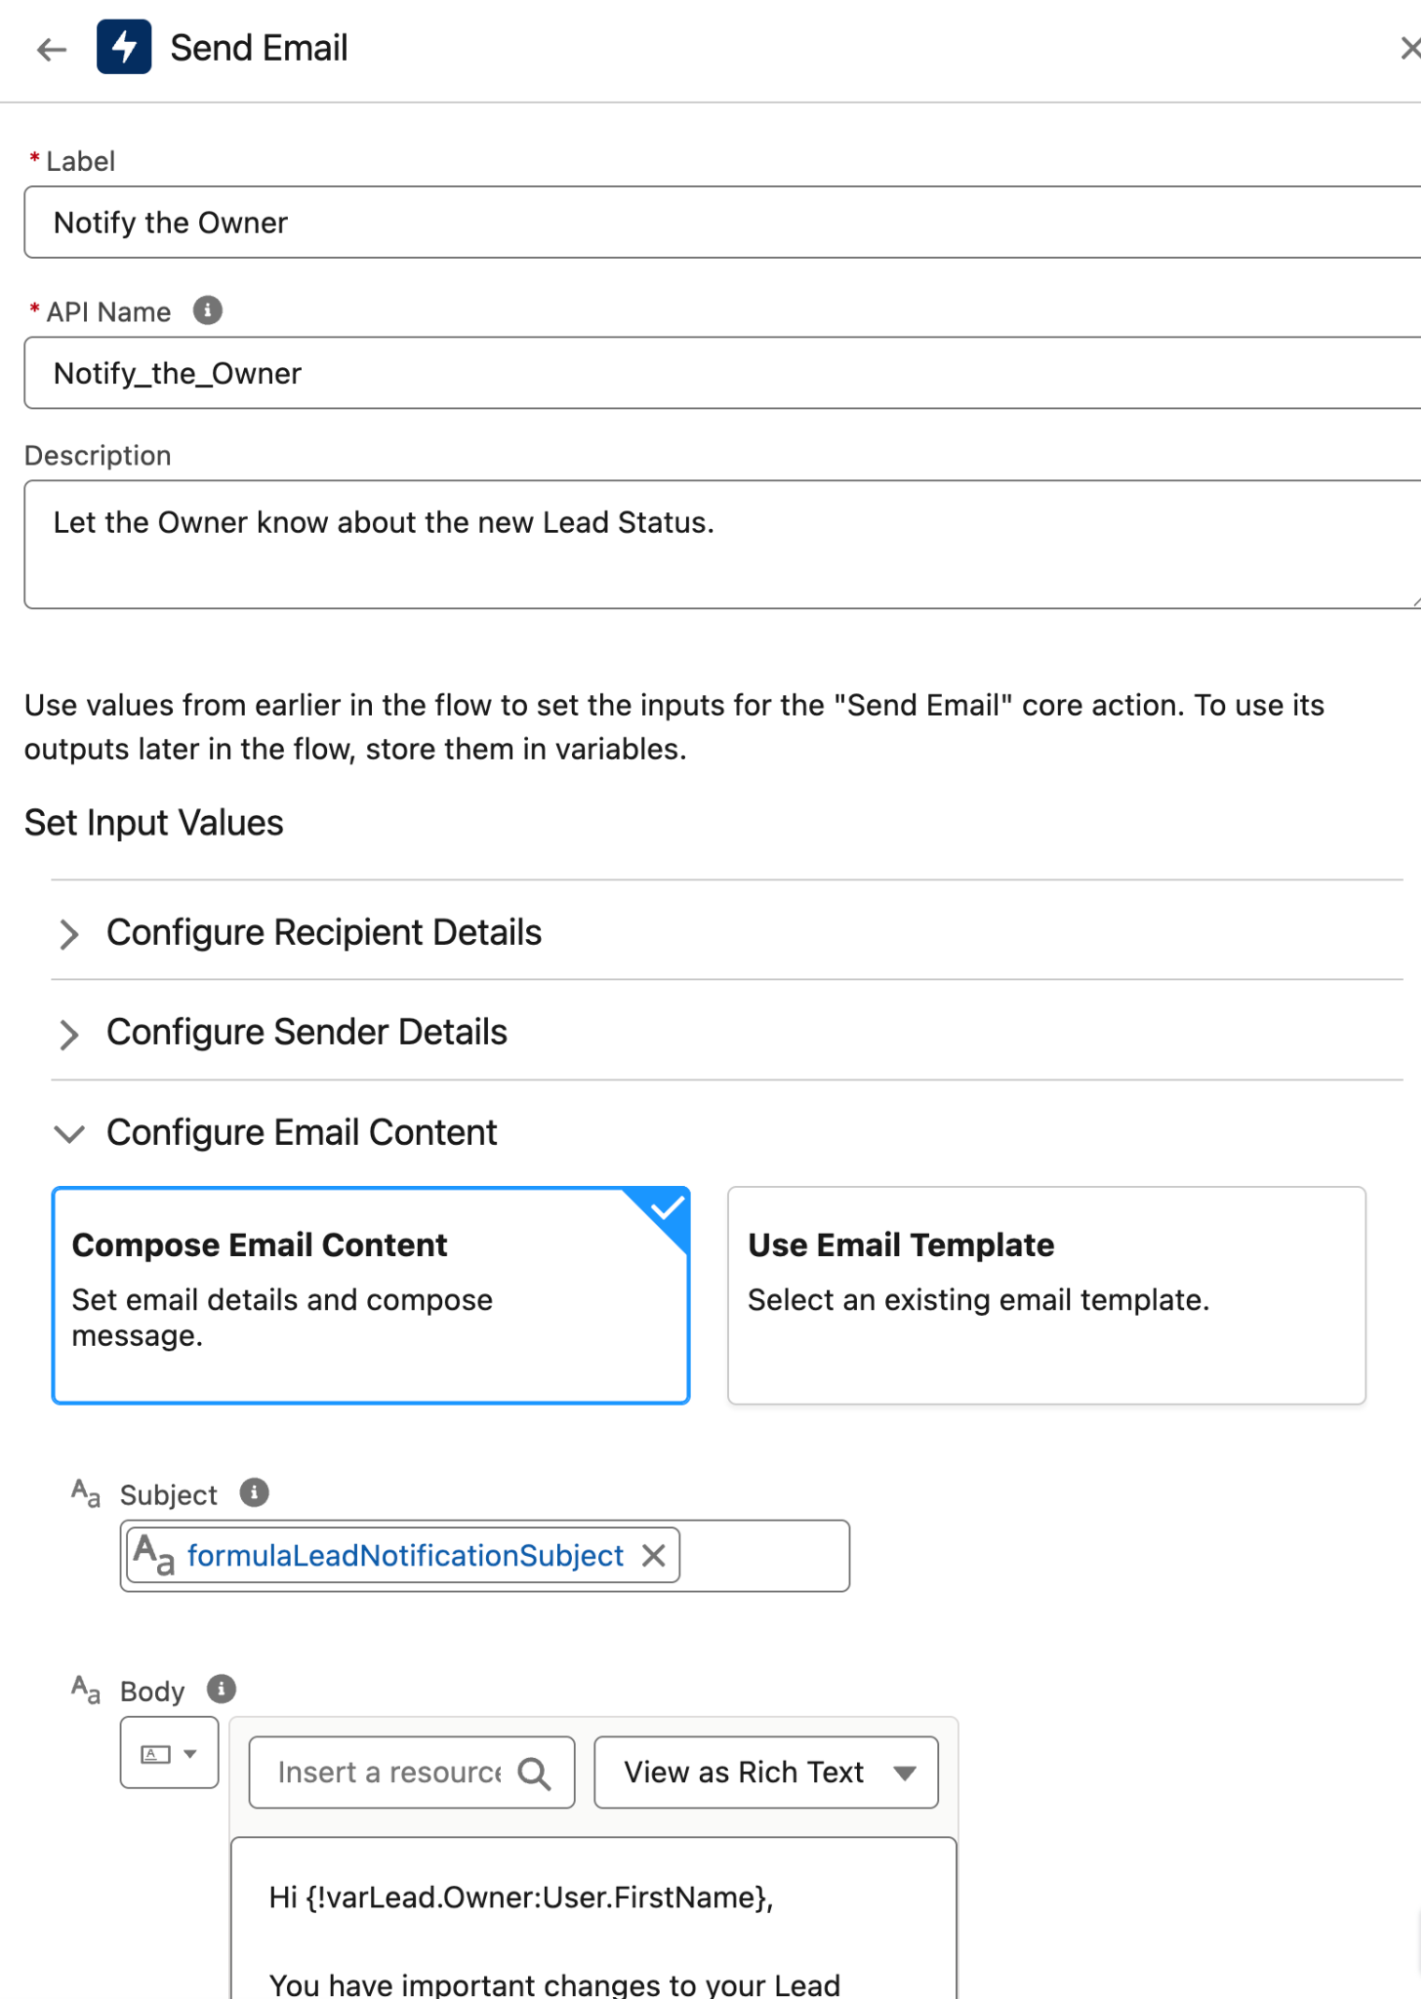
Action
Action elements are used to call processes that occur outside of the Flow itself, such as “send email” or “send for approval”. Similar to Screen elements, you can expand your flows by building custom Actions using invocable apex.
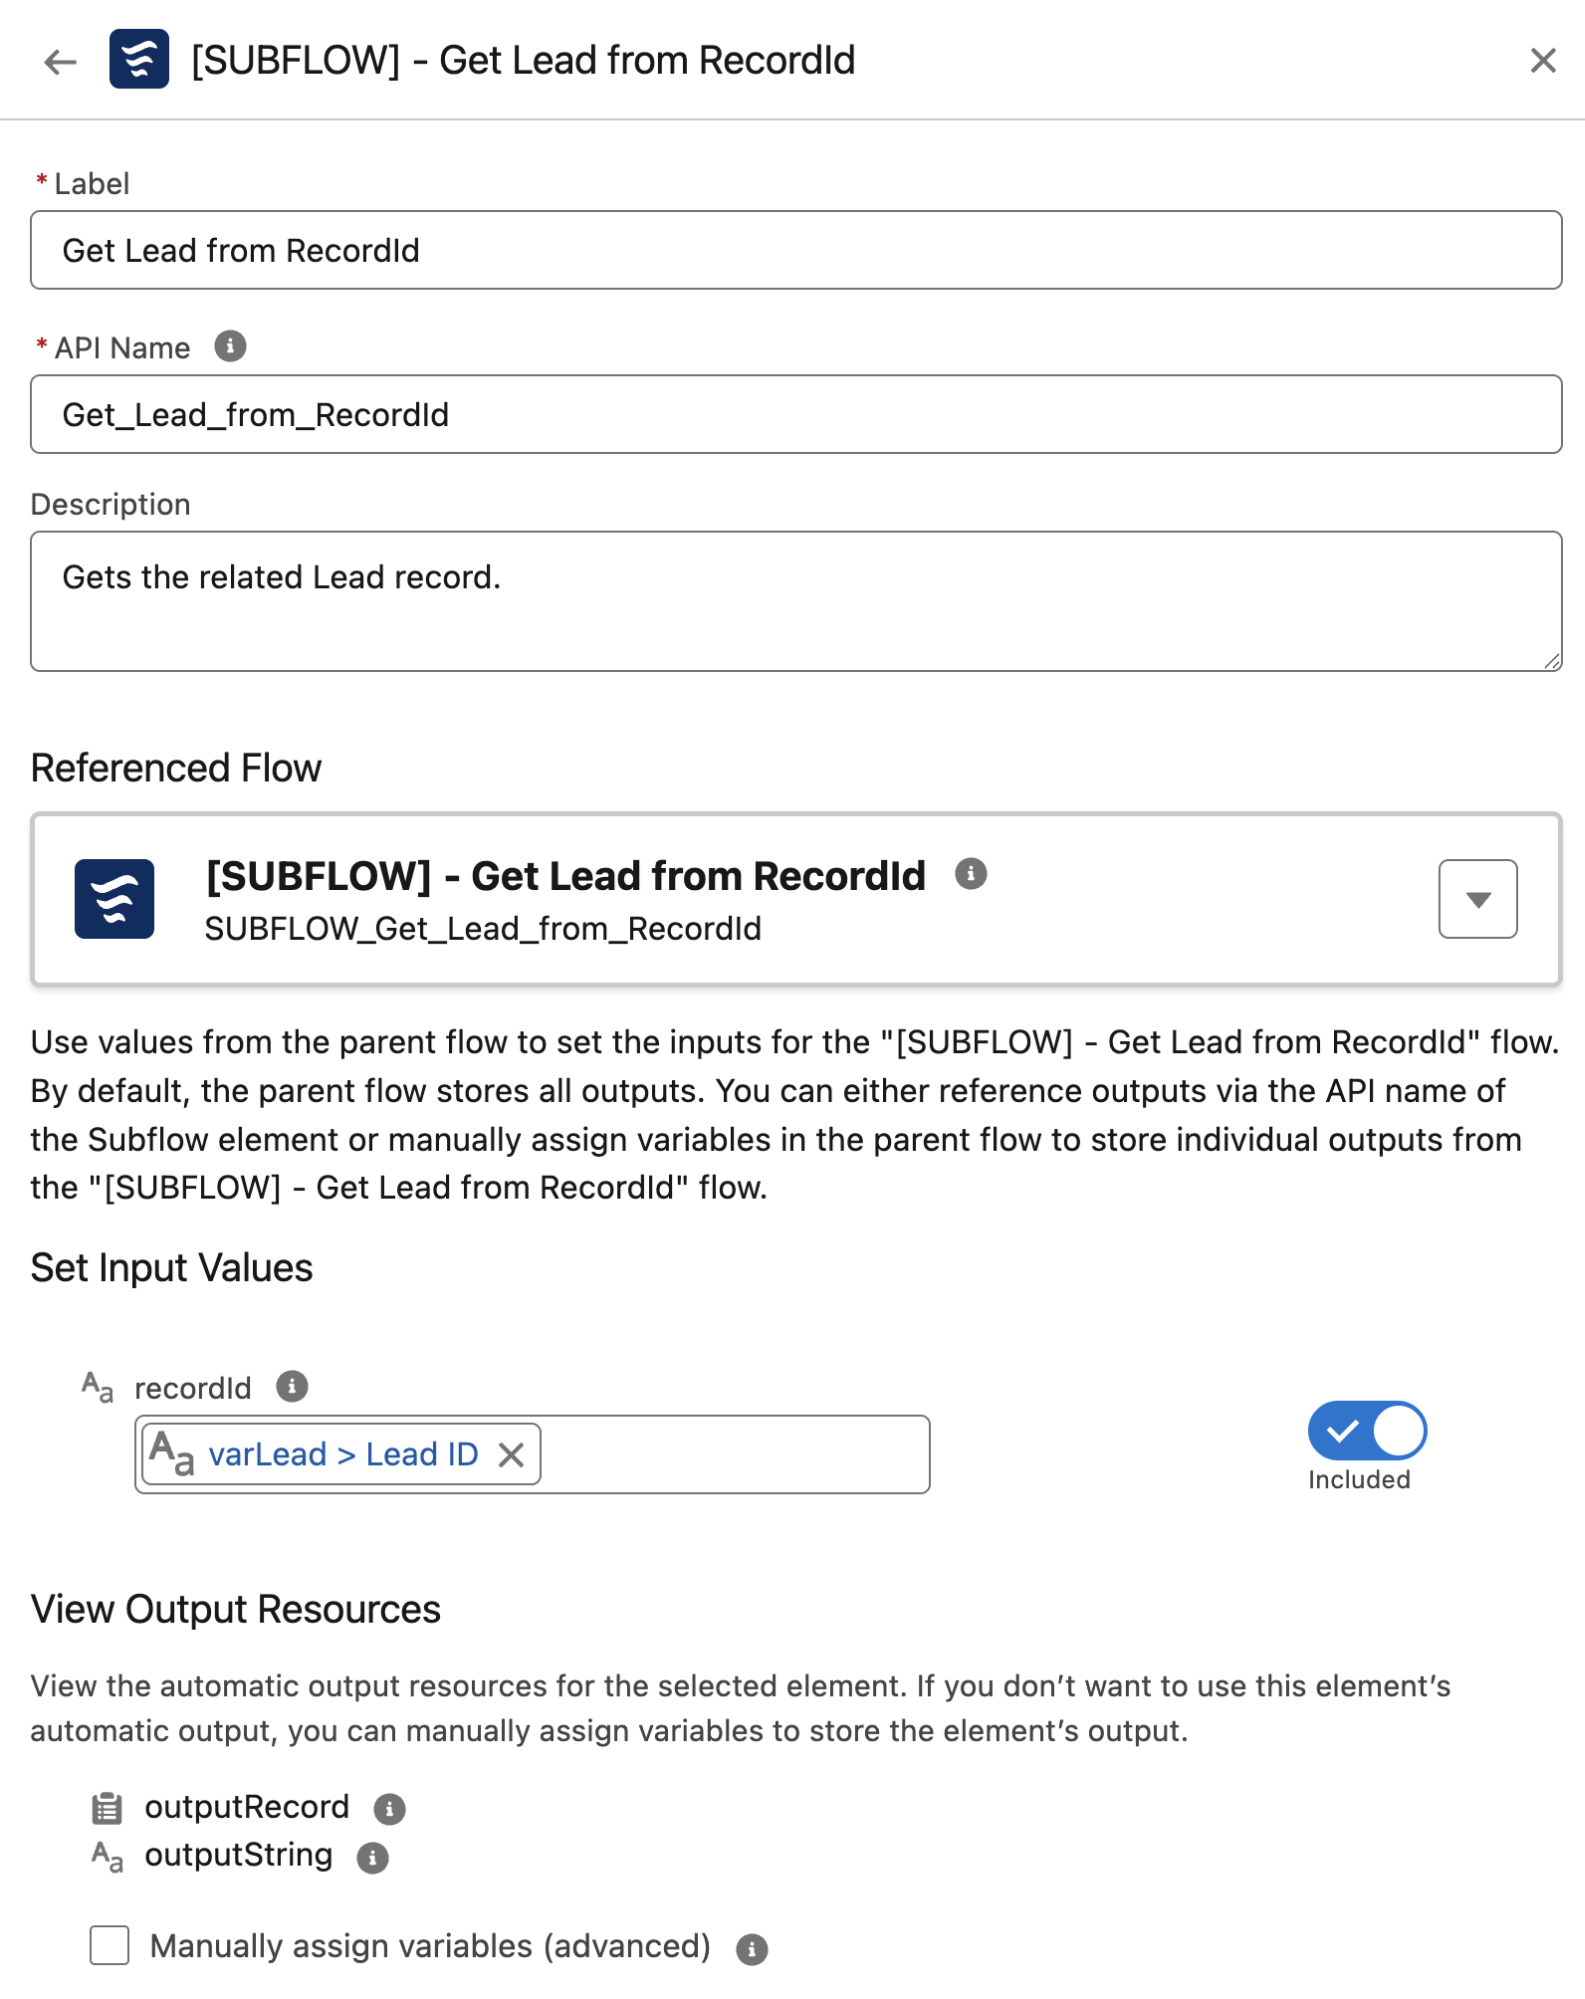
Subflow
The Subflow element is similar to Action except that instead of calling processes outside of Flow, Subflow simply calls another Flow.
If your business has a set of automations that occur in multiple scenarios (or the same actions across multiple Flows), you could simply create a secondary Autolaunched Flow with Input and Output variables that receive and return values to your parent Flows.
Resources
Variable
A Variable is a box that moves around your Flow, contains data that can change throughout the Flow, and can take one of many shapes (i.e., text, number, record). Variables can contain one or multiple Variables, with multiple Variables together being called a Collection Variable.
Constant
Similar to a Variable, a Constant is a box that moves around your Flow and can take one of many shapes (i.e., text, number, record), but the data is set in stone and does not change throughout the Flow.
Formula
Similar to the formula functions that are used in spreadsheets, a Flow Formula is used to calculate a result from multiple Variables, Constants, and other factors, then store the result as a Variable.
For example, if an account’s discount percentage is 10% and an opportunity’s base price is $10,000, a discounted price formula could be configured to calculate the final discounted price and apply it to the opportunity record.
Text Template
Text Templates allow Flow Administrators to store text that can be used throughout a Flow. Commonly, these are used in things like emails sent from a Flow that uses information gathered or created within the Flow itself.
Choice
Choices are used as options that users can select from within radio buttons or multi-select picklist components. They are composed of both a label and a value, which are often confused – the label is displayed to end users, while the value is what is stored behind the scenes and used by the Flow.
Collection Choice Set
Similar to Choices, Collection Choice Sets are a group of options made up of existing Collection Variables used in your Flow. Collection Choice Sets can only reference Collections that already exist, unlike Record Choice Sets and Picklist Choice Sets, which are constructed when they are configured.
Record Choice Set
While the Record Choice Set behaves similarly to the Collection Choice Set, it is populated using a query built into the set itself, whereas a Collection Choice Set uses a collection that already exists within the Flow.
Picklist Choice Set
Picklist Choice Sets use Picklist fields that are configured on objects to provide options within radio buttons or multi-select picklist Screen components.
Stage
Stages sequentially group a user’s progress through the Flow into small milestones that can then be displayed back to the user. Rather than considering each Screen as a milestone, your user may navigate through multiple Screens in a single Stage before passing to the next one (2 Screens in “Customer Identity”, 3 Screens in “Product Configuration”, and 2 Screens in “Payment”, for example).
Infographic


Comments: