

The Engagement Metrics component in Salesforce displays marketing asset performance, directly within Salesforce Campaigns. Thanks to Connected Campaigns, you can sync all activities (engagement) happening with Pardot marketing assets (emails, forms, landing pages etc.)
Having key marketing metrics in one place is a nice capability. That’s the vision for Salesforce Campaigns – to become the central workspace for marketers.
The Engagement Metrics Lightning component is part of the Engagement History collection of features for the Salesforce interface. Adding the Engagement Metrics component to Salesforce Campaign Lightning record pages is quick and easy, involving no code.
Salesforce Engagement Metrics Component: An Overview
The Salesforce Engagement Metrics component displays marketing asset performance, i.e. the activities (engagement) happening with Pardot marketing assets (emails, forms, landing pages etc.)
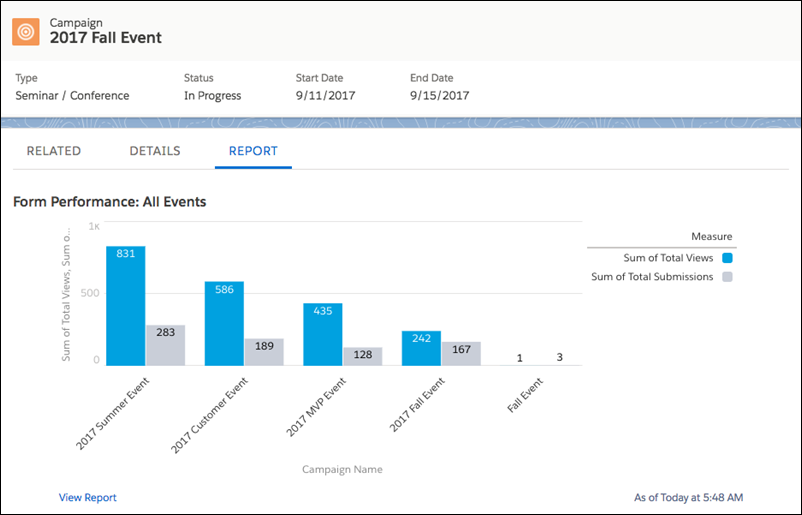
These assets are tied together because they are related to a Campaign (the one you selected when sending the email, building the form, etc.). Report on how each asset performed to make the best decisions for future campaigns.
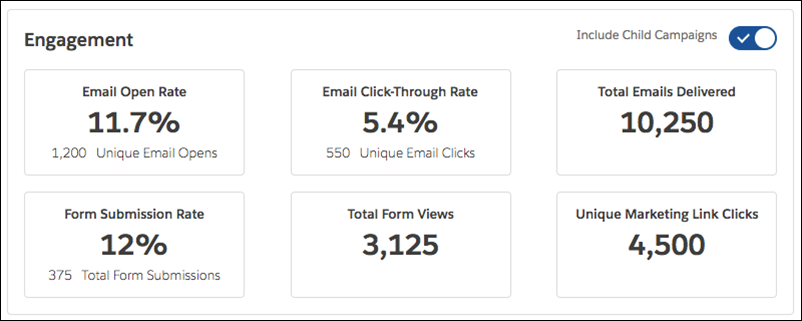
The Engagement Metrics component shows, in a clear grid display, campaign-level metrics:
- Email open rate.
- Email click-through rate.
- Emails delivered.
- Form submissions.
- Form views.
- Unique marketing link clicks (custom redirects).
How to Add the Engagement Metrics Component
The Salesforce Lightning Experience gives us Lightning Record Pages. These are component-based page layouts, meaning you drag-and-drop building blocks (vs. building page layouts, which are field by field).
Popular locations to place the component include the ‘Details’ subtab, the sidebar, or a new subtab dedicated to Engagement Metrics (which you can easily create).
Your choice will depend on who needs to see the information and how much information is already on your Campaign pages.
Prerequisite: Before you start, you must have Connected Campaigns enabled.
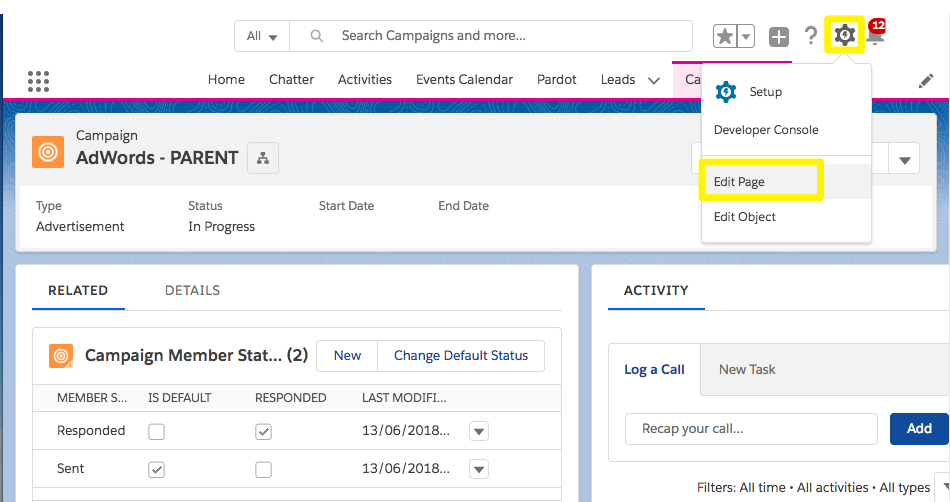
Step 1: Edit the Lightning Record Page
We are going to edit the Campaign Lightning Record Page:
- Go to any campaign. Click on the cog in the top right-hand corner.
- Click Edit Page.
Step 2: Drag and Drop the Component
Lightning Components are on the left-hand sidebar. Grab Engagement Metrics and drag and drop it onto the page, anywhere the green overlay appears – your choice!

Step 3: Add Metric Types
Now switch your attention to the right-hand sidebar. Likely, you see the message: No metric types are selected.
When you click to add metrics, you will see the pop-up (image below). All you need to do is select the metric in the left list, and use the arrows to move it to the right list.

Step 4: Save and Activate
When you save, Salesforce will prompt you to activate the Campaign Record Page.
This is where you can decide who will see this page and where (i.e. by Salesforce app).
Choosing Assign as the Org Default means all users with default visibility settings will see the Campaign layout with the Engagement Metrics added.

Summary
In this guide, you’ve seen the benefits of Engagement Metrics for Salesforce Campaigns and how simple it is to drag and drop your key Pardot performance metrics into view.
Take a step back and check your campaigns are set up properly. I’ve seen Campaigns not respected as they should be – good structure and clean data will save you headaches down the line. Looking at which marketing assets are related to which campaigns within Pardot will give us accurate metrics on the Salesforce side. Accidentally associating an asset with the wrong campaign is easily done – especially when there are multiple assets to juggle or campaigns with similar names.
Invest the time to re-associate Pardot emails, landing pages, forms, files, custom redirects (tracked links) to the correct Connected Campaign. The reward will be accurate Engagement metrics.

Comments: