

Salesforce page layouts are critical to user experience design, allowing you to organize fields in a logical order, as well as set field properties, add buttons, actions and related lists. Page layouts in Salesforce can be tailored to different teams around your organization so each role can access what they need, faster.
How you design a page layout in Salesforce can make or break user adoption – good design leads to greater ROI (return on investment), so it’s never too early to start thinking about your users’ experience!
With a page layout, you can control:
- Which fields are visible (add and remove fields),
- Where blank spaces appear between fields,
- Field properties, including Read-Only and Required,
- Page sections,
- The number of columns in a section and tab-key order,
- Which buttons and actions are included, such as ‘Edit’, ‘Clone’ or ‘Delete’, and in which order,
- Which related lists appear, and customize their properties (eg. choosing which fields to display).
In this guide, we’ll explore how you can create Salesforce page layouts, and customize page layouts for different teams.
How to Create a Page Layout in Salesforce
Head over into Setup > Object Manager > [find the object you want to work with] > Page Layouts.
From here you can view and edit existing page layouts or create new ones:
Page Layout Sections
You can create sections for fields. This can make navigation easier for users and, if collapsible sections are enabled, the sections can then be expanded/collapsed.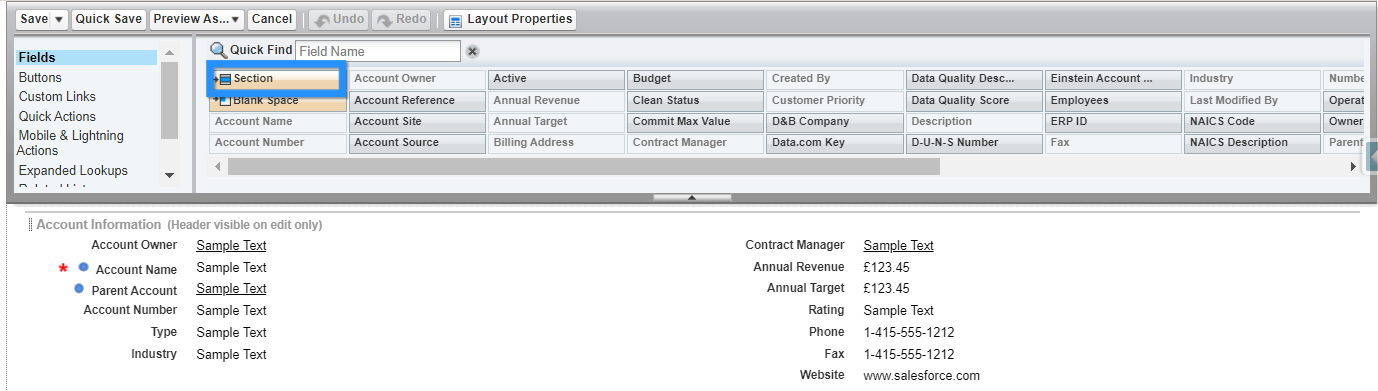
When you create or edit a section, you can determine if the header is visible:
- Detail page (non-edit)
- Edit page
You can also define the number of columns, choosing from 1-column or 2-column and the tab-key order.
Click on the wrench icon to edit the section.

Field Options
Fields can be dragged and dropped, on and off the page layout.
Once a field has been added, click on the wrench to set field properties. From here, you can choose to make a field ‘Read-Only’ or ‘Required’ at the page layout level.
Related Lists on Page Layouts
Related lists can be added and removed from the page layout. Additionally, you can control the related list properties, including which columns and buttons are displayed. This is really important to ensure you display enough information on a related list to make it useful to your users!
Actions
You can control which actions are available, and in what order, via ‘Mobile & Lightning Actions’.
These are the actions that appear at the top, right of a record e.g. Edit, Delete, Clone, and also on the Activity Timeline.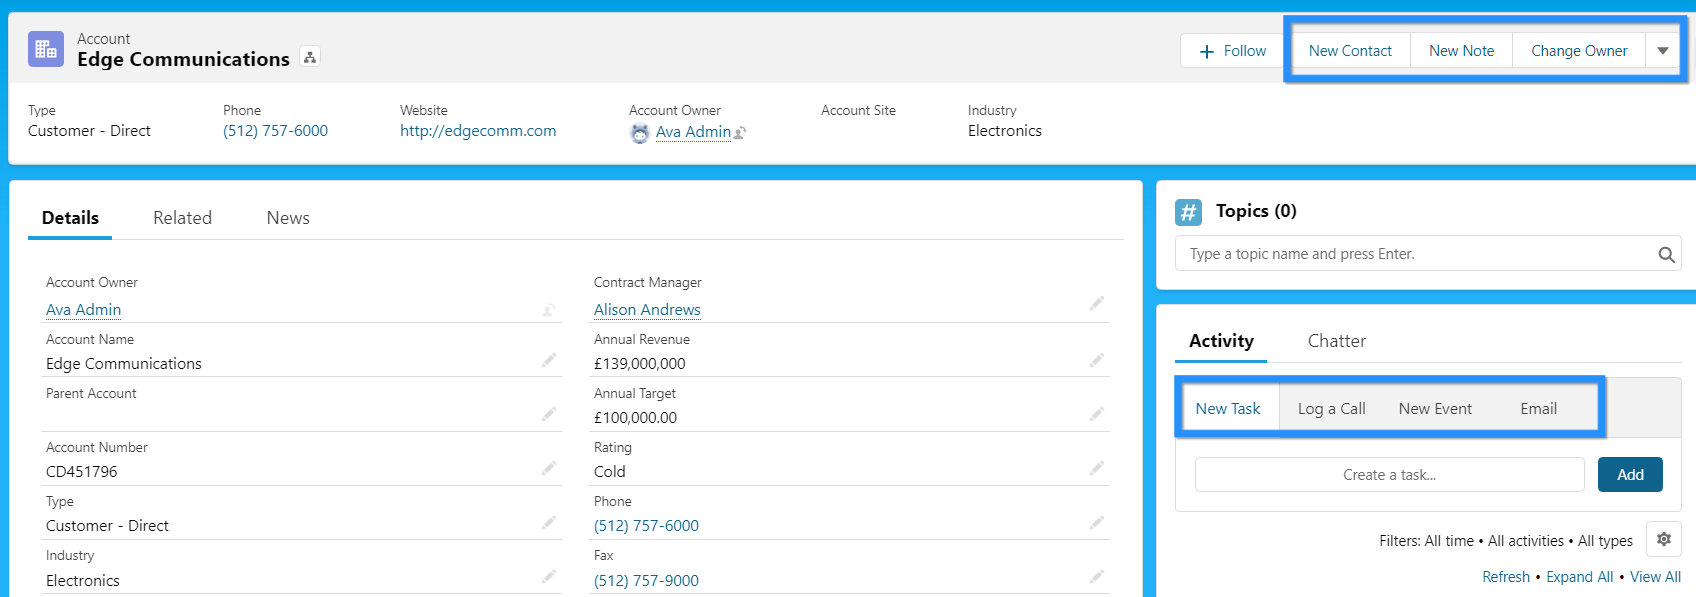
Assign a Salesforce Page Layout
You can have multiple page layouts for different profiles or record types. For example, on the Account object, you might have page layouts for Customers, Competitors and Partners.
You can edit the page layout assignment by clicking ‘Page Layout Assignment’.
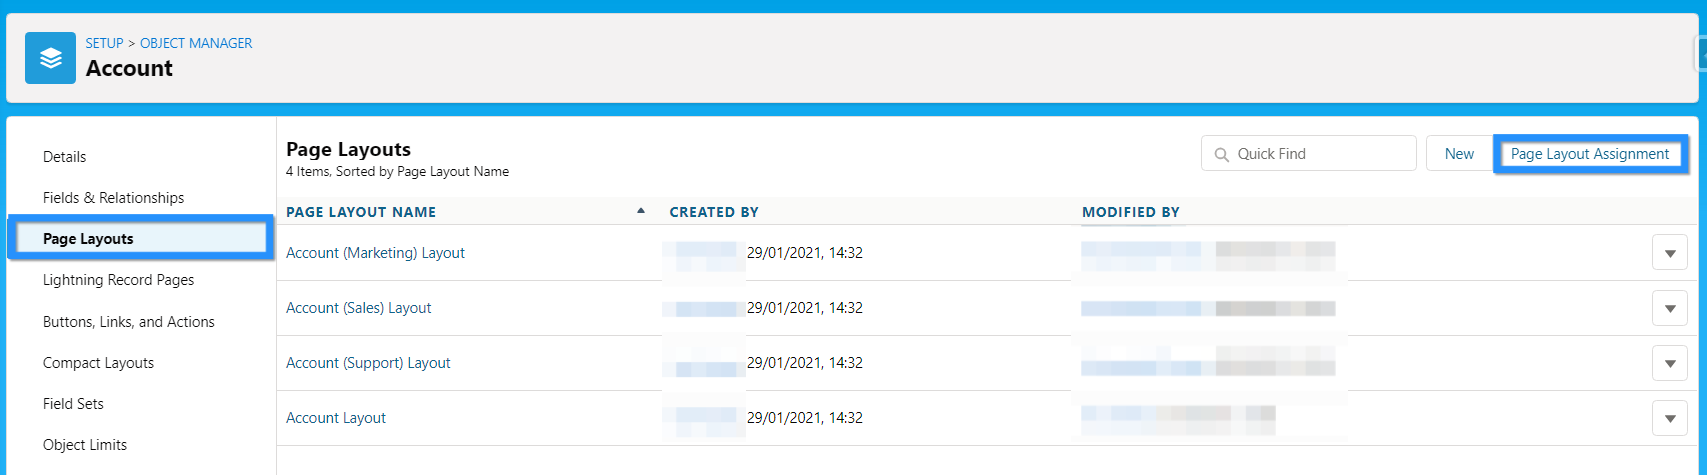
From here, click ‘Edit Assignment’. On the following screen, you can select which layout each profile will see.
What’s the difference between Page Layouts and Record Types?
As we’ve seen, Salesforce page layouts determine which fields are displayed to your users on a record. They allow you to add fields, sections, links, custom buttons, and a few other features.
Record types let you offer different business processes, picklist values, and page layouts to different users. For example, you might use record types when you have different types of Opportunities that require a different sales process and different picklist values.
What about Dynamic Forms?
Great question. We can take our Salesforce page layout design to the next level by using Dynamic Forms. However, this feature is not yet available for standard objects and the traditional page layout still controls things such as:
- Available related lists
- Order of related lists
- Columns on related lists
- Mobile layout


Comments: