

Hello readers! Today, we will learn how to set up a web crawler connection for your Data Cloud instance, including the necessary configuration on Data Cloud and the connection to your Agent.
Our use case is simple but powerful: customer-facing information (promotions, discounts, eligibility rules) is not only ever-changing but also requires accuracy and security. When your agent lacks the latest information, it won’t be able to answer business-critical questions effectively. Can you imagine a customer service agent giving your customers inaccurate information on Black Friday?
Let’s say you are an online retailer with multiple markets to operate in, and your store website features complex FAQ pages that are constantly updated by the marketing team. How will you bring this information to Salesforce accurately and securely? Alternative approaches to keeping AI agents up to date require either manual knowledge article updates (slow, error-prone, and requiring constant maintenance) or building custom integration code.
Technically, you can write an Apex class that calls an API of a Python service to scrape the website data, parse, chunk, and vectorize it, and finally pipe it back into Salesforce. This is not only insecure, but you should also consider Data residency compliance, audit logging, access control, and authentication, scheduling of this integration, and managing data exfiltration risk (since you are using third-party tools).
If you’re finding this frustrating, then you’re at the right place. Security is a growing concern in the ecosystem, and it is getting increasingly important for a good reason. We can solve this easily using Data Cloud and Agentforce without leaving the Einstein Trust Layer. Let’s get started. If you want to follow along, sign up for a developer edition here.
Prerequisites
- Setup → Einstein → Einstein Generative AI → Einstein Setup → Turn on Einstein.
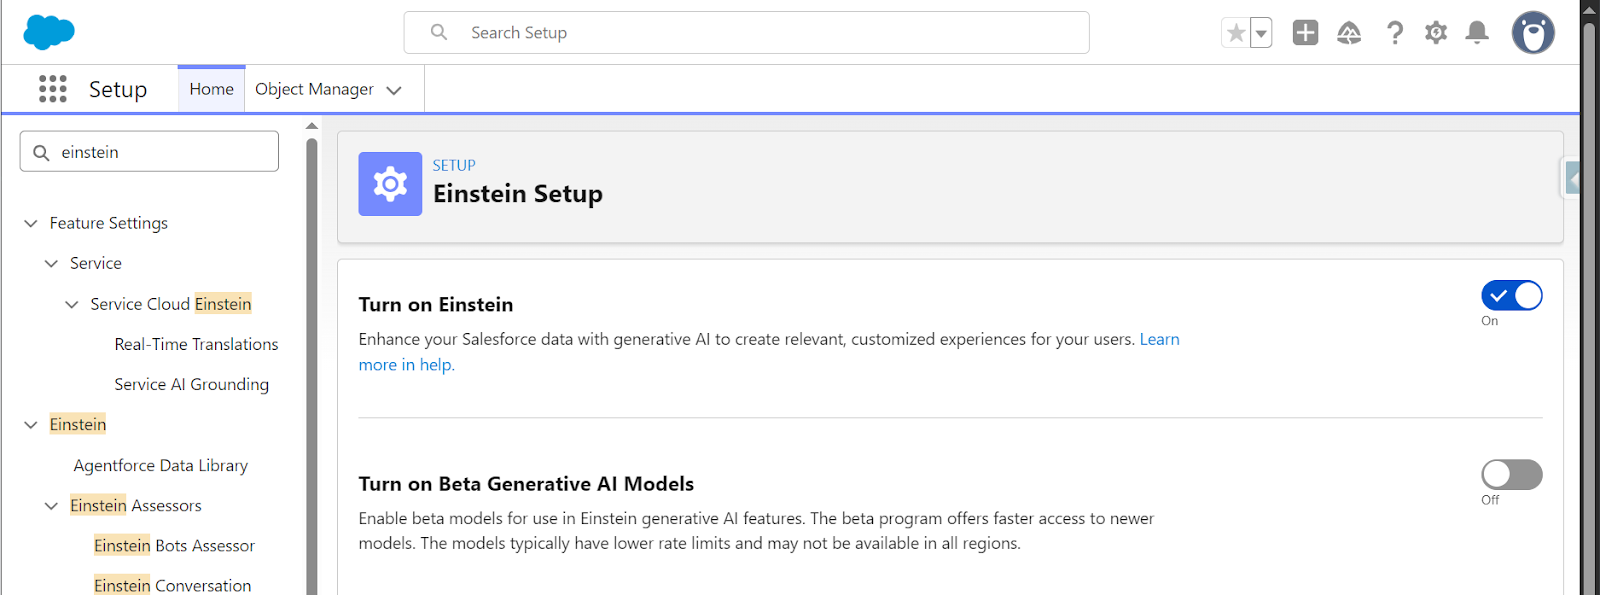
- Setup → Einstein → Einstein Generative AI → Agentforce Studio → Agentforce Agents → Agentforce On.

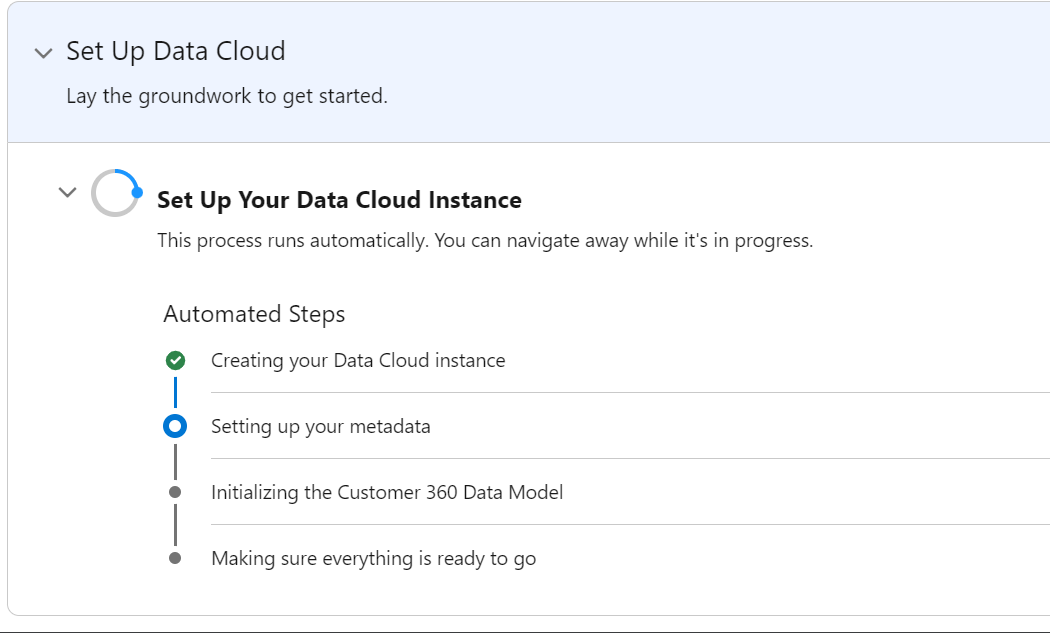
- Now wait for Data Cloud to be deployed.
Create a Web Crawler Connection
- Once Data Cloud is ready, navigate to the Data Cloud app and go to Setup or Data Cloud Setup directly.
- Other Connectors → New → Web Content (Crawler).
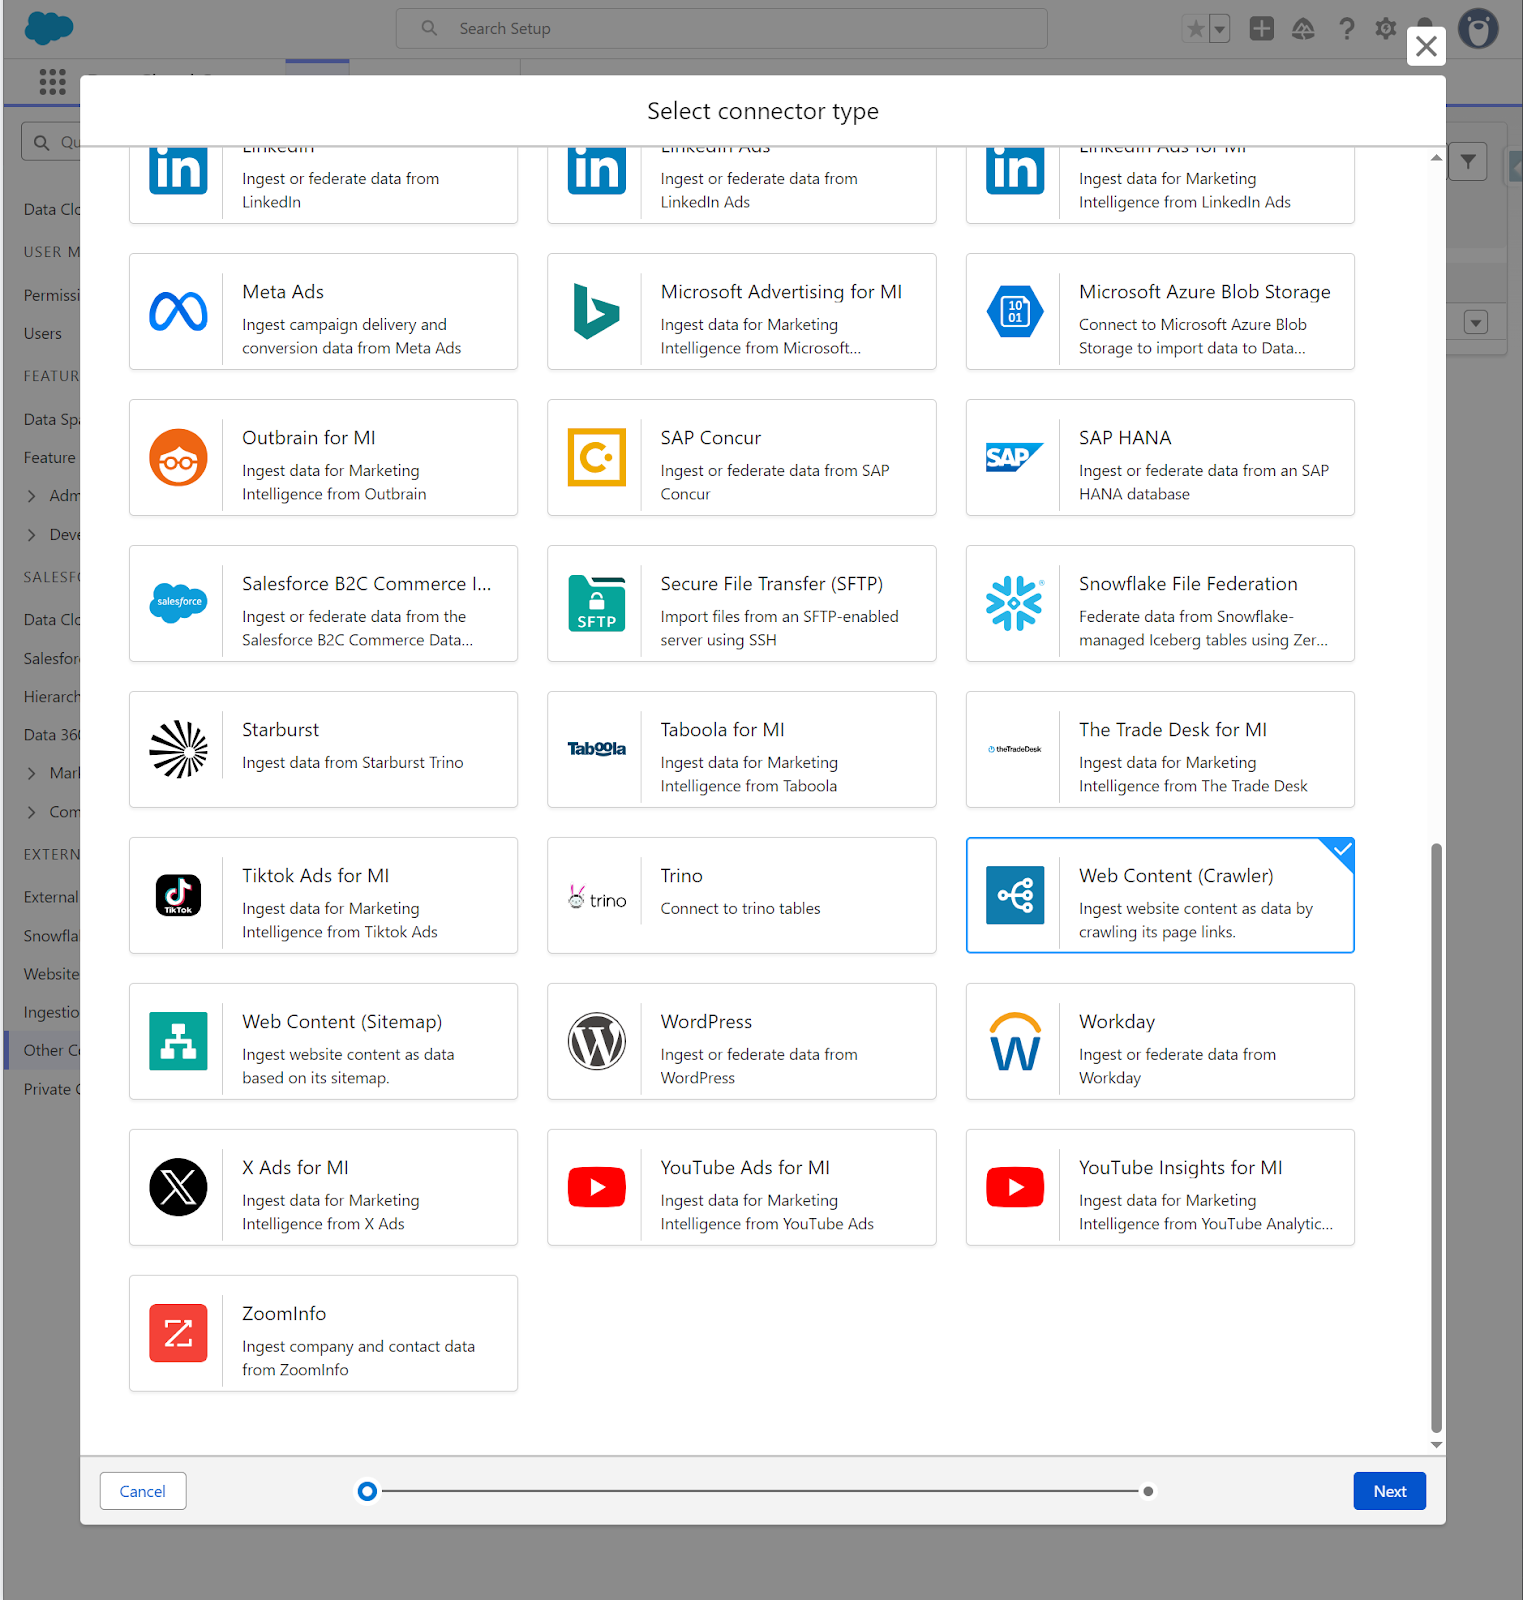
For our scenario, we are using the Salesforce Foundations page and its FAQ section. Our Agentforce service agent will get the data from this page and answer questions about this product.
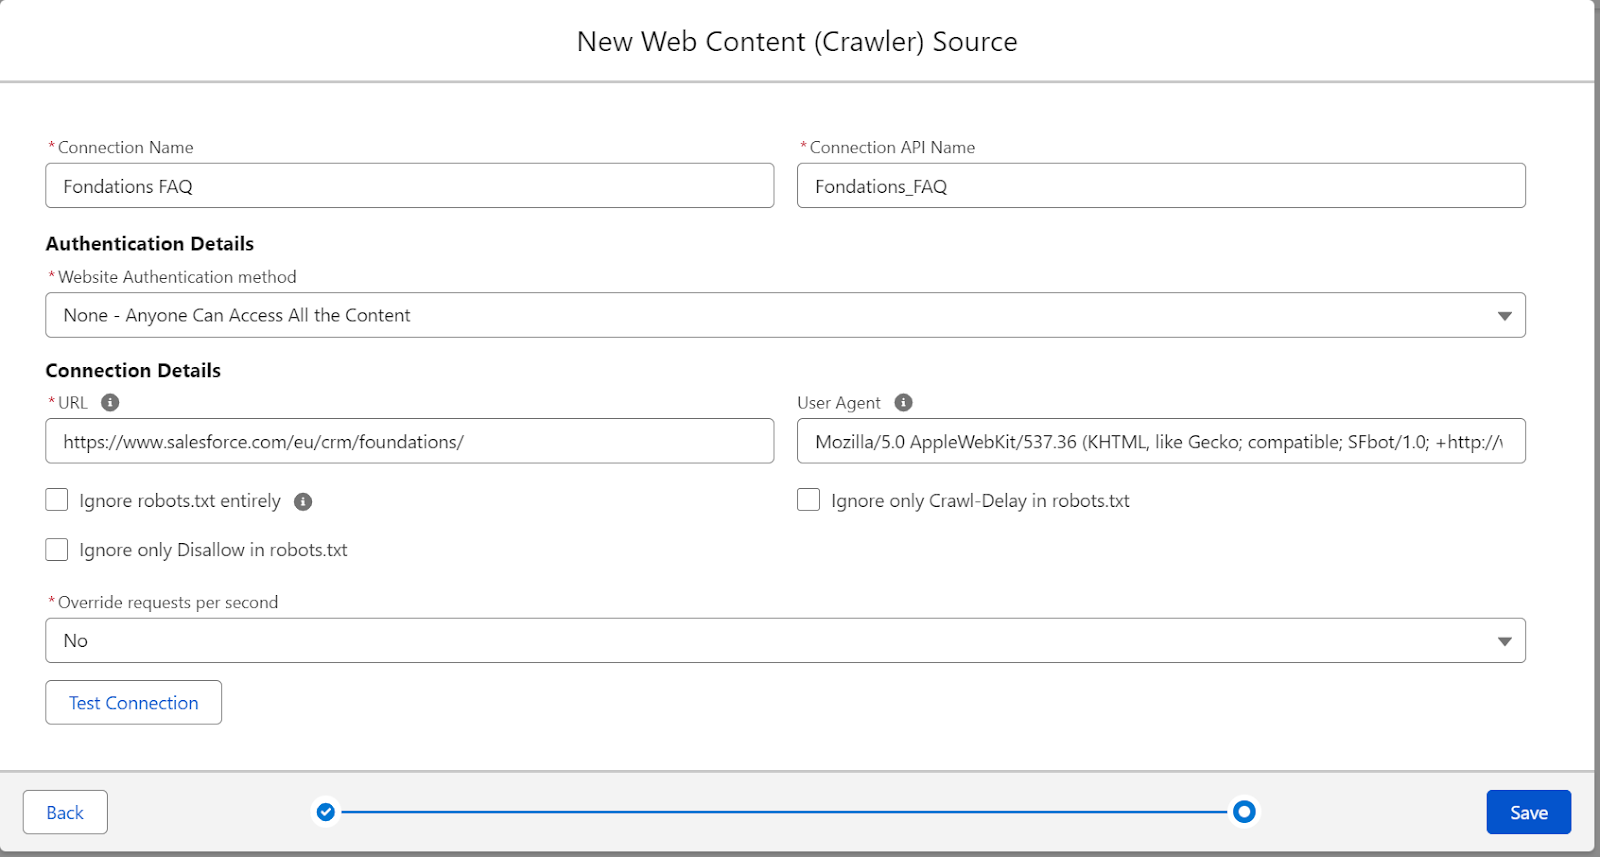
Configure the connection with these settings:
- Connection Information:
- Connection Name: Give it a descriptive name like “Foundations FAQ”.
- Connection API Name: Auto-populated based on your connection name.
- Authentication Details:
- Website Authentication method. Select “None – Anyone Can Access All the Content” for publicly accessible websites.
- Connection Details:
- URL: Enter the starting URL you want to crawl (e.g.
https://www.salesforce.com/eu/crm/foundations/). - User Agent: Leave the default Mozilla/5.0 string.
- URL: Enter the starting URL you want to crawl (e.g.
You only need to create this connection once. You can create multiple Data Lake Objects (DLOs) from the same web crawler connection without recreating it each time.
Create a Data Lake Object From the Web Crawler
Now you’ll create the DLO that actually ingests the content from your web crawler.
- In Data Cloud, go to Data Lake Objects and click New.
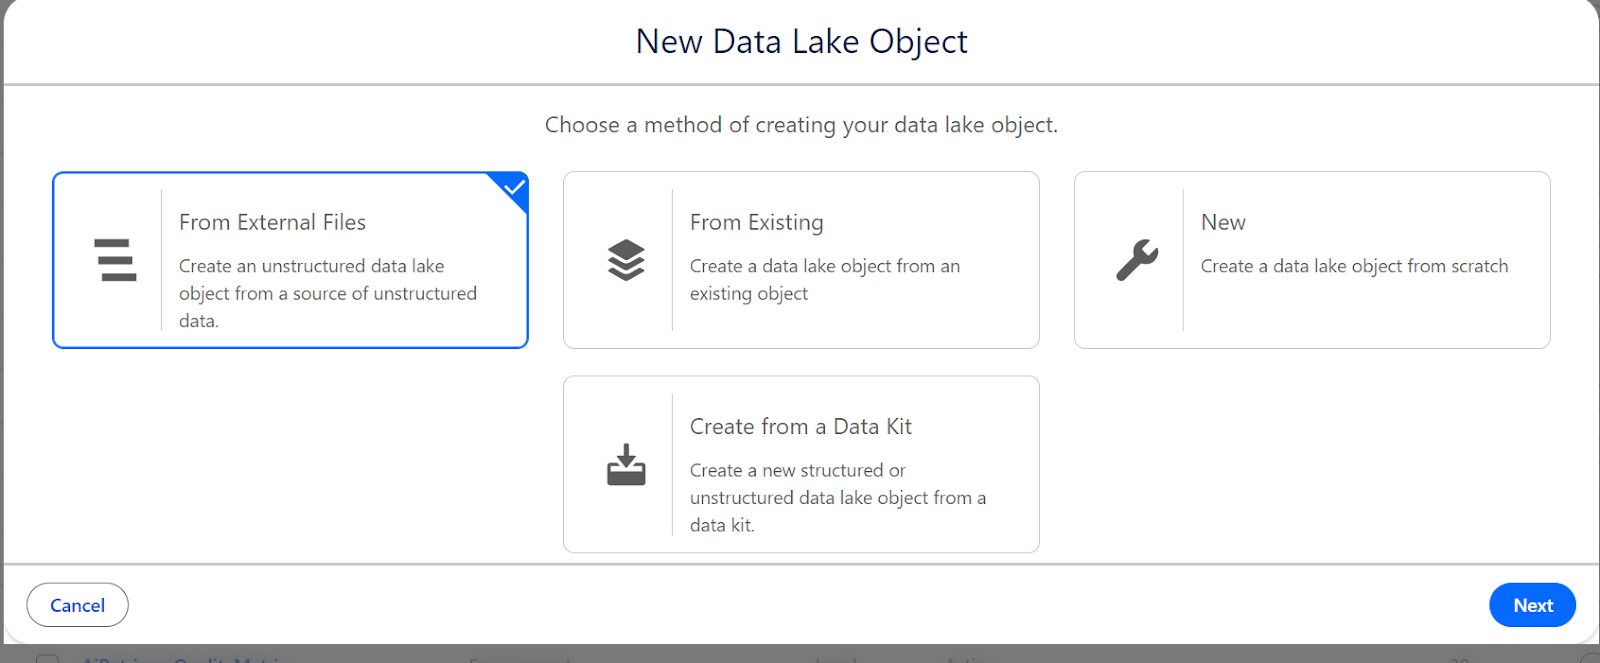
- Select From External Files, then choose Web Content (Crawler).
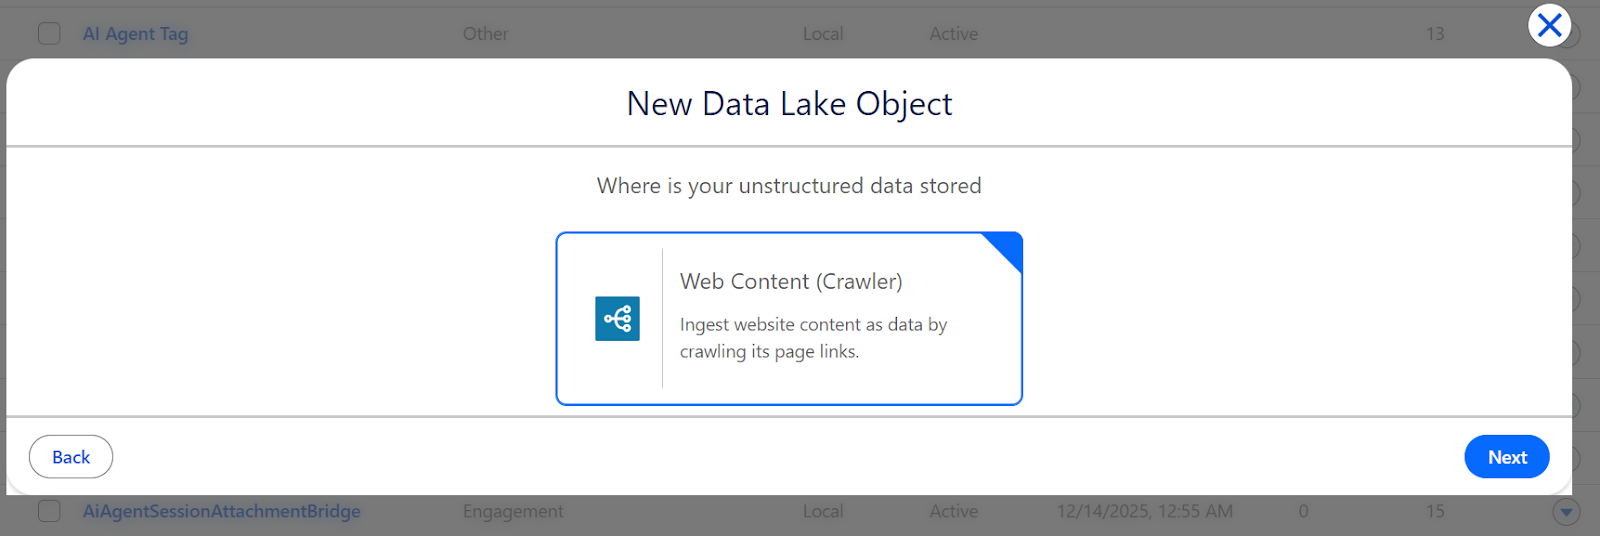
- On the next screen, you’ll configure what content to crawl.
- Connection Details:
- Select Connection: Choose the web crawler connection you just created.
- Configuration Details:
- Crawl Depth: This determines how many levels of links to follow for the crawler.
- 0 will only crawl the single URL you specified (recommended for our use case), 1 will crawl the starting URL plus all pages it links to, and 2+ will follow links recursively to the specified depth, up to 4.
- Connection Details:

For this example, set Crawl Depth to 0 to keep things simple and focused on a single page.
Included Page Element – this is critical for targeting specific content on the page, which is the FAQ section in our target page.
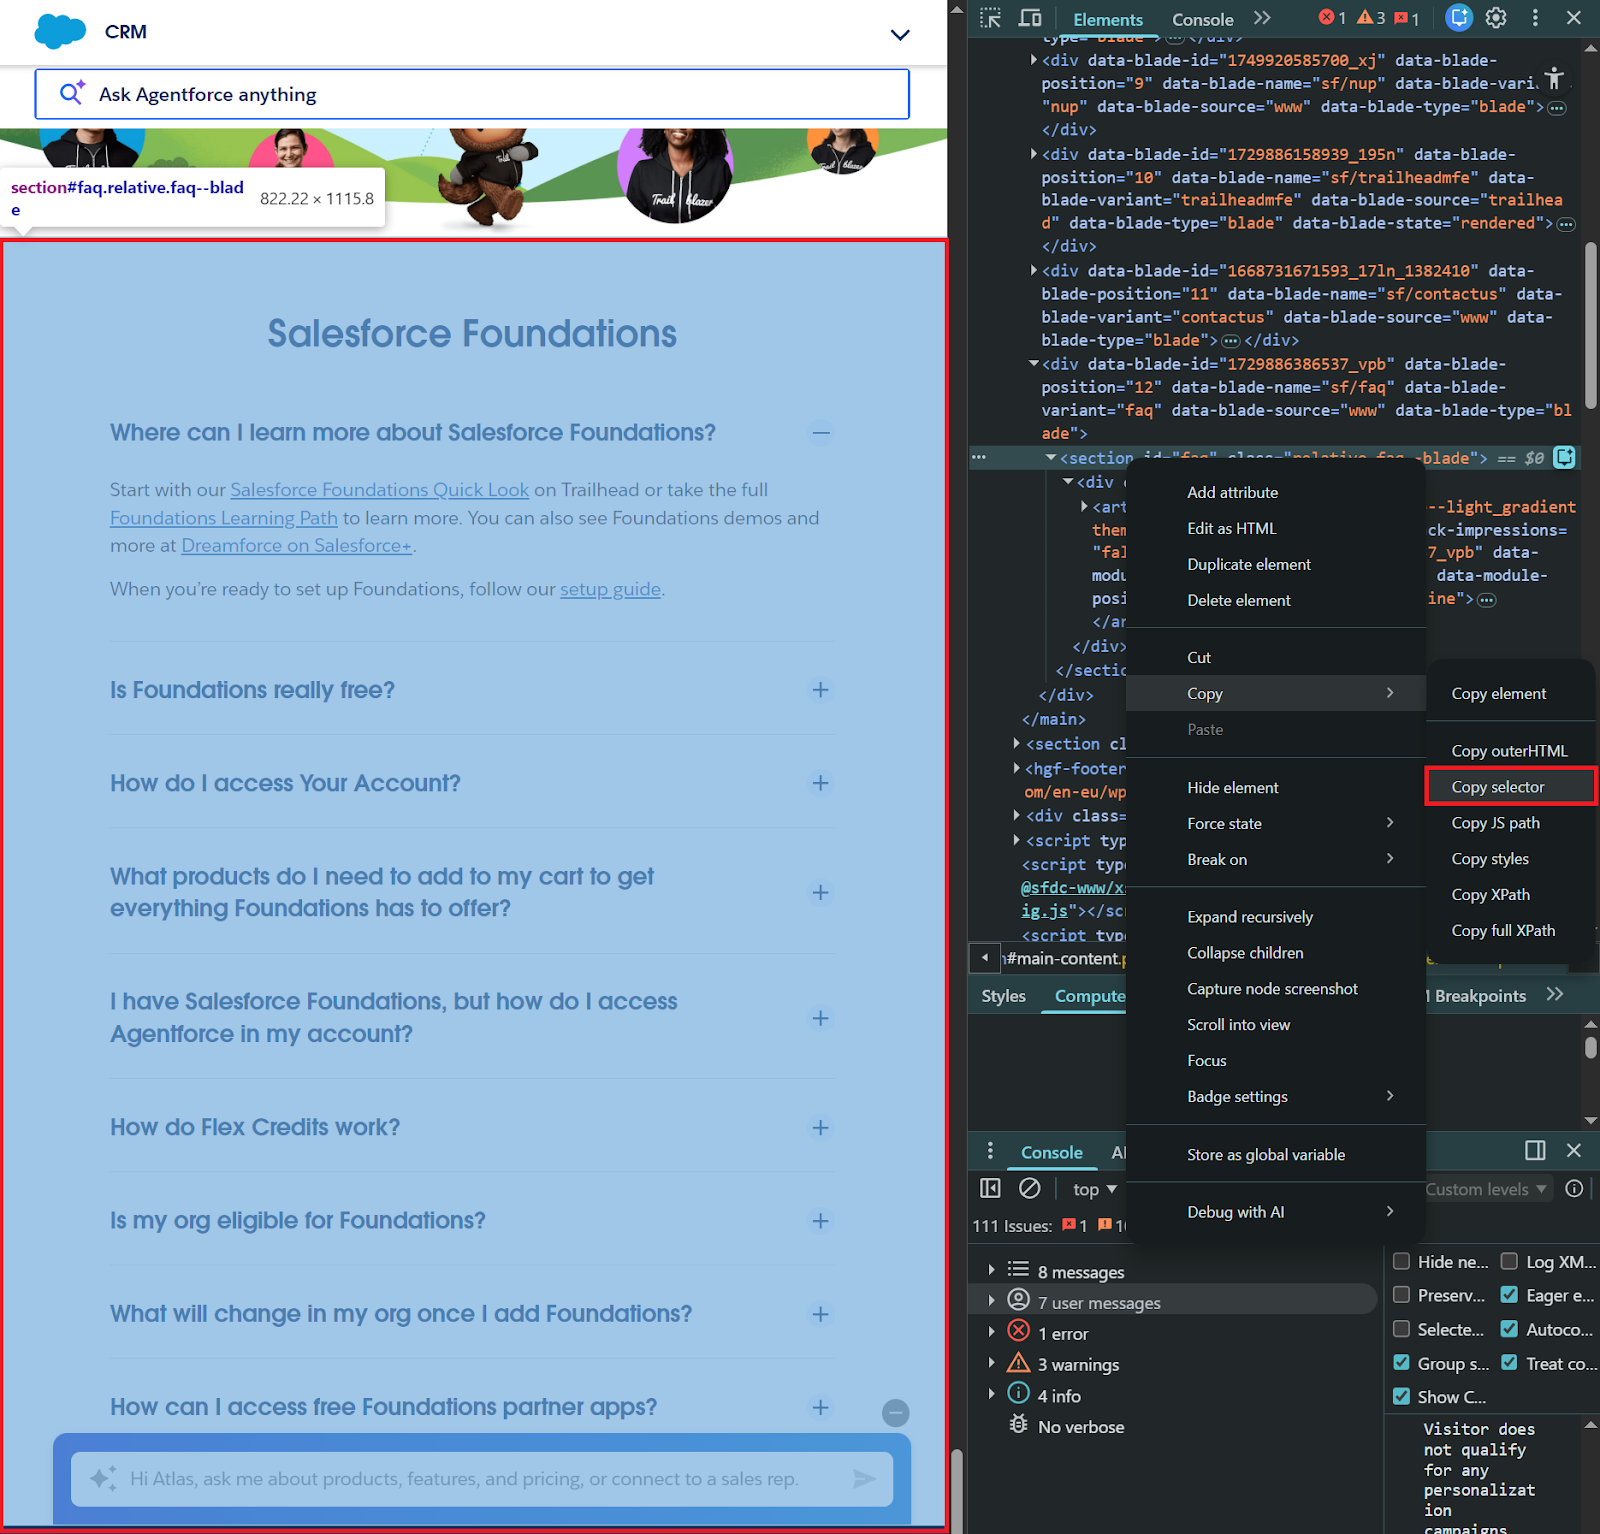
Data Cloud is usage-based, so instead of ingesting the entire webpage (including navigation, headers, and footers), you can specify a CSS selector to crawl only the content you need, such as #id-value or .class-name. To find the right selector, use your browser’s developer tools (F12):
- Open the target webpage in Chrome or Firefox.
- Right-click on the content section you want to crawl.
- Select Inspect to open Developer Tools.
- In the Elements panel, right-click the HTML element that contains your content.
- Choose Copy → Copy selector.
For the Salesforce Foundations FAQ page, the FAQ section uses the selector #faq. Enter this in the Included Page Element field.
Note: If Crawl Depth is 1 or more, you can also limit the pages ingested using a regular expression filter defined in the Included Web Pages field. In this case, this is not applicable given the Crawl Depth value of 0.
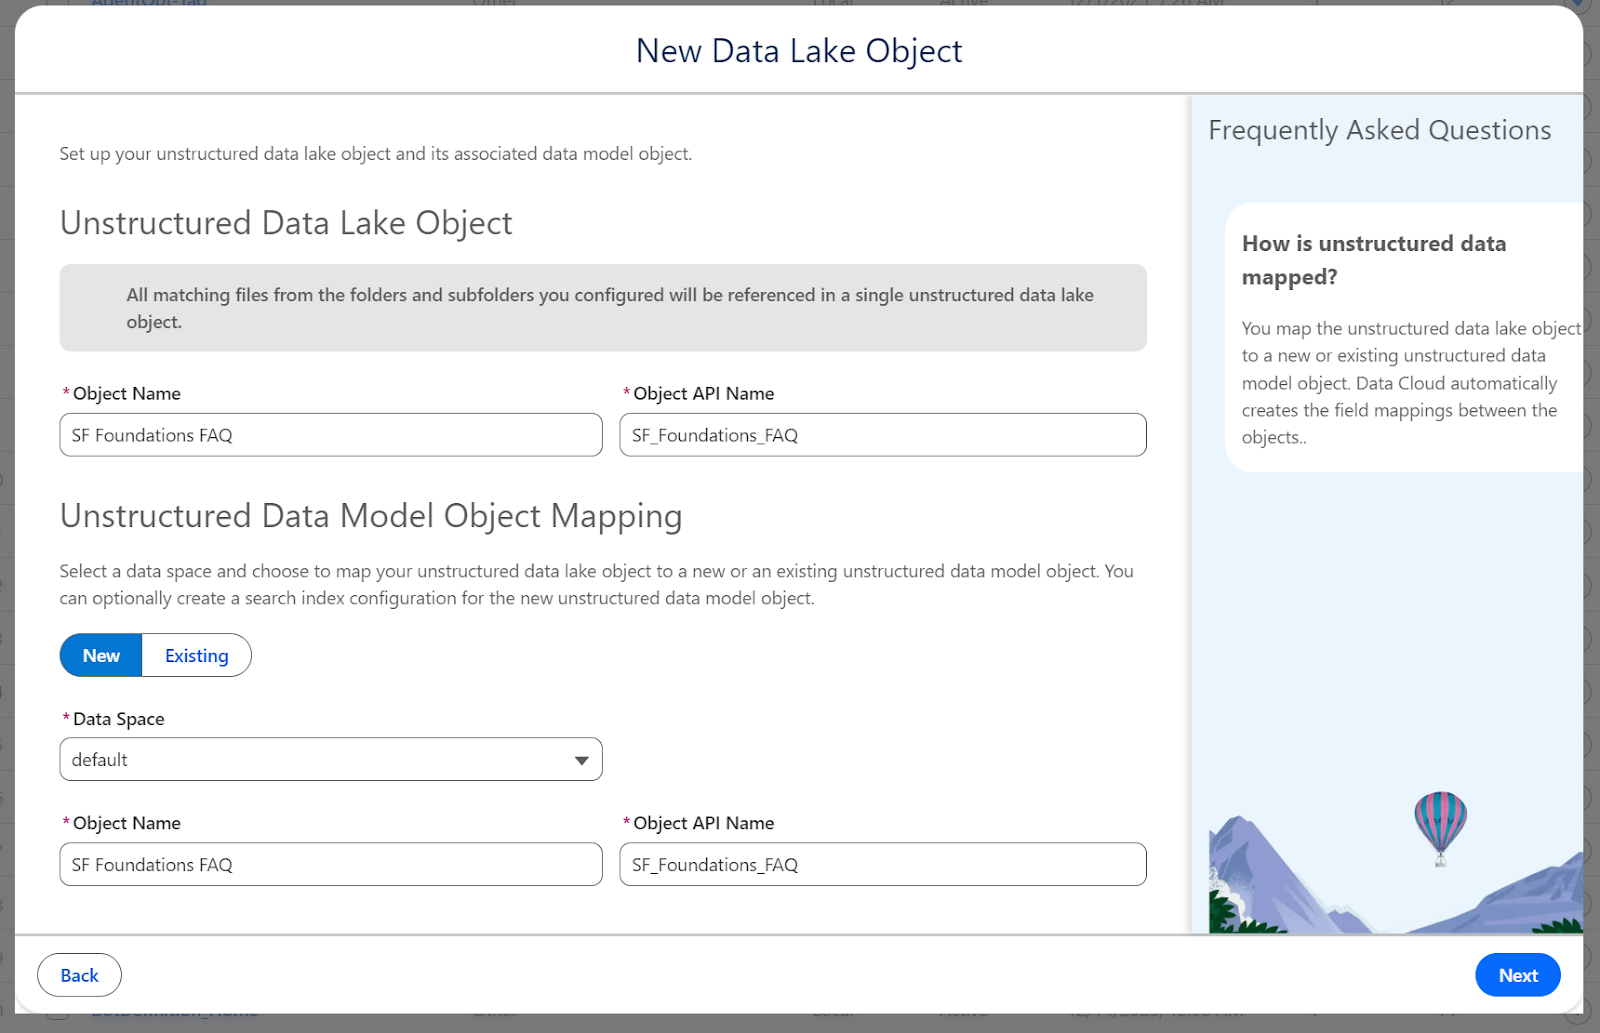
Configure Data Model Object Mapping
In the next screen, we will create the Unstructured Data Lake Object (UDLO) and also its corresponding Unstructured Data Model Object (UDMO).
Configure the Search Index
This is where your content gets chunked and vectorized for semantic search.
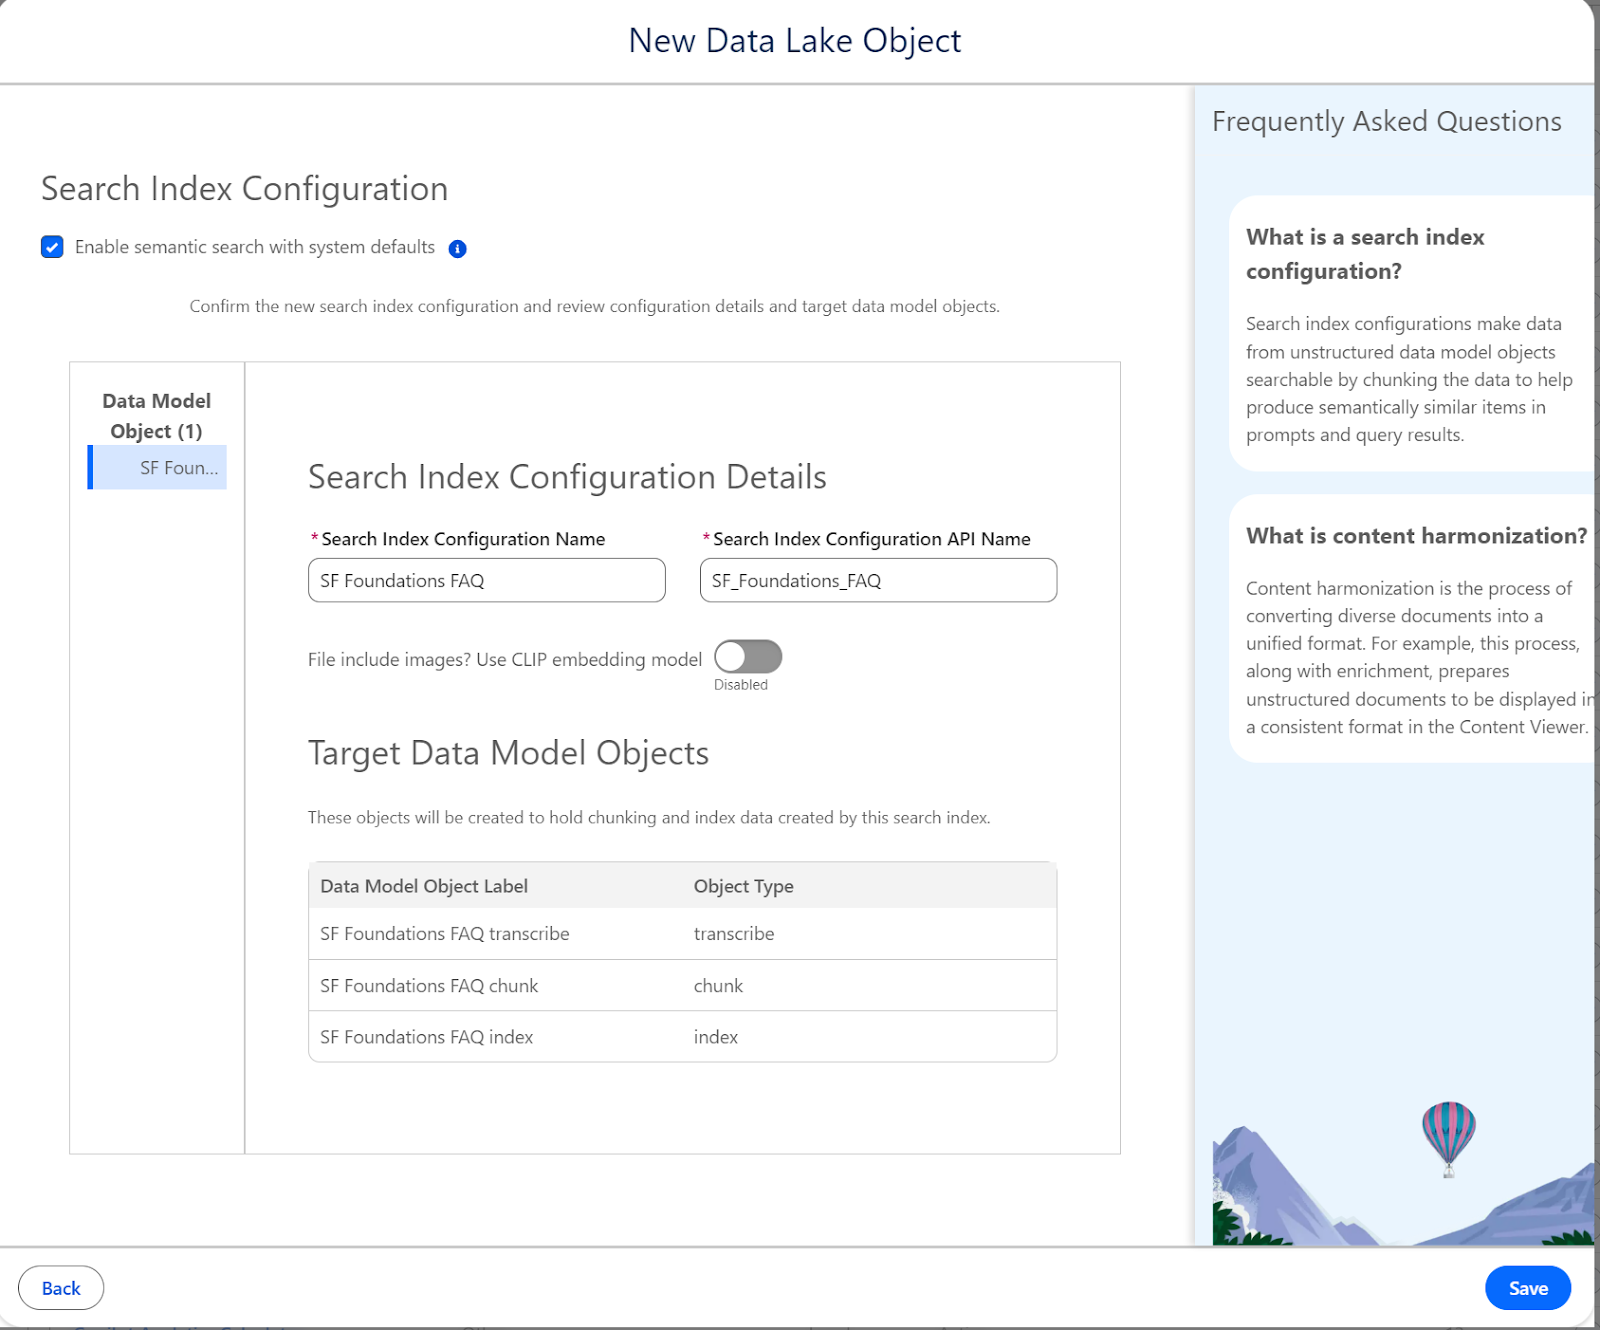
- Enable Search:
- Check Enable semantic search with system defaults. This automatically configures:
- Chunking strategy (512 tokens per chunk, ~400-500 words).
- Vector embeddings using the E5-Large-V2 model.
- Hybrid search (semantic + keyword matching).
- Check Enable semantic search with system defaults. This automatically configures:
- CLIP Embedding Model:
- Only enable this if your content contains images that need to be searchable.
- For text-based FAQs, the default model is optimal.
- Click Save to create everything. Data Cloud will now start the ingestion pipeline:
- Web crawler fetches content from your specified URL.
- Content is extracted based on your configuration (#faq selector in our case).
- Content is stored in the Data Lake Object.
- Content is chunked into smaller segments.
- Vector embeddings are generated for each chunk.
- Chunks and vectors are stored in the index.
For a simple single-page FAQ, this typically completes within a few minutes. More complex multi-page crawls may take longer.
Verify Your Data
Once ingestion completes, verify everything worked correctly.
Option 1: Data Explorer (Simple)
Navigate to Data Cloud → Data Explorer and search for your chunk object (e.g. “SF Foundations FAQ chunk”).
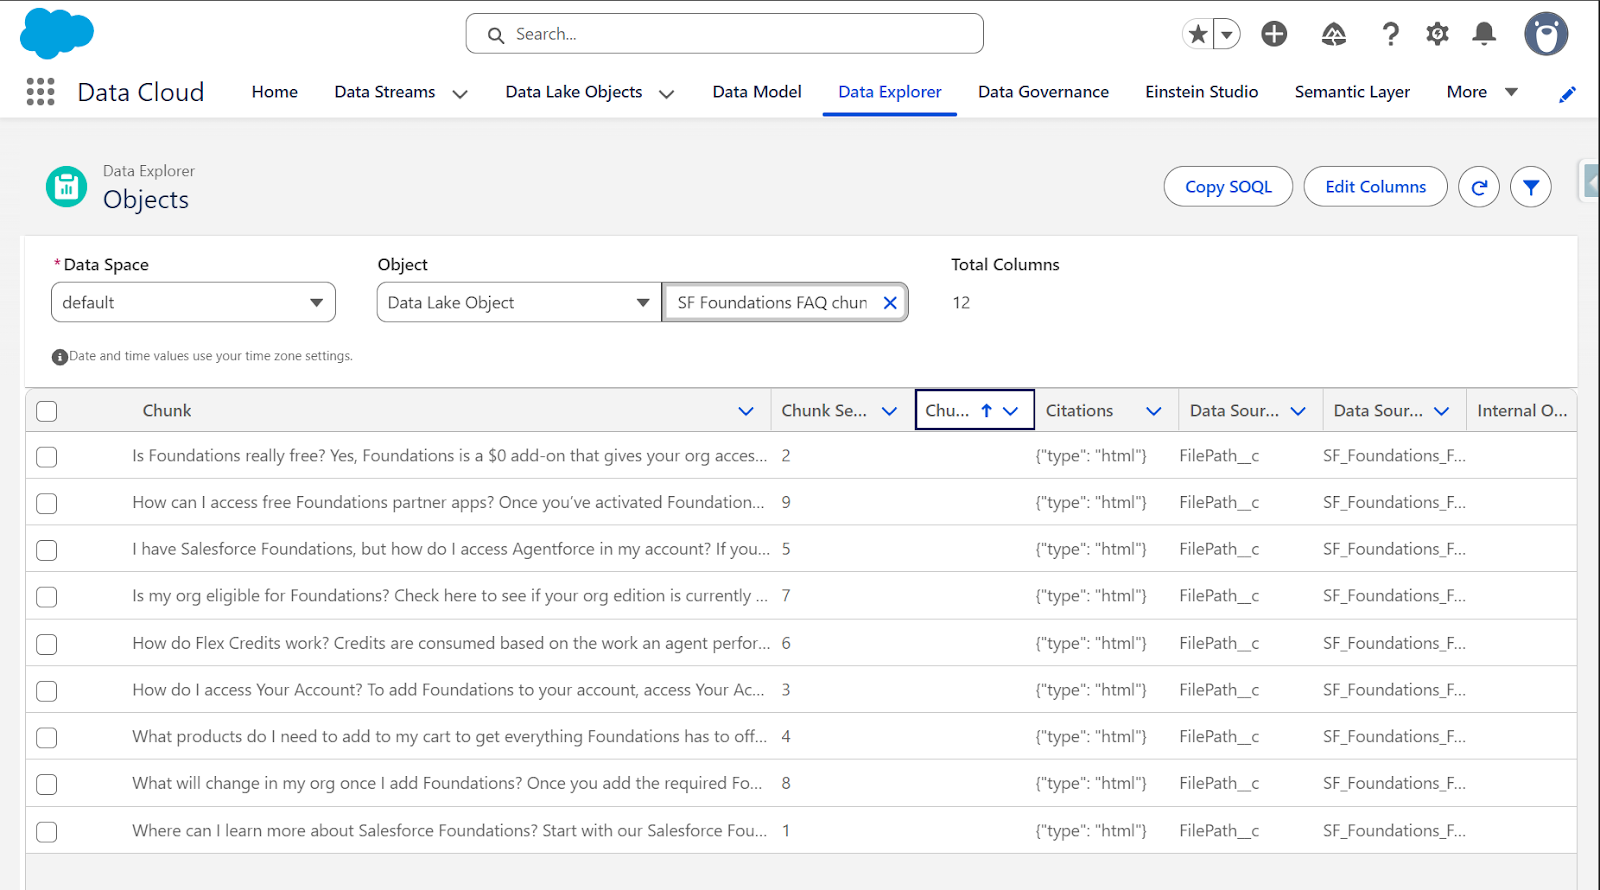
Click on the object to see its schema. Key fields include:
- Chunk__c: The actual text content from your webpage.
- ChunkSequenceNumber__c: Order of chunks in the document.
- DataSource__c: Which field the chunk came from.
- SourceRecordId__c: Link back to the original source record.
Option 2: Query Editor (Advanced)
For more detailed verification, use the Query Editor:
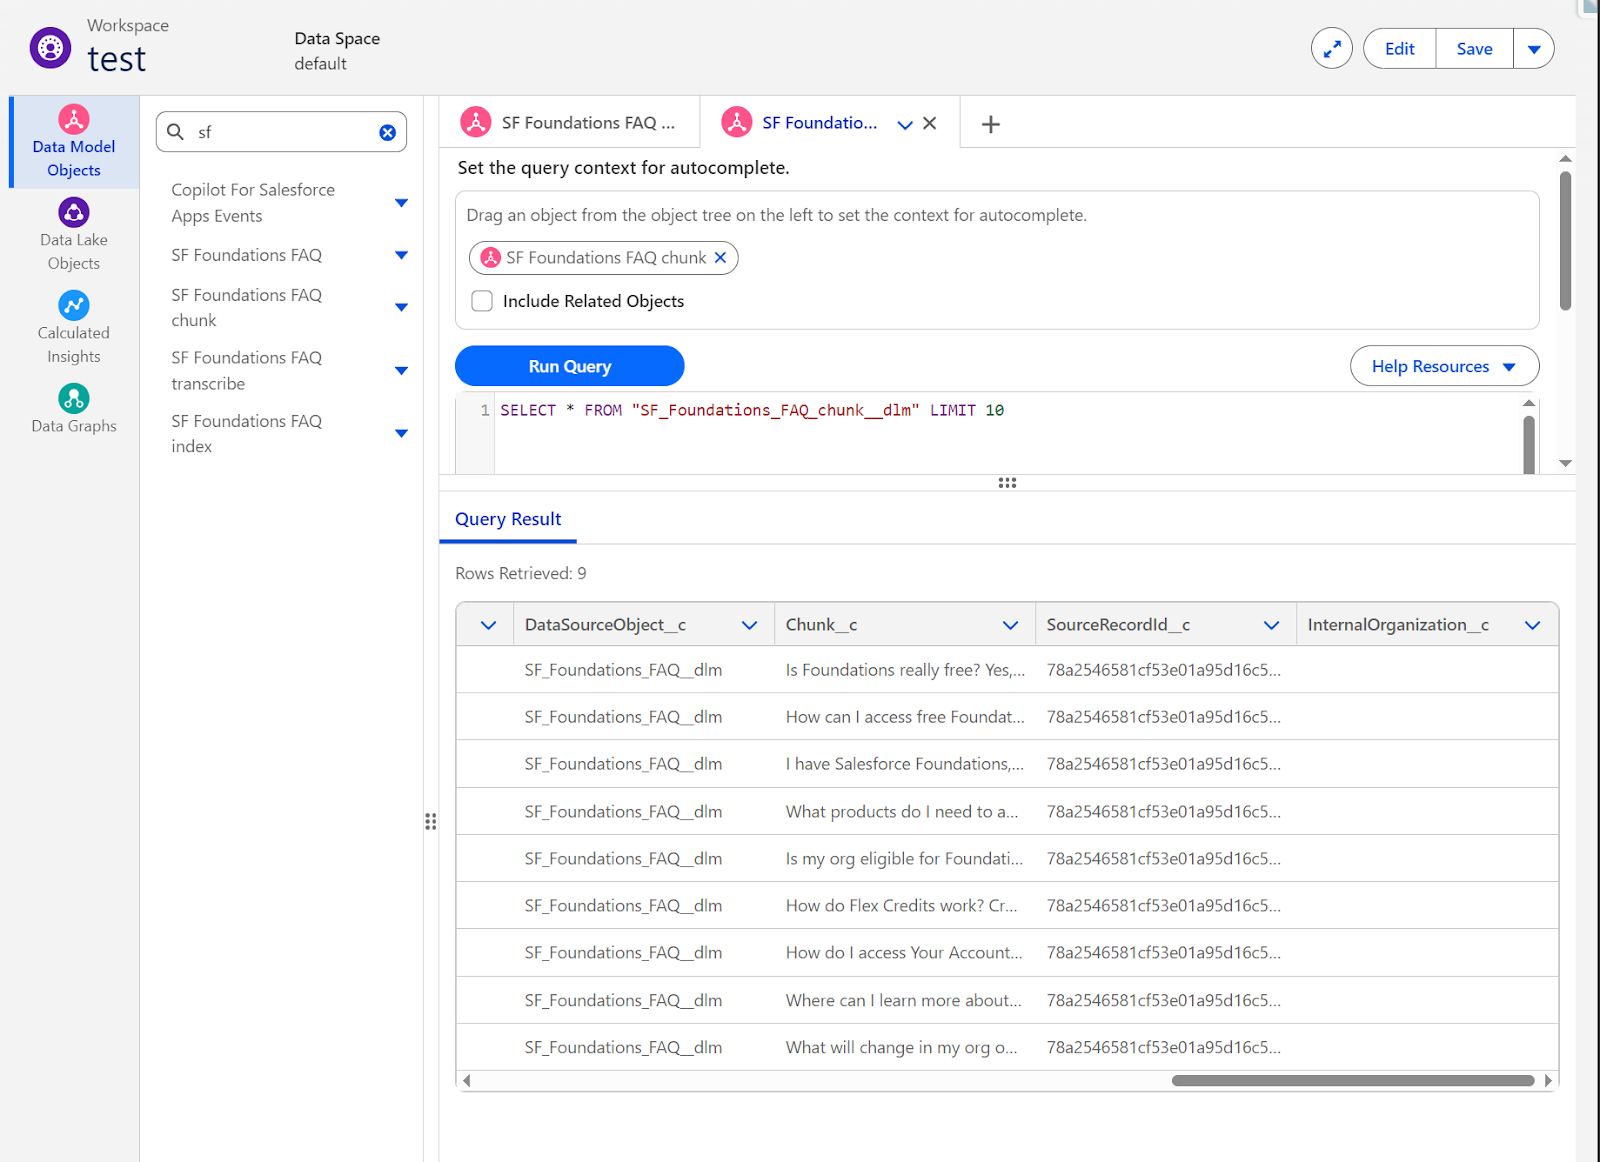
- Go to Data Cloud → Query Editor.
- Drag “SF Foundations FAQ chunk” from the Data Model Objects tree to set the query context.
- Run this query:
SELECT * FROM "SF_Foundations_FAQ_chunk__dlm" LIMIT 10.
You should see results with:
- DataSourceObject__c: “SF_Foundations_FAQ__dlm”.
- Chunk__c: Actual FAQ content like “Is Foundations really free? Yes,…”, “How can I access free Foundations…”, etc.
- SourceRecordId__c: Unique identifiers for each chunk.
If you see rows returned, your web crawler successfully ingested and chunked the content.
Final Thoughts
You’ve now completed the Data Cloud configuration:
- Created a web crawler connection to an external website.
- Configured a Data Lake Object to ingest specific content via CSS selectors.
- Mapped unstructured content to a Data Model Object.
- Built a search index with vector embeddings for semantic search.
- Verified your content is chunked and indexed.
Your external knowledge is now searchable in Data Cloud.
This is the first part of a two-part series including RAG with Data Cloud and an Agentforce Agent. Jump ahead to part two here.
