

Personalising your Pardot Prospect List is like reorganising your furniture – it’s important for you to see and access what you need in order to work efficiently.
When you have tens of thousands of prospects and multiple custom fields, data management can become laborious if you’re not aware of these little customisations. Need I say more?
Here are 4 ways to get the Prospect records you need to hand – and some bonus tips on how to further maximise it.
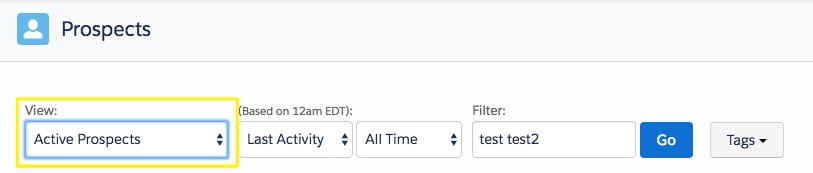
No. 1: Dropdown Prospect Filter
This is the first dropdown filter on the Prospect List, top left of the table.
Using this, you can show any of the following:
– All Prospects
– Active Prospects / Never Active Prospects
– Active Prospects for Review / Reviewed Prospects
– Assigned Prospects / Unassigned Prospects
– Mailable Prospects / Unmailable Prospects / Unsubscribed Prospects
– My Prospects / My Starred Prospects
– Prospects not in Salesforce
It’s something I rely on it a lot for data management and daily monitoring, for example, which of my high-scoring prospects are not in Salesforce? Which are recently unmailable? (more on this in the bonus section). It’s a good springboard to go into further investigation.
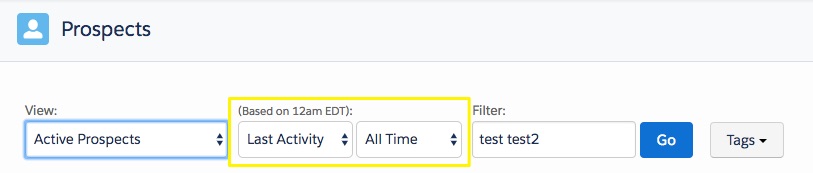
No. 2: Time-based Prospect Filter
Here you can filter for specific milestones/activity in a period of time. Pick from:
– Last Activity
– Created
– Updated
– First Assigned
Then the ready-to-go time periods (eg. Today, Last Month), or select ‘Custom’, where you can pick exact dates to hone in your search.
No. 3: Switch out Columns
To switch out the standard Prospect List columns, hover over the filter icon by any of the table headers. Just use the checkboxes to add/remove.

No. 4: Add Custom Fields
Using the same step in No. 3, there is also a ‘Custom Fields’ option. Clicking on this takes you to the screen as shown below. 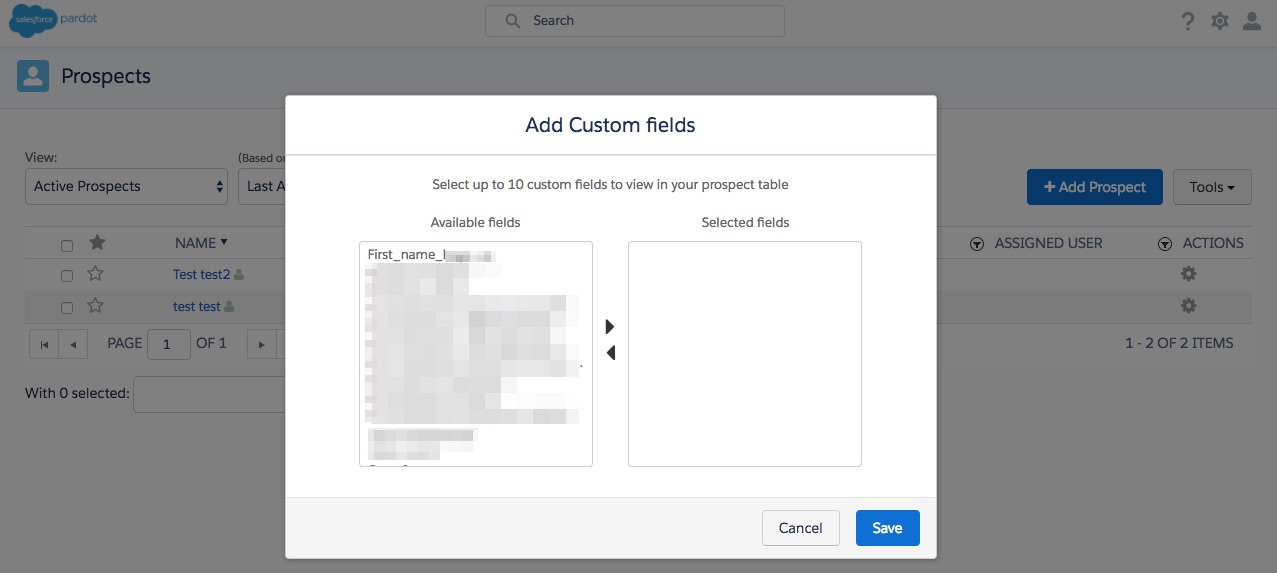
The Bonus: Maximising its usefulness.
Sorting in Ascending/Descending Order
The sort feature can answer many questions you have able your Prospect Engagement and Data, like the questions I posed in Point 1, for example:
Which of my high-scoring prospects are not in Salesforce?
I can get this quickly by filtering by ‘Prospects not in Salesforce’ from the dropdown menu, then clicking on the ‘Score’ header, to order Prospects in descending score order.
By combining these two tools, you can get more intimate with your data.
 Exporting what you need.
You can export what you see to csv., for when you need to further manipulate data.
In the ‘Tools’ dropdown menu, you will see ‘Export as Custom csv.’, which will produce the file of what you see in your view.
Spread the Word!
This post contains useful information especially for people who aren’t heavy Pardot users. Seeing tons of data can be intimidating without knowing how to sift through.
I see this important for Sales users above all because the Prospect List filters mirror the Salesforce List Views that they use for objects such as Lead, Contacts, and Opportunities.
