

Achieving the Customer 360 dream that Salesforce has been selling for years is no easy feat, especially in a world where incomprehensible amounts of data are being generated every single day. Tools like Data 360 (formerly Data Cloud) empower businesses to connect and make sense of their data without necessarily having to move it around.
One of the best ways to see if Data 360 is going to add value to your business is to get hands-on and learn what it is and what it does. In this example, we will be creating a simple Amazon S3 bucket and connecting it to Data 360 for use within Salesforce.
The Four Steps for Connecting Amazon S3 to Data 360
Before we begin the actual building, it’s important to understand the steps that are involved and why they are involved. By the way – if you don’t yet have access to an Amazon S3 environment, don’t worry. This will be touched on in the Prerequisites section later in this article.
The Handshake (AWS IAM and Data 360 Connector)
Security and trust are key when connecting business data across systems. The very first thing that we need to do is set up a metaphorical handshake between Amazon S3 and Data 360.
Just like how there are two hands involved in a handshake, there are two sides to setting up the connection between Amazon S3 and Salesforce Data 360. Firstly, you need to create an IAM role in AWS that gives Data 360 explicit access to read files in a specific bucket. Then, you’ll configure a connector inside Data 360 to establish a secure connection.
The Data Stream (the Data Processing Job)
Once you’ve configured the connection between S3 and Data 360, you can then set up the job that points to what data you want to pull and how often you want to pull it.
This scheduled job is known as the Data Stream. You’ll tell it specifically which file or folder you want to pull from, and set a schedule as to how often you want to pull new records.
The Data Lake Object (the Raw Data)
For your Data Stream’s scheduled job to run, it needs somewhere to surface the data. This is where the Data Lake Object (also known as DLO) comes in. The DLO represents the raw data exactly as it is in S3, represented within Data 360. Nothing fancy or special happens here.
The Data Model Object (Ready-to-Use Data for Agents and Humans)
Raw data comes in many different forms, and isn’t super helpful on its own. To make your data usable by humans and agents alike, you need to map that raw data from the Data Lake Object to a Data Model Object (DMO).
The DMO translates your raw data into a standardized format that Salesforce’s Customer 360 can use. Once it’s set up, it can begin to be used.
Prerequisites
If you’re looking to follow along and set up a simple Amazon S3 to Data 360 connection, you’ll need the following prerequisites.
Amazon AWS Account (Free)
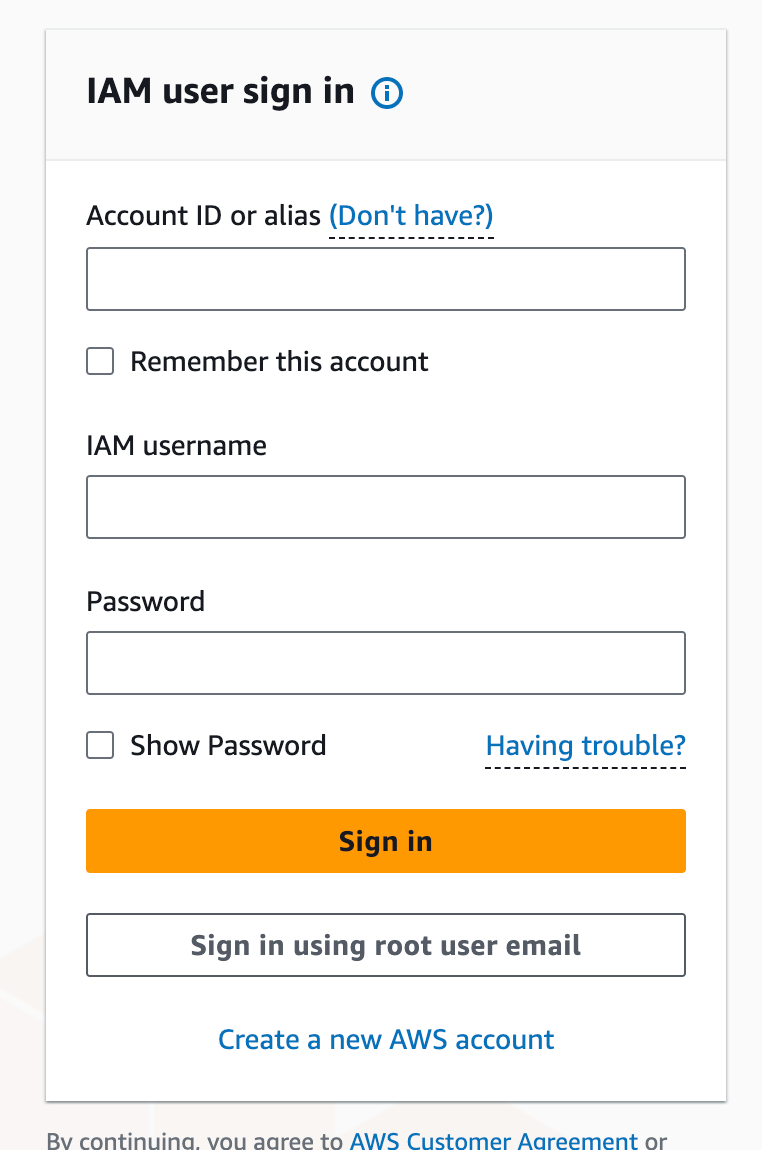
To connect to Amazon, you’ll first need an Amazon AWS account. You can sign up for an AWS account at no cost here.
Note: when you go to log in to your demo AWS account, you’ll need to click the Sign in using root user email button on the login page.
Salesforce Developer Org (Free)
You’ll need somewhere to set up Data 360 that isn’t a Production environment. You may have access to a Sandbox that has Data 360, but if not, the easiest way to get access is through the new Developer Edition that Salesforce offers. This includes Data 360 and Agentforce, as well as core CRM functionality.
Sample Data for Amazon S3
Finally, we’ll need some data that we can surface from S3 into Data 360. Take this table and use it to create a CSV file called Loyalty_Data.csv.
| CustomerID | LoyaltyTier | PointsBalance | ChurnRiskScore | |
| C-552 | sarah.pro@example.com | Gold | 4500 | 0.82 |
| C-109 | bob.smith@example.com | Silver | 1200 | 0.15 |
| C-214 | m.chen@provider.net | Platinum | 8200 | 0.05 |
| C-337 | j_doe@webmail.com | Bronze | 450 | 0.61 |
| C-901 | elara.v@services.org | Gold | 3100 | 0.22 |
| C-442 | sam.rivera@inbox.com | Silver | 1850 | 0.45 |
| C-612 | t_walker@domain.com | Platinum | 12400 | 0.02 |
| C-115 | k.lee@techcorp.com | Bronze | 120 | 0.89 |
| C-708 | oliver.p@mail.net | Gold | 2900 | 0.33 |
| C-229 | h_garcia@fastmail.com | Silver | 2100 | 0.12 |
| C-883 | nancy.w@classic.com | Platinum | 9800 | 0.08 |
| C-551 | jason.b@start.com | Bronze | 890 | 0.54 |
| C-410 | r_mill@global.net | Gold | 5200 | 0.19 |
| C-994 | d.kim@nexus.org | Silver | 1650 | 0.38 |
| C-102 | sara.jones@web.com | Platinum | 15000 | 0.01 |
Once you save the file, you’re ready to start working through the tutorial!
Walkthrough: Connecting Data 360 to Amazon S3
Let’s dive into the walkthrough where we’ll create a new S3 bucket, connect it to Data 360, and ingest it for use by humans and agents.
Note: Setting up robust security in S3 is not the primary focus of this article; we are just getting started with the basics. Please ensure you do not upload any sensitive information to this instance, or that you set up your security properly if you do.
Step 1: Set Up S3 Buckets and Upload CSV
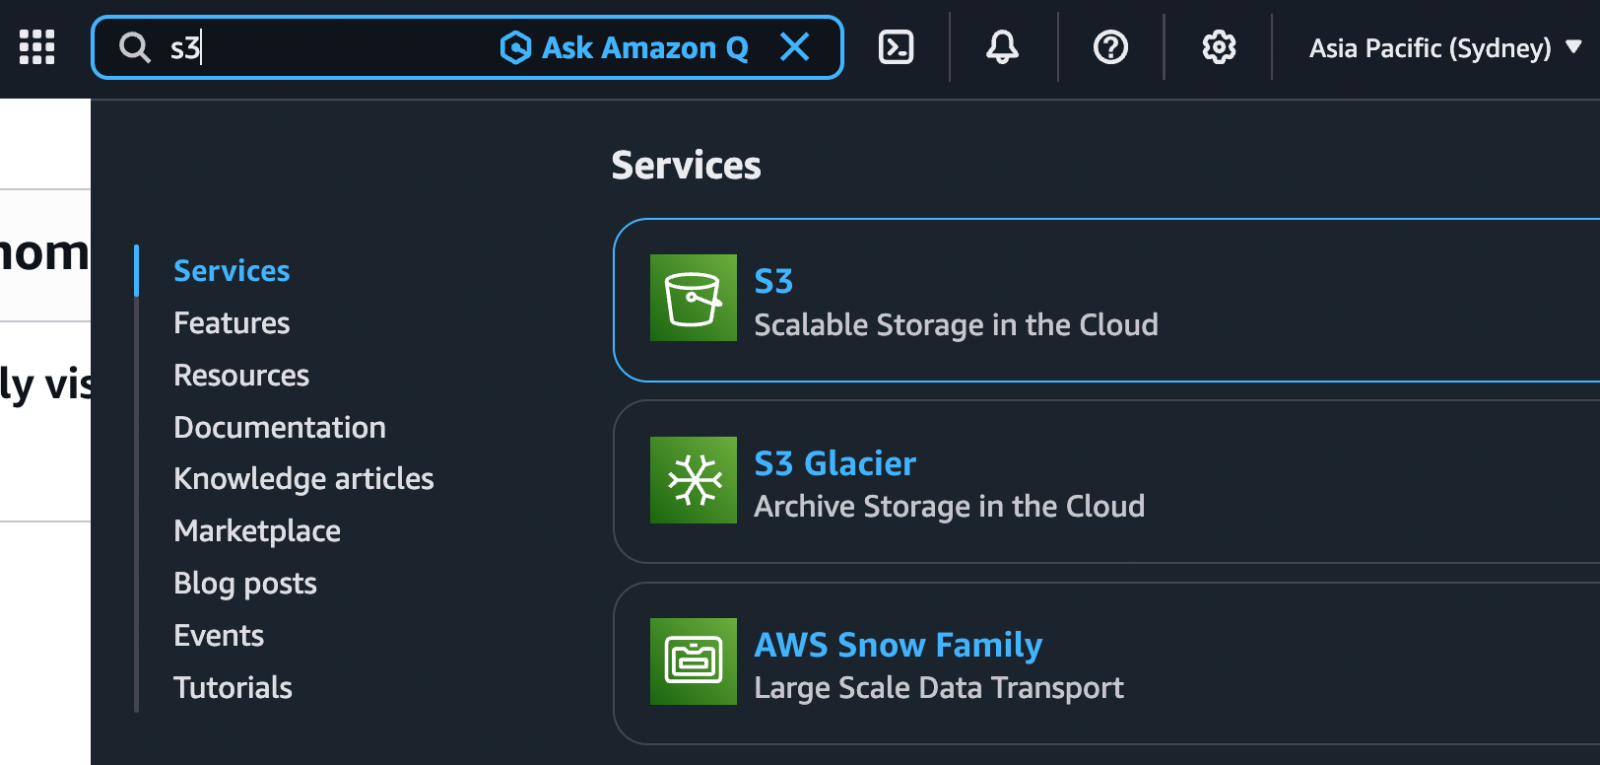
After creating your Amazon AWS account, you’ll need to go and create an S3 bucket. To do this, use the search bar to find and open S3.
In the General Purpose Buckets section, click Create bucket.

Give your bucket a name (In this case, I’ll call mine salesforceben-s3-demo). Leave all the rest as it is and click Create bucket at the bottom of the page.

With the bucket created, it’s time to upload a file. This is where you will upload your Loyalty Data CSV that you created in the prerequisite section of this article. Once dragged in, click Upload to finish.
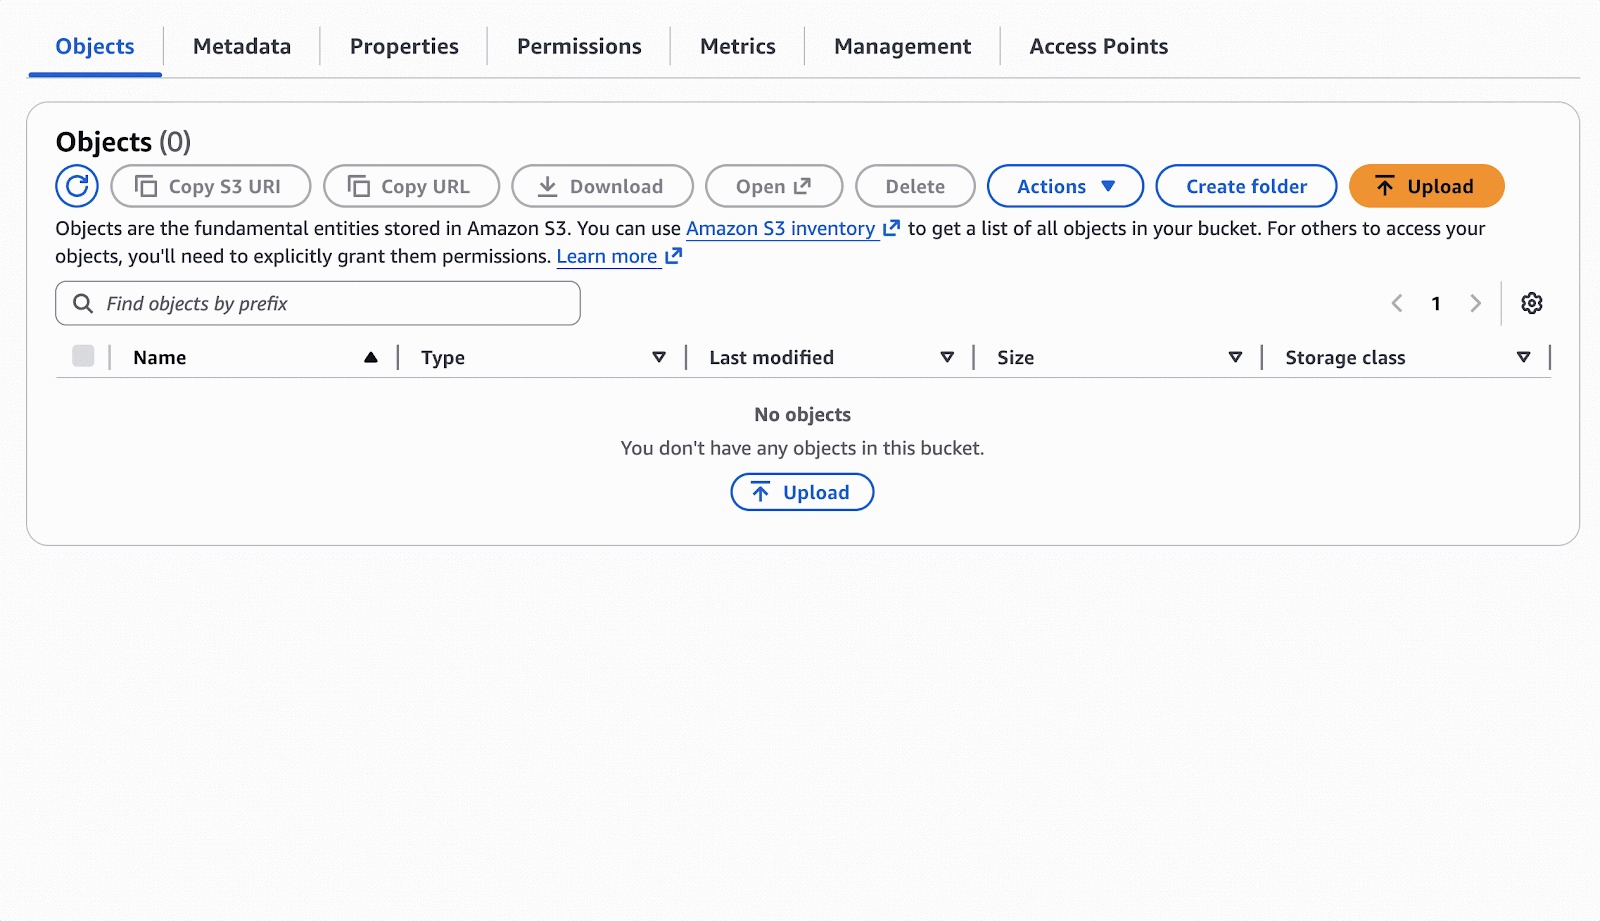
When the file has been uploaded successfully, you’re ready to move on to setting up the first “hand” of the handshake – the AWS IAM!
Step 2: Set Up Amazon IAM User and Role
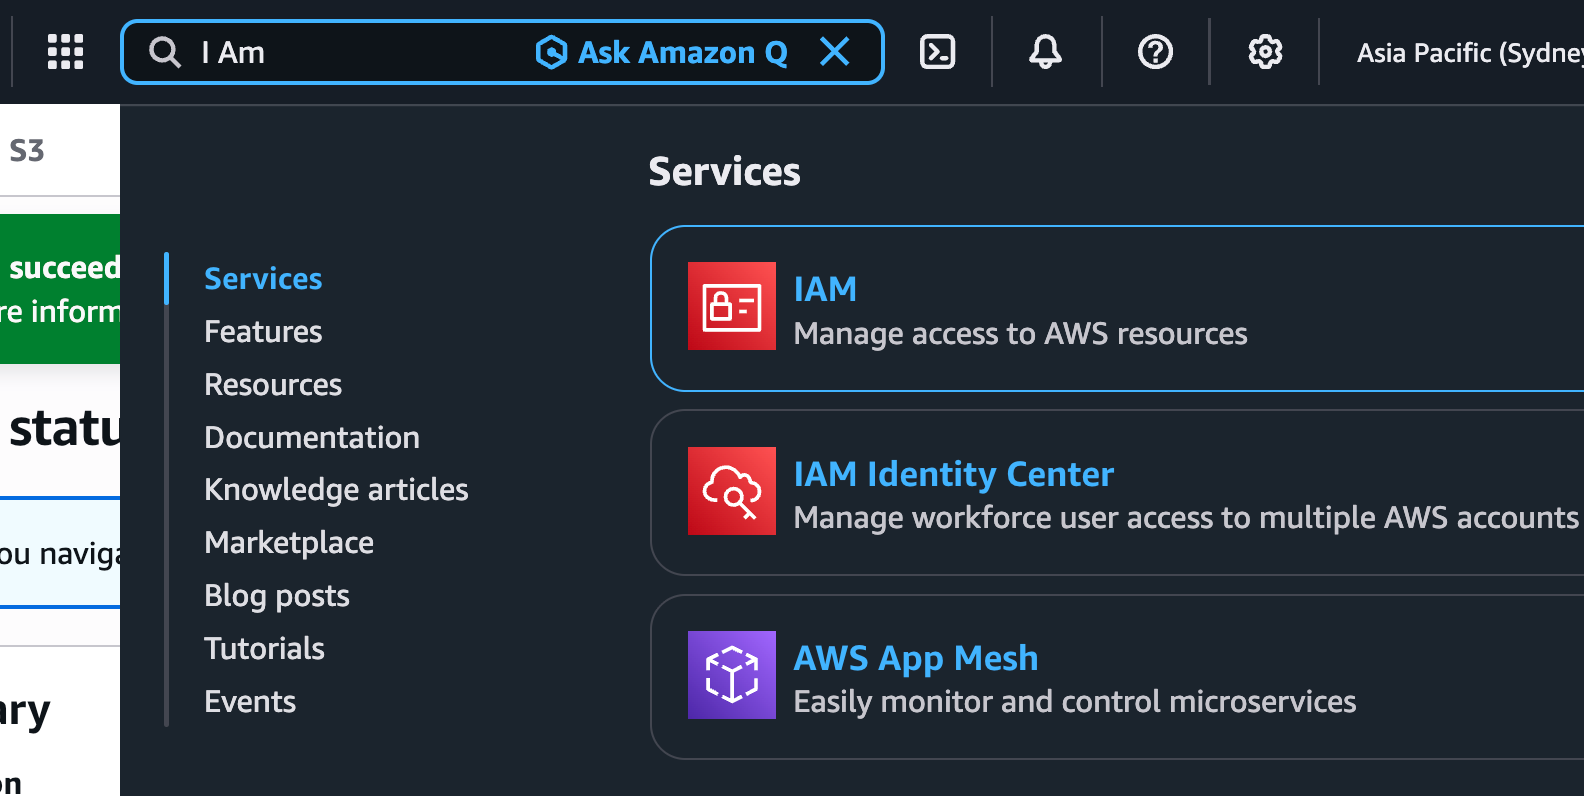
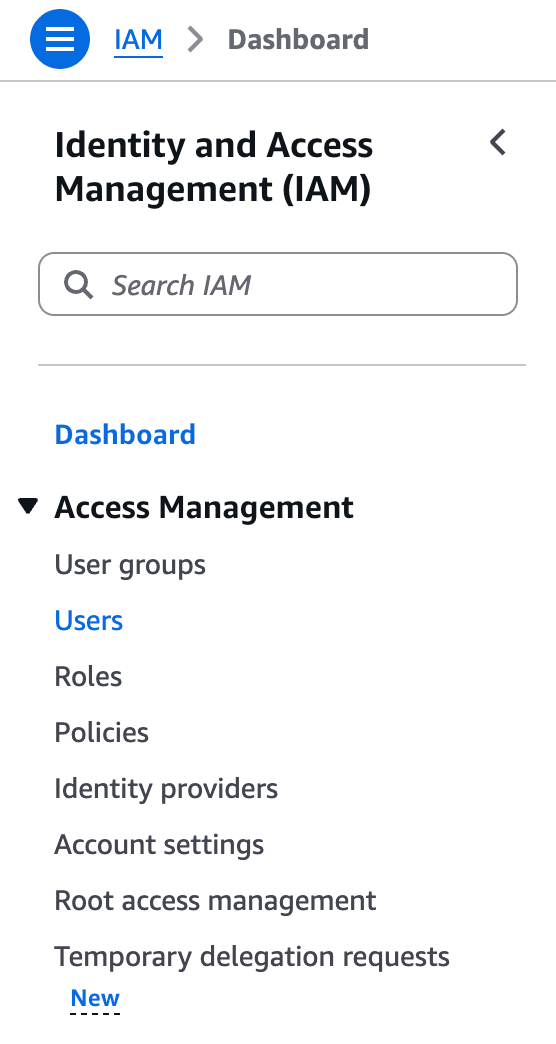
Similar to how we found the S3 section, you now need to search IAM to be taken to the Identity and Access Management section of AWS.
From the IAM page, click Users in the sidebar, then click the orange Create user button at the top right.
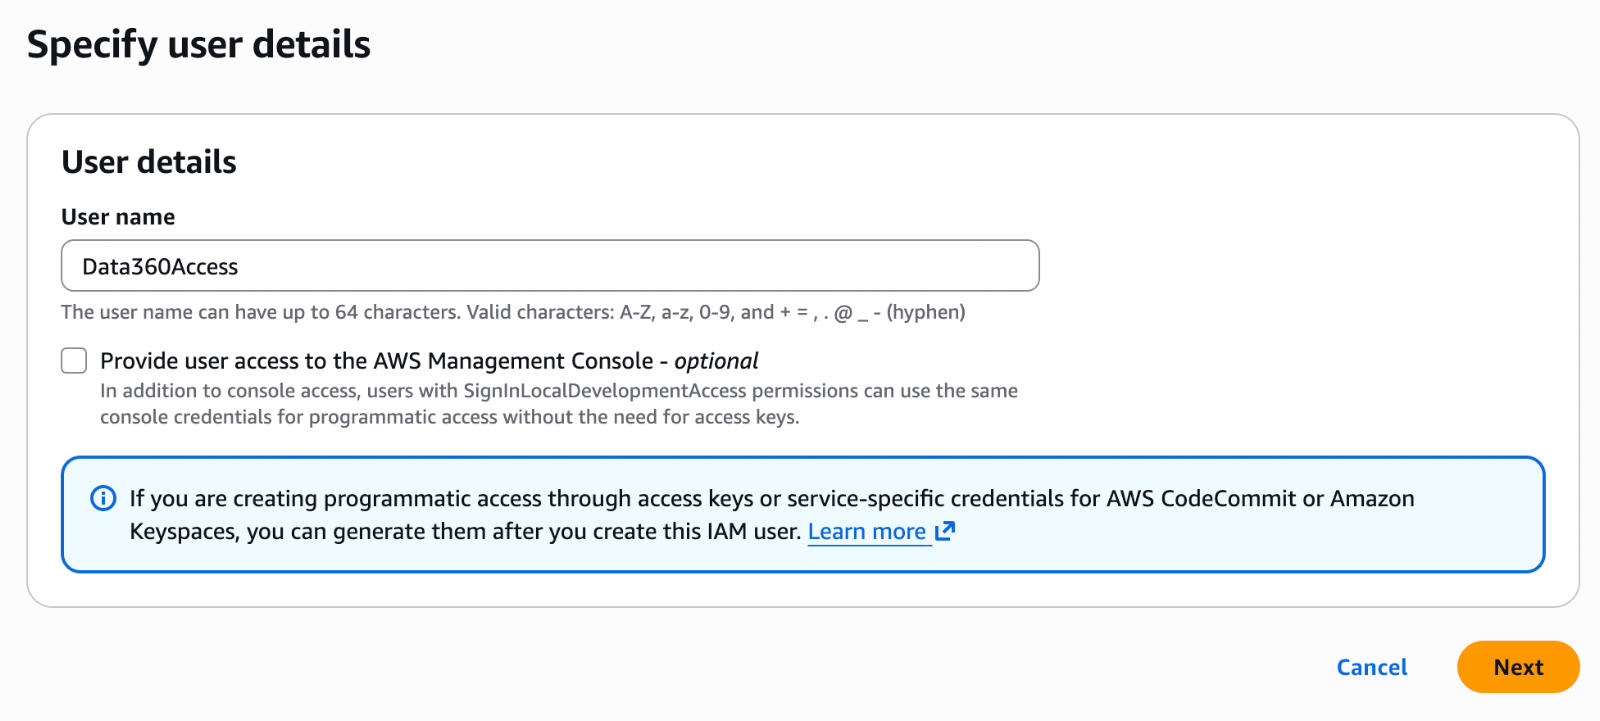
Set a name for your new User. This is AWS’s hand in the handshake – so name it accordingly. I’m calling mine Data360Access.
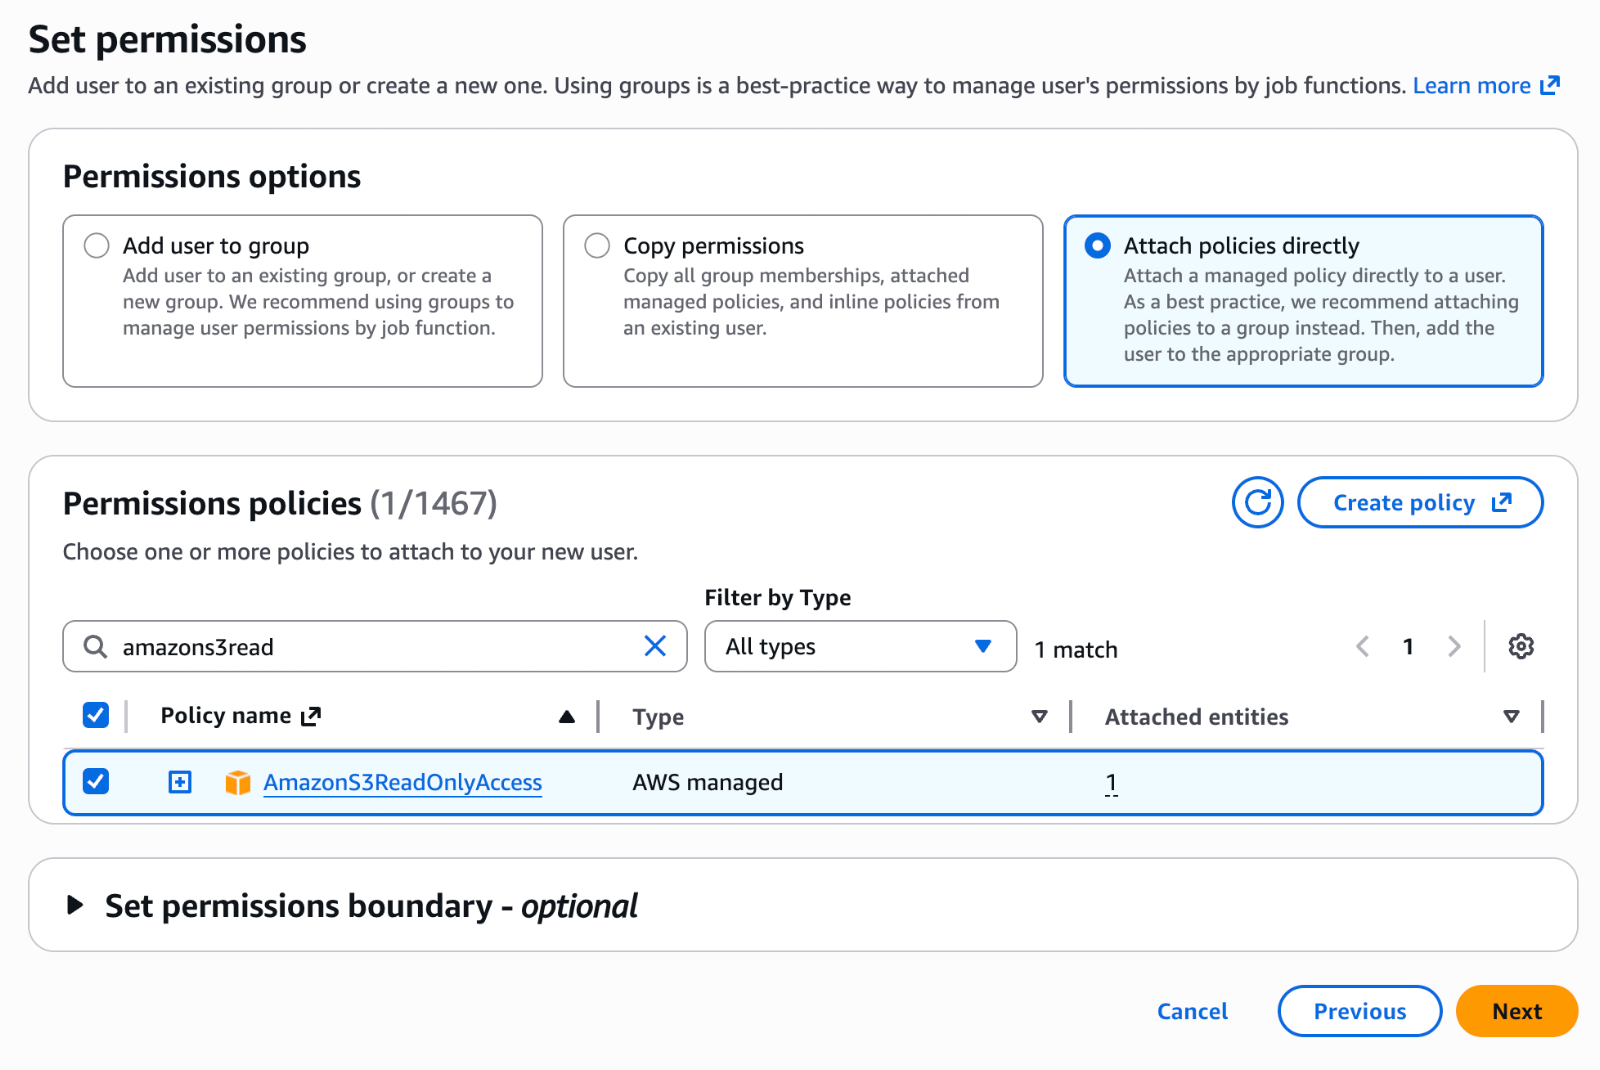
On the Set permissions page, click Attach policies directly, and search for ‘AmazonS3ReadOnlyAccess’. Check the box next to this permission policy and click Next.
Note/warning: This grants the user Read access to all buckets in your AWS account. Setting up AWS security policies isn’t within the main scope of this article, so we are using this for the demonstration, but please do not apply this to sensitive data. Do some additional research and design robust security policies for a real-world scenario with sensitive data.
Review your user details and click Create user to wrap things up. Click on the user in the Users list to open it up.
There’s one last step before we move on to the Data 360 Connector, and that is generating the keys that this user will use to authenticate with Data 360. Within the user record in AWS, click on the Security credentials tab and then Create access key.
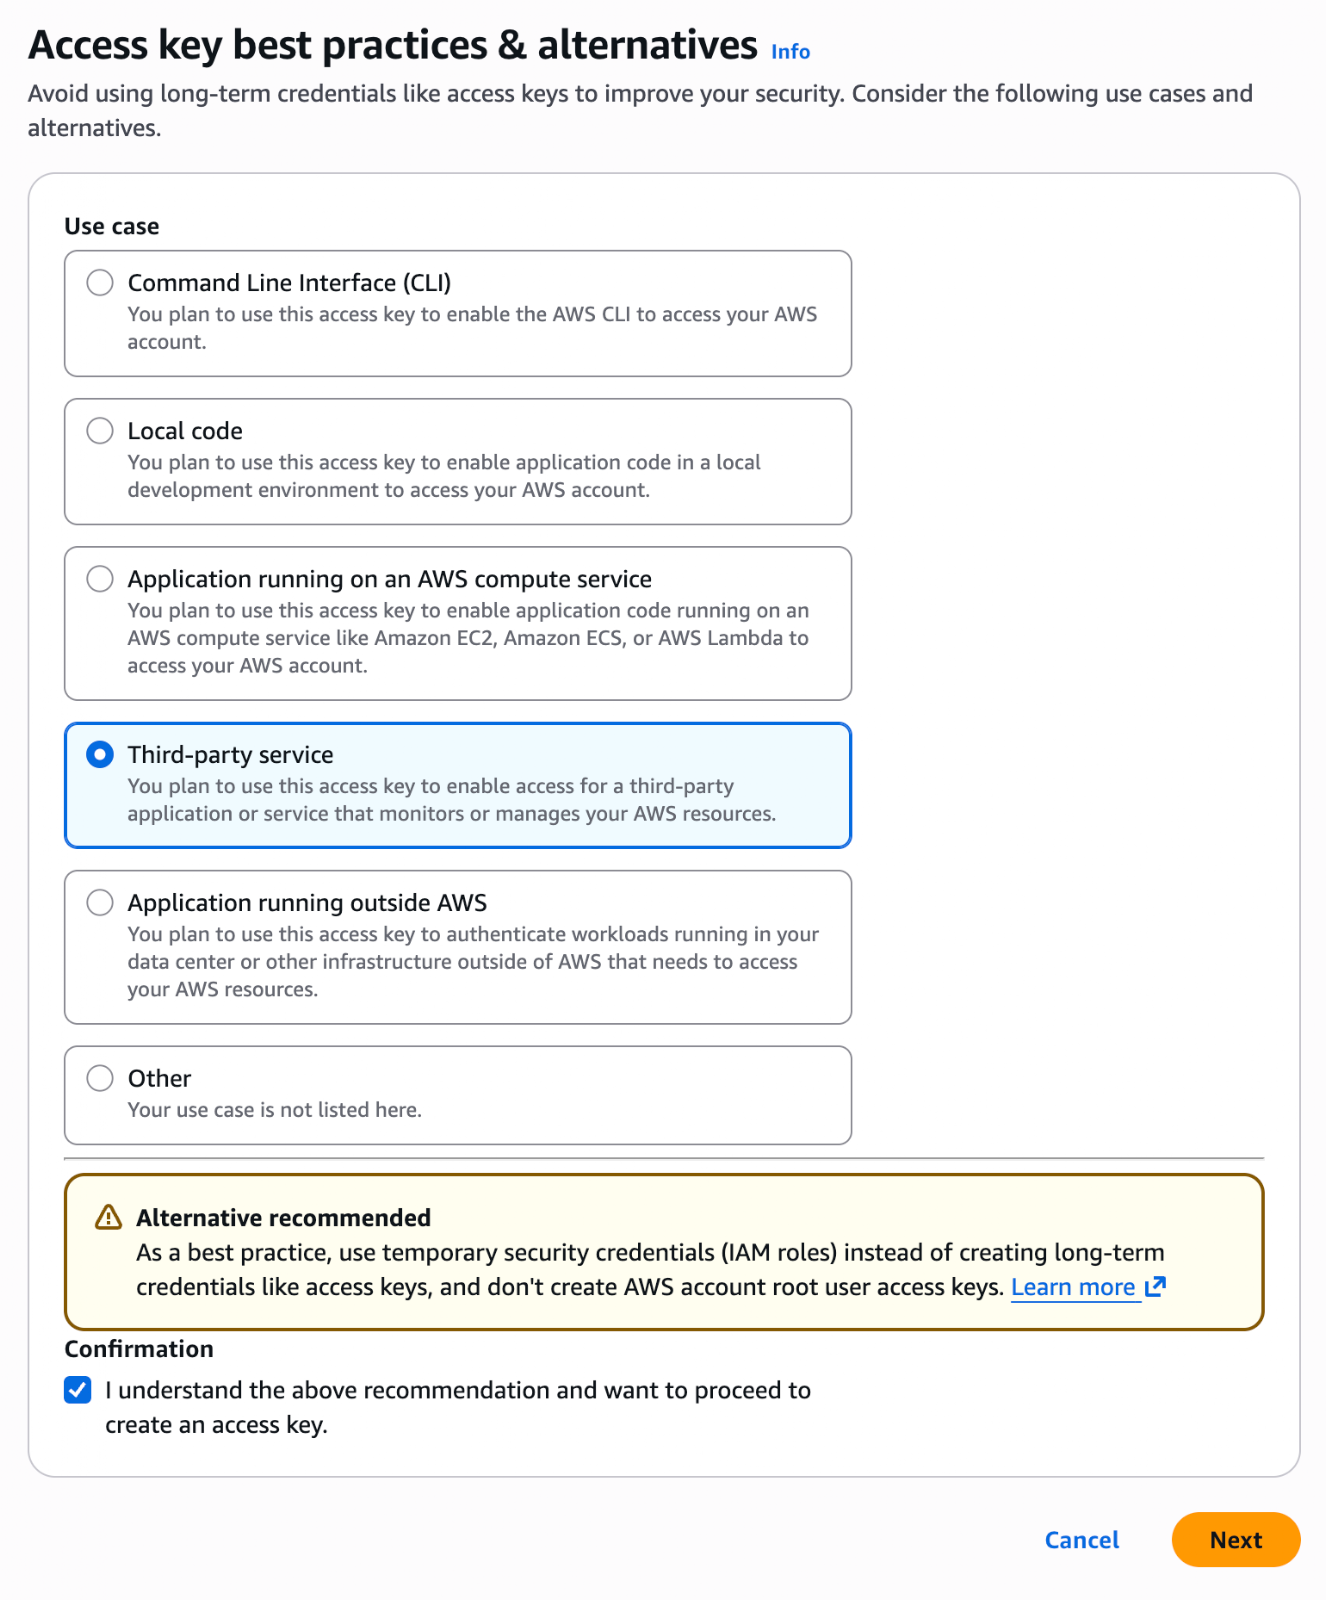
Select Third-party service, confirm your understanding of the security best practice recommendation (more on that below), and click Next.
Note/warning: A recommendation will appear on-screen at this stage, pointing out that this is not the ideal way to set things up. Again, please do not use this method with real, sensitive data. It is not within the scope of this article to deep-dive into AWS security best practices, so we are going with a “quick and dirty” approach that is NOT recommended for production applications.
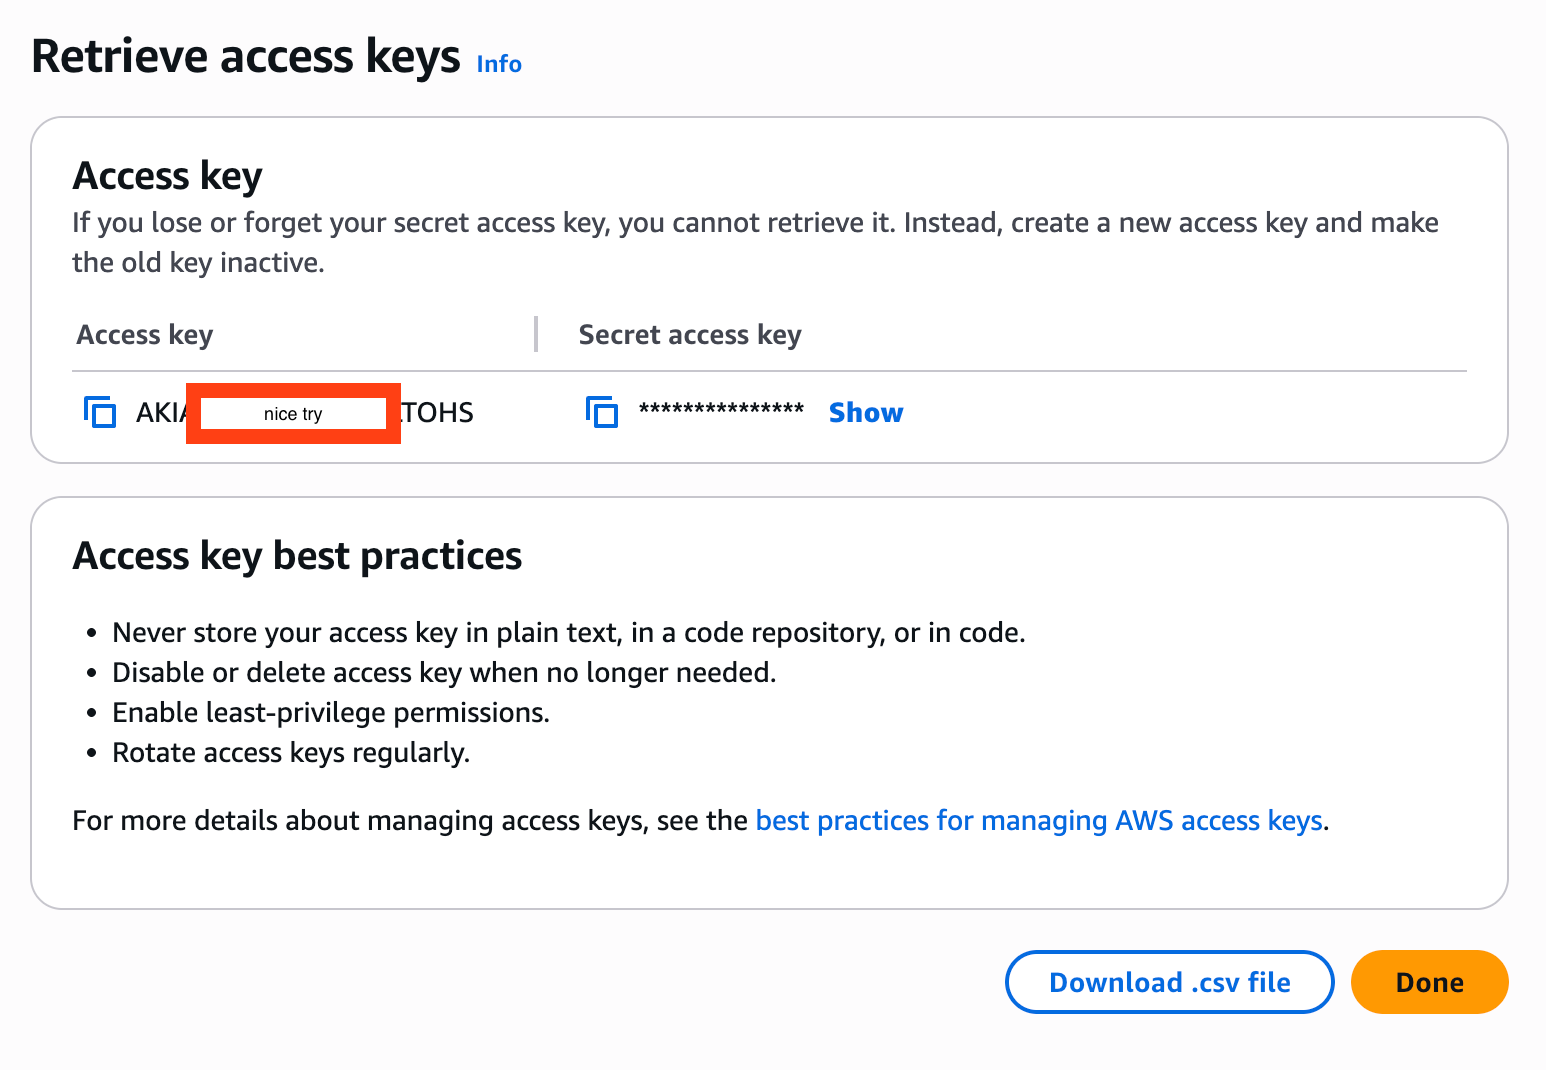
Skip the description tag screen and click Create access key. This generates the Access key and Secret access key. Please note that this is the only time that the secret key will be visible to you, so be sure to copy it and store it securely at this point. Once you’ve copied the keys, click Done.
Now that you’ve established the Amazon AWS side of the handshake, it’s time to go and set up the other side in Data 360.
Step 3: Set Up the Data 360 Connector
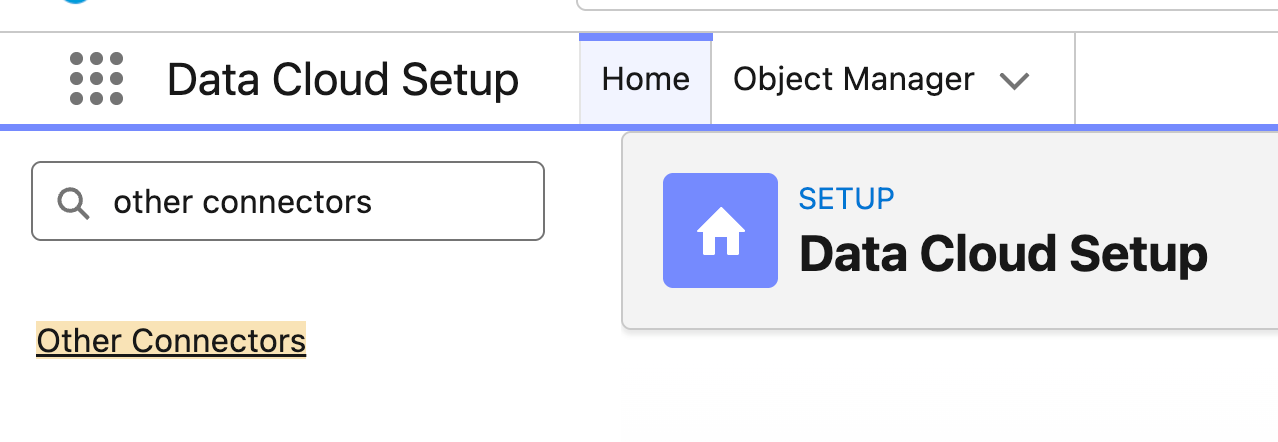
Now, to build the Data 360 side of the handshake! Click the Setup icon and click Data Cloud Setup to open the Data 360 Setup menu. In the Quick Find, search for ‘Other Connectors’. If you’re not able to find Other Connectors, make sure you’re specifically in Data Cloud Setup in an org that has Data 360.
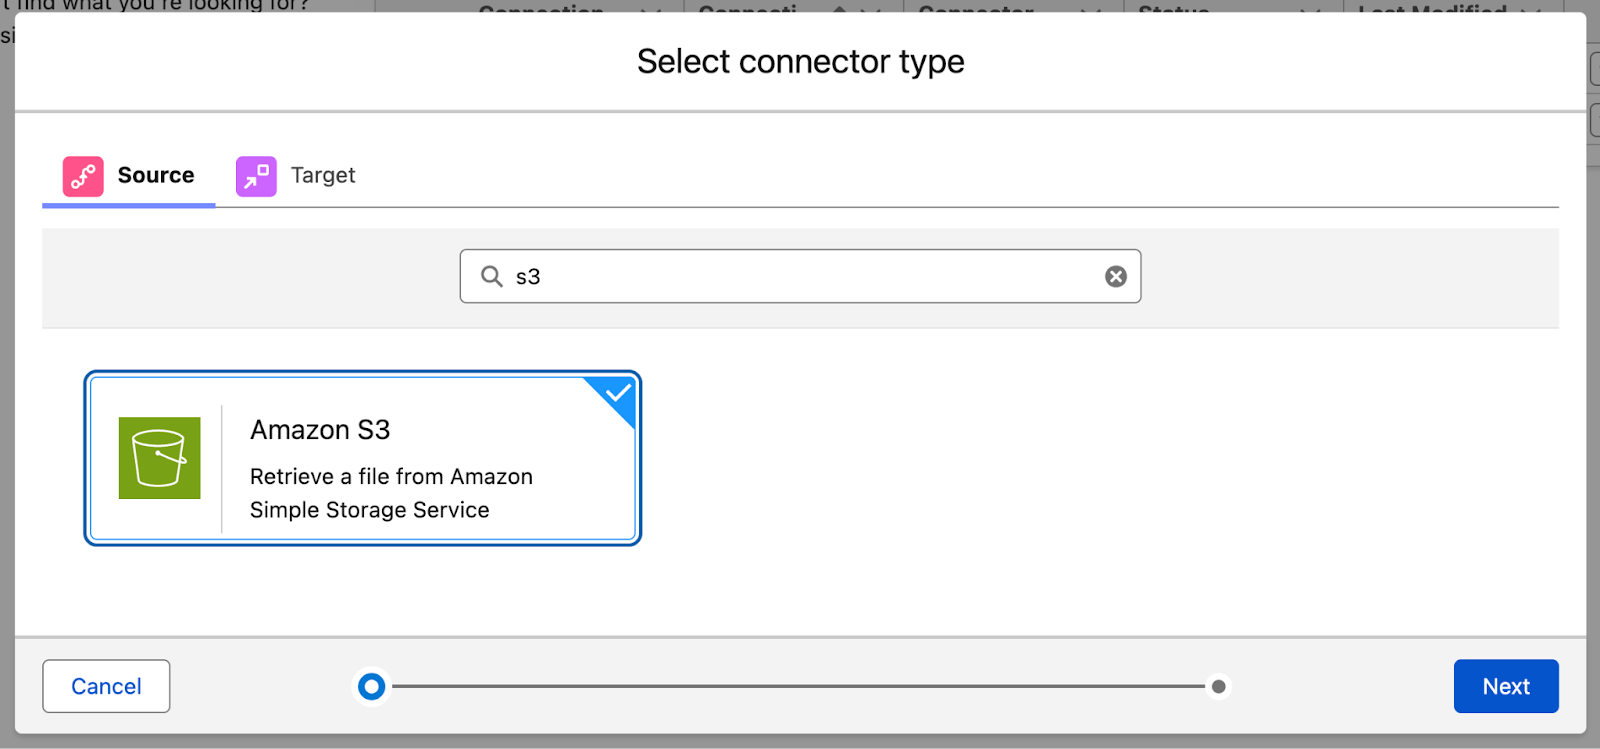
Click New and then search for S3 as the connector type.
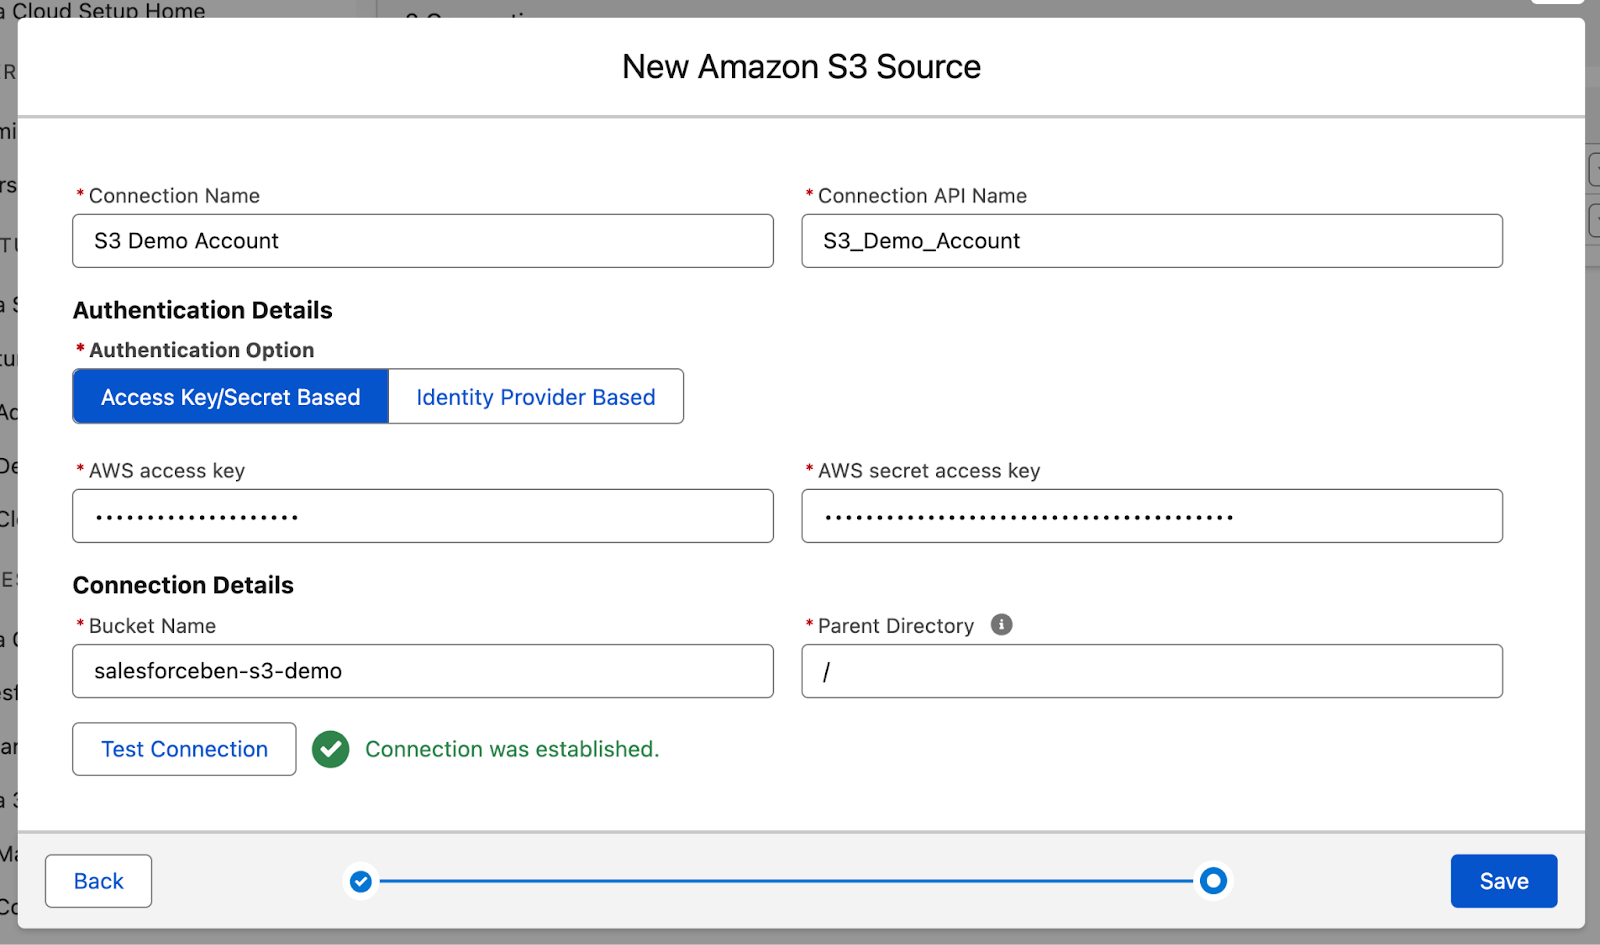
On the next page, give your connection a name (I used S3 Demo Account), API Name (S3_Demo_Account), provide the AWS access key and AWS secret access key that you just generated, and provide the bucket name (salesforceben-s3-demo).
Leave the Parent Directory as it is, and test using the Test Connection button before proceeding. You should see “Connection was established” in green text if all was done correctly.
Click Save to create the Connector. Then we’ll move on to creating the Data Stream.
Step 4: Create the Data Stream and Data Lake Object
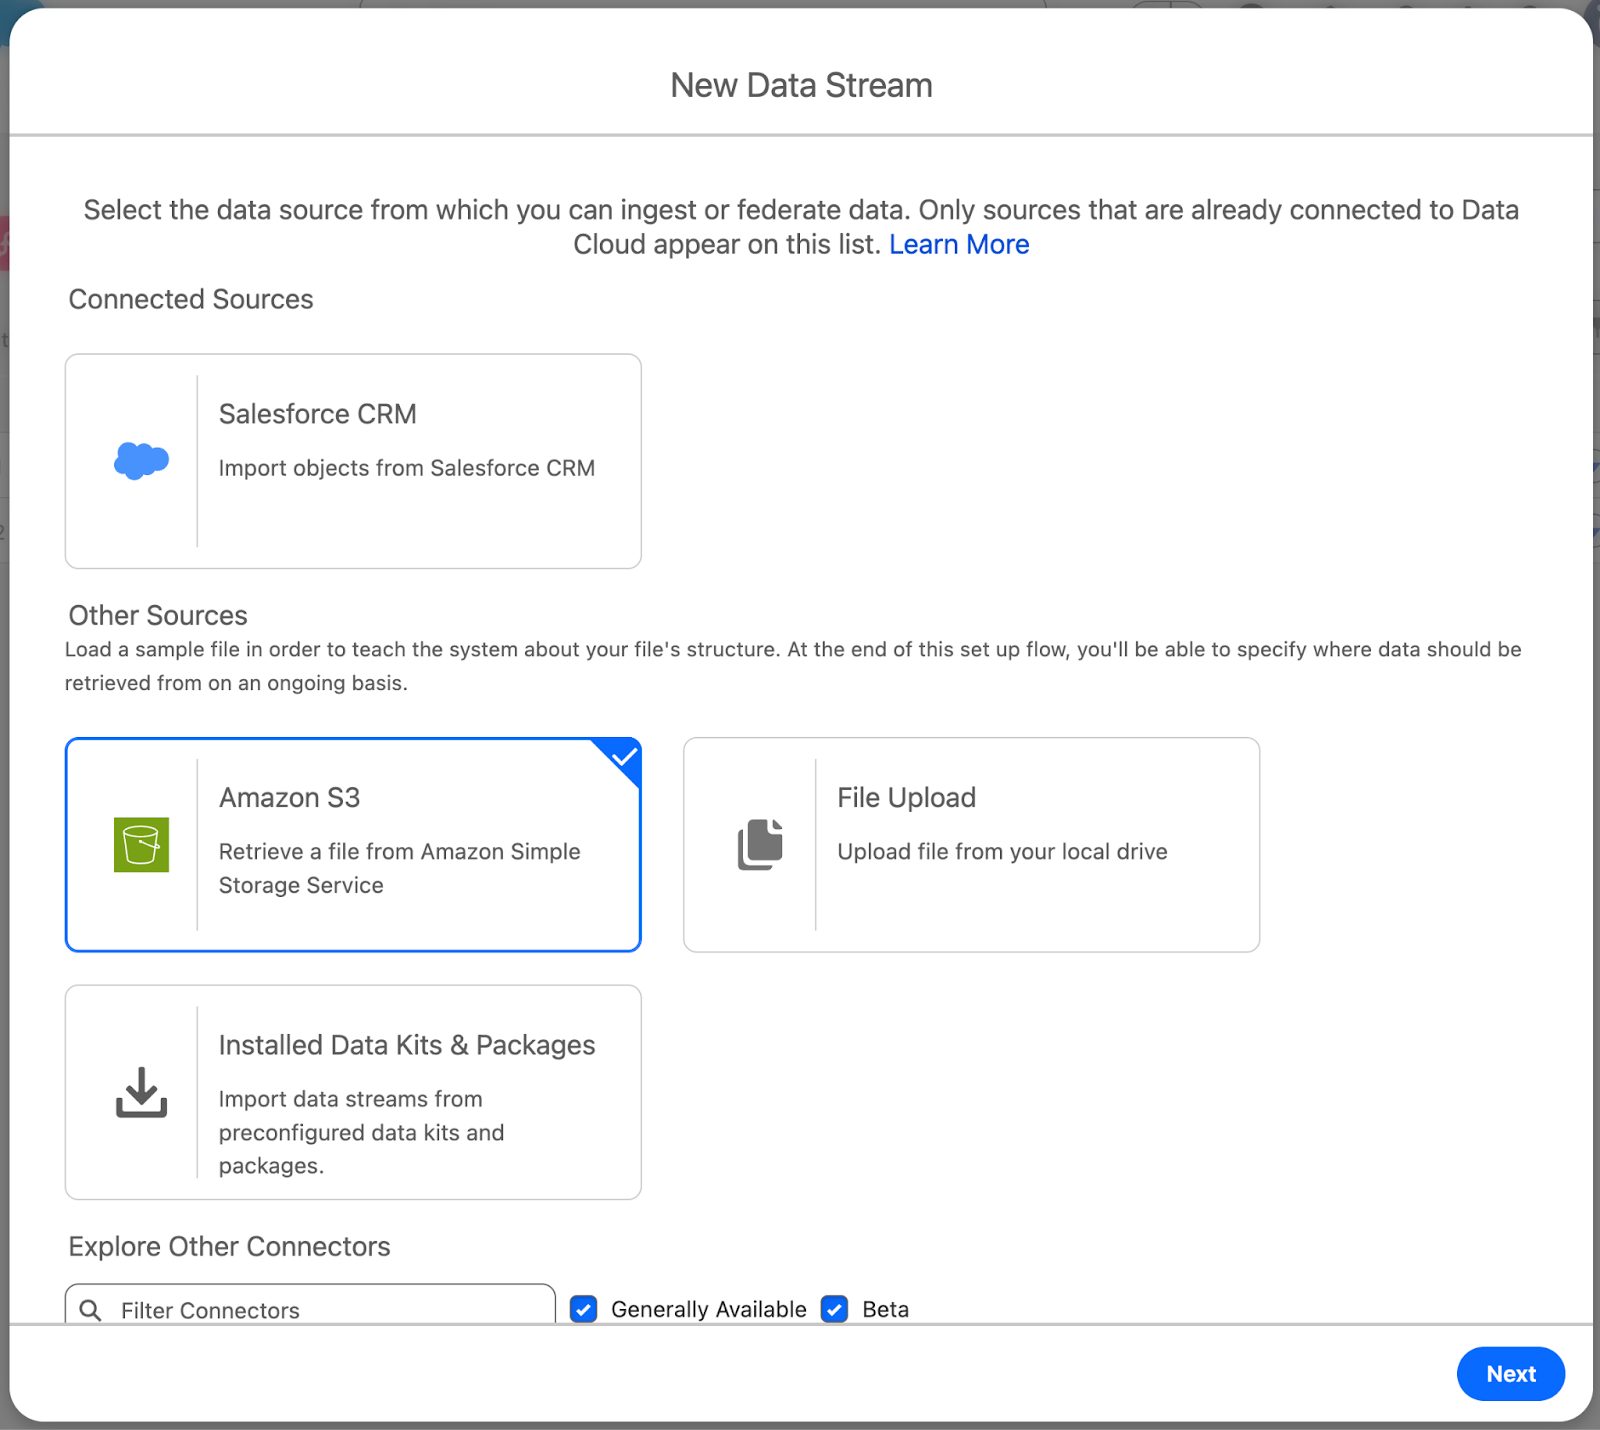
Open the Data Cloud app, and head to the Data Streams tab. Click New to open the wizard, and select Amazon S3 from the Other Sources section, then click Next.
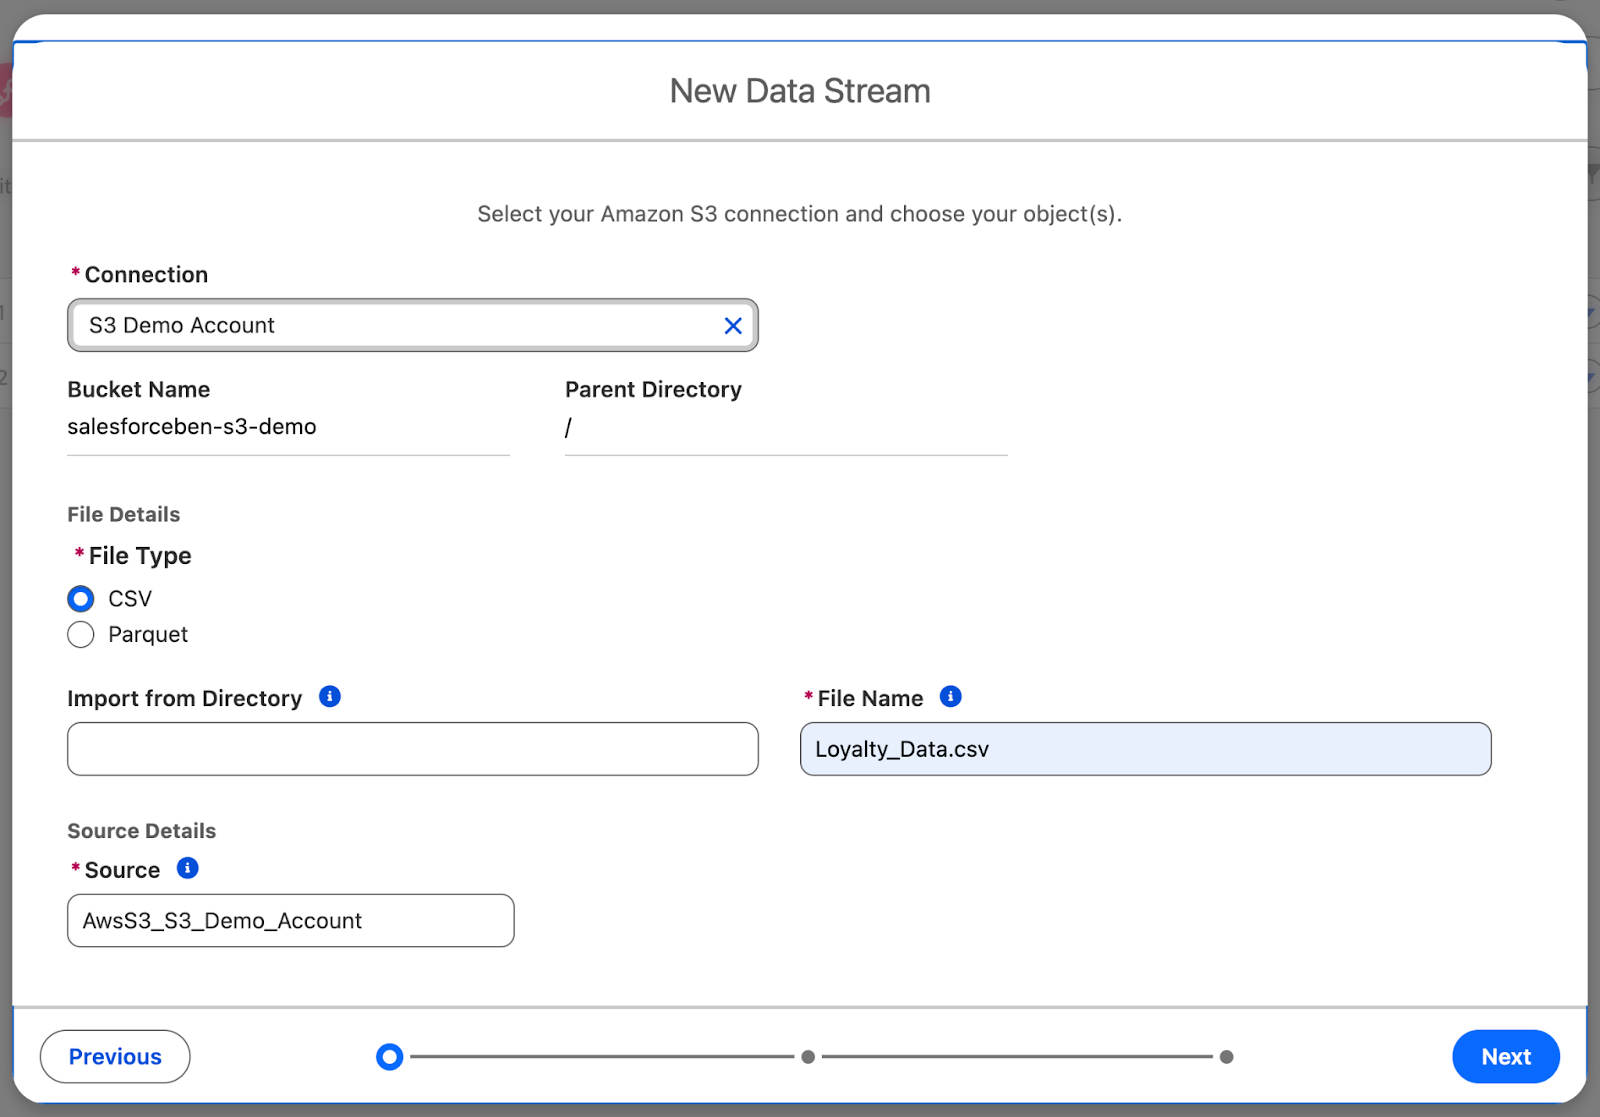
Select your Connection (S3 Demo Account), leave the Bucket Name as it is, and Parent Directory blank. You want to use a CSV as the File Type, specify the File Name (Loyalty_Data.csv), and leave the Source as it is. Then, click Next.
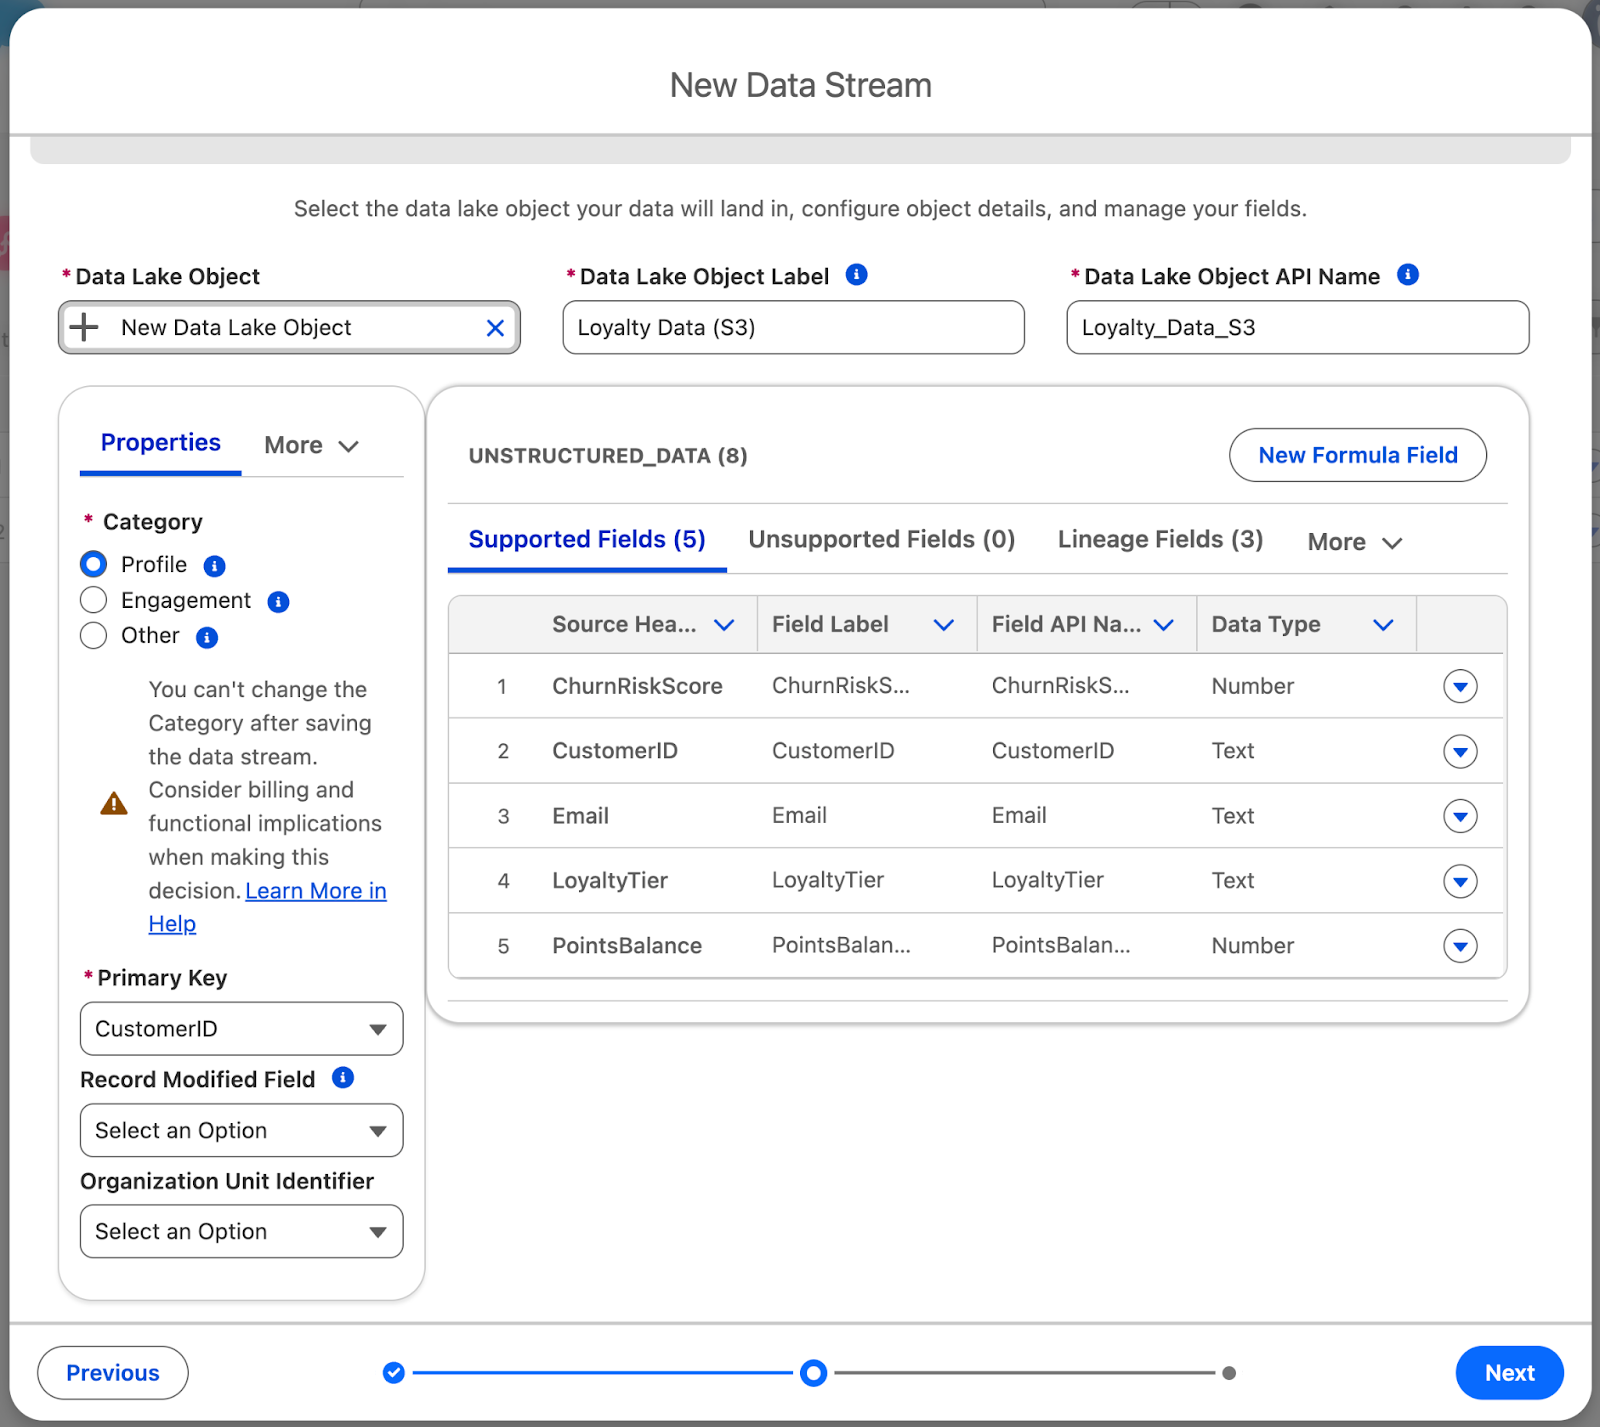
Now you need to configure the Data Lake Object that your streamed data will flow into. By default, New Data Lake Object is selected – this is what you want to use. This lets you create a new Data Lake Object as you are working through the New Data Stream wizard.
Give the Data Lake Object Label a value of Loyalty Data (S3) and Data Lake Object API Name a value of Loyalty_Data_S3.
Next up, you’ll need to select the Category. The three Categories of Data Lake Object are Profile, Engagement, or Other. Once set, the category cannot be changed.
- Profile is used when the Data Lake Object will store data about an Individual or other entity. This is what we will use for the Loyalty Data.
- Engagement is used for behavioral or transactional data (think purchases, logins, or activities) that relates to a Profile.
- Other is used to map information not related to an Individual directly – think Products or other store information.
Select CustomerID as the Primary Key, then click Next.
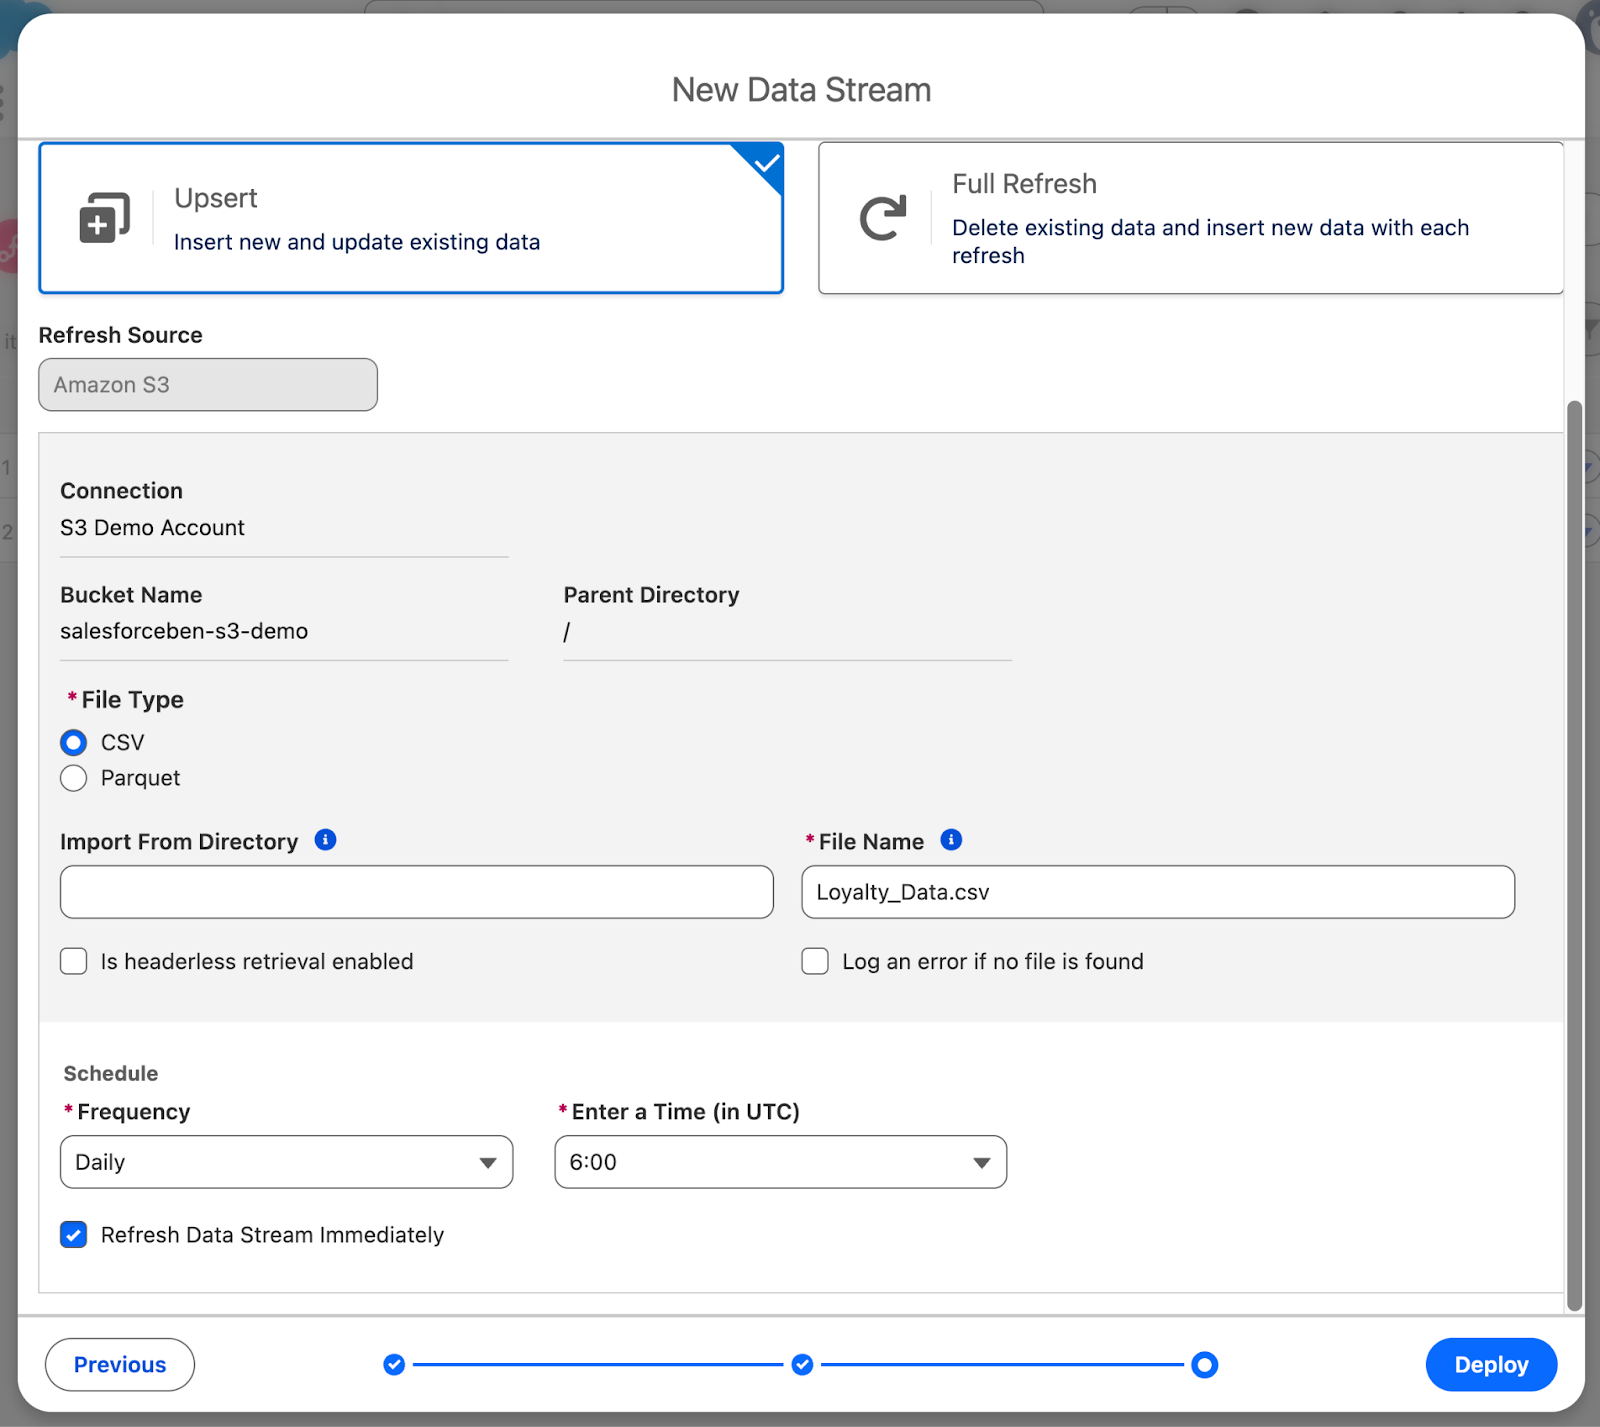
Make sure the Data Stream Name is Loyalty Data (S3), leave the Data Space as default, and scroll to the bottom to set the Scheduled Frequency to Daily. You can leave the Time (UTC) at 6:00. Make sure the Refresh Data Stream Immediately checkbox is ticked, then click Deploy.
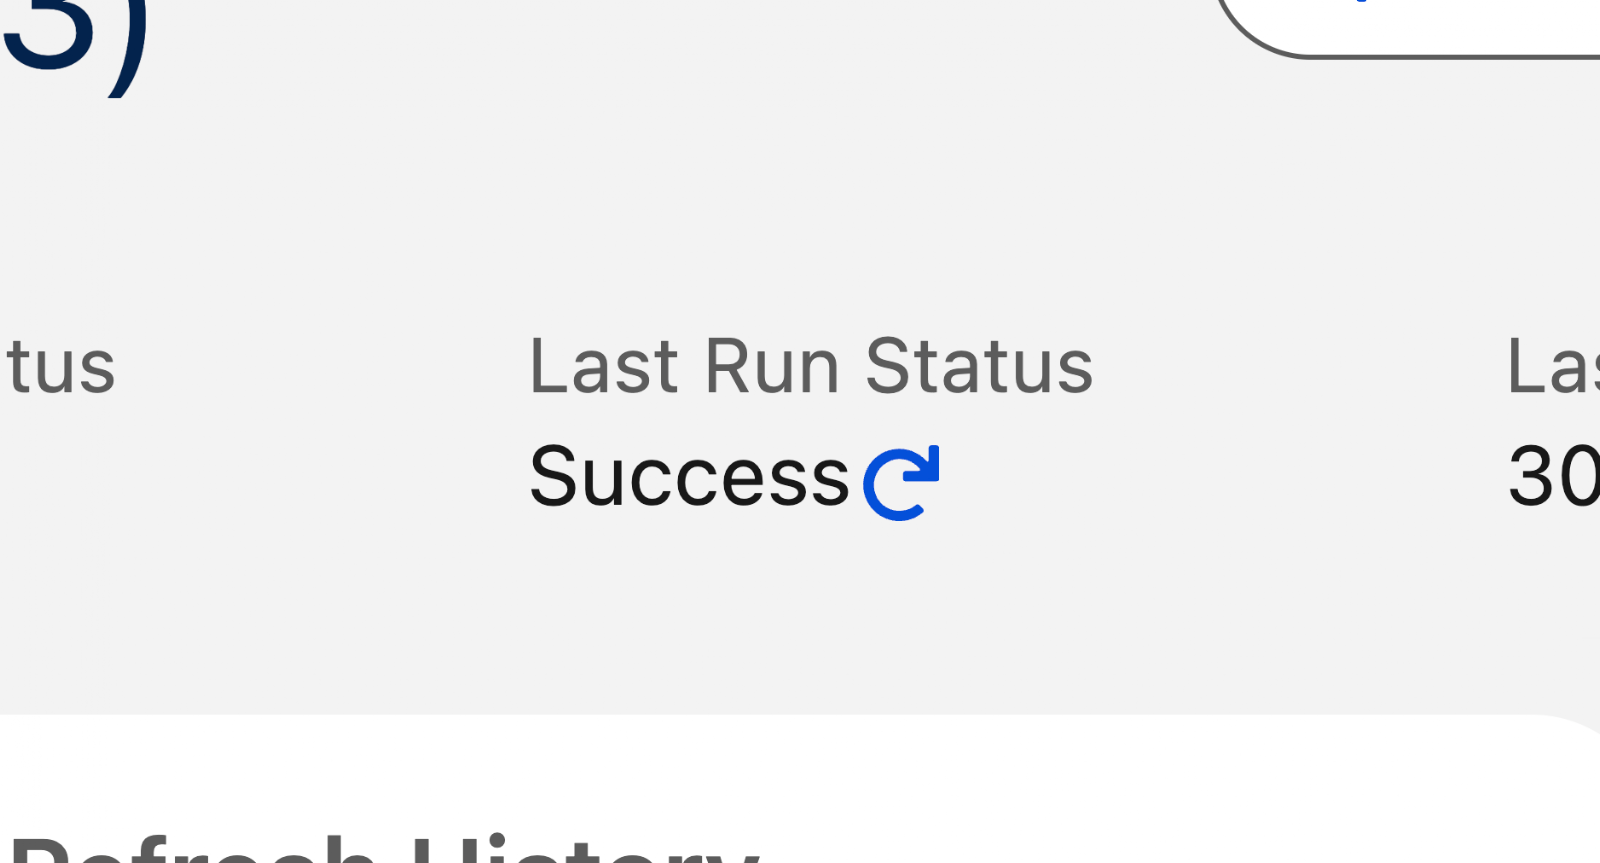
Once the deployment is complete (it takes a minute), click the refresh button next to Last Run Status. After moving to Pending, wait a few more minutes for it to finalize, then keep refreshing it until it moves from Pending to In Progress to Success. To get the data ready for use by humans and agents, it’s time to map the data to a Data Model Object.
Step 5: Mapping Fields to the Data Model Object
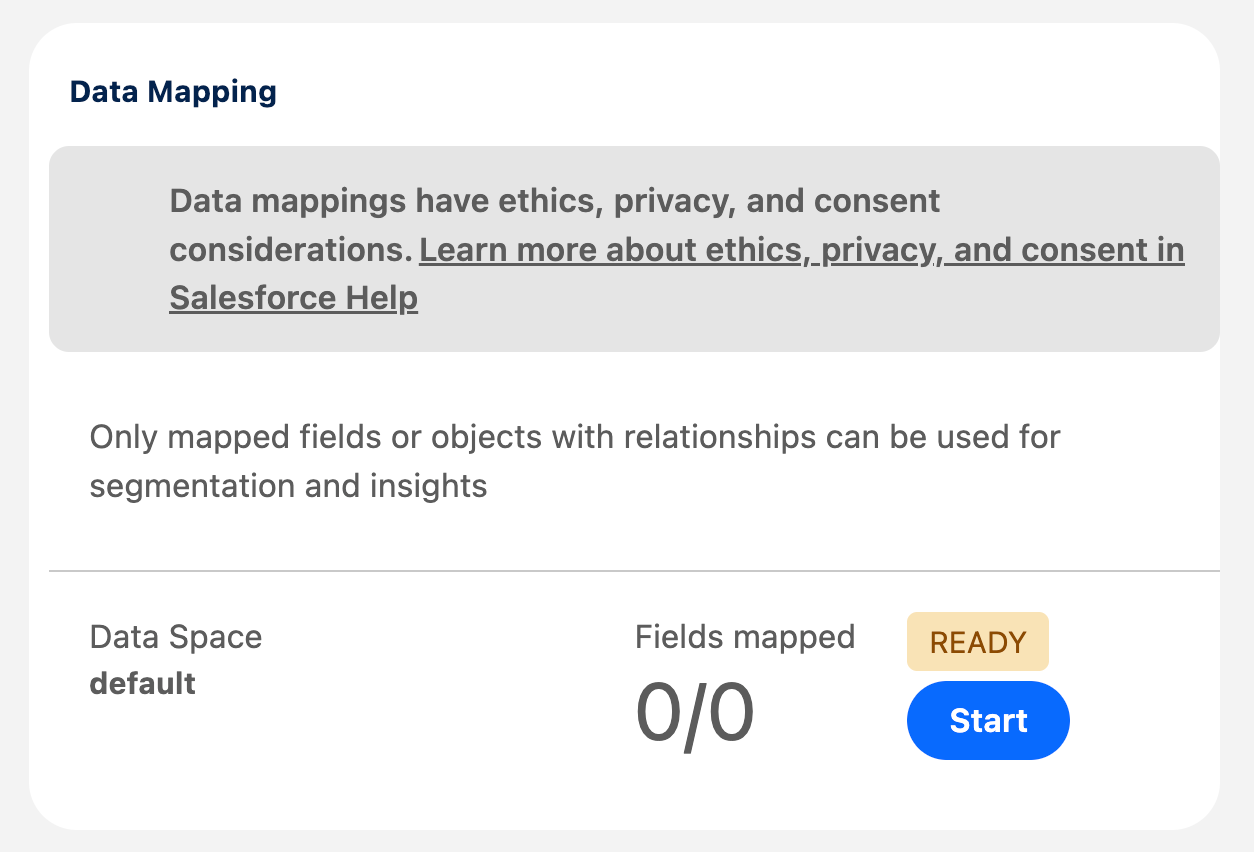
Data Lake Object data is raw and not ready for human or agent consumption. This is where Data Model Objects come into play. To create one, head to your new Data Lake Object and click Start on the Data Mapping section.
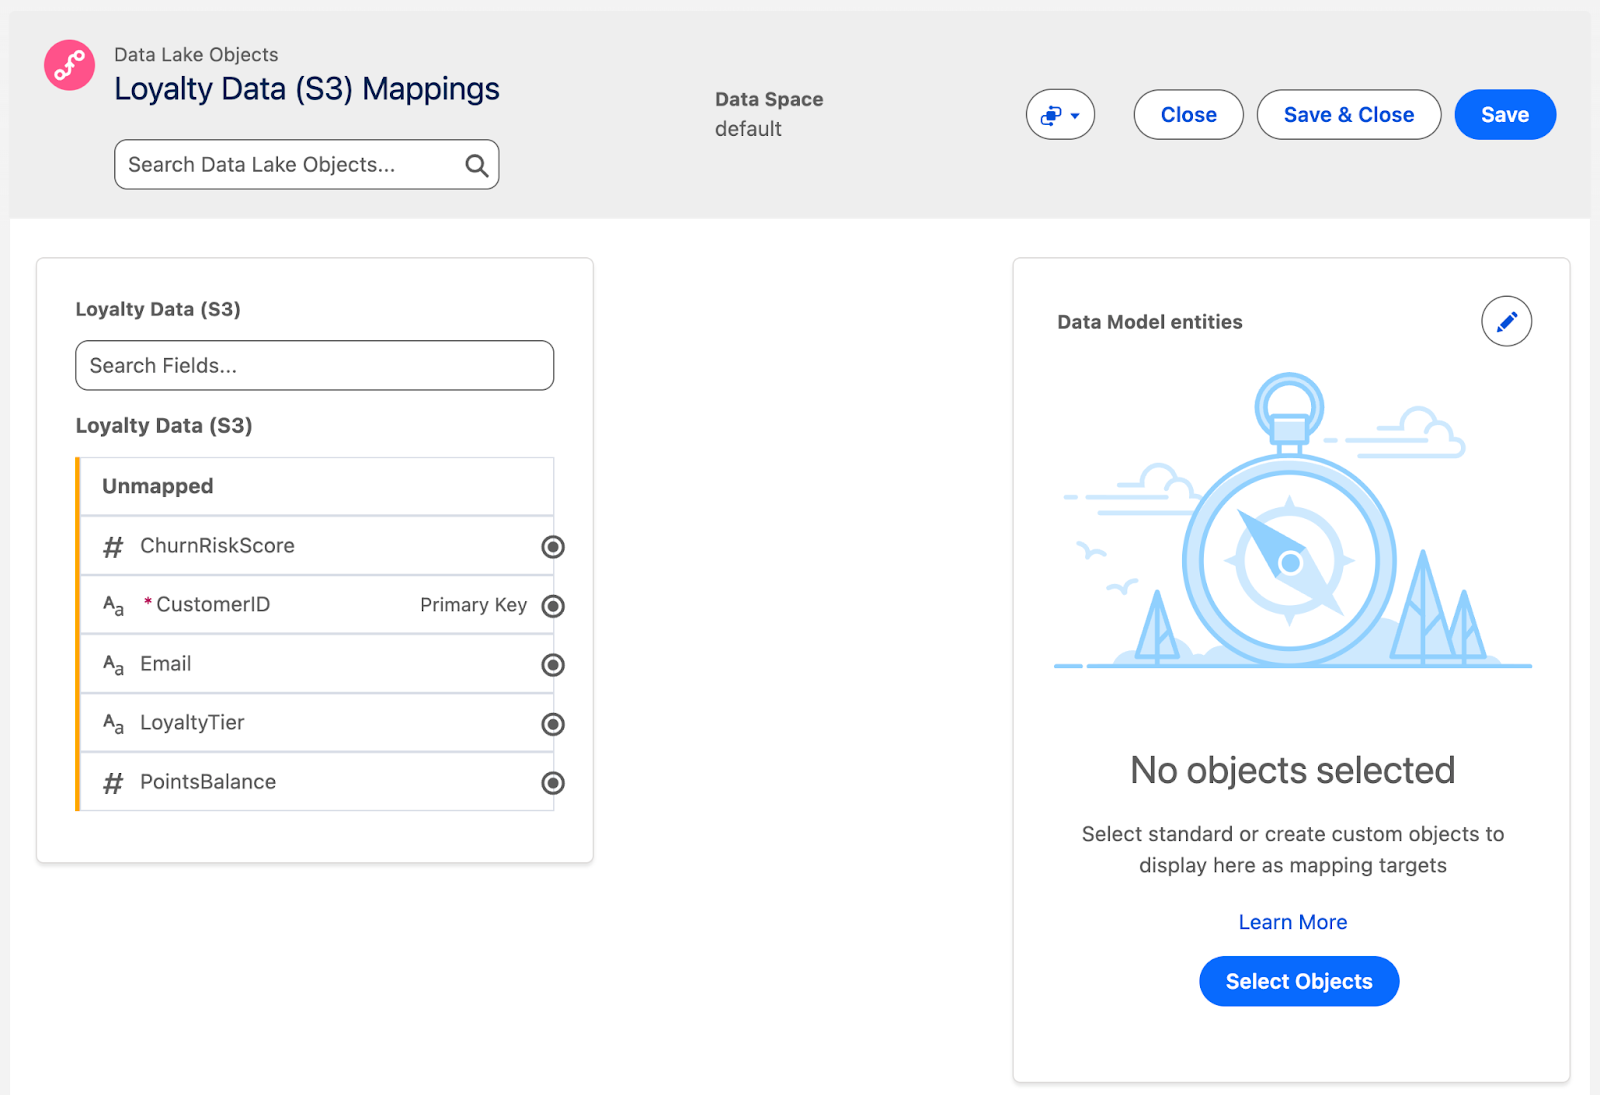
On the left are your Data Lake Object fields, and on the right is where your Data Model Object will be. In between the two is where you will map your fields. On the right, click Select Objects and wait for the available objects menu to load.
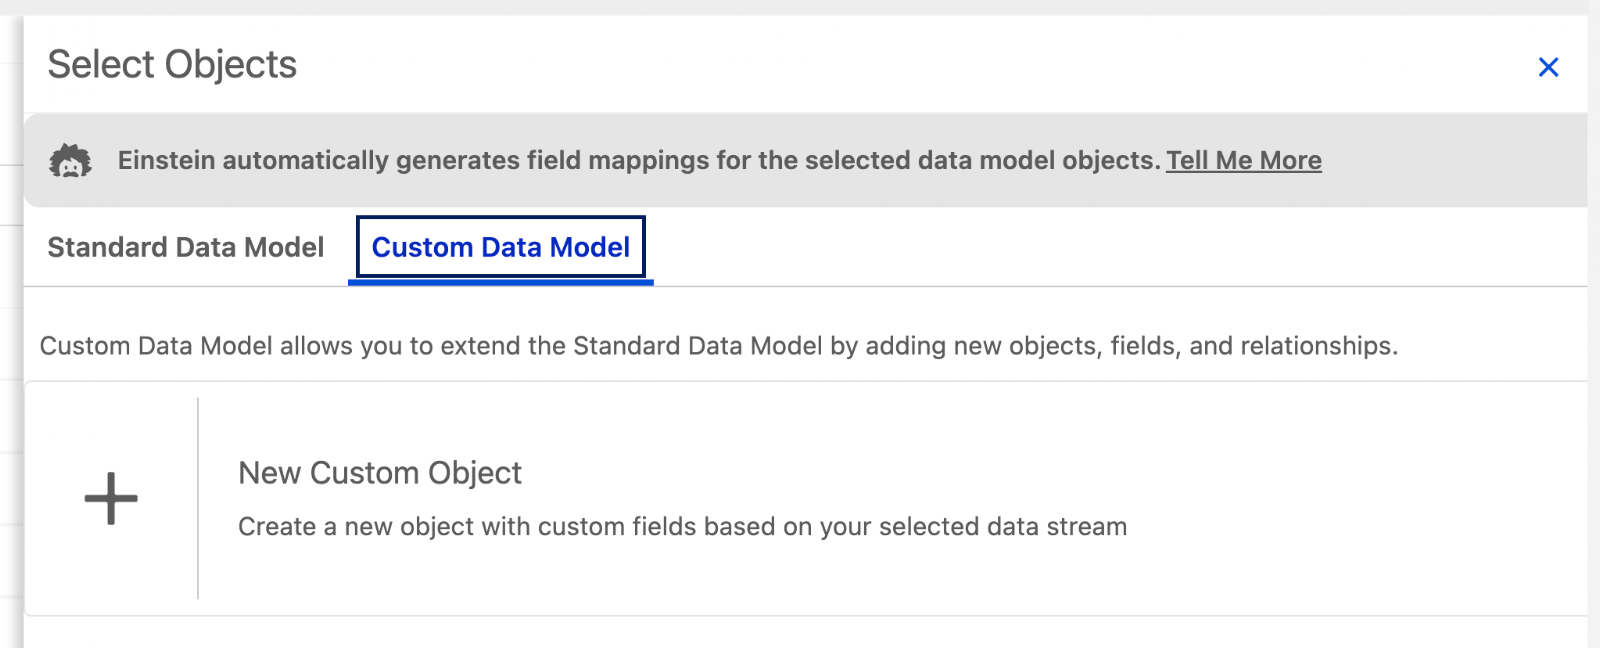
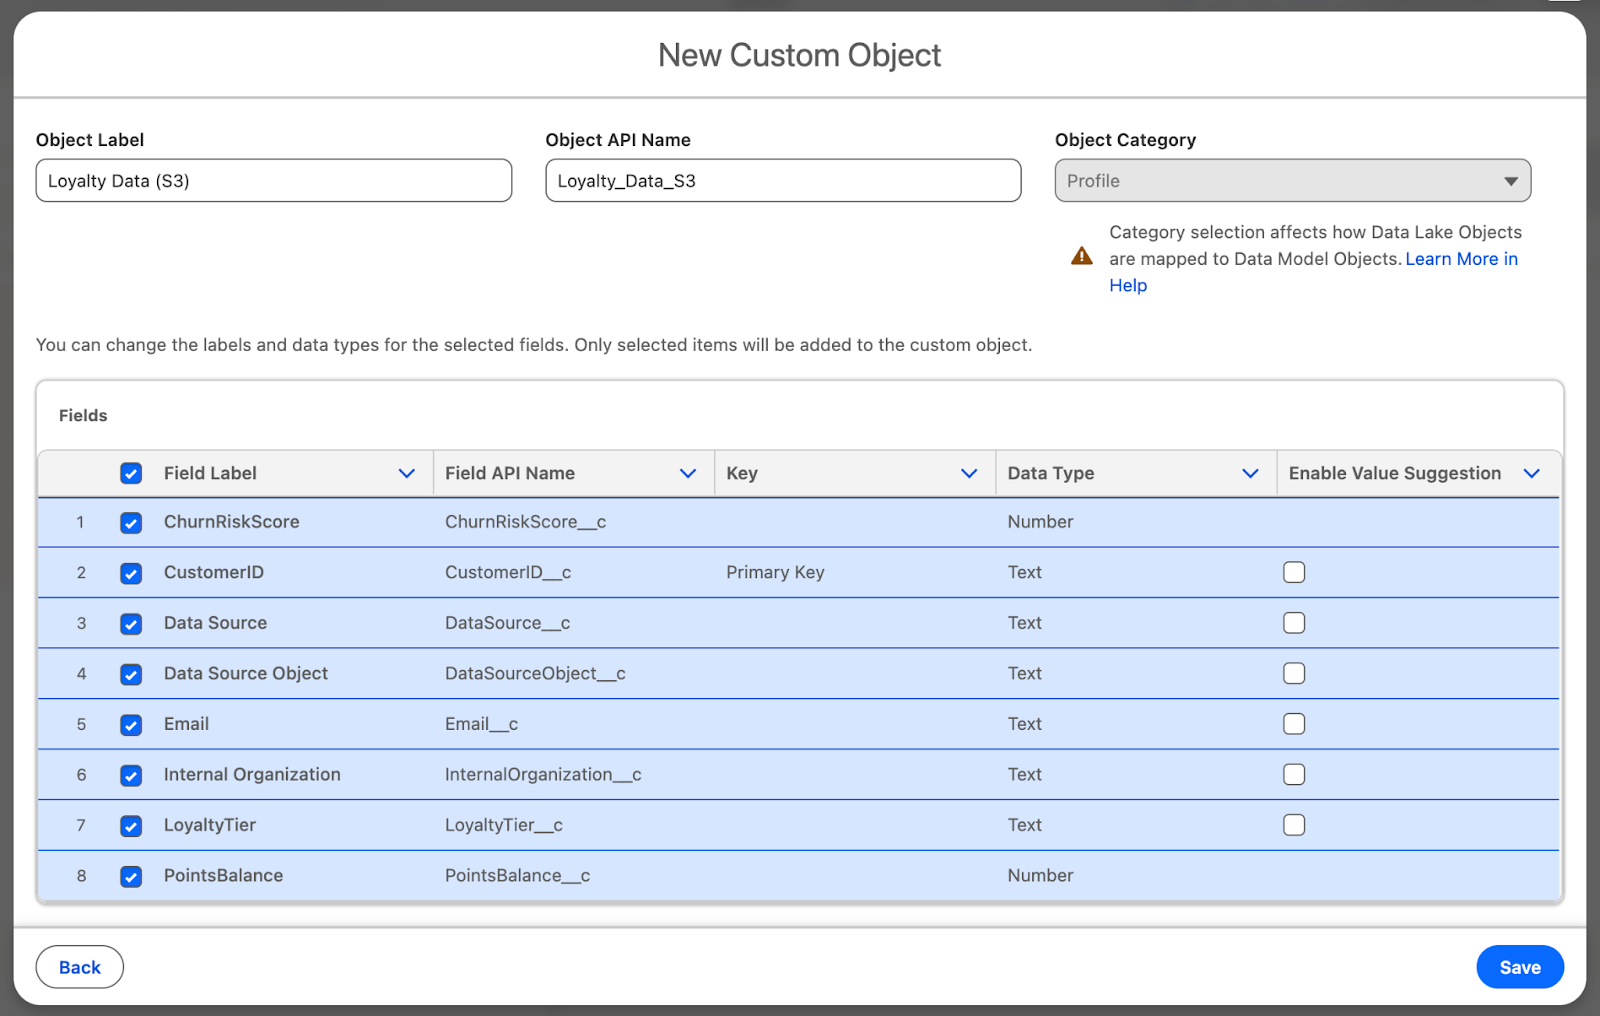
Switch to the Custom Data Model tab when the list loads, then click New Custom Object to begin building a new Custom Data Model Object.
Leave the default Object Label and API Name (Should be Loyalty Data (S3) and Loyalty_Data_S3). Similarly, leave the field selection to all fields, then click Save.
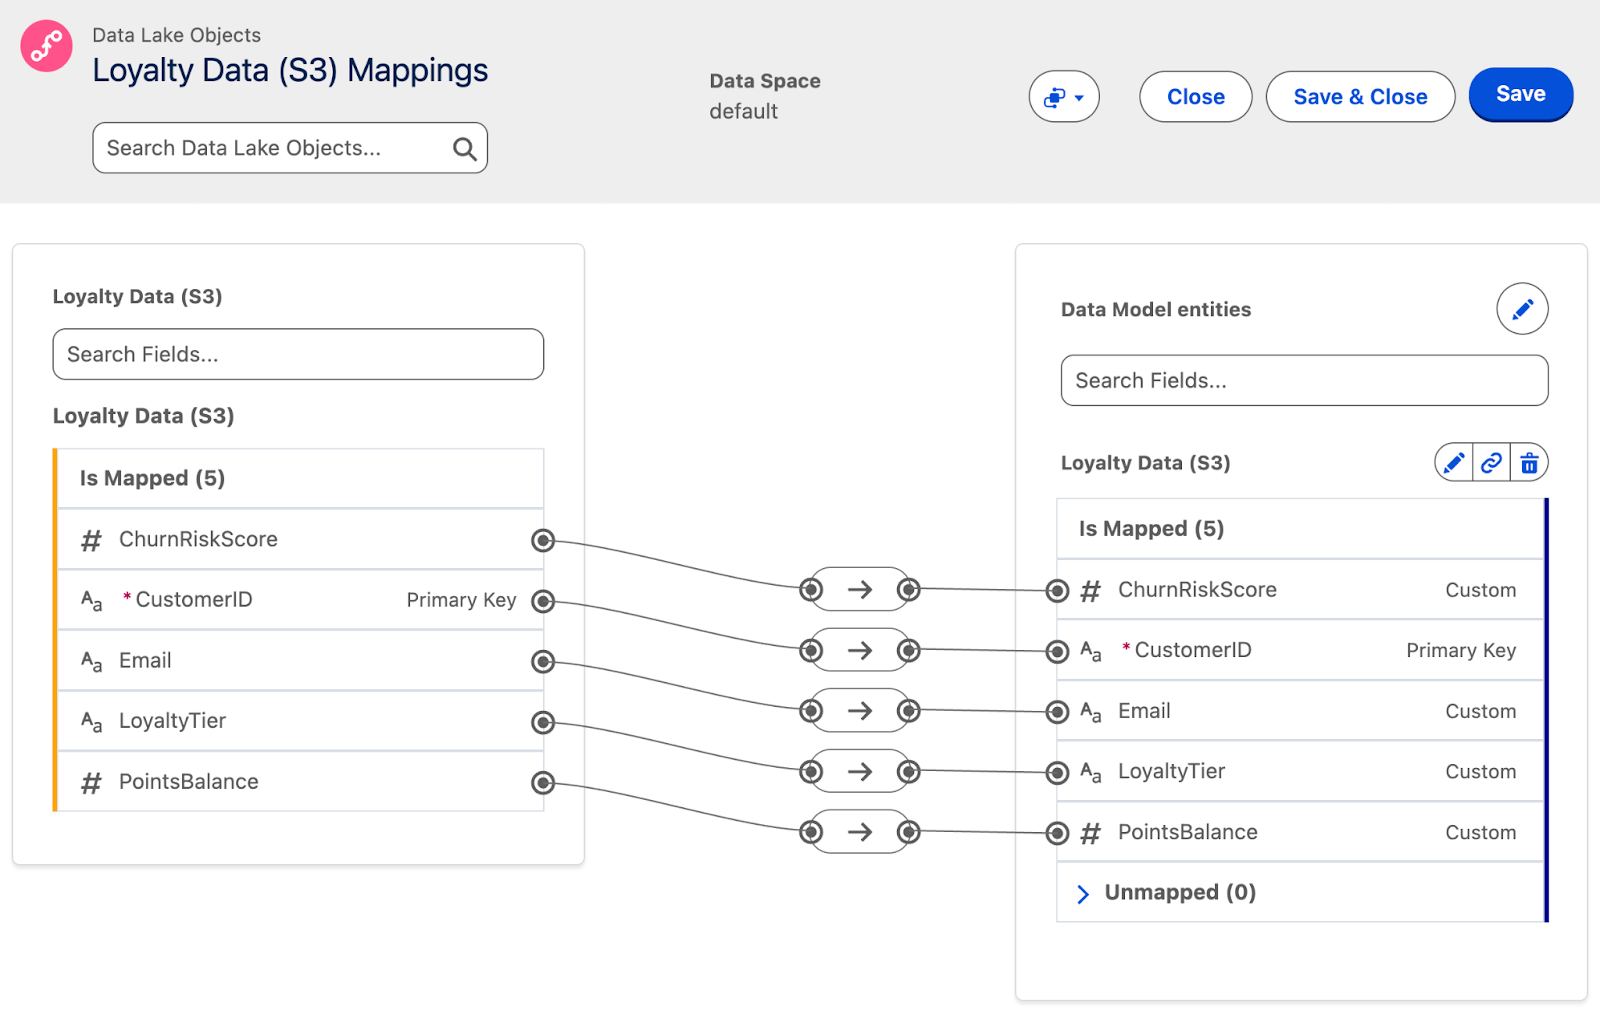
Once the Data Model Object has been created, the mapping should automatically connect each of the DLO fields to the newly created DMO fields. Click Save to finish the mapping.
Step 6: Confirm Available Data
There are two ways to confirm your data has travelled from your Amazon S3 bucket, through the Data Stream, into a Data Lake Object, and finally mapped across to the Data Model Object.
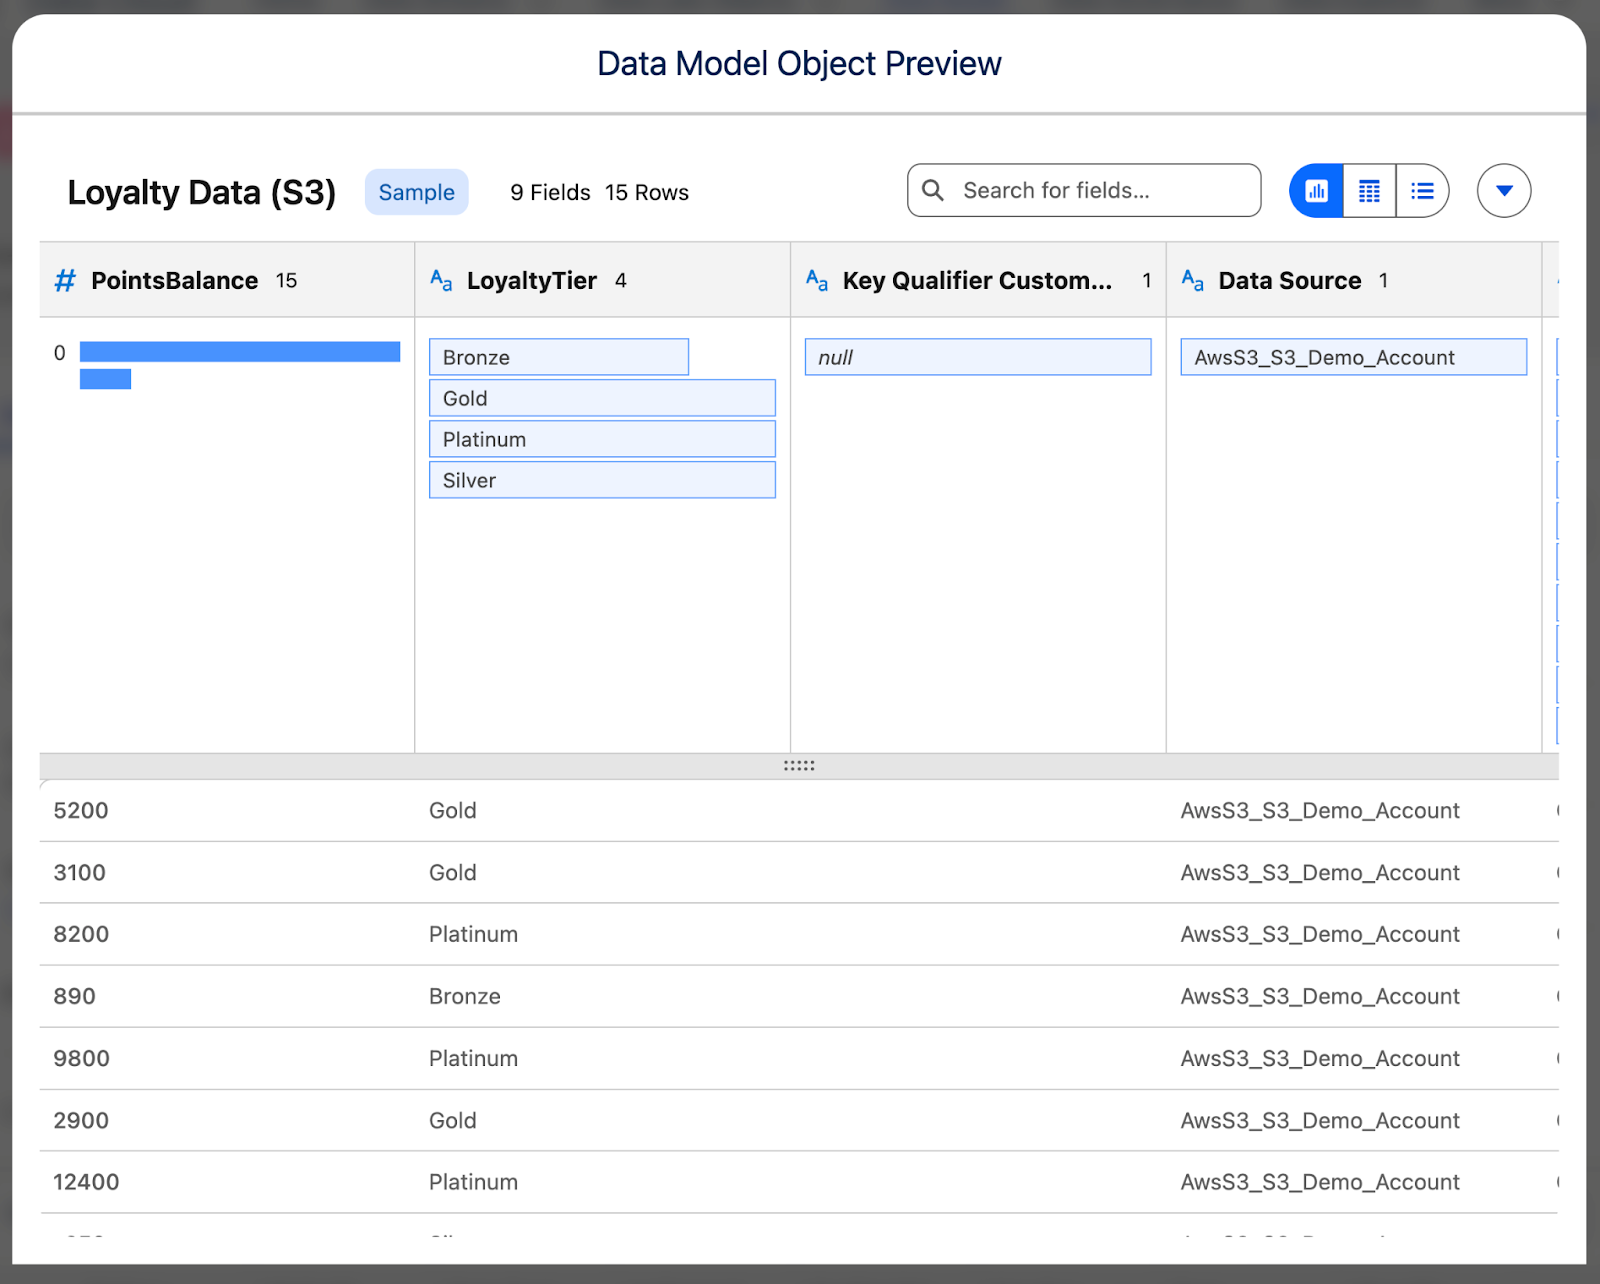
The first is heading over to the Data Model tab, finding your new Data Model Object (Loyalty Data (S3)), opening it, and clicking on the Preview button. If you see your records as they appear in S3, you’re all done!
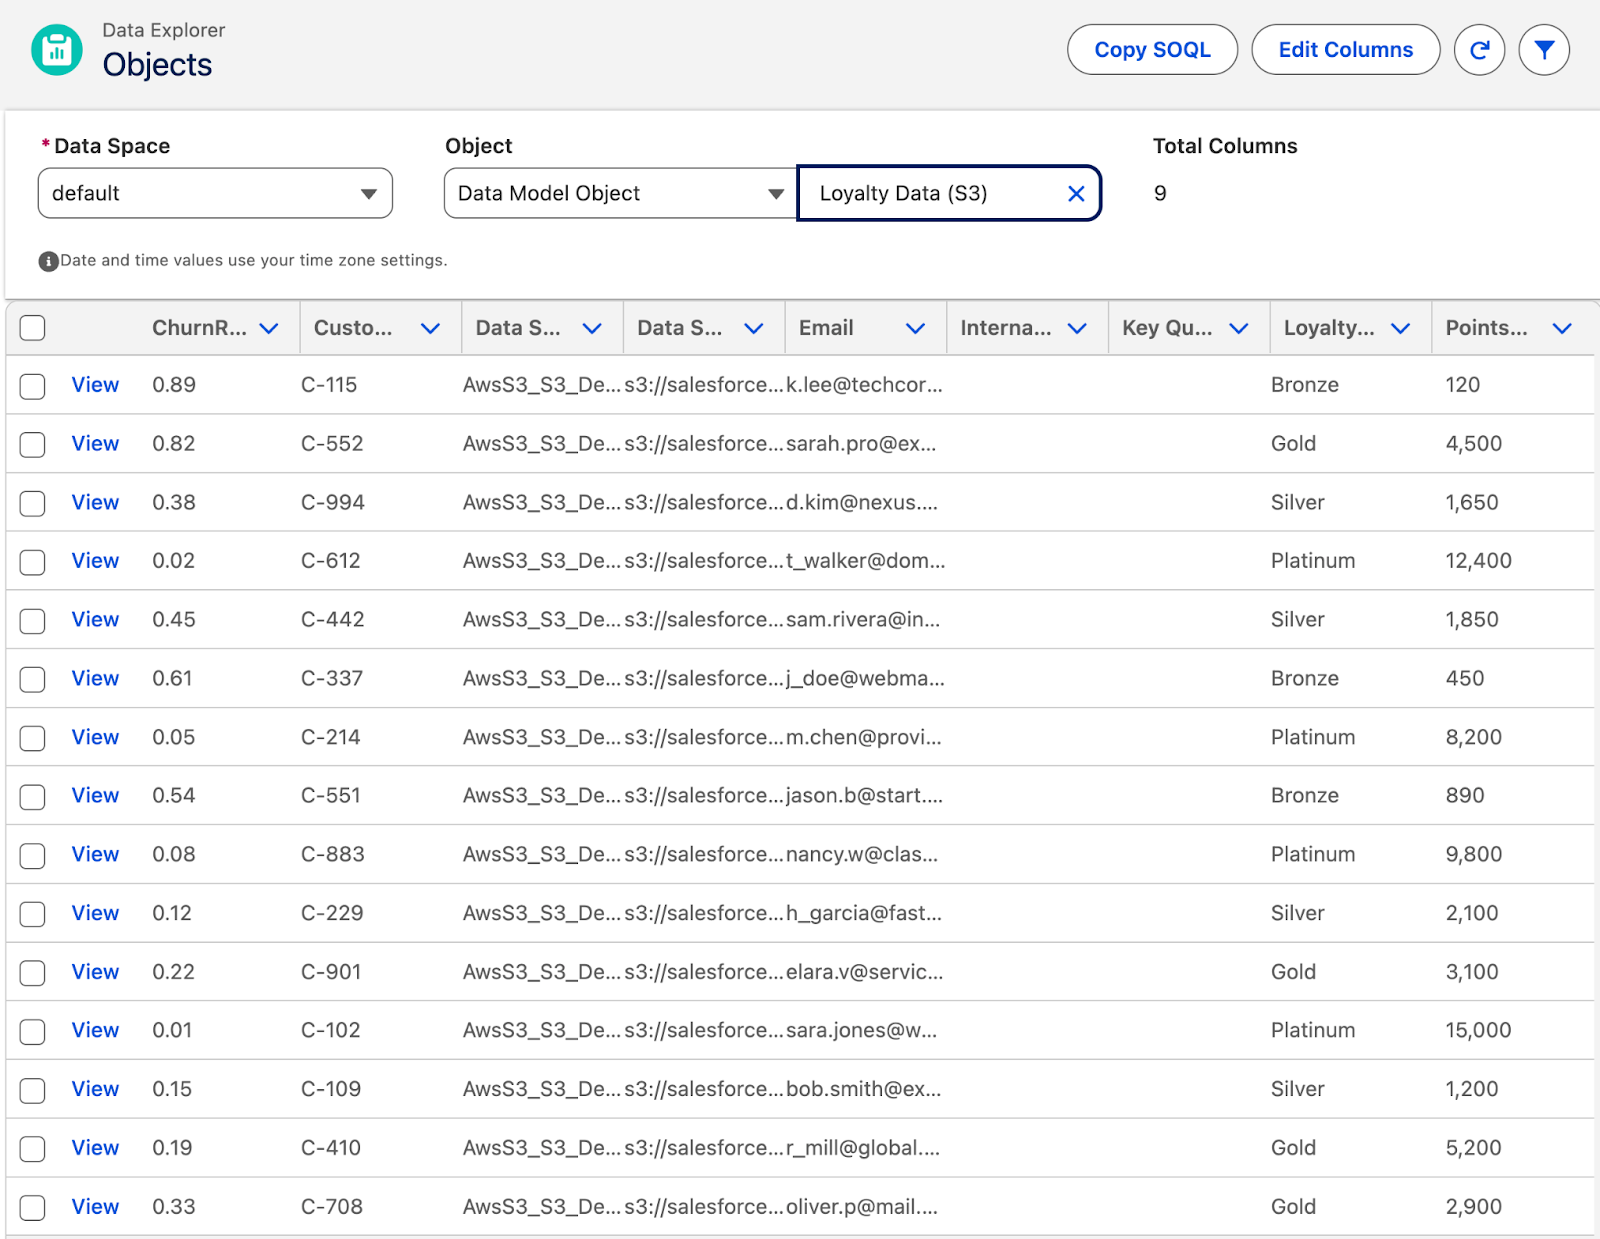
Alternatively, you can open the Data Explorer tab, set the Object to Data Model Object, and select Loyalty Data (S3) as the Object. Once again, if your records show up as expected, you’ve done everything correctly!
Summary
Connecting Data 360 to an external data store like Amazon S3 is a critical skill for modern Salesforce professionals. It can be used to complete the Customer 360 vision of having all customer data accessible in one place. Setting it up, once you know what you’re doing, is relatively straightforward.
Now knowing how it functions and what it allows you to do, can you see Data 360 becoming a valuable tool in your business’s tech stack? Let us know in the comments!
