






Salesforce Flow is an extremely versatile tool, empowering admins to automate complex business processes with clicks, not code. Flow Orchestrator takes things a step further by enabling admins to create multi-step, multi-user Flows with ease.
New to Flow Orchestrator? No problem! In this article, you’ll learn all about what Flow Orchestrator is, how to use it, and where it may be beneficial to you in your org.
What Is Flow Orchestrator?
Salesforce Flow Orchestrator is an extension to standard Salesforce Flow functionality that allows admins to string a number of flows and business processes together across multiple people. Rather than rebuilding your existing flows to support the new feature, Flow Orchestrator has been built with your existing flows in mind and allows you to use them in any new orchestration.
Salesforce defines the Flow Orchestrator as a tool that allows you to orchestrate multi-user, multi-step, and multi-stage Flows. What this means is that admins are able to create a string of automations that may need to be assigned to different people for action along the way.
Think of a process like employee onboarding – this requires multiple different users across various teams in the business to take some form of action, either in parallel or in a sequence.
Where Can I Build a Flow Orchestration?
If you’re like me and trying to start new flows from the Automation app, you’re out of luck when it comes to Flow Orchestrator. For some reason – don’t ask me why – you can only create a new Orchestration Flow from the Setup Page.
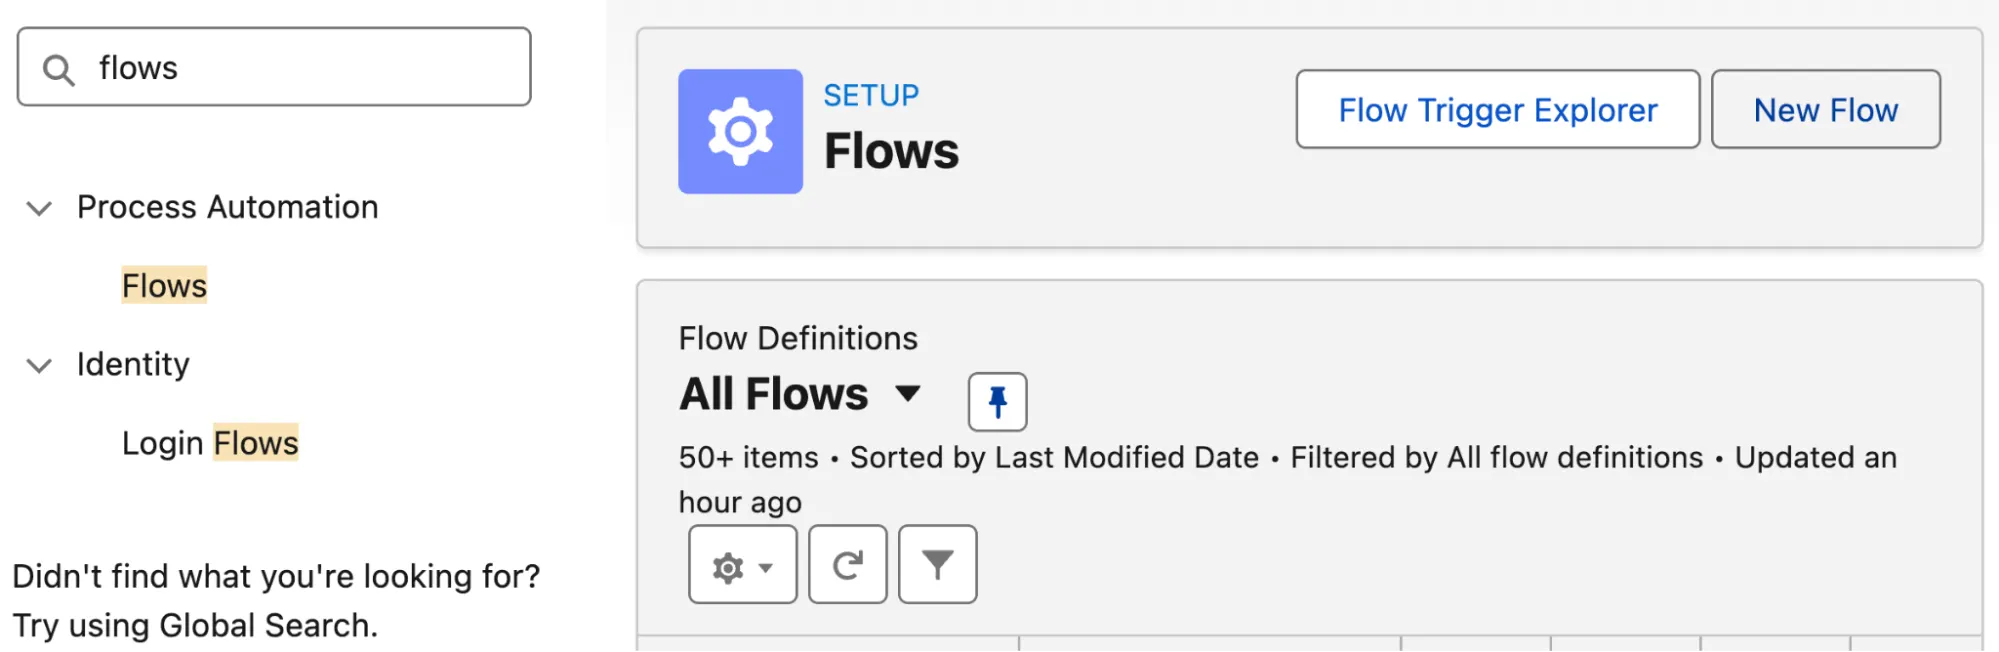
In Setup, search Flows in Quick find, and navigate to that page. Click New Flow at the top, and then in the New Automation page, search “orchestration”.
The two that we care about are Autolaunched Orchestration (No Trigger) and Record-Triggered Orchestration. You may have other types of orchestration flows (signified by the conductor icon), but a majority of users will lean mostly on these two.

Building a Flow Orchestration
Creating a new Flow Orchestration is very similar to building any other Flow. The difference begins when you start adding functionality to it.
Allow me to introduce you to two core Flow Orchestration new concepts: Stages and Steps.
- Stages: A Stage is one or more Steps, grouped together and executed sequentially.
- Steps: A Step will define which Flow or Flows you would like to run, who is assigned to the step, notifications, and where the Flow should appear. Steps can run after each other or in parallel.
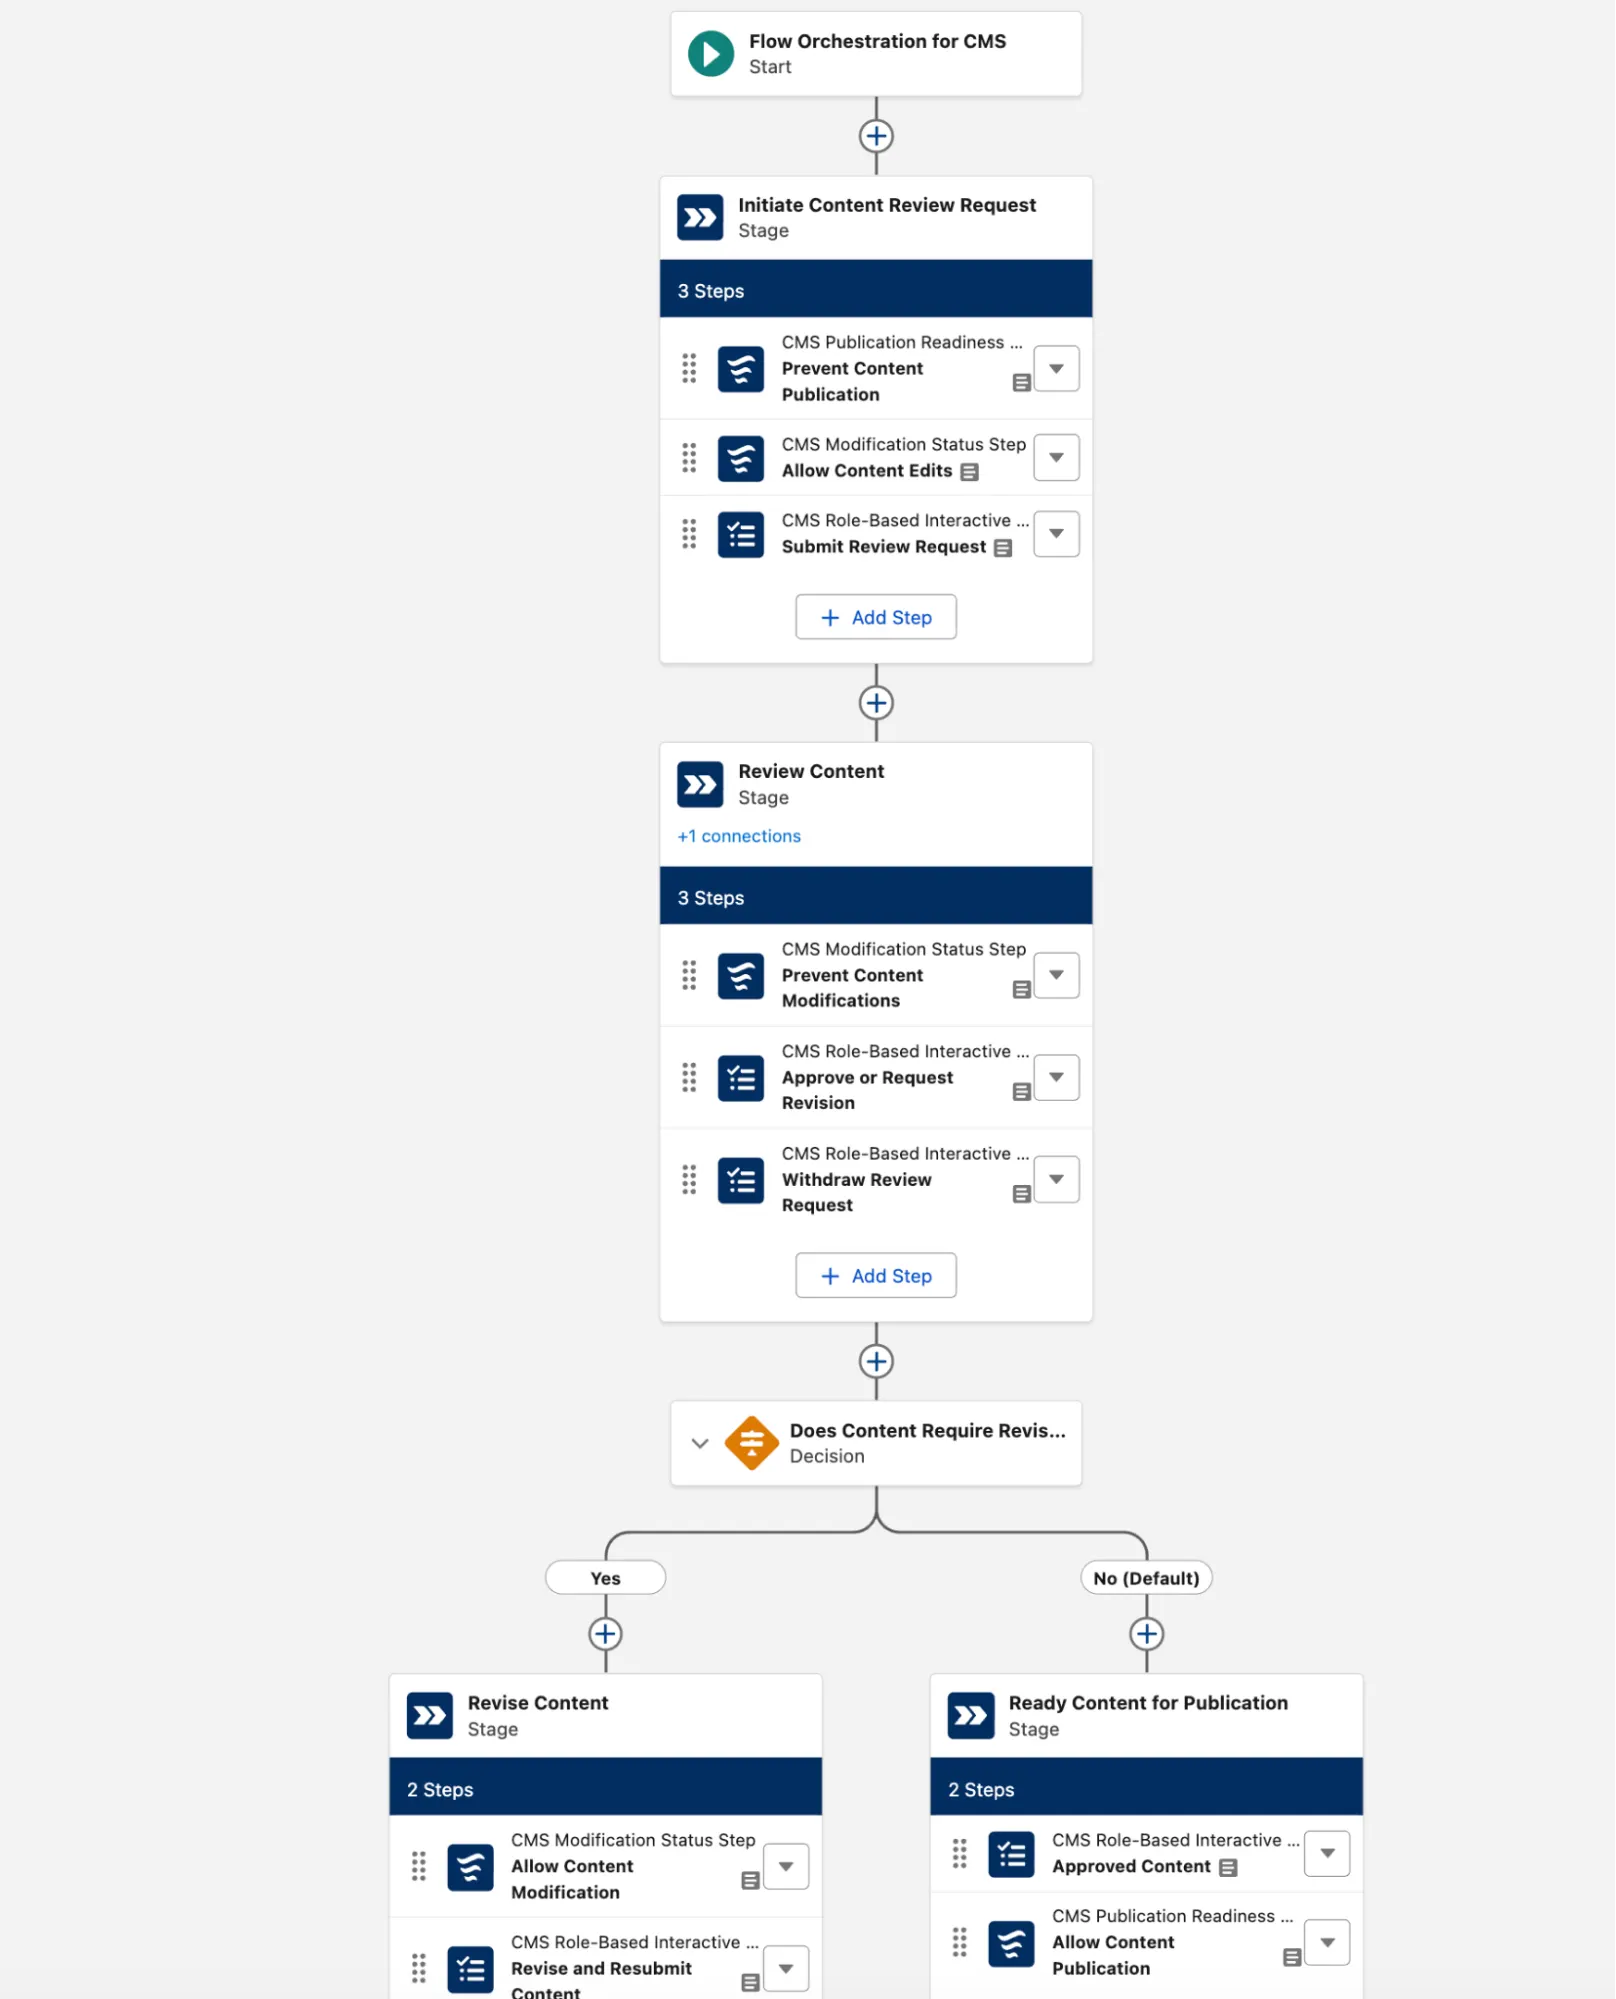
In the screenshot above, you’ll see that there are a number of card groups with a blue arrow icon.
The groupings are called Stages, and these contain individual Steps that can be completed either in parallel or sequence, depending on what is required for that particular business process.
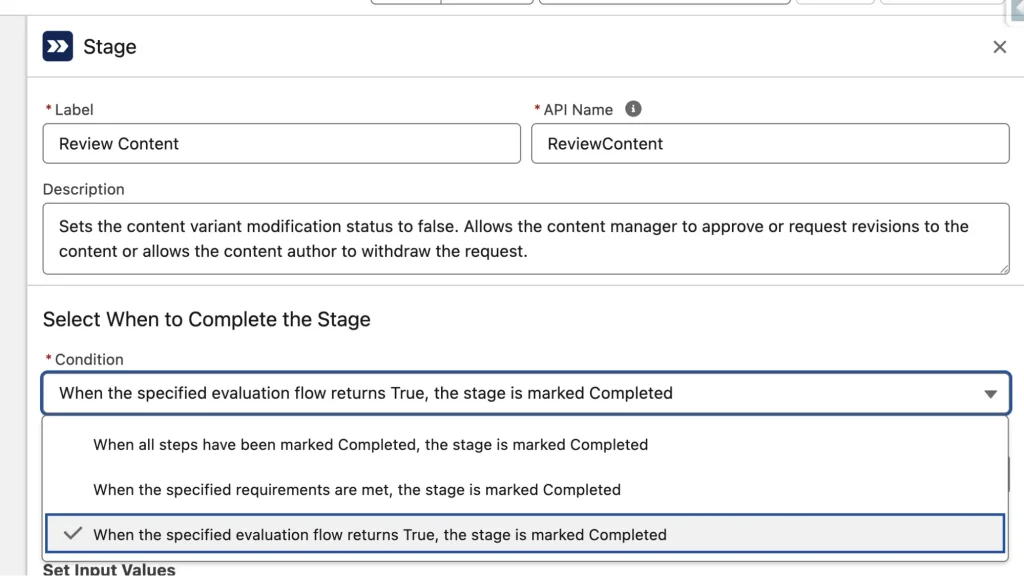
While setting up each Stage, you’ll need to set the Exit Conditions to either be when all Steps are completed, or when a specific auto-launched flow returns a TRUE value.
Using Decisions in Flow Orchestrator
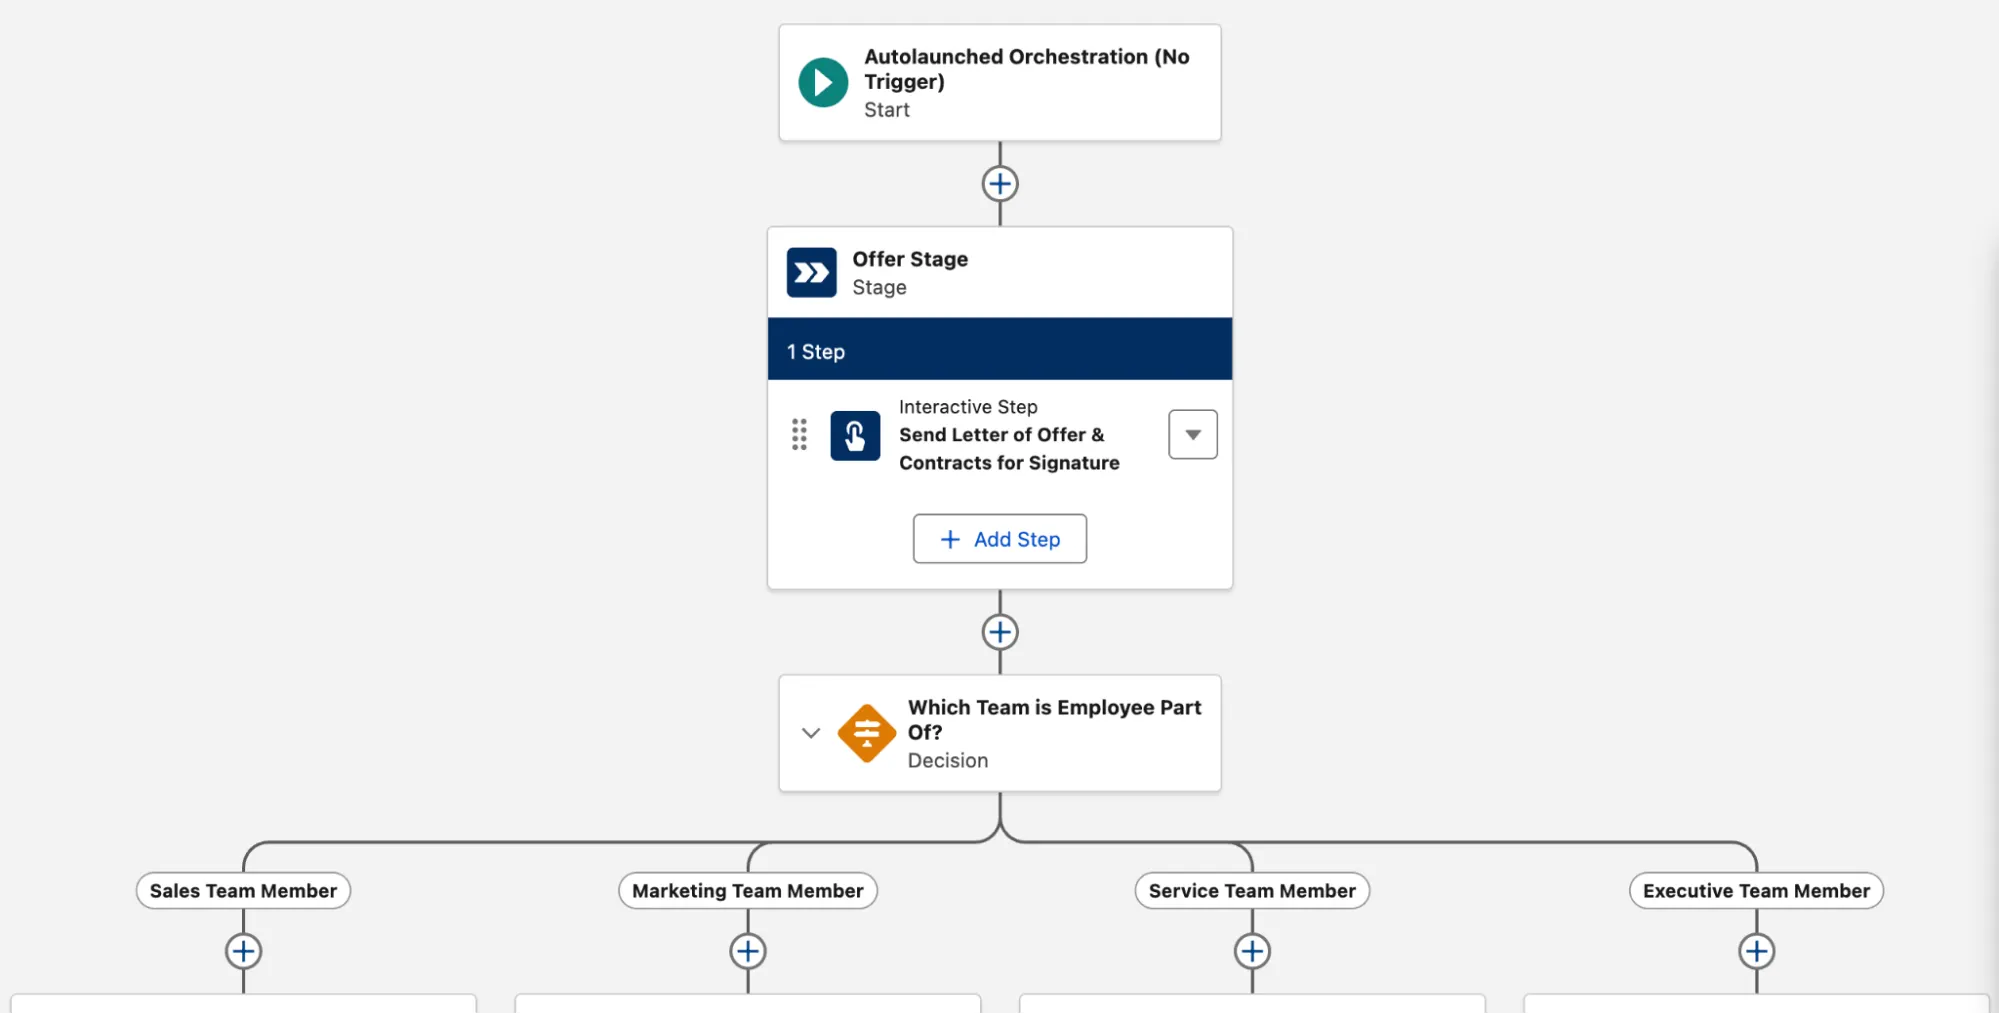
It’s worth noting that you can configure the logic between Stages using Decisions, where you may want to skip specific steps depending on criteria.
For example, let’s say you’re creating a New Employee onboarding Flow Orchestration, and you want to add a section for Laptop Setup, but ONLY for contacts that should receive a laptop. You can put a filter for the Laptop Setup Stage to be bypassed when a Requires Laptop checkbox isn’t ticked, for example.
This way, your Flow Orchestrations can be built dynamically, ready to perform different sets of steps depending on the context in which it has been called.
Configuring Steps
As I mentioned earlier, within each Stage are one or more individual Steps. Steps are similar to Subflows, but there are a few key points of differentiation – the key one being how your users interact with the flows, and just WHO those users are.
There are two main kinds of Steps in a Flow Orchestration: Background Steps and Interactive Steps.
- Background Steps are typically flows that do not require user interaction and run behind the scenes (think Autolaunched Flow).
- Interactive Steps are Screen Flows, as they do require the user to interact with it.
Steps can be configured to run after another Step, when the Stage starts (i.e. all Steps under a Stage with this option selected will run together), when specified criteria are met, or when an evaluation flow returns TRUE (similar to the Stage Exit Condition above).
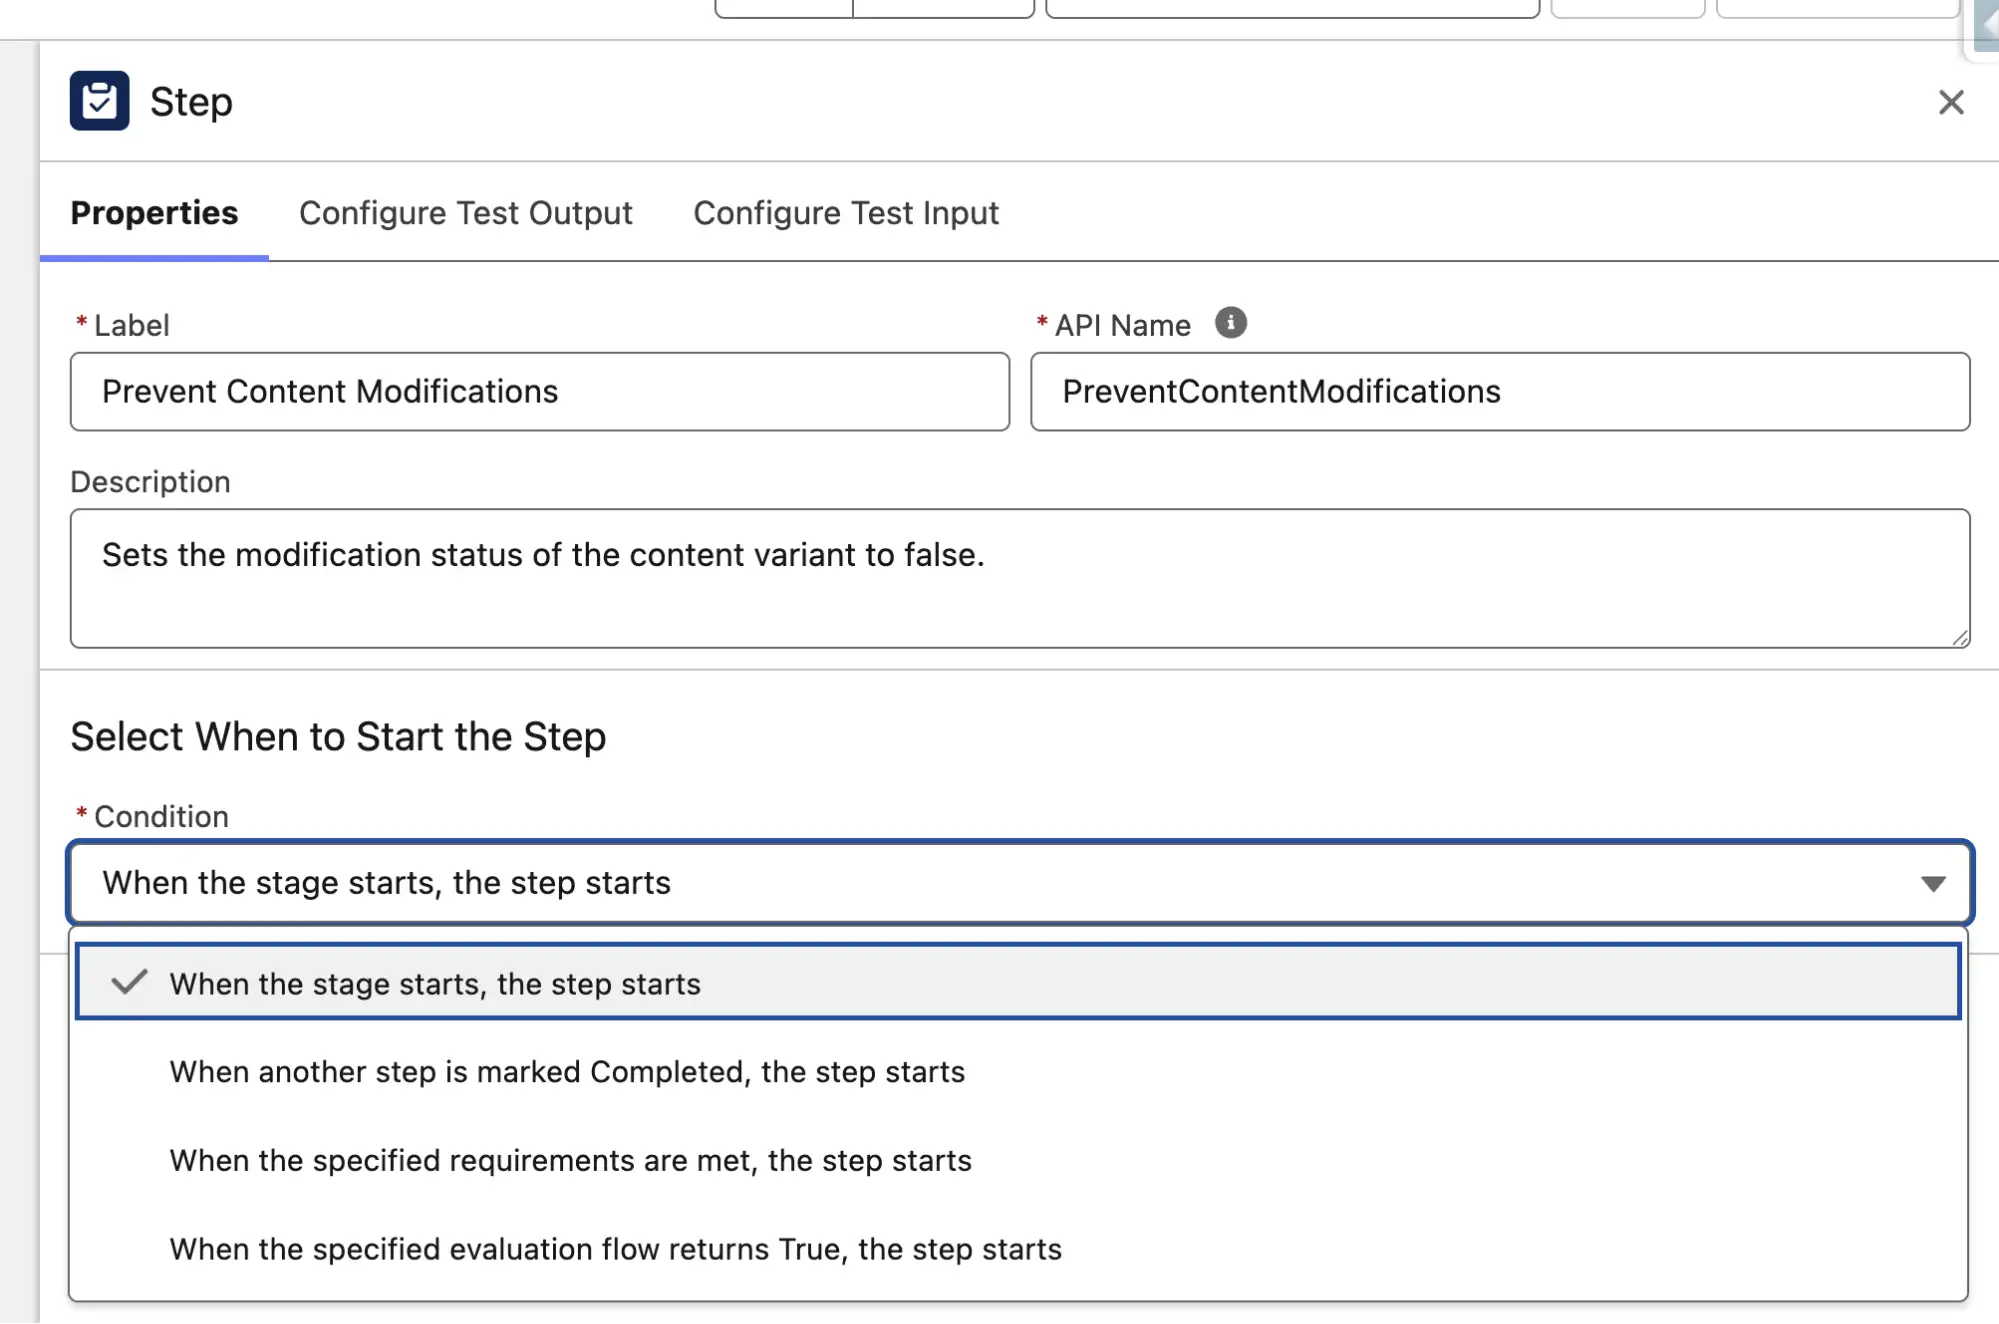
Usually, when a screen flow is created, it must be run manually by a user. You can’t have a triggered or auto-launched screen flow… or at least, you couldn’t until now.
Screen flows can be called through a Record-Triggered Flow Orchestration and added to what is known as the ‘Orchestration Work Guide’ on each record page. When a record meets criteria and specific people need to take action through a flow, they can see it in the Work Guide Component. More on that later.
When constructing a Step, you need to select the flow (screen flow or auto-launched flow), the record Id that the flow should be called from, and an assigned user (another HUGE benefit of Flow Orchestrator – you can set different Steps for different people. Pretty neat!).
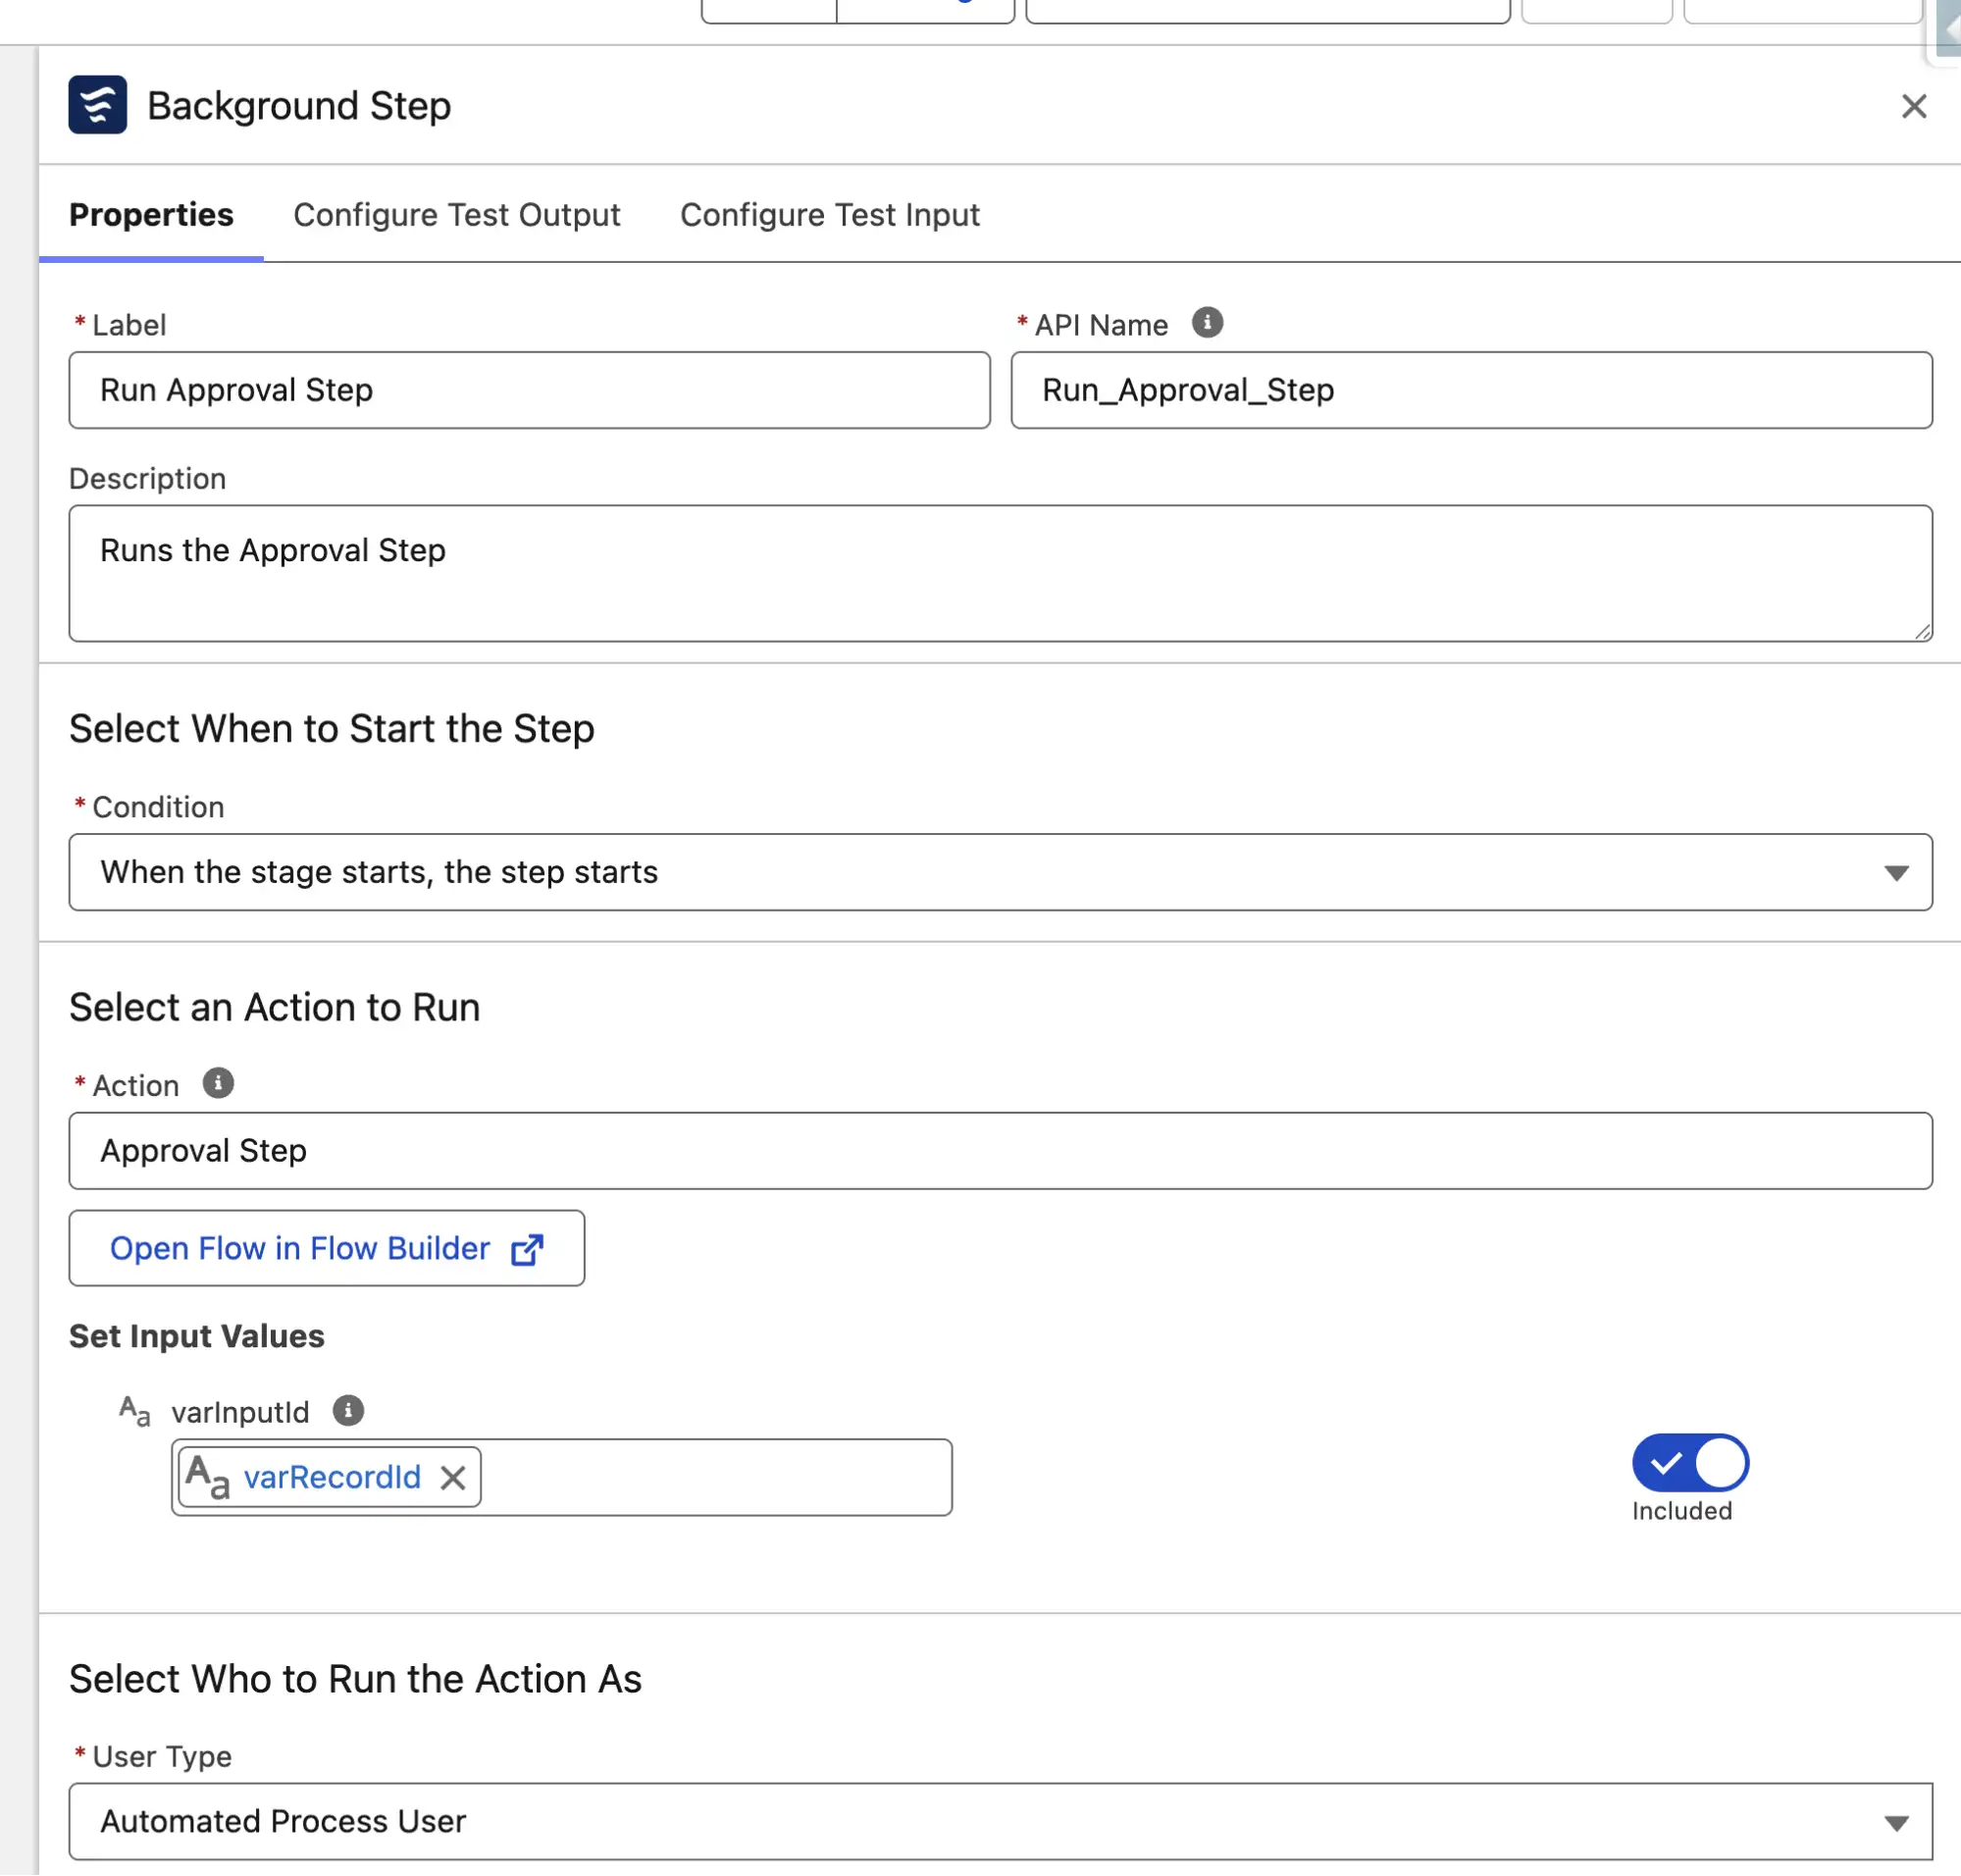
Flow Orchestrator Work Guide
Once a User has been assigned a Screen Flow (i.e. Interactive Step), they can access it by navigating to the Work Guide Component. You’ll need to add it to the Lightning Page first – it’s called ‘Orchestration Work Guide’.
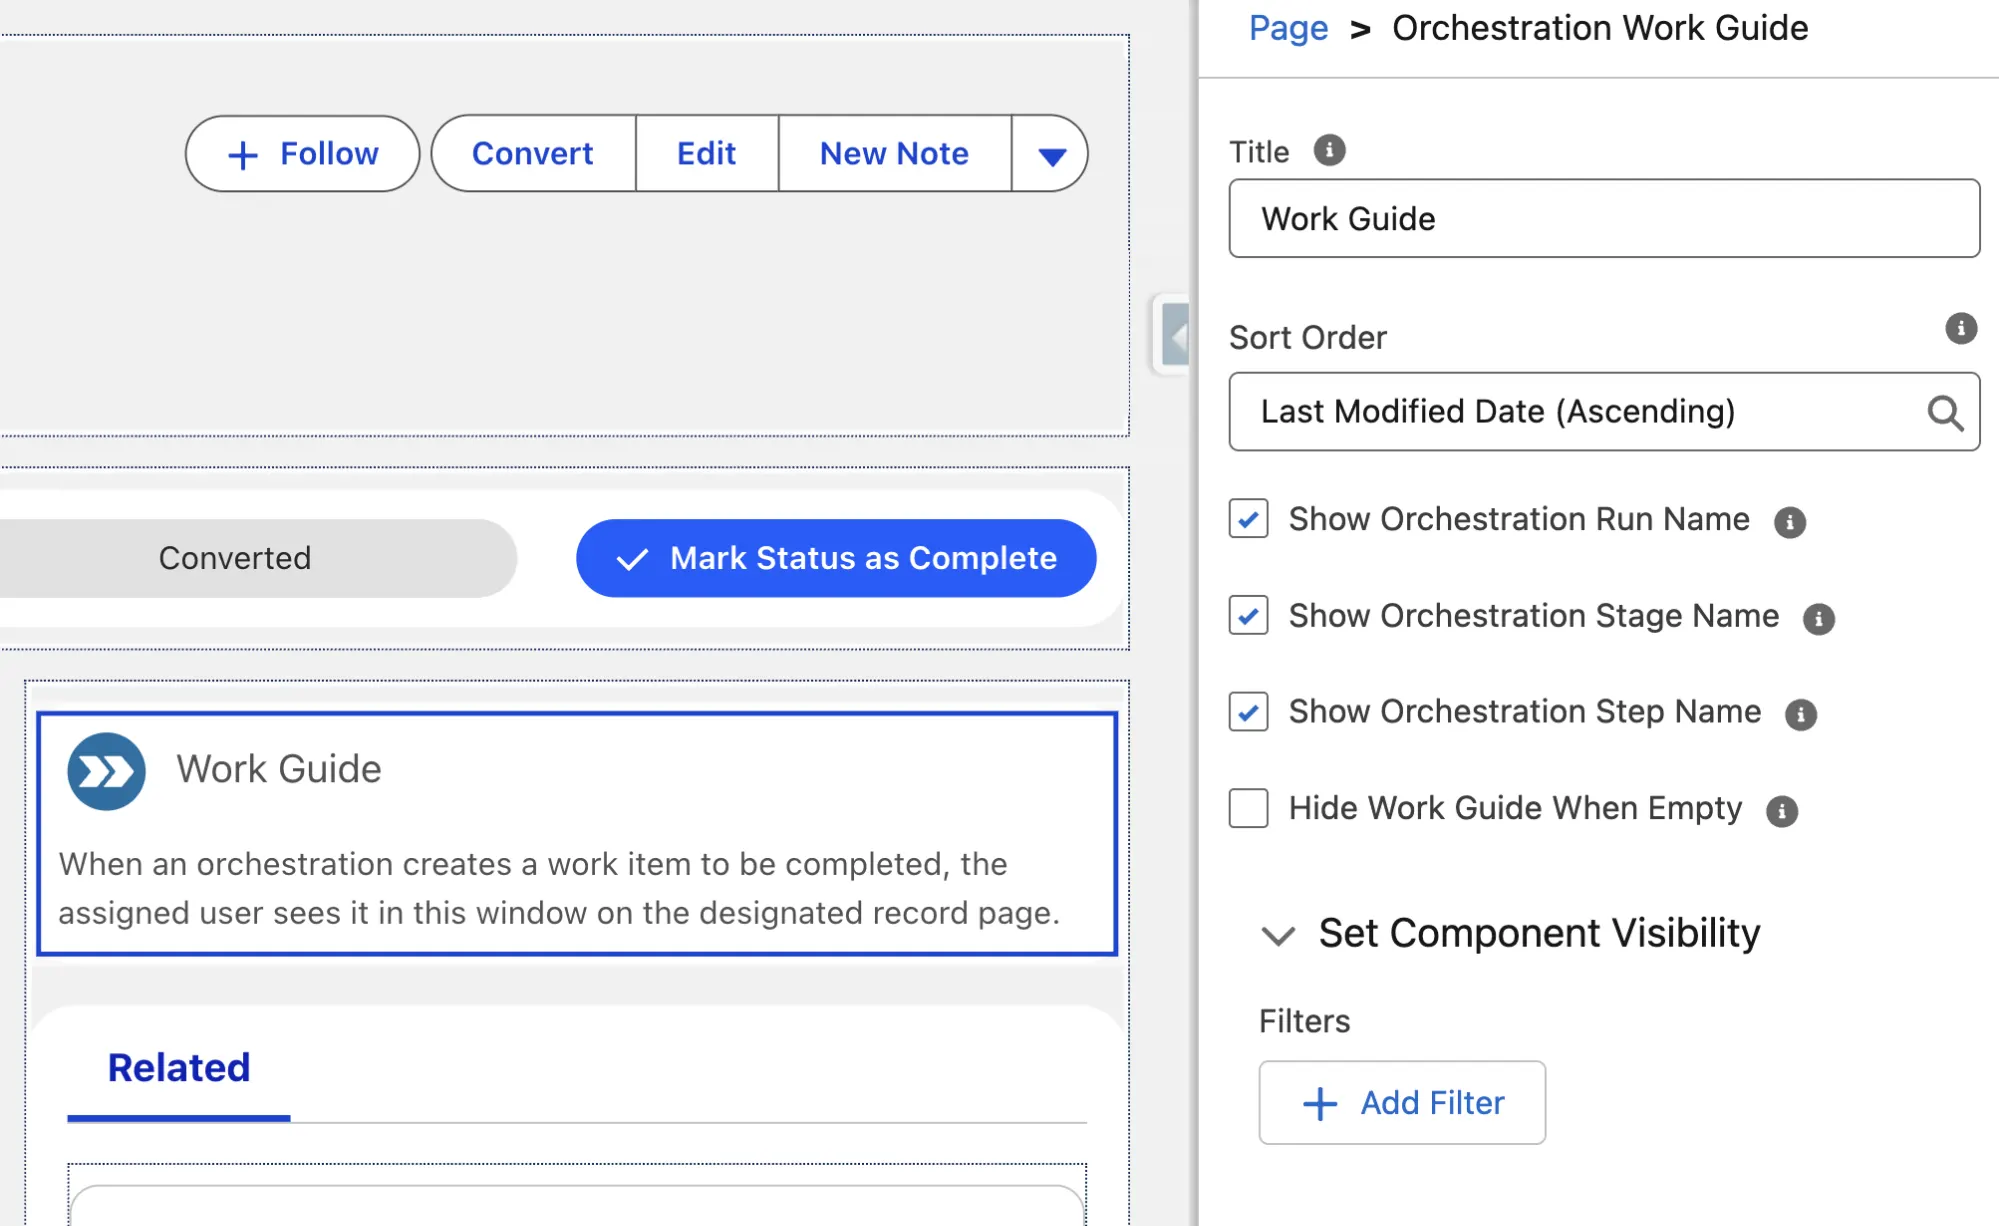
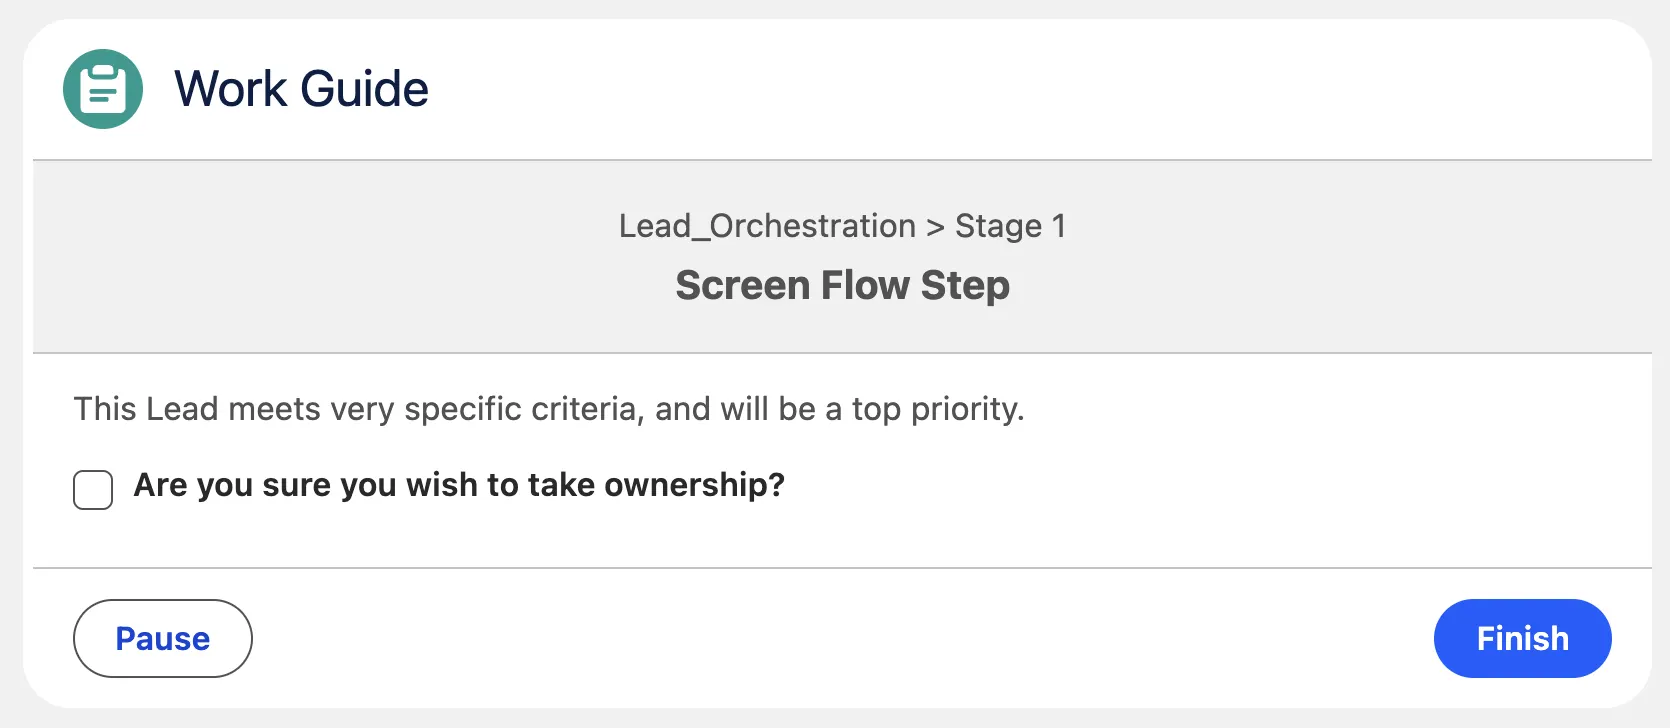
This is where users will be able to access the screen flows that have been assigned to them. Below is what this will look like for them when a screen flow is assigned to them:
When Should I Use Flow Orchestration?
There are a number of different ways that Flow Orchestrator could be used to benefit businesses. A few examples would be a Service Delivery Orchestration (where multiple teams need to action various steps throughout a client delivery process in a specific order), a multi-person approval (Approval Flows are an extension of Flow Orchestrations) or escalation process where a record may need to be passed to different team members depending on the criteria it enters the Orchestration with, and of course, the example I’ve been using when discussing Flow Orchestrator with colleagues is a New Employee Onboarding Orchestration.
This Orchestration is triggered when a contact’s Employee Start Date field is set. It will first be assigned to the HR Manager to confirm that some additional information has been entered and is correct using an existing screen Flow.
Once the HR Manager has confirmed the information, it will then be passed to the next person who needs to ensure they have a laptop and the relevant user accounts in Salesforce and other applications have been created prior to their start date. This goes on and on until the new employee has had all the relevant setup processes that surround their commencement at the business completed, and they’re ready to go!
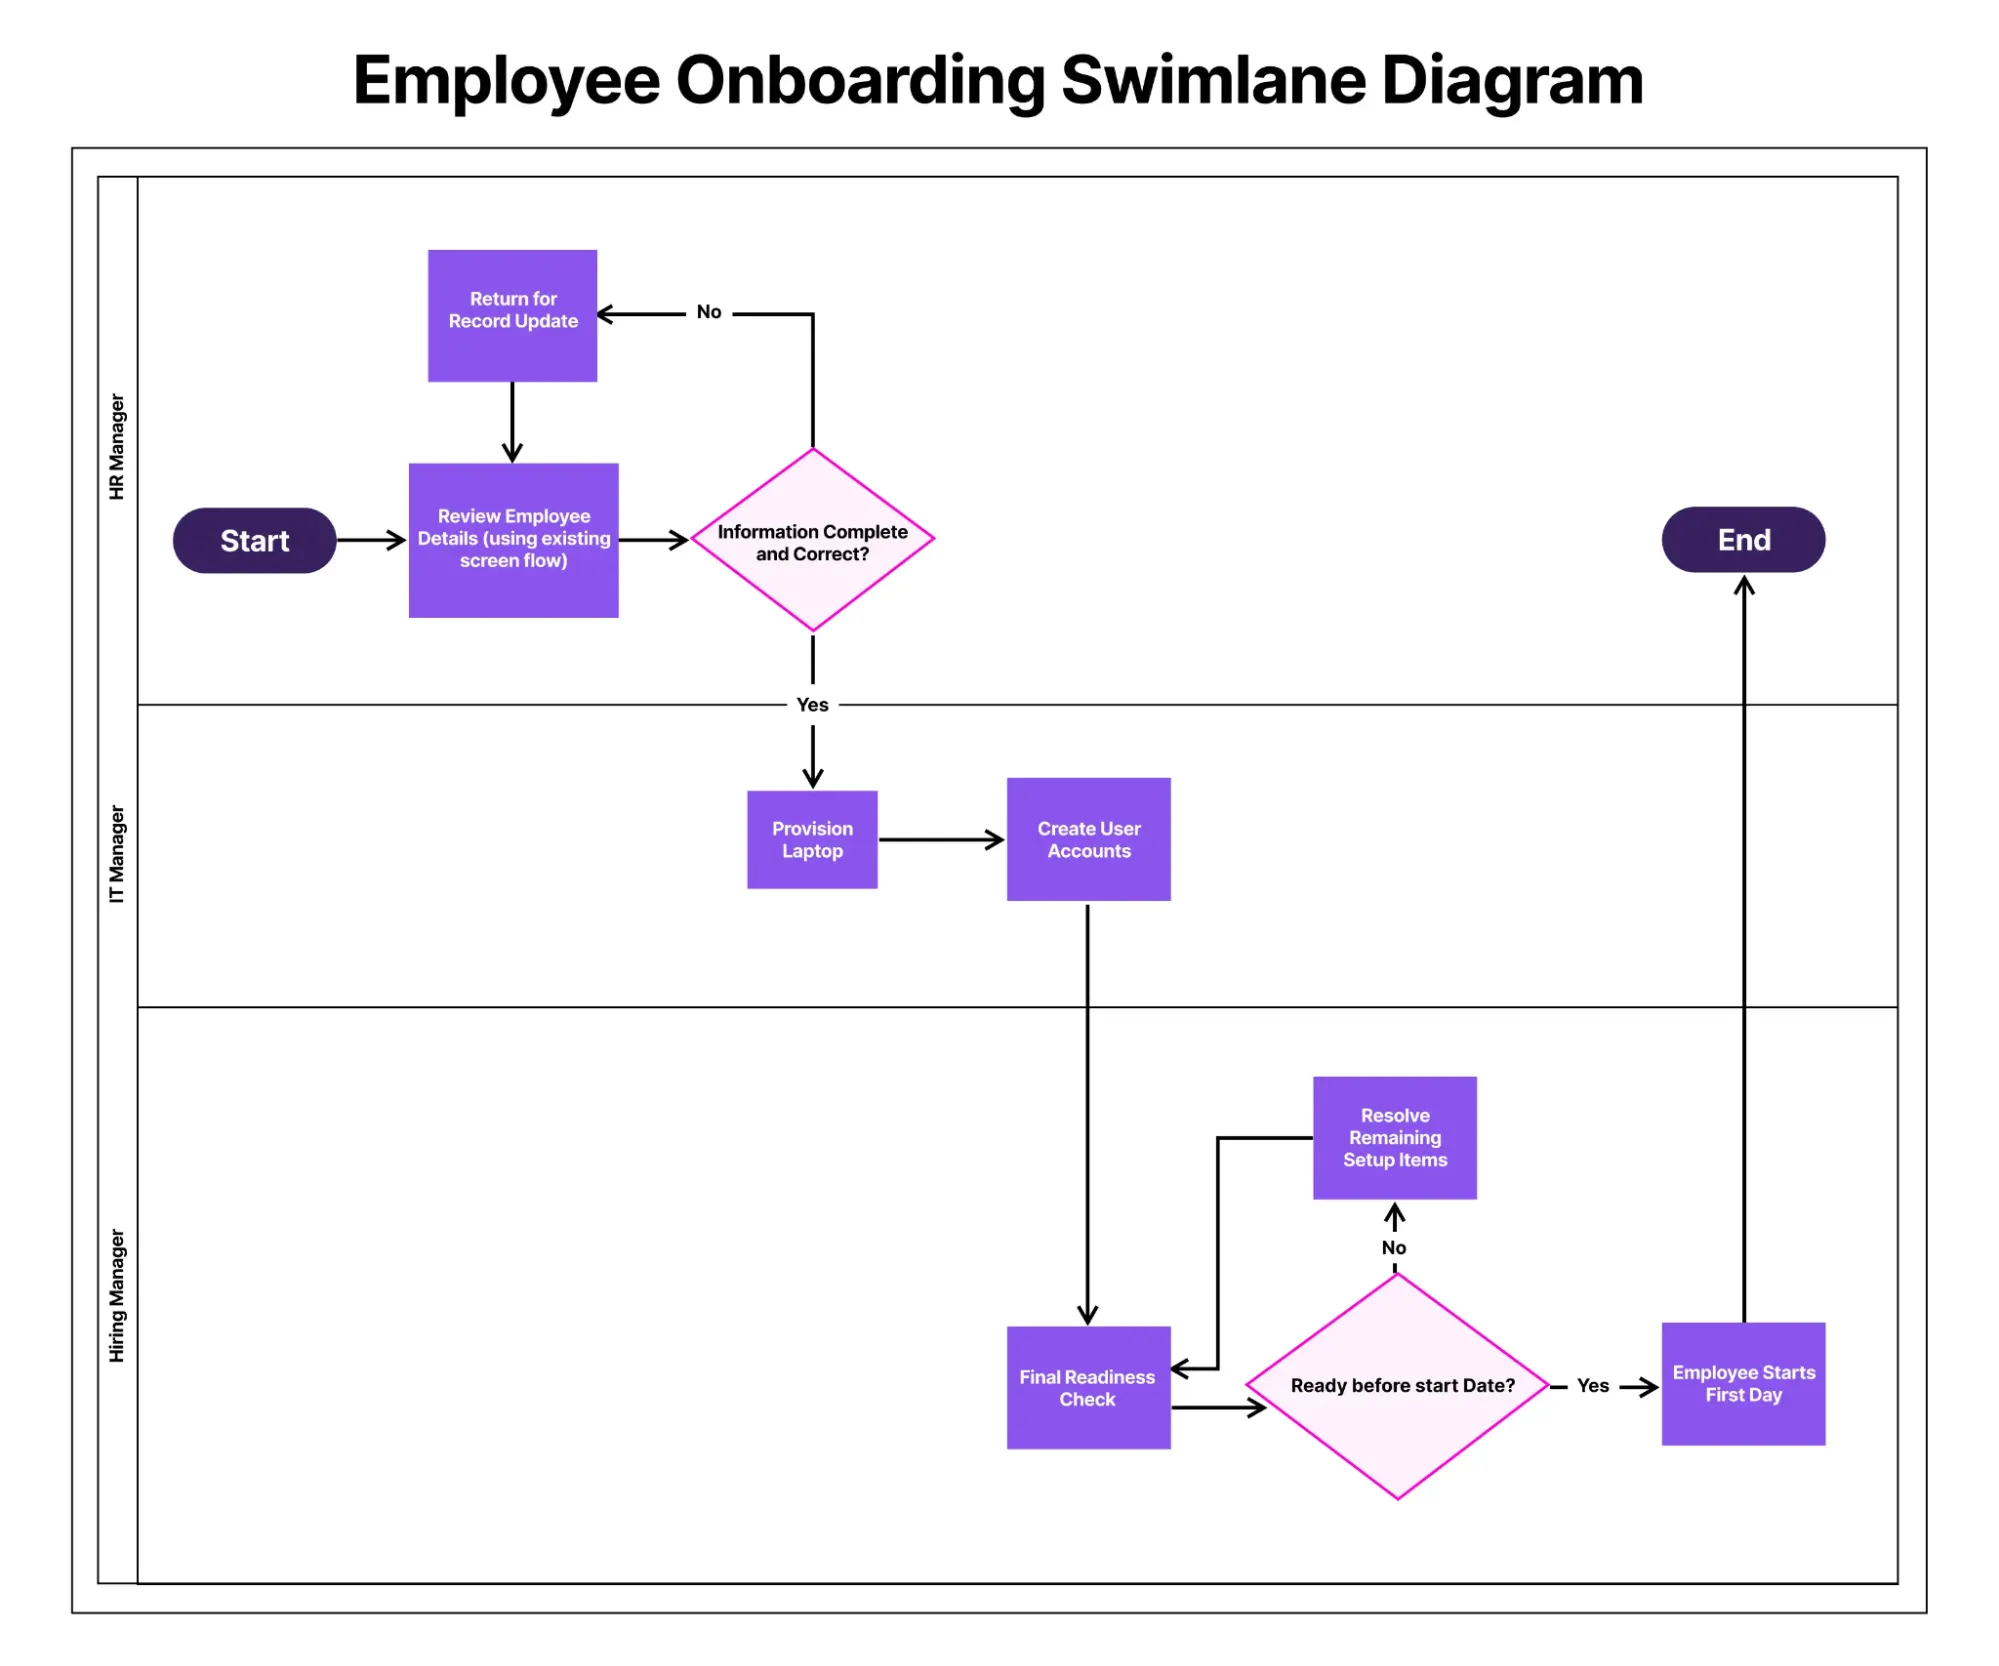
Previously, this may have been driven by flows and a combination of email alerts, notifications, list views, reports, etc. that would let the relevant staff members know that they need to take action. The beauty of Flow Orchestrator is that this all sits within a single master flow now, so to speak, rather than spread out across multiple Salesforce tools.
So remember: Flow Orchestrator is useful when you need to string together multiple steps (Flows, actions, or interactions) across multiple users or teams. Similar to Flow Approvals, it provides end-to-end visibility into a complex business process, including who is responsible for each step.
Summary
Salesforce Flow Orchestrator is now free for Salesforce customers on Enterprise edition and above. It brings with it some incredible new capabilities for Salesforce Admins to make use of, and I’d recommend trying it out in a sandbox or Developer Edition org as soon as possible to see how it may benefit you and your orgs!
Multi-step processes across multiple users running automatically is an absolute game-changer, and the fact that Flow Orchestrator can utilize existing auto-launched flows and screen flows is bound to make it easier for admins!





Comments: