

If you’re new to Salesforce, using Flow could very well be the first time you dabble in automation within the platform. But if you’re not a Salesforce newbie and have been comfortable with the OG automation tools like Workflow Rules and Process Builder (like me!), then your first rodeo with Flow Builder can feel both exciting and intimidating. I know, I’ve been there, and the idea of switching to something more complex might feel like a steep climb.
I’ll be honest – I didn’t “fall in love” with Flow immediately. But with Workflow Rules and Process Builder’s retirement, along with pretty aggressive developments to Flow, I knew I had to learn it. Flow has become the standard for declarative automation, so to build solutions that scale and are future-proof, Flow is the way to go.
What Is Salesforce Flow?
Put succinctly, Flow is the automation powerhouse that connects data, logic, and user experience in Salesforce.
Flow doesn’t just replace those legacy automation tools we’ve grown comfortable with – it’s a significant upgrade. With Flow, you can do everything you used to do in Workflow Rules and Process Builder – like sending emails, updating fields, or assigning tasks.
But it doesn’t stop there. Flow lets you go even further with building step-by-step screens to guide users, create branching logic, and connect across multiple objects. Despite these sounding pretty complicated to implement, the best part is that you can do it all without writing a single line of code. Its clicks-not-code nature gives Salesforce Admins power to rival that of Salesforce Developers.
As mentioned, I went on a learning journey when it comes to Flow – to learn as much about it as I could within 90 days. Along the way, I collated the need-to-knows, the things I wish I knew earlier, and the examples that helped things click into place for me – almost like a diary.
This won’t be like our other tutorials or a Trailhead course. It is more of an opportunity to learn alongside me, to start you on your own learning journey with Salesforce Flow. Mistakes will be made as you go on, but remember, those mistakes mean that the learning never stops. Every flow you build makes you a better builder in the long run.
My Salesforce Flow Learning Journey
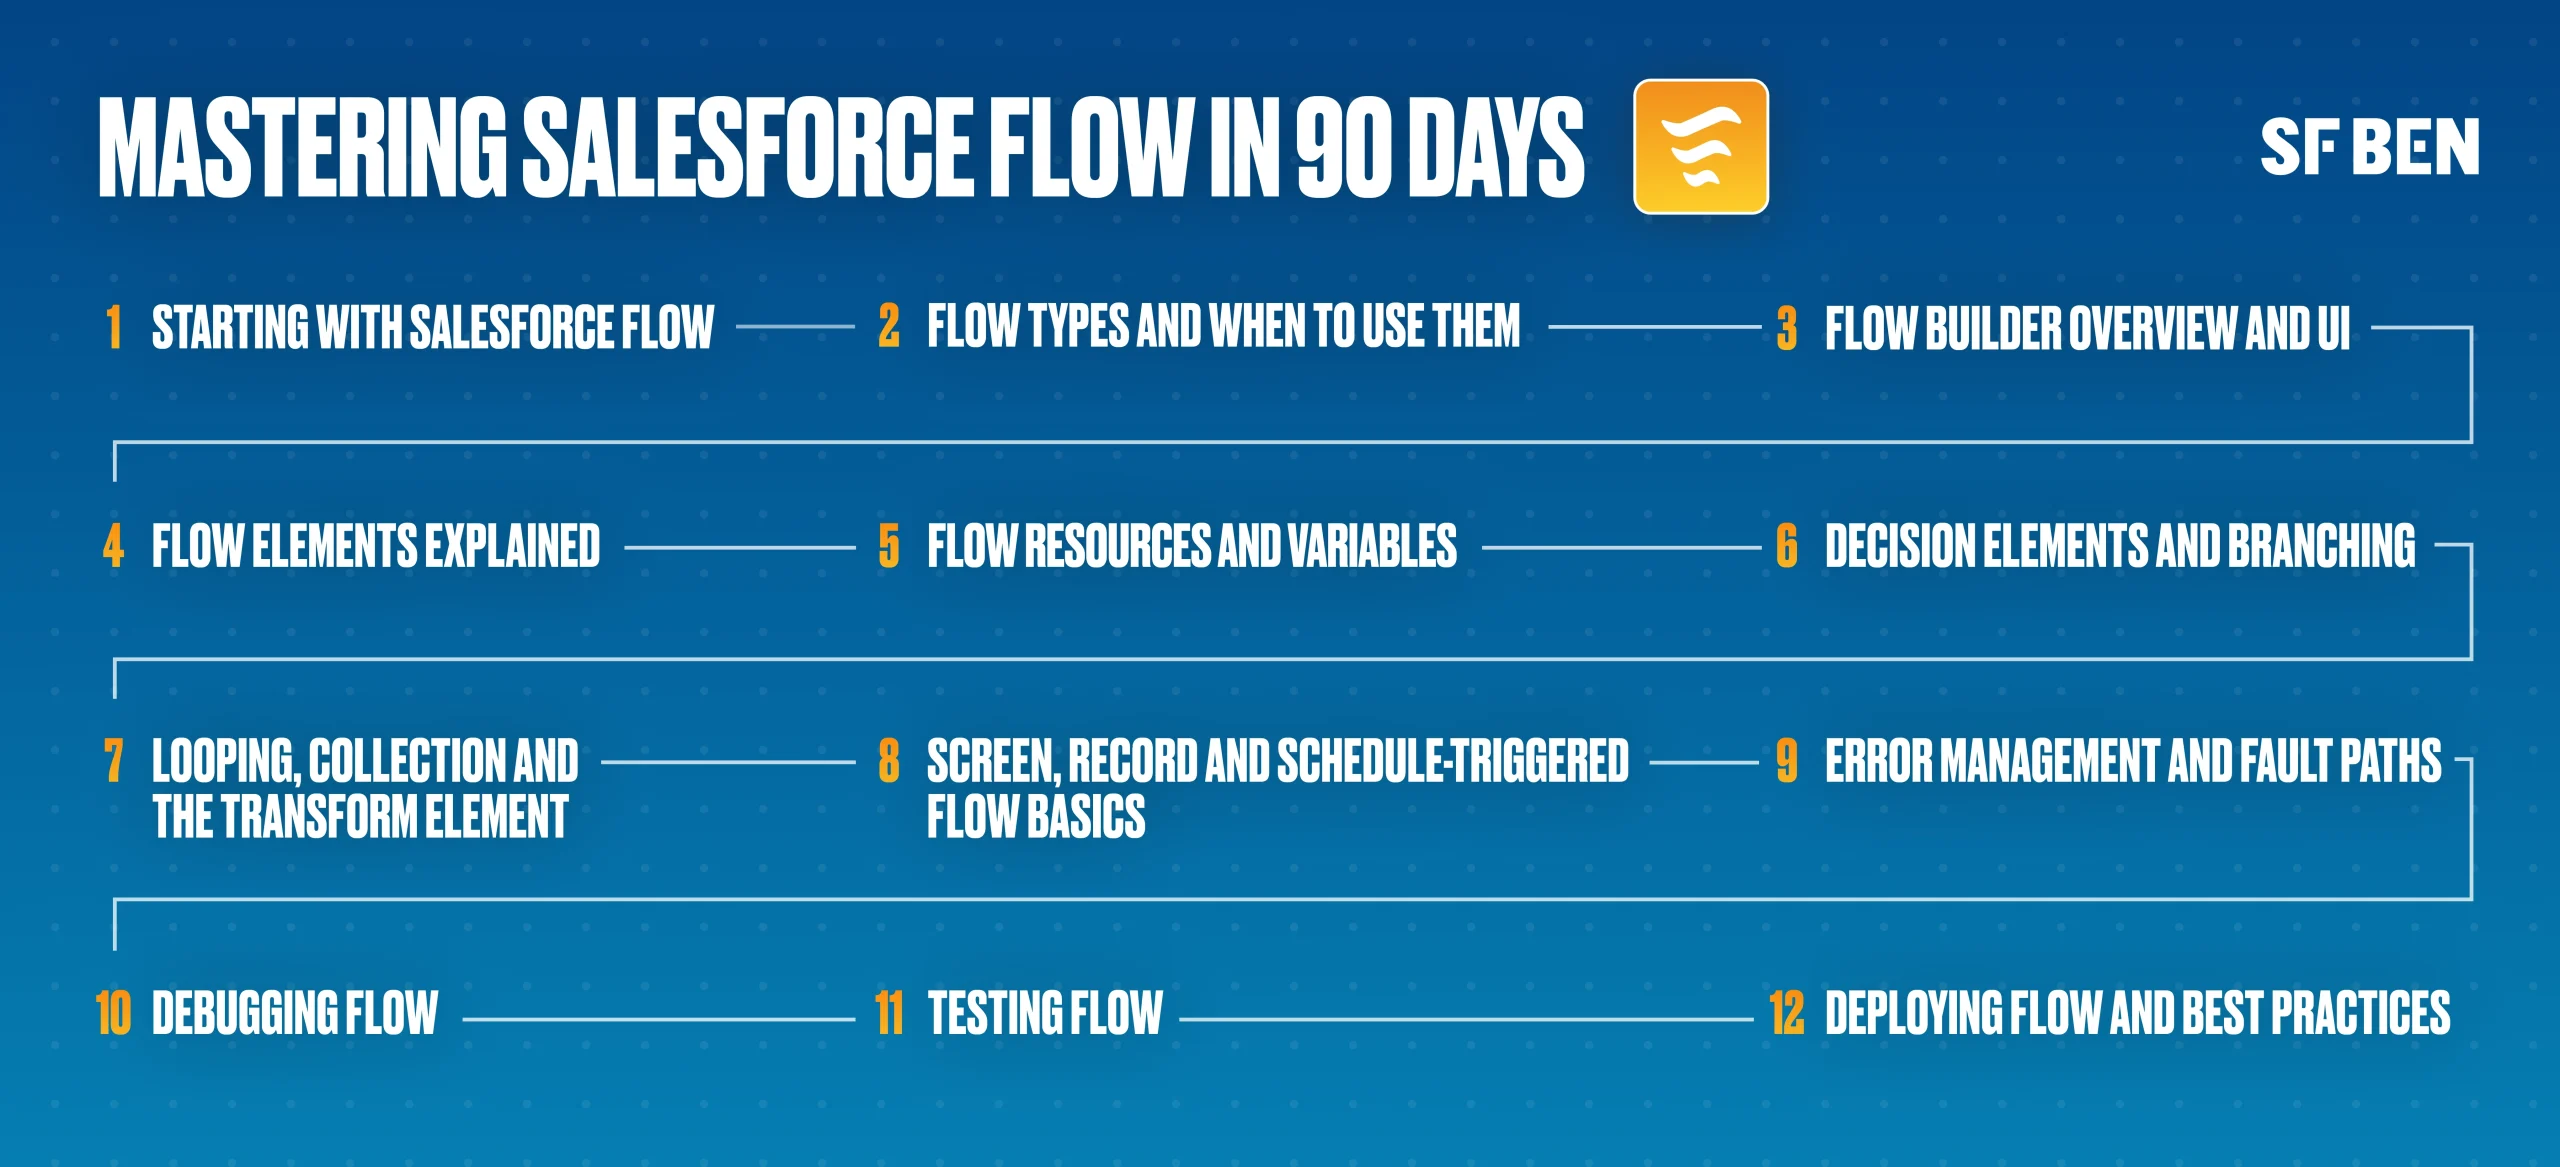
Flow Types
Screen Flows for user interaction, Record-Triggered for automating data changes, Schedule-Triggered for time-based actions, and Autolaunched Flows to be called from other automations. Knowing when to use each type is the first step to designing efficient automations that truly fit your purpose.
Flow Builder
Familiarity with Flow Builder’s layout (the canvas, toolbox, errors panel, and debug panel) builds the confidence you’ll need to build flows easily.
Flow Elements
Each Flow element (interaction, logic, and data) plays a specific role and knowing when to use each of them transforms guesswork into thoughtful automation design.
Flow Resources and Variables
Variables, constants, formulas, text templates, stages, and choices make flows dynamic. They are the key to how data moves, changes, and reacts to conditions behind the scenes.
Decision Elements and Branching
Decision elements bring flexibility, and they allow flows to branch logically, ensuring the right outcome for the specific conditions.
Looping, Collection, and the Transform Element
Collections and loops – when used together – handle bulk data in Flows. And with the Transform element, bulkifying can be made easier and more maintainable through the organization and mapping of data.
Screen, Record, and Triggered Flow Basics
For Screen Flows, build with the user in mind. For Record-triggered flows, guard against infinite loops and be specific with entry criteria. For schedule-triggered flows, be intentional and mind the time zone.
Error Management and Fault Paths
Building fault paths prevents failed automations from becoming vague errors, giving users clearer context. Use them to show user-friendly error messages, log the error internally, or send alerts/notifications.
Debugging Flow
The debug panel helps a lot in understanding how each part of your flow behaves when triggered. It’s great for checking if your flow works as intended.
Testing Flow
Testing is essentially the same as debugging, but with intention. It ensures reliability before deployment and shifts your mindset toward anticipating worst-case scenarios. Proactively validating every path, condition, and outcome is essential so users don’t run into issues later.
Deploying Flow and Best Practices
Deployment is where everything comes together with version control, documentation, and best practices to ensure your flow remains scalable and maintainable.
Final Thoughts
If you’re looking to learn Salesforce Flow, these articles will give you all the foundational knowledge you need.
Prefer to watch? Check our series of YouTube Shorts and follow along in real time:
- The 4 Main Flow Types
- Flow Builder Overview and UI
- The Flow Elements
- Resources and Variables in Flow
- Decision Elements and Branching in Flow
- Why Loops, Collections, and the Transform Element Matter
- Screen, Record, and Schedule Triggered Flows
- Error Management and Fault Paths
- Debugging Flow
- Testing Flow
- Deploying Flow and Best Practices
