

Before you can start building powerful automations with Salesforce Flow, you have to get used to the tool where we create them – the Flow Builder. It is the canvas where all your automation ideas will come to life.
If it is your first time opening Flow Builder, it may feel overwhelming. But don’t worry, it’s mostly just getting familiar with where everything is, so you know where to click.
A Quick Tour of the Builder
When you navigate to Flows from Setup (or Shortcuts > Flows from Salesforce Inspector Reloaded, which you should definitely check out if you haven’t yet!), it takes you to a list view of all the Flows in your org. Click “New Flow” on the upper right to start building.
Salesforce first asks you what type of Flow you want to create. Your choice determines what kind of logic you’ll be able to build and what elements will be available to you. For example, you won’t find Screen as an element to add while building if you chose Record-triggered Flow in the beginning.
Once you make your pick, you’ll land on the builder with just a Start and End node on the screen. This is true for Auto-layout mode, but in Freeform, you’ll just have a Start node.

Let’s break it down: on the upper left below the back arrow, you’ve got your Toolbox. This is where you manage the building blocks used in your Flow, such as elements (screens, decisions, actions, etc.) and resources (variables, formulas, text templates).
It has a handy search bar where you can find the specific elements you need, which is extremely useful, especially for complex flows. So make sure you’re labeling everything right! You can also create new resources from here.

The center canvas is where your Flow is visualized. You can add elements by clicking the plus sign between your start and end node, and every other plus sign that appears between your building blocks as you go (assuming you’re still in Auto-Layout mode). Every element added becomes a part of your process.
The space on the right is reserved for the Settings panel, where any element’s configuration appears as soon as you click on it from the canvas. You can view and edit the element’s configuration from there.

Since we’re working in Auto-Layout mode, building is as easy as clicking the plus signs as you go. What’s great about this is you already have a clean and organized view of your flow from the start. Even if you end up using multiple decision elements resulting in a lot of branches, they stay well laid out and evenly spaced.
You can drag the canvas and use the “+” or “–” buttons on the lower left to navigate and zoom in or out, making it easy to work with larger and more complex flows in Auto-Layout.

“How about in Free-Form mode?”, you might ask. Well, there are slight differences between building in Free-Form vs. Auto-Layout:
- The elements in Free-form can be dragged around individually.
- There are no restrictions on how nodes can be connected in Free-form. Connections and fault paths between elements can be made simply by dragging from one element to the other.

- The Toolbox has an Elements tab in Free-form, where you can simply drag your chosen element onto the canvas and configure it before attaching it to your flow.

- Duplicating elements in Free-form is as easy as clicking the Copy button (the one with two overlapping rectangles) while your element is selected. In Auto-Layout, it’s more like copying and pasting: click the “Select Elements” button, select your elements, and then click the Copy button to copy. They’ll be added to your clipboard, where you can just paste them the next time you add another element to your flow. It might seem like a small difference, but knowing how to do it on both modes really helps when you’re dealing with repeating logic.

Another feature I found handy is how Auto-Layout handles subflows. Just click the three-dot icon on the right side of your subflow element and select Open Referenced Flow, and it’ll open the referenced flow in a new browser tab. Unfortunately, Free-Form doesn’t offer the same shortcut.
Though Auto-Layout is my personal favorite, users are usually pretty torn between the two. I even know someone who likes switching multiple times between both modes mid-build! It often boils down to your preferences and which one you get used to.

Another notable section of Flow Builder is the errors panel, which you can access by clicking the button with the circle icon and a diagonal line through it (kind of like a simpler “no entry” sign). This opens a sidebar of errors and warnings, which is great for seeing what needs fixing.

And speaking of fixes…yes, you can undo recent changes with a quick Ctrl+Z! Flow Builder supports a handful of handy keyboard shortcuts like this, so you can work faster without constantly reaching for your mouse. Click the question mark on the upper right and select Keyboard Help to bring up a list of Flow Builder keyboard shortcuts.
The gear icon beside your error panel icon brings up the current flow version’s properties, where you can find the Flow Label, Flow API Name, and Description. Clicking on Advanced will also present what type of flow you’re working on (in case you forget or if you’re on a team dealing with another person’s work).

Once your flow is built, you’ve got a few important buttons to know:
- Run gives you a quick way to test the latest saved version of the flow by simulating its execution in a live environment. It’s perfect for quick checks to see whether running your flow triggers any errors.
- Debug lets you step through the flow and see exactly what’s happening at each stage, making it easier to spot issues. It’s like Run, but offers more detailed information about your flow’s execution path. It even gives you the option to test your flow in different ways.
- For example, you can skip the start condition requirements so the flow runs even if the start criteria aren’t actually met, run the flow as another user to see how it behaves under different permissions based on user, or test in rollback mode, which is default for record-triggered flows and means it runs without permanently changing any of your Salesforce records. These options make debugging both flexible and safe, so you can experiment without fear of breaking anything important.
- Save as New Version keeps the existing version intact while making your latest version an updated copy, so you can make changes without affecting the active flow.
- Save stores your progress! It’s best to do this often if you don’t want to lose your progress at unexpected times!
- Activate puts the flow live so it can be triggered in your org.
The last is the most important button because until you hit Activate, the flow won’t actually run in the wild. It’ll just sit there, waiting for the green light, so do all your debugging and testing before clicking it!

Bonus: Agentforce for Flow
Agentforce for Flow is a generative AI assistant built right into Flow Builder. If you have Einstein Generative AI set up in your org, this is a great feature to enable that can help make your life as a Flow builder easier.
This is currently in Beta, but it’s as easy as going to Setup > Process Automation Settings > and selecting Agentforce flow automation. When creating a new flow, in the Use Agentforce to Help You Build (Beta) section, click Get Started (Beta), and from there, you should be able to write instructions from scratch and describe what you want to automate, or get started with sample instructions provided:
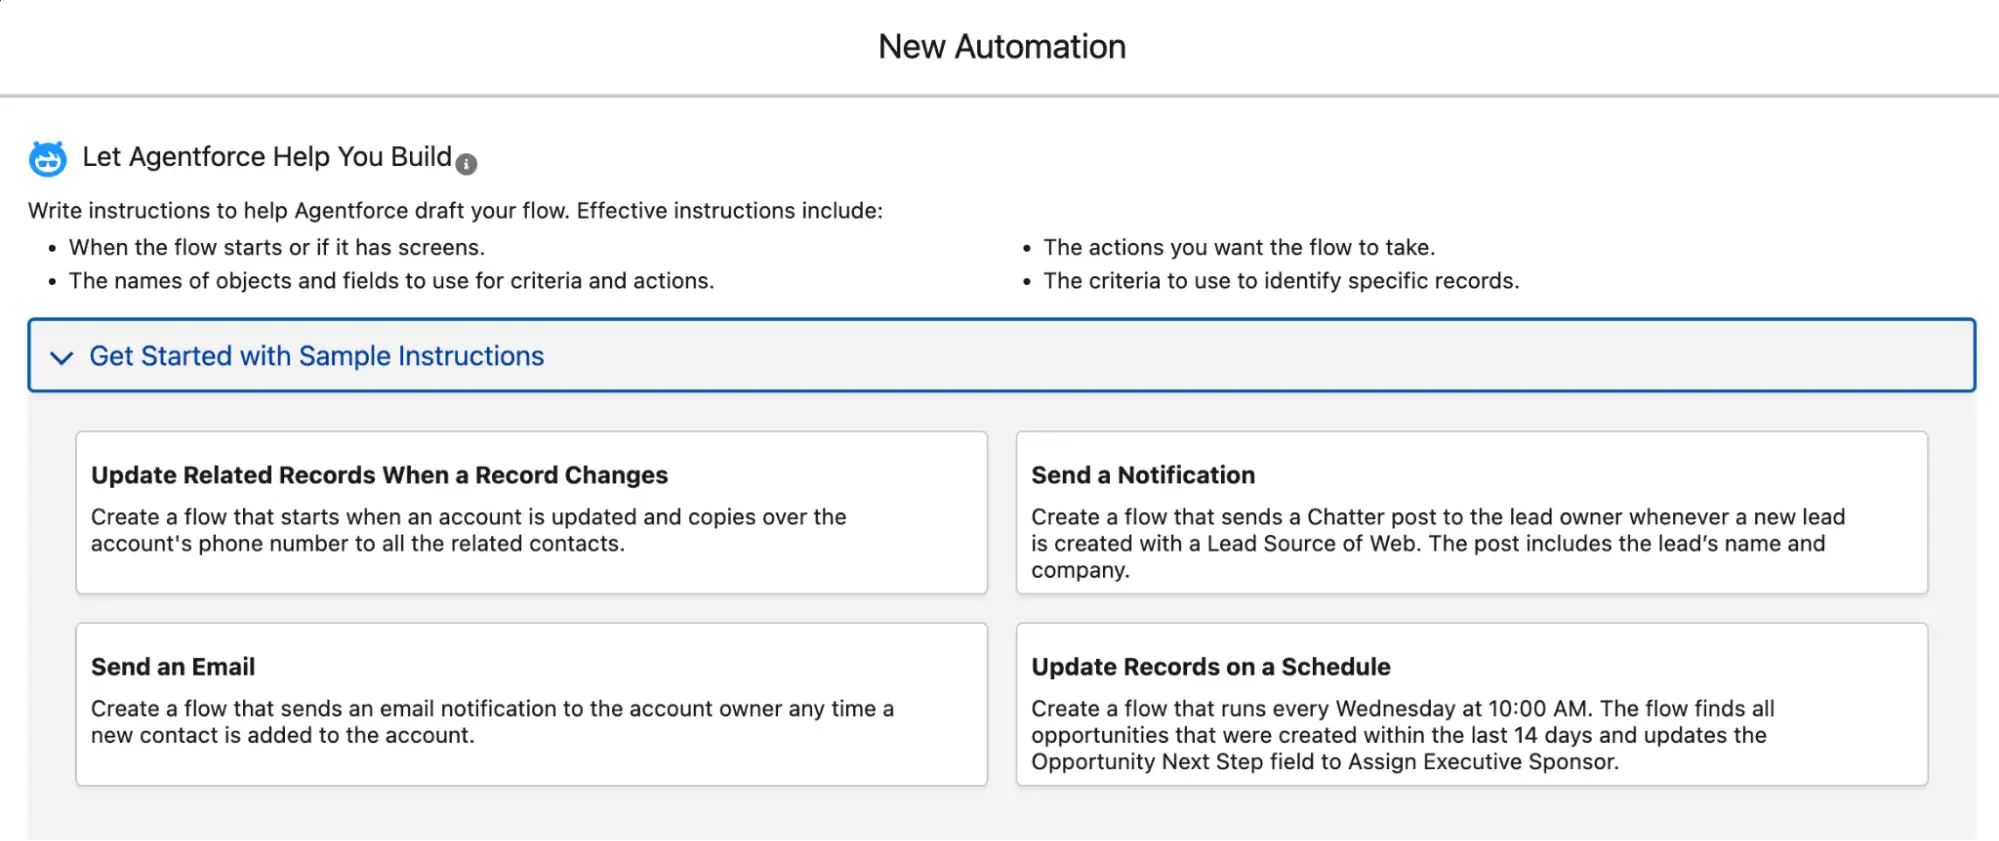
As a beginner, having Agentforce generate a starter flow using your well-written instructions can be very useful. All that’s left is to review your flow and add more customizations depending on what your automation needs!
Final Thoughts
It’s all about exploration. Open Flow Builder, click around, and get familiar with where things live.
You don’t need to build anything complex, but do familiarize yourself and know what’s possible – it will really help you when building in the future.
