


Of all the Salesforce features that make implementations truly personable for admins, Salesforce Flow is by far the most versatile and powerful option. You’ve got Screen Flows to tailor the form-input experiences, Record-Triggered flows for smooth background automations, and plenty of other useful flow types available. But one thing should always be on the admin’s mind from the get-go – can you guess what that is?
In this article, we’ll explore a simple and reusable error handling mechanism that can empower you and your team to stay on top of your Flows – even when things don’t go to plan.
Prepare for the Unexpected
You’re likely familiar with the saying “better safe than sorry”, and error handling from the moment you start designing and building your Flows in a sandbox accounts for exactly that.
It’s generally not only a matter of if, but when, something will happen that will impact your automations – this could be dependencies changing, new validation rules being introduced, or simply a mistake. Whatever may be the case, knowing that your automations are prepared to handle errors that can be quickly addressed is the key to successfully deploying automations.
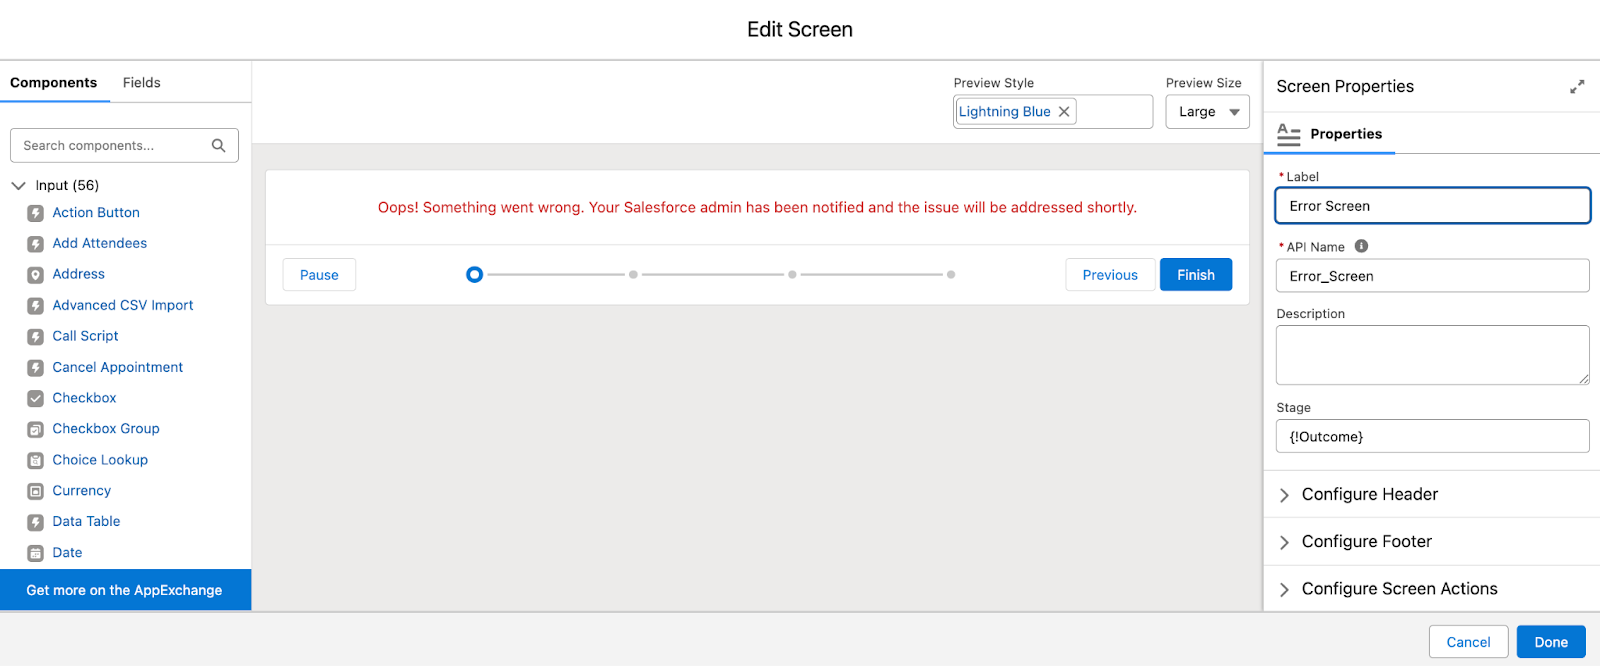
Within Salesforce Flows, you can achieve this with Fault Paths. These can be added to CRUD elements and actions, which will let the automation know how to proceed if an error happens in a given element. When it comes to Screen Flows, the Fault Path can also enhance the user experience on top of, for example, notifying the administrator. Instead of seeing a generic error message, you can tailor the error so that your users know how to proceed.
As always within Salesforce, there are a few ways to go about handling, storing, and troubleshooting these errors, in both Flows and Apex. You can devise your own mechanism or, for example, use an already established tool such as Nebula Logger. Also, make sure to take a look over the new Flow Logging option in Spring ’26 if you are a Data 360 customer.
Add Fault Paths to Salesforce Flows
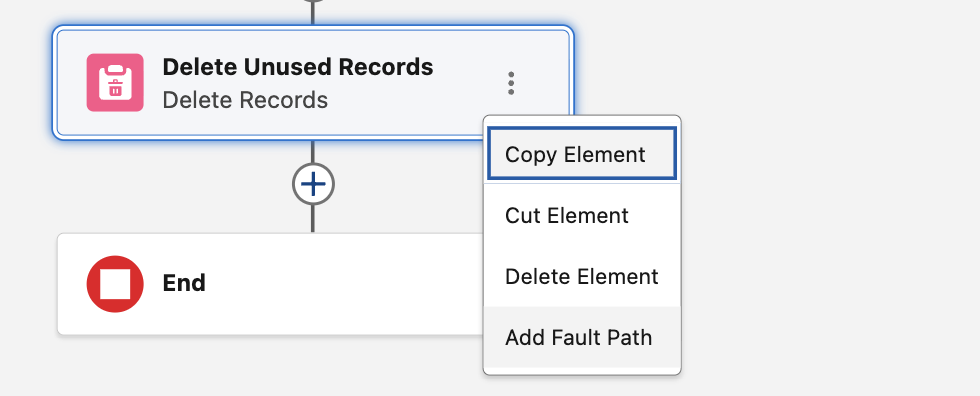
Going back to Fault Paths, if you haven’t used them before, now is definitely the time to start. The option to “Add Fault Path” is surfaced on eligible components as soon as you click the three dots on the card. These elements include:
- CRUD elements (Create Records, Get Records, Update Records, and Delete Records).
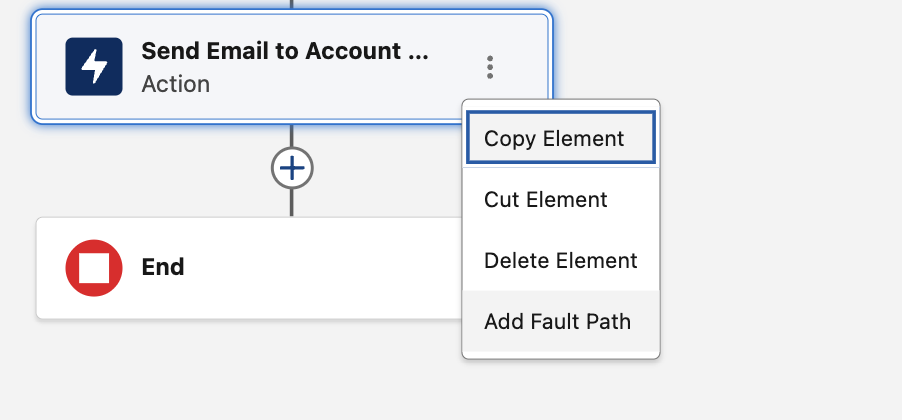
- Actions, such as sending an email.
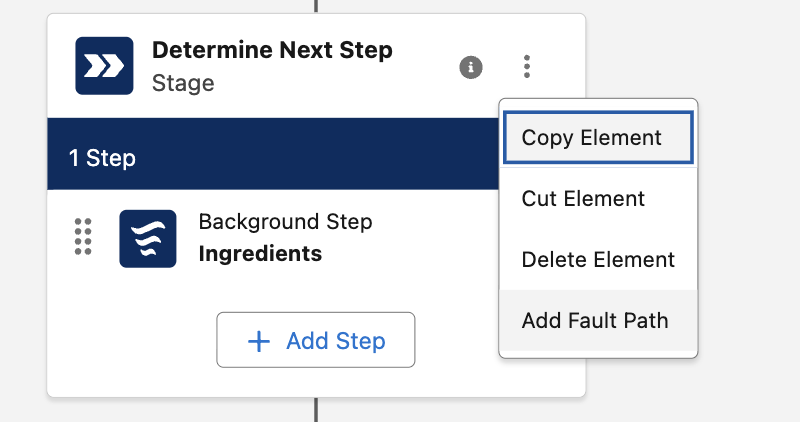
- Stages in Flow Orchestrations, which are used for Flow Approval Processes.
While it may be tempting to start adding individual actions and Fault Paths for every single flow, it’s a good idea to take a step back first and ask yourself: Does the automation need to do the same thing when multiple elements and flows error out?
How to Create a Reusable Autolaunched Flow
Chances are that, in most cases, the answer to the above question is yes. This doesn’t mean that you can’t still tailor the Fault Path actions by flow and by individual Fault Paths, but keep in mind that doing so means individual items you and your team need to maintain and account for in the future.
For all the scenarios in which the same steps need to happen once an error occurs, subflows are the perfect way to go about them! These are not a new type of flow per se, but rather either autolaunched or Screen Flows, which can be built once and then reused as many times as needed.
This way, you won’t find yourself maintaining the same steps in several different flows. Although in this article, there will be an example for error handling specifically, keep the option of subflows in mind for any steps you may be repeating across your flows.
Create a Custom Object for Errors
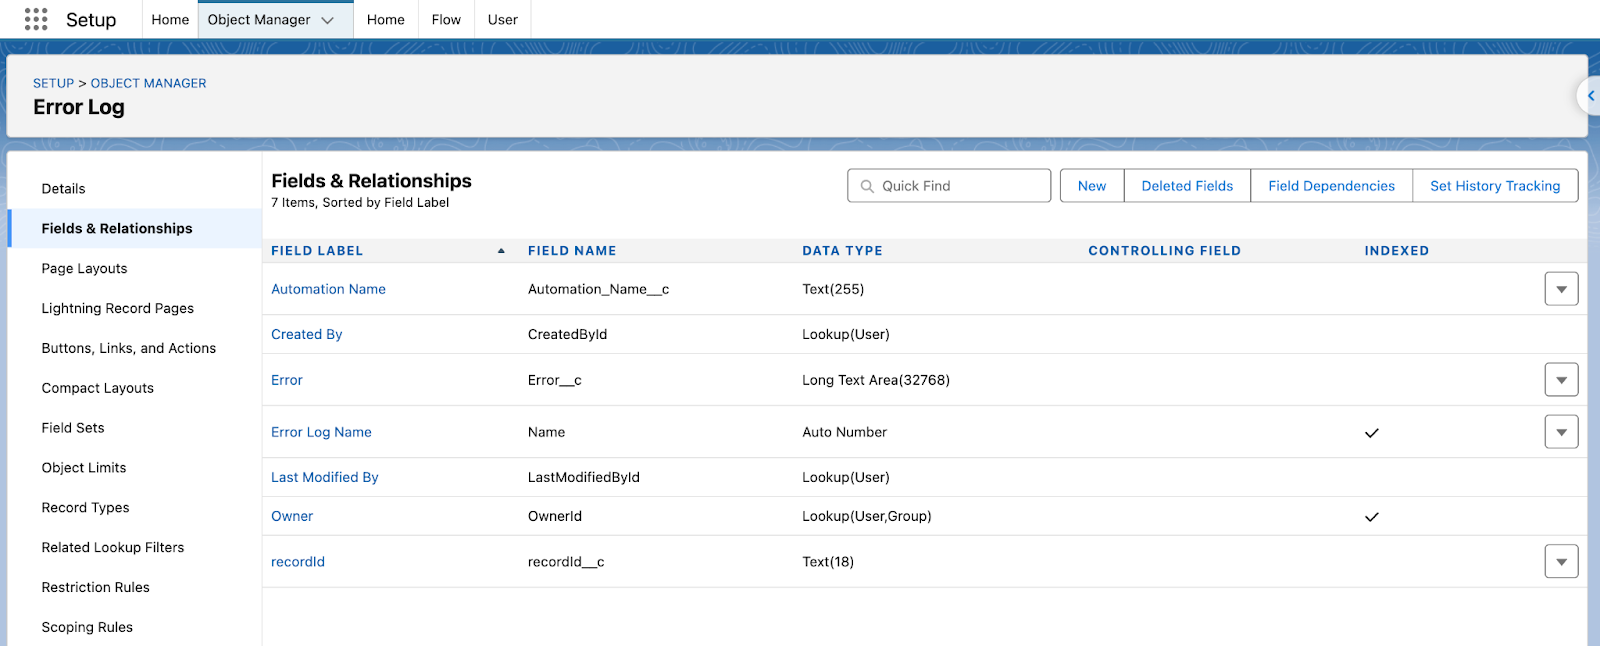
Returning to the Fault Paths, the first thing you need in this example is a custom object to store the errors in, which I called Error Log. Since this example is the build-it-yourself route, make sure to create all fields that may be relevant for troubleshooting down the line, such as Automation Name, the actual Error, and the recordId of the record that triggered the error.
Having a place to store the errors is not only meant for the Fault Path, but also for what comes after – troubleshooting, reporting, and even routing the records to the person who handles it while informing the impacted stakeholders.
Practically, having such an object enables you to define a proper process that your entire team could follow in these scenarios. Also, if you take this route, consider an archival strategy depending on the volume you have.
Create and Activate the Autolaunched Flow
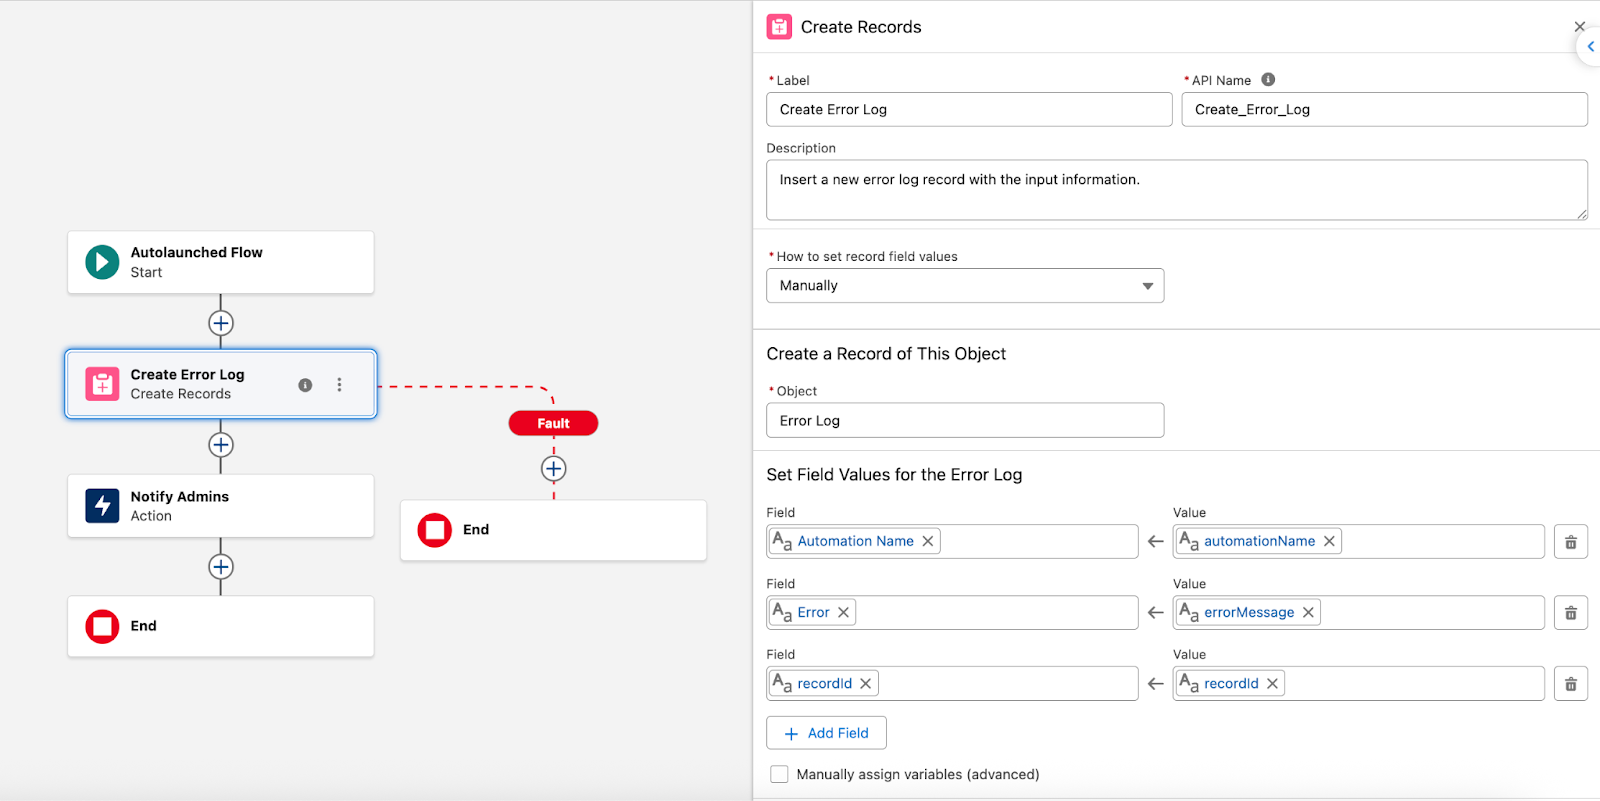
In this example, I will be using an autolaunched flow to create a new Error Log record and also send a notification to the admins. In a more complex environment, make sure to consider the recipients, consider how to set them, and if the email notification is the way to go. As I mentioned above, since the Error Log records will be available, it could be worth extending the implementation on that side of things. For example, you could explore splitting the actions based on the object’s prefix found in the recordId.
One advantage of subflows is that you can easily pass data from the parent flow (the Flow that the subflow will be called from) into the autolaunched flow. To do this, make sure to create the variables corresponding to your fields, name them appropriately, and add descriptions for them.
Once ready, the autolaunched flow can be activated. Make sure to test it beforehand, noting who has object permissions and the running context, to prevent any errors. You can add a Fault Path in the autolaunched flow to send a notification if the record creation fails, for example.
Add Autolaunched Flow as Subflow to Existing Automations
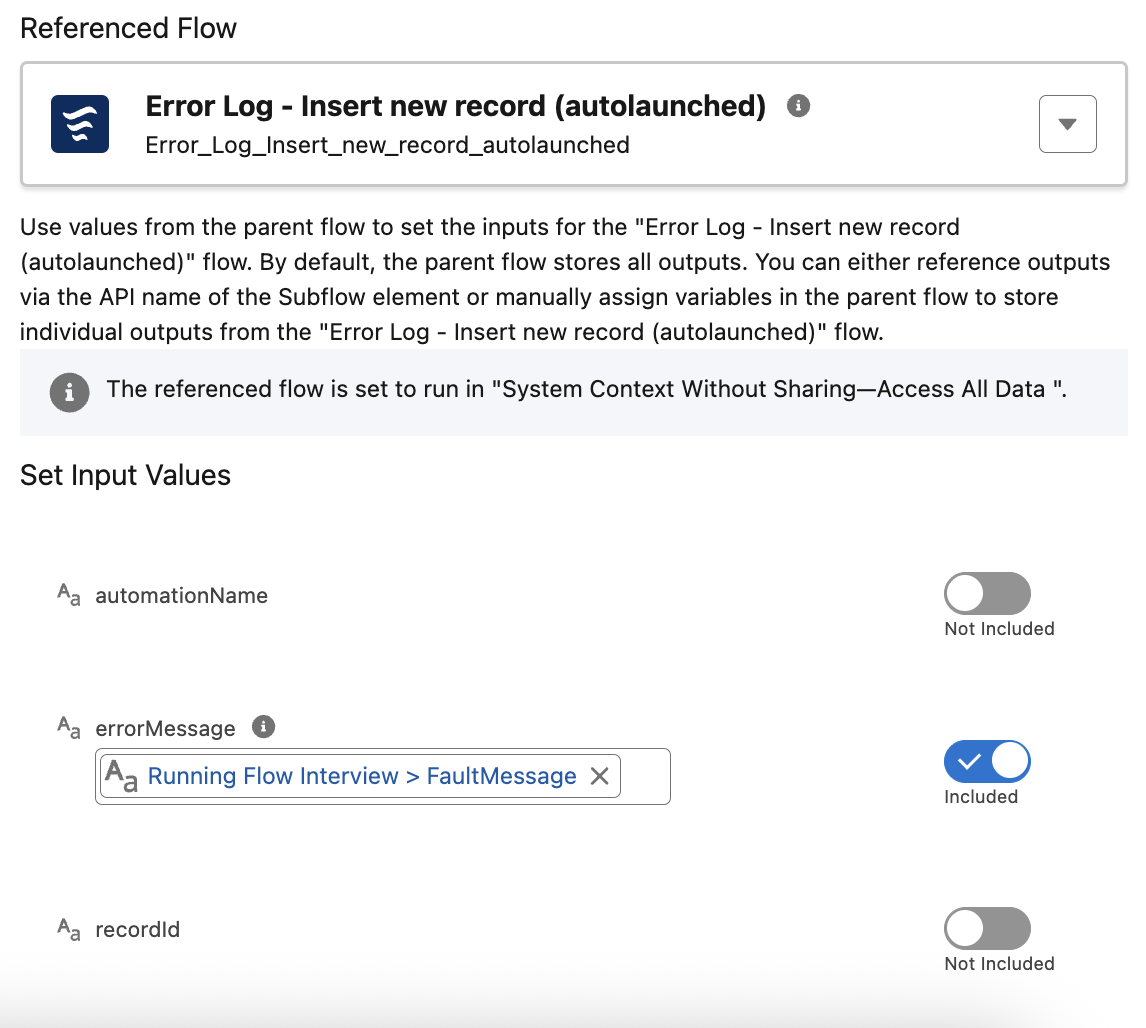
With both the custom object and autolaunched flow now ready, it’s time to make use of them. For all the Flows you would like to start using this subflow, add a Fault Path, select subflow, and then search for the one you’d like to use.

Note that you will have to set the input variables accordingly, and depending on the fields you wish to populate, you may use all of them or only a few. Make sure that you don’t forget to input any relevant information – otherwise, the values won’t be available to the autolaunched flow.
Once the subflow is in use for error handling – even if you might have set up email notifications or not – it’s a good idea to also have a report at hand so that no error falls under the radar. It may be a report or a query, based on the approach you prefer when reviewing data. For example, if you chose to create the same fields and object as I did, you can use:
Select Id, Automation_Name__c, recordId__c, Error__c from Error_Log__c
Final Thoughts
Be it simple or more complex Salesforce Flow automations, error handling shouldn’t be an afterthought. Regardless of the route you choose to take to account for them, the ultimate goal is to ensure that no error goes unaddressed and that the possibility of automations silently failing without anyone taking action is prevented.
How are you currently using Fault Paths in your Flows? Let us know in the comments below!


Comments: