Flow is undoubtedly the future of automations tools in Salesforce. With the retirement of workflow rules & Process Builder, it is the most powerful tool available, providing Salesforce Admins with almost developer-like superpowers.
But like every other powerful tool, there are best practices and tips that you should follow. Since winning the first FlowFest V1 event last month, I’ve put together my top 10 Salesforce Flow Tips…
1. Don’t Perform DML Operations or SOQL in a Loop
Let’s get the most important tip out the way first, and in fact, I would consider this more of a rule.
In order to avoid hitting governor limits, you should always perform DML operations (edit, create, or delete) and SOQL, out of your loop. You should use the assignment element inside the loop to assign new values to a record variable.
Then use another assignment element to add the record variable to the collection variable. At the end of the loop, perform the DML operations for all the records at once, and voila!
2. Add a Decision Element Before Performing a DML Operation
In some cases, there might be no records in your variable, or no records that meet your criteria. Therefore, it is pointless to run a DML operation for an empty list of records.
Even though there are no records in your variable, or records that meet your criteria, the create and update operations do not fail. They run as normal, but still consuming the DML statements governor limit.
However, the situation is different for the delete operation. If there are no records to delete, your flow will fail. Therefore, it is best practice to add a decision element before performing any DML Operation.
3. Choose the Right Trigger Type for Record-Triggered Flows
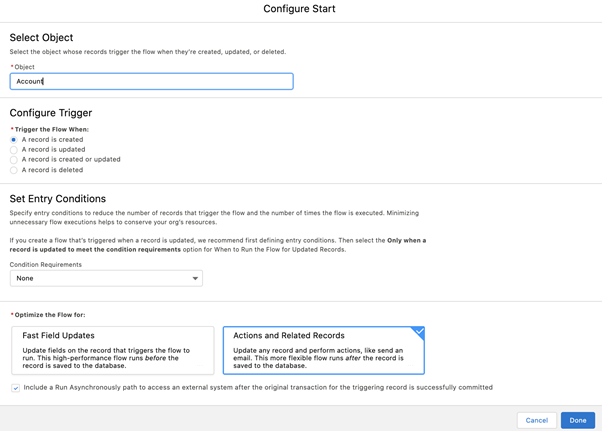
Record-triggered flows run automatically when a record is created, updated, or deleted. Depending on what you need to perform, it is possible to choose the flow to run before or after the record is saved.
For example, if you want to update fields on the record that triggers the flow, choose the flow to run before-save. In order to do this, select Optimize the Flow for: Fast Field Updates.
Before-save flows run almost 10 times faster than after-save flows, and they don’t consume DML limits. Therefore, it is crucial to choose the right trigger type.
Salesforce introduced a new tool called Migrate to Flow (Beta). This tool lets you convert your existing workflow rules to record-triggered flows. However, it creates a new record-triggered flow for each workflow rule. For example, if you have 10 workflow rules on the same object, it will create 10 record-triggered flows.
I recommend you to merge those new flows so that you will have fewer flows and better understanding of the steps and actions.
4. Define the Trigger Order of Record-Triggered Flows
Is it clear that before-save flows run before after-save flows. However, you can have multiple flows on the same object, with the same trigger type (before or after save) and the same start criteria. So, which one will run first?
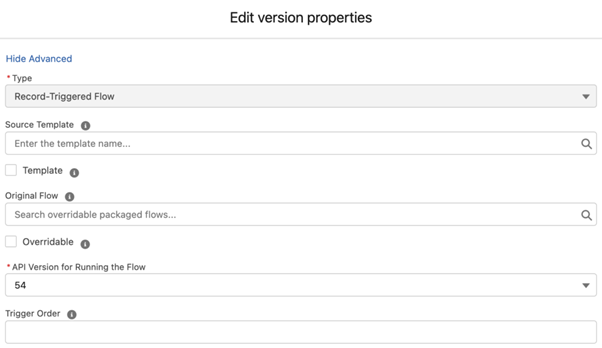
Salesforce have introduced a new feature that lets you decide the trigger order of record-triggered flows. This is found in the advanced section of the flow version settings, where there is a new parameter to set the trigger order.
If you have multiple record-triggered flows with the same trigger type and start criteria, I recommend entering a number in the Trigger Order parameter. When you do so, flows with the same trigger type on the same object will run in ascending order.
You are able to set a value from 1 to 2,000, but I recommend entering 10,20,30 instead of 1,2,3. This means that if you want to enter a new flow in between two existing flows, you won’t have to change all the trigger order values of the flows – you can just set the new one to 15.
5. Use Subflows for Repeated Logic
Occasionally, you may have multiple flows that use the same set of actions. Instead of building these actions repeatedly, you can create an autolaunched, or a screenflow, and use this as a subflow whenever you need it. If you want to call a screen flow as a subflow, your master flow must be a screen flow as well. You cannot call a screen flow from an autolaunched flow.
By using subflows, you can save time, reduce the complexity of your flows, and improve the ease of maintenance.
6. Pass the Entire Record to a Screen Flow From an Action
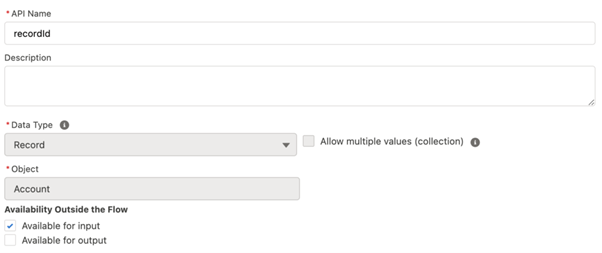
The Action button is one way to launch a screen flow. When you have an input text variable called recordId, the ID of the current record is automatically passed to the flow. Since it passes the ID, you have to perform a get record in order to bring the other field values of the record. However, I have a little trick to pass the entire record as well.
Instead of a text variable, if you create a record variable called recordId, then the entire record is passed to the flow. Therefore, you don’t need to perform an additional Get in order to bring the fields of the record.
Check out this post to learn more about passing the entire record to a screen flow.
7. Use Fault Connectors to Handle Errors
Even the most perfectly constructed flows fail sometimes. This isn’t necessarily related to the quality of your flow, and there can be many causes for failure. Record locking, governor limits, or even a new valuation rule can be the root of the issue.
If you don’t handle errors properly, users get an error message that isn’t comprehensible.
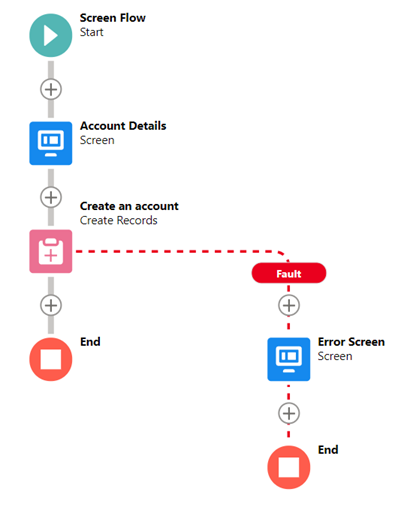
By Using Faul Connectors, you can display a logical message to the user, or perform any action that you need. If you are using a screen flow, you can join the fault connectors to a screen and display an error message.
To display the actual error message, you can use {!$Flow.FaultMessage}.
I would recommend you to create a flow just for handling errors, and use it as a subflow whenever you need it. By doing this, you don’t need to add the same error handling set of actions to every flow.
Don’t forget to pass the error message and a few more details as parameters to your subflow!
8. Don’t Give Up If There Is No Standard Solution
Whilst Flow is the most powerful tool available to declarative admins, sometimes, standard elements are not enough.
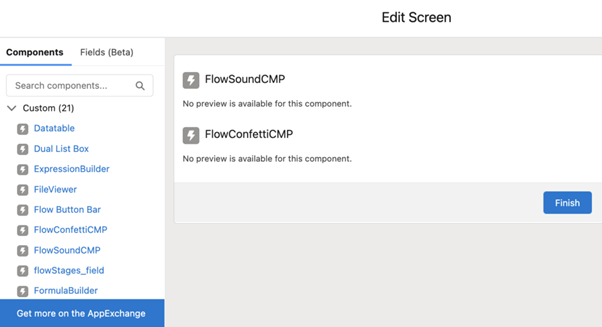
Just because there isn’t a standard solution, don’t give up, as there are many invocable actions and screen components that you can install for free. I highly recommend you to check out Unofficial SF, a blog that heavily focuses on extending Flow beyond standard elements. Even if it doesn’t exist in Unofficial SF, you can still develop your own invocable action or screen component.
9. Flow Is Not Just an Automation Tool
Whilst workflow rules & Process Builder were seen as simply automation tools, Flow goes way beyond this.
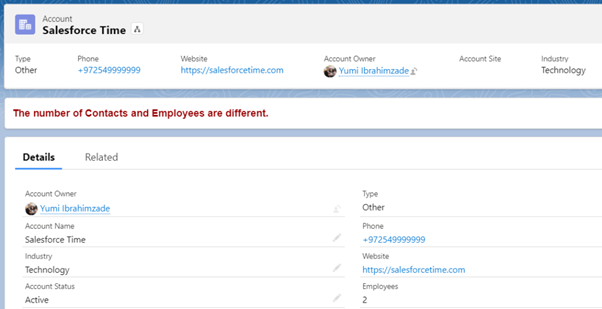
You can use a screen flow to display a message on a page, create a flow that can be used as a related list (a great solution to build a related list that supports inline editing), or even as a report. You could also create a flow that runs automatically when a user views a page.
There are endless possibilities for Flow, they don’t only have to be used for modifying data – you just have to think outside the box. But most of the time, Flow is the answer!
10. Reset Limits in Big and Complex Flows
There are many limits that apply per flow transaction. Governor limits and executed elements at runtime per flow are the most common ones. When you have a bigger flow that runs on many records, especially when you have a loop, it is more likely that you will hit these limits. But there are a few ways to reset limits…
If it is an autolaunched flow, the pause element ends the flow transaction. This means that the limits start from zero after the pause element. It doesn’t mean that you need to pause the flow for a long time – you could pause it at 0 hours from the current date/time.
If you are working with a screen flow, there are two ways to end the transaction and reset limits.
Firstly, whenever a screen is displayed, the flow transaction ends. However, in some cases it doesn’t make sense to display a screen just to rest the limits in the middle of a flow. Therefore, the second option makes more sense: Local Action.
Local Action is a Lightning component that lets you perform actions in the browser, and not with the Salesforce server. You can create a dummy local action that resets the limits of your screen flow without really doing anything.
You can install it as an unmanaged package from Unofficial SF.
Summary
There are endless cases that you can solve using flows. When building a Salesforce Flow, it is important to follow some tips and best practices. These were some of my Salesforce flow tips as FlowFest champion and a true Flow lover.


If you want to read more about Salesforce flow tips and best practices, you are more than welcome to visit my blog: Salesforce Time.




Comments: