

Transactional emails in Marketing Cloud are “immediate, automated, non-promotional messages”, and are critical to business operations and customer satisfaction (for example, an order confirmation email following a purchase).
The Transactional Messaging API in Marketing Cloud is the updated version of Triggered Sends in Email Studio. The Transactional Messaging API offers more scalability and flexibility than its predecessor – but with flexibility comes more responsibility to monitor mission-critical emails. Let’s see how you can set this up…
Note: This guide is intended for those who are familiar with the Transactional Messaging API, and will cover advanced topics relating to it. If you are interested in learning the basics about the Transactional Messaging API, I suggest you check out the Trailhead Module.
Marketing Cloud Transactional Messaging API vs Triggered Sends
There are several advantages of Transactional Messaging API in Marketing Cloud compared to its predecessor Triggered Sends in Email Studio:
- The API runs on an updated messaging platform, which improves scale and send speed.
- All messages are sent as quickly as possible.
- You can track performance at an individual level, and get notified when different events happen for each email (we will cover this later in the guide).
While all this sounds great, there are at least two noticeable limitations of the newer API method compared to the Triggered Send option:
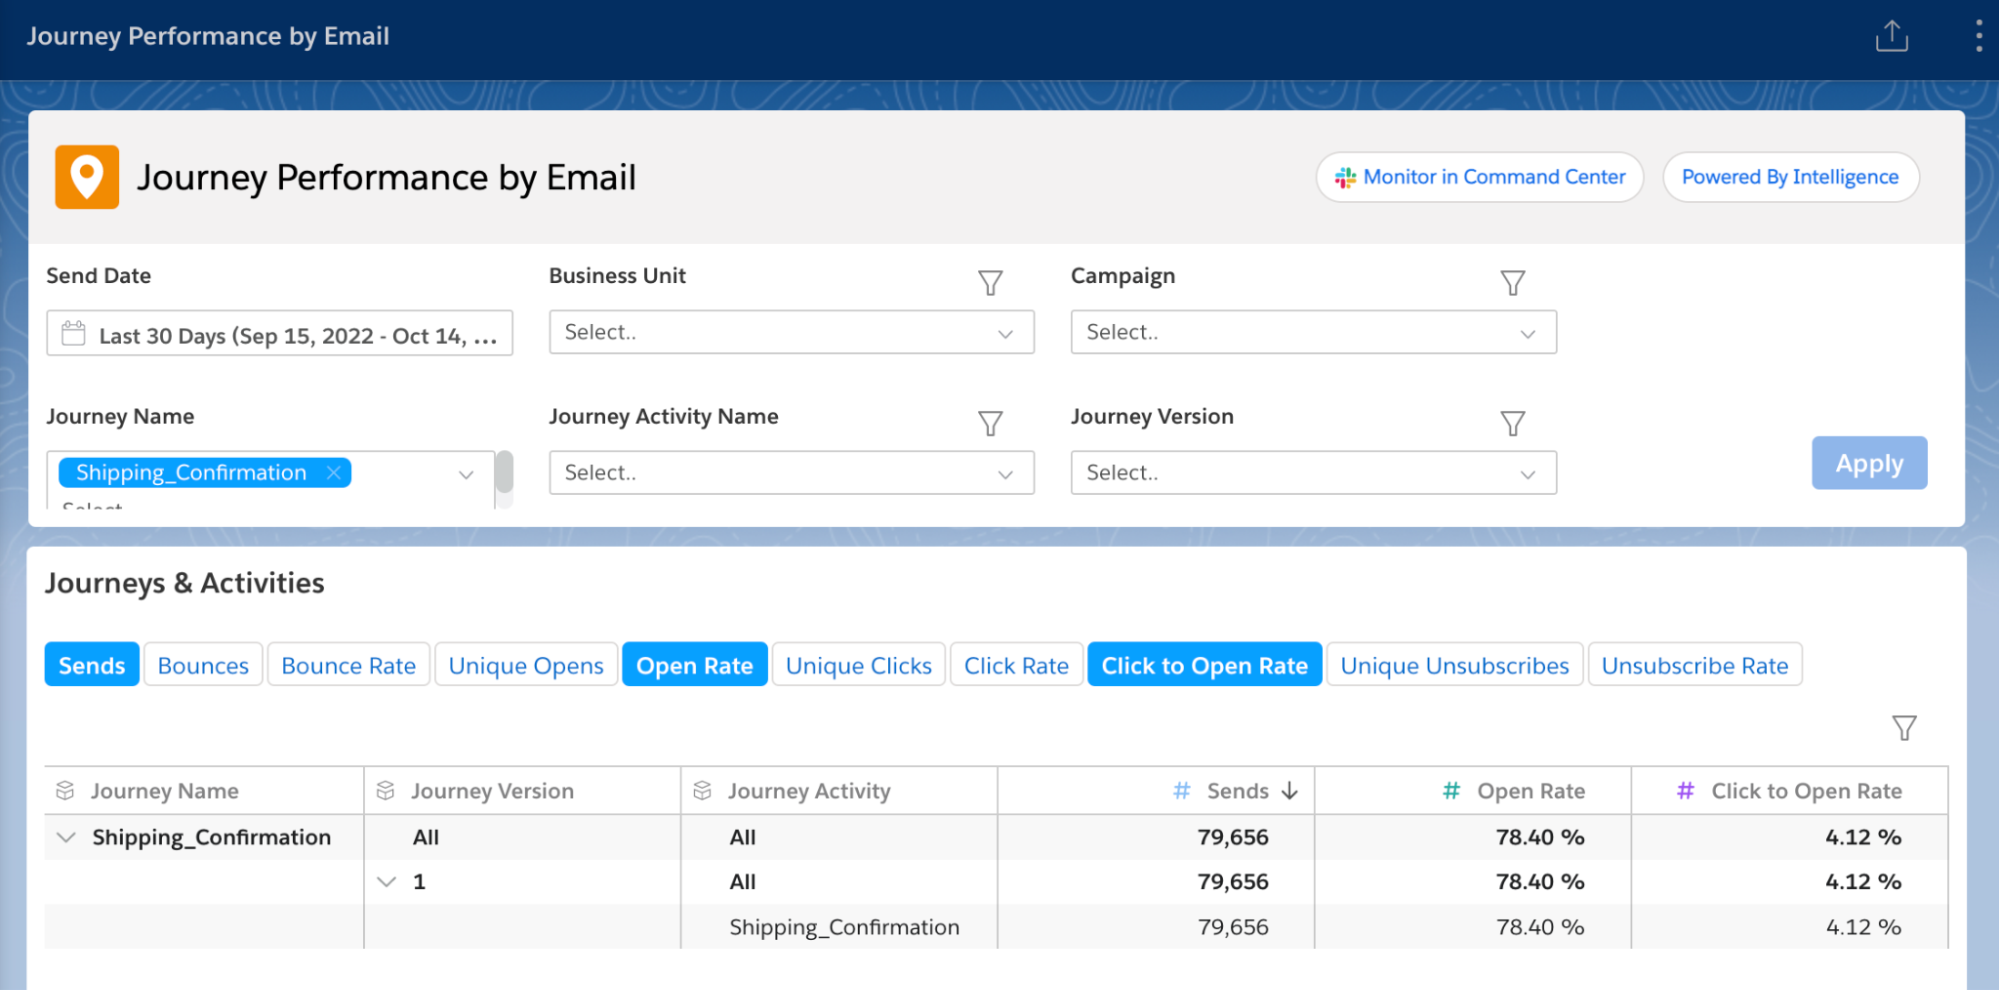
- Messages sent using the Transactional API won’t show up in the classic “Tracking” tab in Email Studio – however, you can get reporting if you enable Intelligence Reports in your Marketing Cloud account (see image below).
- Since all your messages are sent individually, and you are in charge of monitoring these messages, there’s not a UI like in the Triggered Sends view in which you can see how many messages were sent, not sent, or queued.
The second limitation (monitoring transactional messages) is probably the most critical. Transactional messages are crucial to business operations and customer satisfaction. If a customer does not receive an order confirmation email, they might call customer support to complain, causing the support team to spend time looking for the order or even having to cancel the order due to a disgruntled customer.
Additionally, while you probably performed proper testing of your transactional messages before going live, such messages may fail to render depending on a particular scenario. If you can’t see what the error is, you won’t be able to fix it.
Event Notification Service: The Solution
Event Notification Service (ENS) sends you notifications when certain events occur in Marketing Cloud, such as when a transactional email is sent, or opened (regardless of its classification). For a full list of supported events see the official Marketing Cloud documentation site.
For our solution we are going to monitor transactional emails not being sent.
Let’s pretend that the marketing department wants to make sure shipping confirmation emails are being monitored regularly, and if more than 50 emails fail within the span of 6 hours, they should receive an alert so that the IT team can look into any critical issues.
We will utilize CloudPages to receive notifications from the ENS and store these notifications in a Data Extension.
Additionally we are going to set up an automation with a verification step; if we have 50 rows within the last 6 hours, we will send a notification email.
Note: If you want to skip ahead and just download the package for this solution to deploy it in your account and play around click here.
Step 1: Create the VerificationKey Data Extension
To get started using the ENS you need to set up a URL Callback. The URL Callback is the URL that will be called when an event happens.
However when you set up a URL Callback for the first time, you need to verify by confirming the Verification Key that will be sent to this URL.
So we are going to set up a Data Extension that will store this Verification Key temporarily.
- DE name: TransactionalSendsVerificationKey
- Fields:
- Field Name: VerificationKey
- Field Type: Text (150)
- Required: Yes
Step 2: Creating the Callback CloudPage
Our second step will be setting up our CloudPage that will receive the events from the ENS. Initially we are going to set up this CloudPage to receive and store the verification code.
Once we’ve verified the Callback, we can replace this code with our final logic.
Create a Code Resource JSON CloudPage and paste the following code in it:
<script runat="server" language="JavaScript">
  Platform.Load("Core", "1");
  var jsonpost = Platform.Request.GetPostData();

  var json = Platform.Function.ParseJSON(jsonpost);

  var rows = Platform.Function.InsertData("TransactionalSendsVerificationKey",["VerificationKey"],[json.verificationKey]);

</script>
Step 3: Create and Verify the Callback
Now you have all the elements needed to create and verify your callback!
Go to: Setup → Feature Settings → URL Callbacks → click on Register New.
Complete the details of your callback with the CloudPage URL you just created:

After your Callback is created, click on Verify. Open a new tab and go check your Data Extension to see the Verification Code Marketing Cloud send to verify your callback:

Copy and paste this verification code in the modal from the setup screen and you should be all set to start receiving events!
Step 4: Create the ENS Log Data Extension
Our CloudPage will receive notifications from ENS and store the details of the notifications in a Data Extension (DE) called TransactionalSendsMonitor.
This DE will have several columns, so to make your job simpler I’ve packaged it so you can deploy it using Package Manager.
Note: This solution monitors the Not Sent and Bounce events so the DE structure is prepared for this payload. If you want to review the payloads for other events, read the official documentation on supported events.
Step 5: Modify the Callback CloudPage to Process Events
The last part of this solution involves modifying our Callback page so the logic now receives the payload for the notification and stores them in the TransactionalSendsMonitor Data Extension.
Your code should look like this:
<script runat="server" language="JavaScript">
  Platform.Load("Core", "1");

   var jsonpost = Platform.Request.GetPostData();

   var json = Platform.Function.ParseJSON(jsonpost)[0];

 Platform.Variable.SetValue("@status",json.eventCategoryType);
  try {
  if(json.eventCategoryType != "" && json.composite && json.info){

   var rows = Platform.Function.InsertData("TransactionalSendsMonitor",["EventCategoryType","TimestampUTC","CompositeId","DefinitionKey","EmailAddress","SubscriberKey","MessageKey","Reason","StatusCode","StatusMessage","DefinitionId","JobID","BatchID","ListID","SubscriberID","EmailID"],[json.eventCategoryType,json.timestampUTC,json.compositeId,json.definitionKey,json.info.to,json.info.subscriberKey,json.info.messageKey,json.info.reason,json.info.statusCode,json.info.statusMessage,json.definitionId,json.composite.jobid,json.composite.batchId,json.composite.listId,json.composite.subscriberId,json.composite.emailId]);
    Platform.Variable.SetValue("@status",rows);
  }
    } catch(e) {  Platform.Variable.SetValue("@status",Stringify(e)); }

</script>
{"status":"%%=v(@status)=%%"}
Step 6: Create the Monitoring Automation
This final step is quite easy. I bet you can build this part of the solution!
You will simply create an automation with a verification activity to count the number of rows you have in your monitoring DE:

Tip: If you use Slack you can send the Automation Notification to a specific Slack Channel by getting the channel’s email address.
Based on our use case, you will need to add a query prior to this step for the amount of emails not sent in the last 6 hours. Additionally, you could add data retention settings in your Monitoring DE so it gets clear often and you are only monitoring new errors.
That’s it! We are now able to monitor mission critical emails and troubleshoot them easily.
Considerations
- You can download the entire solution for this article and deploy it using Package Manager here. The CloudPage for this solution has both the code for storing the verification key and to store the payload from the ENS. Comment out the necessary section of the code depending on which steps you are going through.
- Remember that the CloudPage that receives events has to be a Code Resource page as these types of pages do not account against your Super Messages consumption (for now).
- When creating Event Subscriptions consider filtering the events by event definition keys, otherwise you will receive all events for all Transactional Sends that go out of your Business Unit.
- When utilizing the ENS consider your use case carefully and decide whether this solution utilizing CloudPages is the way to go or if your use case is better suited to utilizing a web development server like Heroku.
- When you are using the Transactional Sends API use a MessageKey for your API call that you will be able to reference later as this is sent in the ENS payload. For instance, for Order Confirmation Emails, use the Order Number as MessageKey. It’s unique and you will be able to easily find the order that errors later by looking at the monitoring DE.
- This solution monitors the Not Sent and Bounce events so the DE structure is prepared for this payload. You could potentially structure the solution so it stores the “info” attribute as a JSON string but that might cause you to have to do more work later when troubleshooting. If you want to review the payloads for other events, read the official documentation on supported events.
Summary
The Transactional Messaging API offers more scalability and flexibility than its predecessor. But with that flexibility comes more responsibility on your end to monitor mission critical emails (such as the shipping confirmation email in our use case).
Combining the power of CloudPages with Automation Studio we can create a solution that can help you get to the bottom of things quickly when issues arise.
I hope you enjoyed this article as much as I enjoyed writing it – happy monitoring!
