The Salesforce Data Loader is a great tool that is used universally no matter your role, Admin, Developer or Consultant. Unlike most Salesforce features, the data loader has to be downloaded locally to your desktop to be used (Available for both Windows & Mac). The premise of the tool is very simple, it allows you to interact with your data inside of Salesforce across all objects. This includes inserting, updating, exporting and deleting. Use cases for the tool can vary massively but the most commons ones include…
- Inserting data from one system to another upon the original implementation of Salesforce
- Mass updating records with new information
- Mass deleting records that aren’t needed anymore
- Exporting data to upload to another system, or to back-up
Installing & Functions
The Salesforce Data Loader can be installed by navigating to the setup menu in Salesforce, and heading to the Data Loader tab, here you will find download links both for Windows & Mac. Once installed, you will be greeted by a screen that looks like the below, simple right? As mentioned, the Data Loader is very simple and easy to use, but you must ensure that you know what you’re doing or the results can be disastrous (There’s no going back from changing or deleting a bunch of records without a backup!).
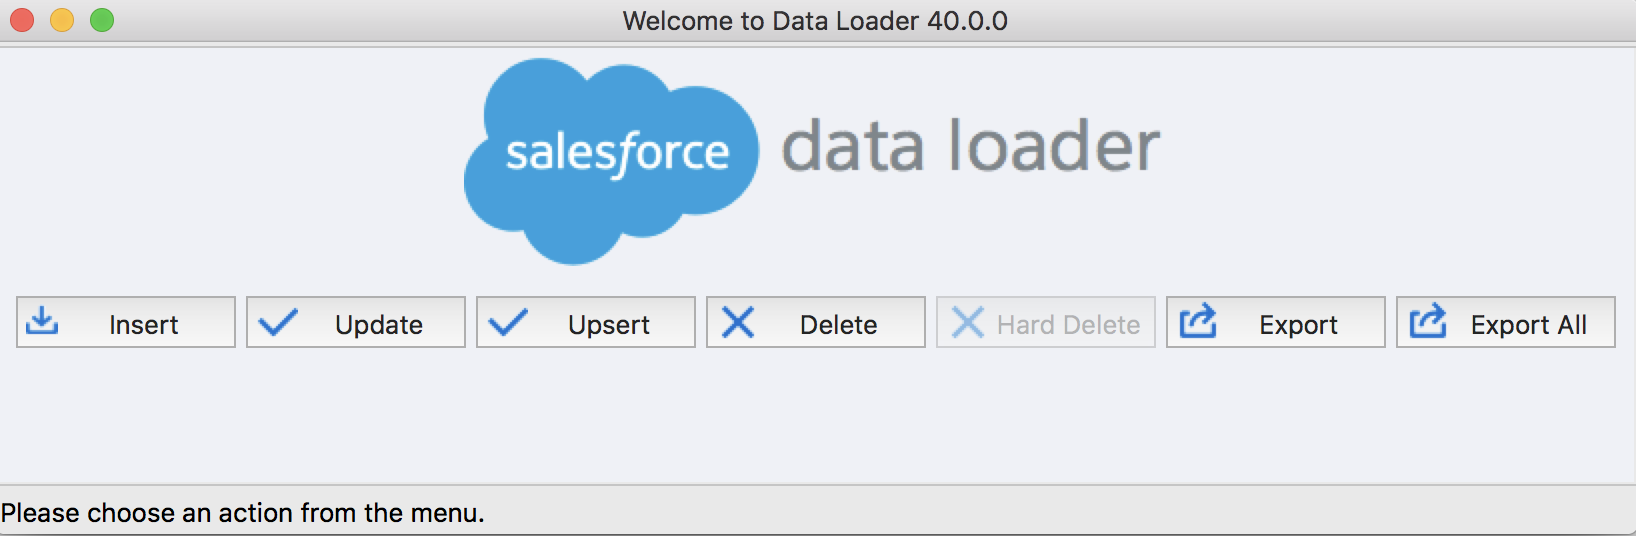
There are 7 main functions you can carry out with the Data Loader, let’s look into the function of each one…
Insert – Gives you the ability to insert new records into Salesforce
Update – Enables you to make changes to existing records inside of Salesforce
Upsert – Combines the above options, updates a record if it already exists, or if not, inserts it
Delete – Deletes records from the system
Hard Delete – While the delete option stores information in the Recycle Bin for a limited period, Hard Delete will remove straight away
Export – Export information from the system into a CSV format
Export All – While Export only extracts “live” records, Export All will also remove anything that is in the recycle bin as well as anything that has been archived (Some records are archived after a period of time such as tasks)
Preparation
For each function of the data loader, there are different requirements of which you will have to ensure you will be prepared for. Most of these surround having your CSV file in the correct format for the object you are carrying out the function for, and remember that you can only carry out a function for one object at a time. Let’s look at the requirements for each function…
Insert – You must ensure for the insert function, that you have a preprepared CSV with columns in your CSV file that match the fields in the object you are inserting into. You must also ensure that the column data is in the proper format for the field (E.g. No text if inserting into a currency field), and also that you are abiding by any required fields or validation rules you have in place.
Update – If updating records, you must follow all the rules of the “Insert” function, but with the exception, you need to include either the Salesforce ID of the records you are updating or a valid External ID field.
Upsert – Exactly the same for the Insert & Update functions.
Delete & Hard Delete – If deleting records, the only field you need within your CSV is the ID of the record you are deleting
Export & Export All – No preparation needed, export to your heart’s content!
Usage
The Salesforce Data Loader is extremely easy to use and most basic functions take only two steps, these do differ ever so slightly depending on whether you are importing data or exporting. So the first step is, of course, to choose the type of function you require, after this, you will be directed to a wizard-style guide…
Importing
 After selecting the type of function, the next step is to choose the object you want to import data into. All object will be included in the list, if it’s not, try checking the “Show all Salesforce Objects” box. In tandem with this, you will also need to select the CSV file you wish to import. This will need to be prepared in the format described above.
- The next step is to prepare your field mappings. Field mappings are the process of matching columns in your Excel to fields in your Salesforce Org. You will need to ensure that you have all required fields, as well as ID’s that are needed to match data against.
- After you have completed the above steps, you are done!
Exporting
- Exporting data is slightly easier as you do not need to prepare anything beforehand. As per the section above, the first step is to select the object you wish to export data from.
- The second step is to create what is called a SOQL query. This is a standard Salesforce language similar to SQL, that allows you to extract data from a Database. Don’t worry if you are not familiar, Salesforce has a great wizard that allows you to automatically build up the SOQL query. We also have a cheat sheet here on Salesforce Ben, check it out!
- After you have completed the above steps, you are done!

Wrap Up
The Salesforce Data Loader is a very powerful tool that is used in almost every Salesforce implementation around the world. Understanding the tool as an Admin, Developer or a Consultant is a must if you wish to get certified and have the best tools at your disposal for a job. The Salesforce Data Loader isn’t the only tool out there to load data into Salesforce, but its very reliable and free of use.
Any questions or comments? Feel free to give us a shout below.


Comments: