

Dispatch day is the day you press the ‘send’ button and release your email campaign to the world. Whether the email campaign build has been a sprint or a long labor of love, you don’t want to fall down at the last hurdle with these common errors.
Under pressure, there are aspects that don’t get a second thought – the challenge is greater if you’ve been receiving the content in pieces, requiring multiple amendments, as opposed to all in one go.
Email is core to marketing automation – the ‘bread and butter’. If you’re new to email sending in Pardot (Account Engagement), the process differs from one marketing automation platform to the next. With Pardot, you will want to ensure that you have all of the correct “ingredients” ready. We prepared a recipe – a step-by-step guide to ‘cook up’ your first email campaign:
Now you’re familiar with building Pardot (Account Engagement) emails, this sending checklist captures the items you should do before pressing the send button.
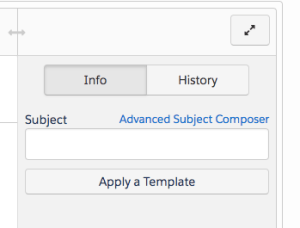
1. The Subject Line
Subject lines are the first impression that a prospect makes of your email as it lands in their inbox. These few words determine whether your email gets opened, or not.
- In the Lightning builder: Click save. You will be taken to the email content record. Add a subject line.
- In the Classic builder: The subject line box appears in the sidebar when you first open up the email wizard; however, as soon as you click to edit the email content, it disappears. From this point, you can set the subject line either on:
- The Building tab, by clicking the green arrow on the sidebar.
- The Sending tab, scrolling down to the bottom of the page.
2. Merge Fields
Merge fields enable you to easily add personalization because it dynamically pulls in data specific to the prospect that is viewing your Pardot emails.
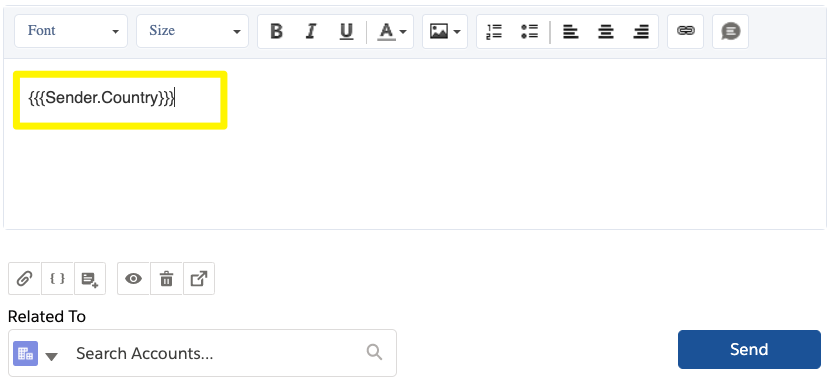
You’ve added that personalized touch by selecting your merge field from the Pardot merge picker – but, did you look deeper? Pardot (Account Engagement) can’t populate the merge field if there is no data stored in the field itself on the prospect record!
So, how do you assess data completedness for this field? There are two ways to check if there’s data in this field:
- Option 1: Using a dynamic list to filter records that have an empty field value.
- Option 2: Exporting the send list into CSV, and analyzing outside of Pardot (eg. in Excel). This option is quicker if you have more than one field to analyze, or you are concerned about standardization (i.e. fields in the proper format, such as proper case for first and last names).

To cover yourself further:
- Set a default merge value on the field’s settings, which will display whenever there is no value available (a blank prospect field).
- Use a Conditional HML. This works in a ‘if/else’ way – in other words ‘if-then-show-this, if-not-then-show-that’. This code snippet will show alternative text as a fallback value when there is no value in the prospect field, preventing awkward blank spaces or nonsense sentences.

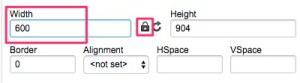
3. Images
If images are the wrong size, disfigured (stretched) or just simply incorrect, it’s tough for the recipient to engage with your content.

The image above is an extreme example from the Classic builder. Use your eyes to assess what looks off, and back that initial judgment up by doubling clicking on each image and ensuring they are:
- The correct size to fill the frames. (In the Classic Builder, make sure the image is 600px wide).
- The correct proportions. By locking aspect ratio in the Classic builder with the padlock icon your images won’t get stretched.
4. Hyperlinks
Send yourself a test email to check that links are going to the right destinations when clicked.
Next, answer these questions:
- UTMs: Do you want to use UTM parameters? These are added to your URLs, so that when the link in the email is clicked, the tag values are sent back to Google Analytics, including the ‘source’, ‘medium’, ‘campaign’ of the click. (While this guide relates to another use case, it explains the principles of UTMs.)
- Custom Redirects: Should any links be custom redirects instead? By converting links into custom redirects, you can set additional actions that will automatically fire each time.
- Social Buttons: These need to be linked to the correct social accounts – especially beneficial to check when you have multiple brand accounts per social channel.
5. Plain Text Version
Naturally, your energy goes into the HTML version, but forgetting to generate the plain text version can hurt your email deliverability.
Email service providers scan incoming email, and the text version will be friendlier for them to ‘read’ the content. Another reason is that your message will get across, even if your recipient’s inbox can’t support HTML.
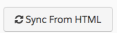
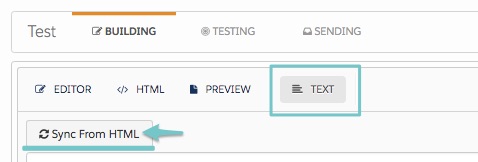
- In the Lightning builder: Click save. You will be taken to the email content record. Click to edit, then Sync from HTML. It will look a bit whisked up, so neaten this up by deleting the spaces. Do not delete the unsubscribe links!

- In the Classic builder: Under the Text tab, click Sync from HTML. It will look a bit whisked up, so neaten this up by deleting the spaces. Do not delete the unsubscribe links!

6. Rendering Tests
Let’s now put ourselves in the seat of the recipient.
- In the Lightning builder: Switch between desktop and mobile views. Don’t get caught out by editing the mobile preview, or the desktop version will be changed. The purpose of the mobile view is to show you what it looks like on mobile.

In the Classic builder:
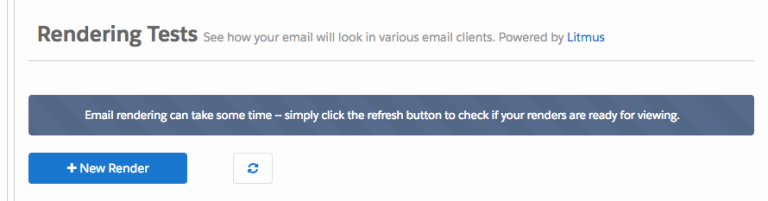
- On the Testing tab, you can send test emails to your inbox. Alternatively, create a Test list (a new Pardot list with the Test checkbox selected) and add your colleagues as prospect records, then into the test list.
- Create a rendering test* which will show how the email will look in different email clients and devices (* available for Plus edition and above).
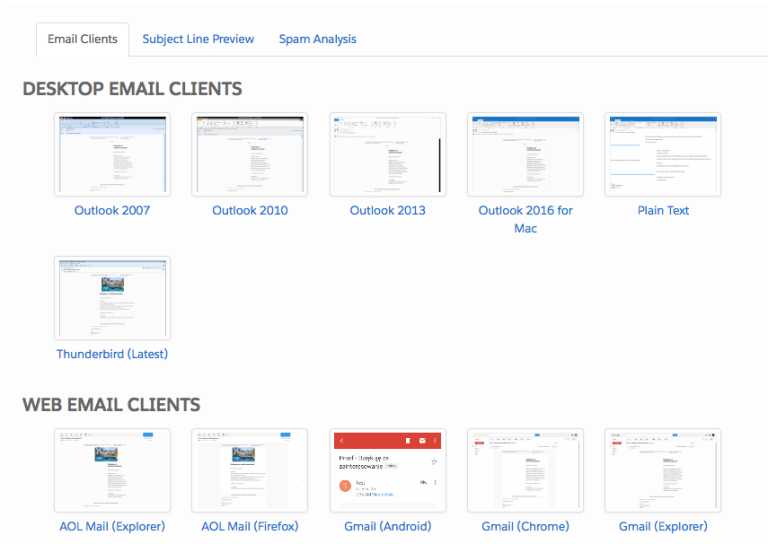
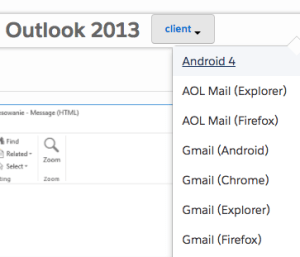
Be sure to check these types of renders closely:
- Outlook: Outlook is the bane of any email marketer’s life. There are many design elements that don’t work well with Outlook, so it’s best to pick these up now to fix.
- Mobile: Oftentimes images aren’t responsive, so check that your images are not distorted on mobile devices.
7. Suppression Lists
We know who we want to send to, but have you ever skimmed past who not to send to? You can exclude prospects by using a list that will be added as a suppression list before you send the email.
Note: If someone is on both a ‘send to’ and a suppression list, they won’t receive the email.
In the Lightning builder:
In the Classic builder:

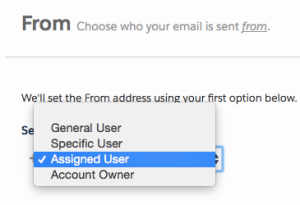
8. “From” – Sender Information
Although Pardot (Account Engagement) does force you to fill sender information in to even save a draft email, the sender details are important to double check in case you copied the email template, or stuck in a placeholder sender to initially save your draft in a hurry!
There are the different options you have to choose from, according to whether you’re using the Lightning or Classic builder.
| Lightning builder | Classic builder |
|---|---|
| General user (free to type), a specific user (a user in your Pardot account), assigned user (prospect record) and account owner (Salesforce account). Account CRM user custom field, prospect CRM user custom field. | General user (free to type), a specific user (a user in your Pardot account), assigned user (prospect record) and account owner (Salesforce account). |
In the Lightning builder:
- On the email content record, click the drop down menu (top right), and click Send.
- Find Send and reply options. Choose from a general user (free to type), a specific user (a user in your Pardot account), assigned user and account owner. Account CRM user custom field, prospect CRM user custom field.

In the Classic builder:
- On the Sending tab → Send and reply options. Choose from a general user (free to type), a specific user (a user in your Pardot account), assigned user and account owner.
9. Completion Actions
Completion actions are not retroactive, which means that if you forget to set them initially, then go back to put completion actions in, any prospects that would have matched up until that point won’t have the completion action applied to them.
Example: You want to add prospects to a Salesforce campaign when they click a link in the email. However, you forget to add the completion action – and then remember 5 hours later. The prospects that clicked in the email in the first 5 hours will not be added to the Salesforce campaign.
In the Lightning builder:
In the Classic builder:
10. Communicate With Your Team
Is follow-up the final puzzle piece of a successful campaign? The people responsible for follow-up need to be informed (typically the sales team) – when they should follow-up, and where they should look for the information. This could be a Salesforce campaign (e.g. member status ‘To follow-up’), a list view, or a Salesforce queue.
Summary
Dispatch day is the day you press the ‘send’ button and release your email campaign to the world. Whether the email campaign build has been a sprint or a long labor of love, you don’t want to fall down at the last hurdle with these common errors:
- Subject lines: The first impression that a prospect makes of your email as it lands in their inbox. Check yours is correct.
- Merge Fields: Add personalization by dynamically pulling in data specific to the prospect that is viewing your Pardot emails. Assess data completedness for this field by creating a dynamic list to filter records that have an empty field value, or exporting the send list into CSV (quicker if you have more than one field to analyze, or you are concerned about standardization).
- Images: Check images are the correct size to fill the frames and the correct proportions. By locking aspect ratio in the Classic builder with the padlock icon means that your images won’t get stretched.
- Hyperlinks: Check that links are going to the right destinations when clicked. Ask yourself if you’d like to use UTM parameters, custom redirects, and that social buttons are going to the correct accounts.
- Plain Text Version: Use Sync from HTML, then neaten this up by deleting the spaces. Do not delete the unsubscribe links!
- Rendering Tests: Put yourself in the seat of the recipient. Be sure to check Outlook and mobile renders closely.
- Suppression Lists: Exclude prospects by using a list that will be added as a suppression list before you send the email.
- ‘From’ – Sender Information: Important to double check in case you copied the email template, or stuck in a placeholder sender to initially save your draft in a hurry! There are the different options you have to choose from, according to whether you’re using the Lightning or Classic builder.
- Completion Actions: Being not retroactive, if you forget to set them initially, then go back to put completion actions in, any prospects that would have matched up until that point won’t have the completion action applied to them.
- Communicate With Your Team: The people responsible for follow-up need to be informed (typically the sales team) – when they should follow-up, and where they should look for the information.

