





There’s so much change afoot for Salesforce Admins right now. New agentic tools are driving new opportunities and expectations, and new skills are required to keep up. It can be a bit overwhelming at times, especially with so many different tools that appear to be the same.
Fear not! In this article, I’ll clear up some of the confusion between tooling, get you up to speed with connecting Claude Code to your Salesforce org for building metadata, and run through a simple example so you can get your hands dirty. Let’s dive in!
Which Tool Is Which?
First things first: let’s clear up some of the confusion between different tooling that seems to be the same.
Salesforce Development Plugin
This is the tool we’re going to be using beyond this section, and it empowers you to build Salesforce metadata within Claude Code. This plugin groups Skills, CLI, and hosted metadata servers into one single toolset.
Salesforce DX MCP Server
I’ll highlight the key factor here and nothing more: This DX MCP Server is end-of-life as of November 2, 2026. So, it’s no longer something you need to worry about. If you see references to this in other tutorials, it’s no longer the go-to way to approach Salesforce development with AI tooling.
Salesforce in Claude
The name may be a bit confusing here, but this is a tool designed for end users, not Salesforce builders. Its purpose is to serve record data into Claude so that end users can perform their day-to-day work.
Example Project: Building and Deploying a Custom Object
To help things make sense, I’m going to walk you through a simple example: we’re going to build a custom object, add some fields to it, build a permission set or two, and deploy it to a developer org.
If you plan to follow along with the example in this article, I recommend you do it in a Developer Edition org. You’ll need to ensure you can apply various permissions, such as the MCPService permission set and the ability to activate an MCP server in Setup.
You’ll also need a Claude plan that includes Claude Code (currently, this is Pro, Max, Team, or Enterprise).
Setting Up Your Workstation
Before you continue, you’re going to need to install a handful of tools on your computer. I’ll put them in a brief list below, as well as a link to official documentation on how to install them. While this may seem a bit deep at first, it’s important to lay a proper foundation and install your prerequisites before continuing.
It is critically important that you ensure you’re keeping these packages up to date, and that you only install from reputable, official sources. Supply chain attacks are common, so I can’t stress this enough.
- Node.js: This is a background requirement that you won’t interact with directly, but it runs scripts that the plugin will use. Download instructions here.
- Python: Another background requirement that you won’t interact with directly. This is only required for some internal hooks that relate to org detection and deployment safety, according to Salesforce. While Salesforce states that this requirement may go away in the future, it is currently required for security and safety checks, so best to install it. Download instructions here.
- Salesforce CLI: This is the command line interface tool for Salesforce, essentially the bridge between your terminal and your Salesforce org. This is something that you may already be familiar with, and is critical to the functionality of the plugin. Download instructions here.
- You’ll also want to authenticate your developer org with the Salesforce CLI before continuing.
- Claude Code: Finally, you’ll need to ensure your terminal has access to Claude Code by installing it. This is the AI assistant itself, and is where you’ll interact with it directly. Download instructions here.
Preparing Your Org
You need to ensure your org has the right MCP servers available to it. Something to note is that Flex Credit usage and billing may apply at this point, so while dabbling, it’s best to continue in a Developer Edition org.
Head over to Setup and open the MCP Servers page (under Integrations → API Catalog). Enable the metadata-experts and salesforce-api-context servers from the Salesforce Servers tab.
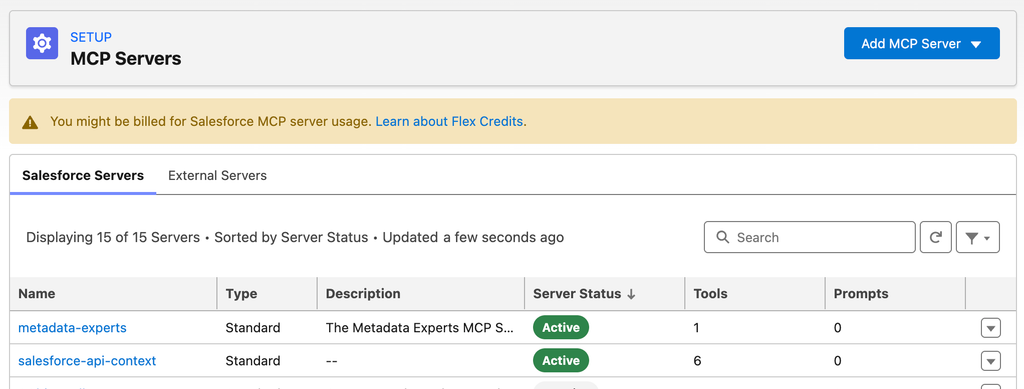
The salesforce-api-context server helps Claude to understand your org specifically, rather than just understanding Salesforce in general. It gives your agent access to your org’s schema, object definitions, API descriptions, and more.
metadata-experts helps Claude to produce high-quality metadata. It also gives it the execute_metadata_action tool, which handles core business logic for registered metadata types.
Connect Your Project and Connect to Your Org
Alright, it’s time to get your hands dirty now! I’m going to assume that you’ve got the Salesforce CLI installed and configured now, given this was an earlier prerequisite.
Next, you’ll need to create a Salesforce DX project folder and authenticate your developer org. You can read exactly how to do this here.
Install and Validate the Salesforce Development Plugin
Open up your terminal and run the Salesforce Development Plugin for Claude Code install command, as outlined below.
Note: I highly recommend that you check the latest guidance from Salesforce’s official documentation before proceeding to ensure you have the latest install instructions. The install command below was taken directly from Salesforce at the time of writing, but may have changed since:
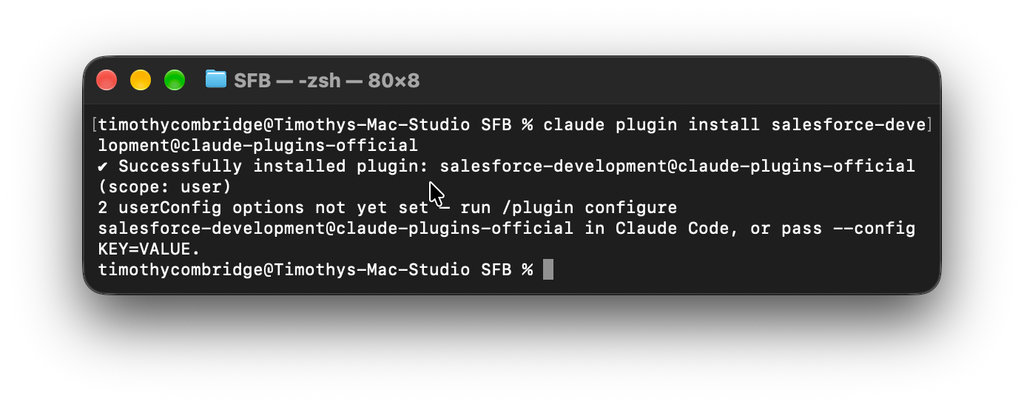
claude plugin install salesforce-development@claude-plugins-official
Once installed, run /salesforce-development:setup to confirm the plugin and your org connection are set up correctly. In my example below, you can see that I then needed to follow up with some additional configuration to get things cleared away before I proceeded. You may need to do the same; make sure you follow the prompts that you’re guided through to ensure you’re following the latest guidance.
Getting Hands-On With Claude Code
Once you’re all set up, it’s time for you to get down and dirty with Claude Code and build your metadata! Rather than working within the Setup menu and building piece by piece, you can simply have a conversation with Claude Code and get it to build everything for you as raw metadata.
Demo Client: The General Store
In this example, we’re going to build out a simple example for our mythical customer, The General Store. The General Store supplies armour and equipment to adventurers all throughout the land of Gielinor. Business is booming, and they’re looking to start lending out their gear to customers who can’t afford to buy it in full. The problem is that, as of right now, all their loans are managed in a spreadsheet, and they need a better way to do things.
They’ll need a simple custom object called Equipment Loan (Equipment_Loan__c) that will be used to track loaned-out armour. On the object, they’ll need to have a picklist field for Metal Type (Metal_Type__c) with options for Bronze, Iron, Steel, Mithril, Adamant, and Rune. They’ll need a Status field (Status__c) with options for In Stock, On Loan, Being Repaired, and Lost in the Wilderness.
Borrowed By (Borrowed_By__c) should lookup to the Contact object, and they’ll need a field for Due Date Back (Due_Date_Back__c), which will be a date field.
They’ll need to ensure the object and fields are all visible to the right users, and to do so, they want a simple permission set called Equipment Loan (Read Only), and another called Equipment Loan (Full Access). This grants two levels of access: Read Only, and another that gives full CRUD to the new object and fields. Last but not least, they also want a simple Lightning Page to be created for the object that simply puts all these fields on the page – they can edit it further later.
Just a reminder – as their AI-empowered Salesforce Admin, you’ll be doing all of this without touching the Setup menu at all. Challenge Accepted!
Creating the Project
Firstly, create a folder somewhere on your computer that you’re going to work from. I called mine theGeneralStore. If you have a repository already set up on your machine, you can use that.
Next, open your terminal and run Claude in it by typing claude and pressing Enter. You may need to authenticate with your Anthropic account before continuing, but once you’ve done that, it’s time to prompt Claude with the first part: creating the DX project:
Create a new Salesforce DX project called theGeneralStore in this folder using the Salesforce plugin. Do not connect it to an org just yet. Do not create any metadata yet. Do not deploy or connect to any orgs without my explicit permission.
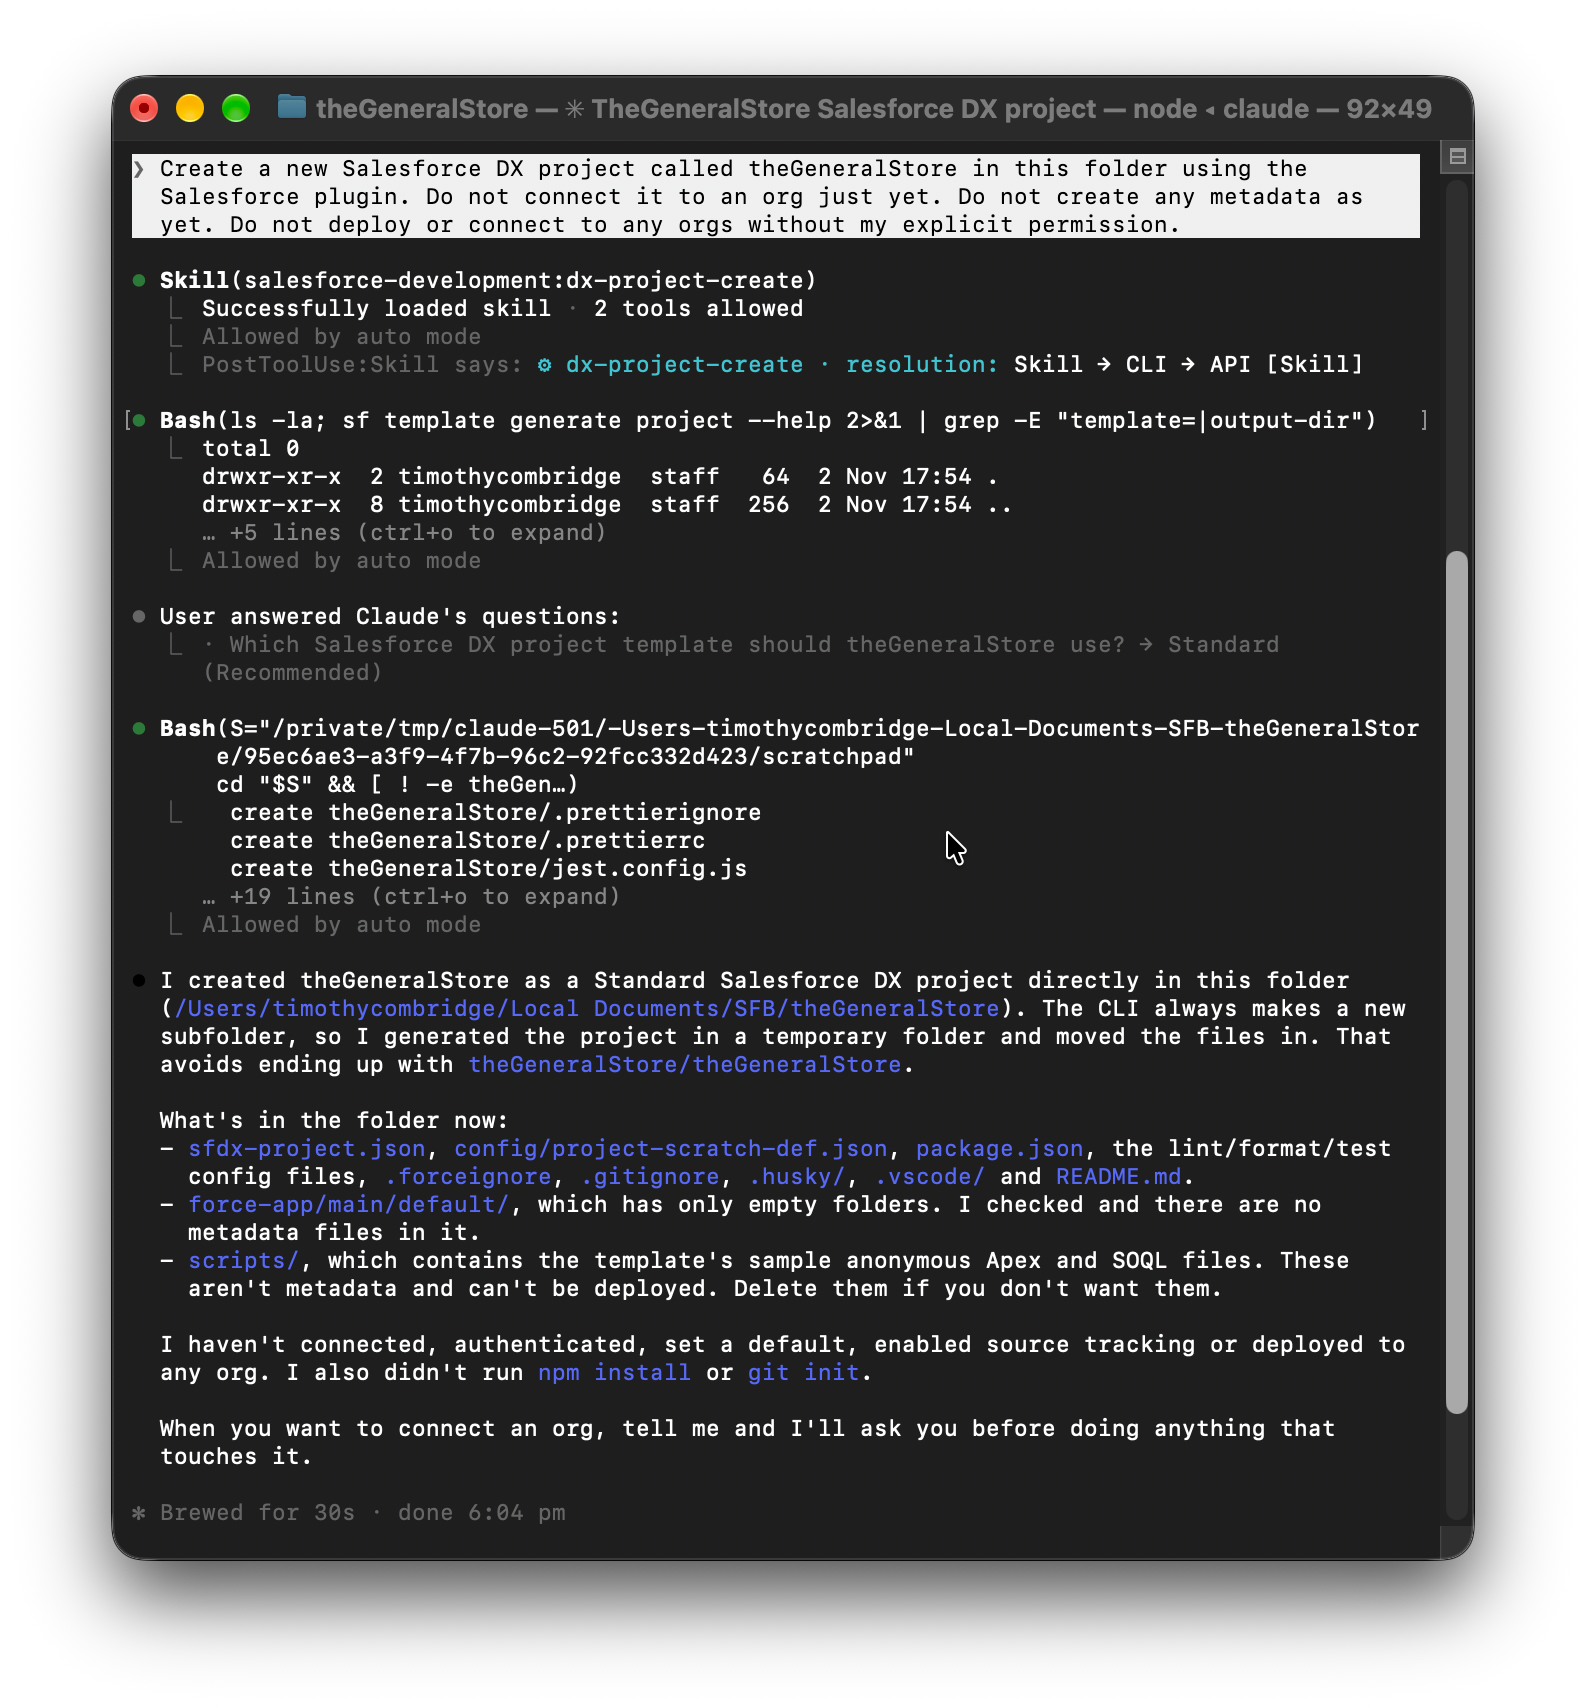
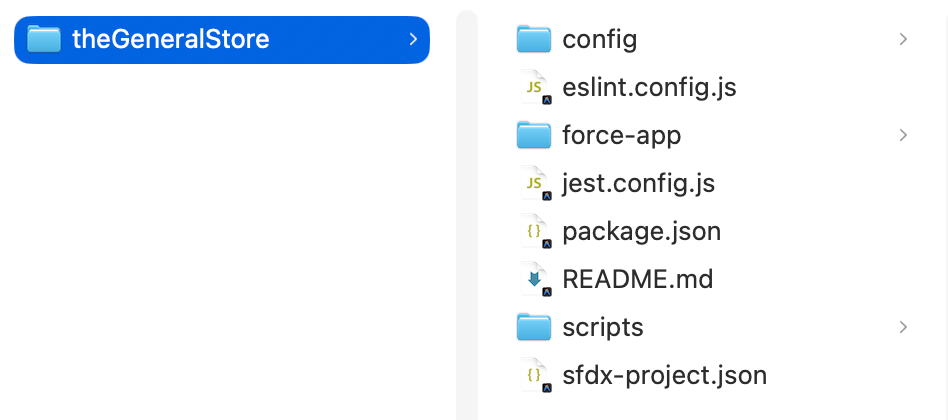
Claude may then ask you further questions about the project before proceeding, as it did for me. It asked what type of project I wanted to create, and I answered that I wanted to create a Standard one. Once that was done, I checked to ensure that everything was done as expected, which it was.
Building the Custom Object
Now that we have a project, it’s time to start building the metadata. I didn’t clear my context between runs, so I didn’t add instructions about not deploying or connecting to any orgs just yet. That carried over from the previous run:
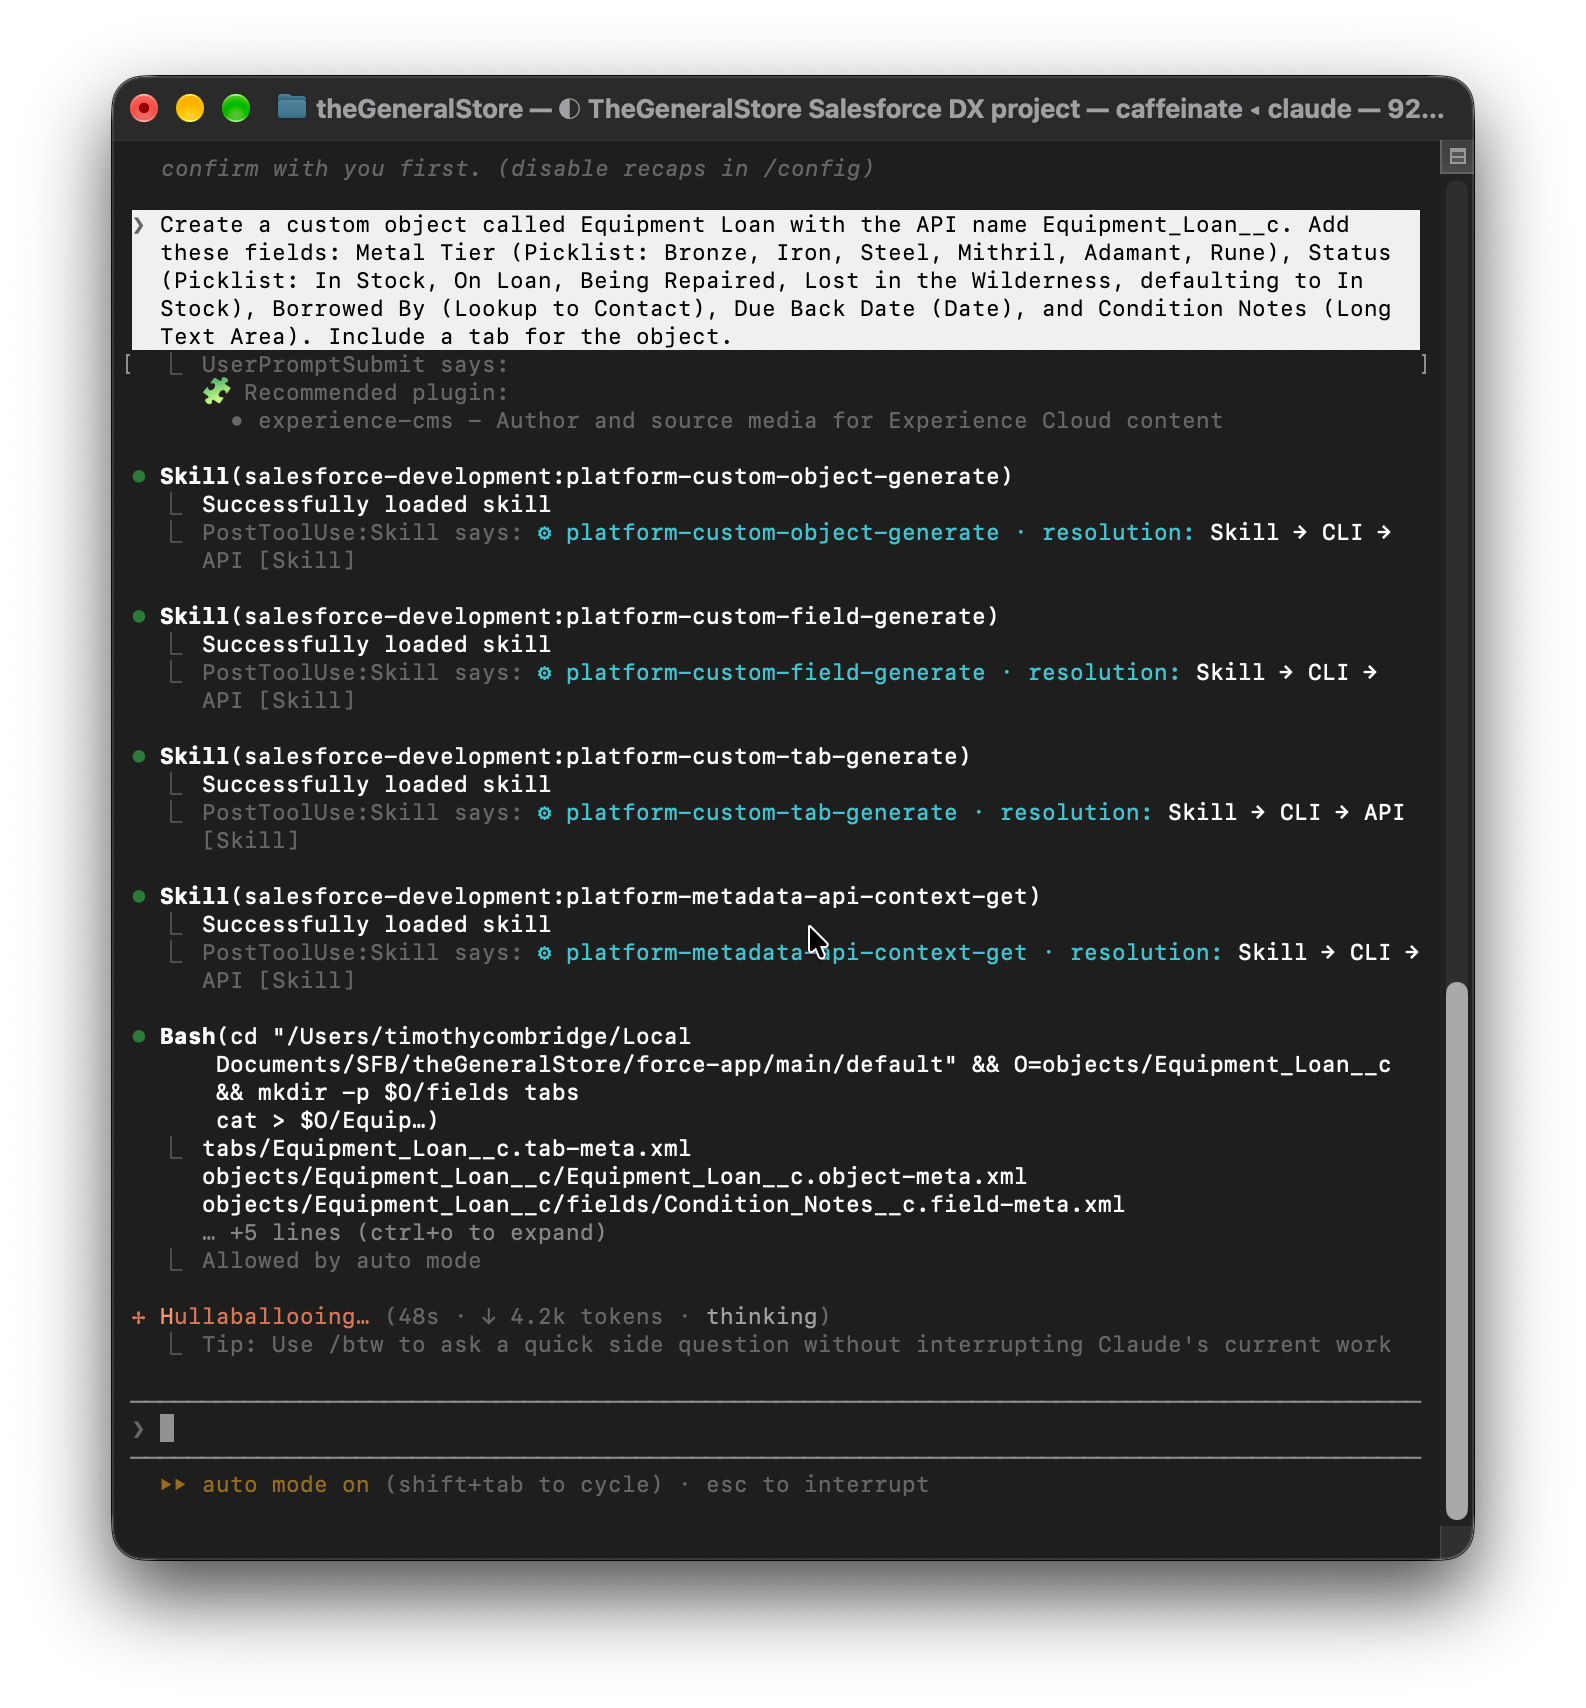
Create a custom object called Equipment Loan with the API name Equipment_Loan__c. Add these fields: Metal Tier (Picklist: Bronze, Iron, Steel, Mithril, Adamant, Rune), Status (Picklist: In Stock, On Loan, Being Repaired, Lost in the Wilderness, defaulting to In Stock), Borrowed By (Lookup to Contact), Due Back Date (Date), and Condition Notes (Long Text Area). Include a tab for the object.
While Claude Code was doing its thing, I was able to see what skills it was leveraging to do so.
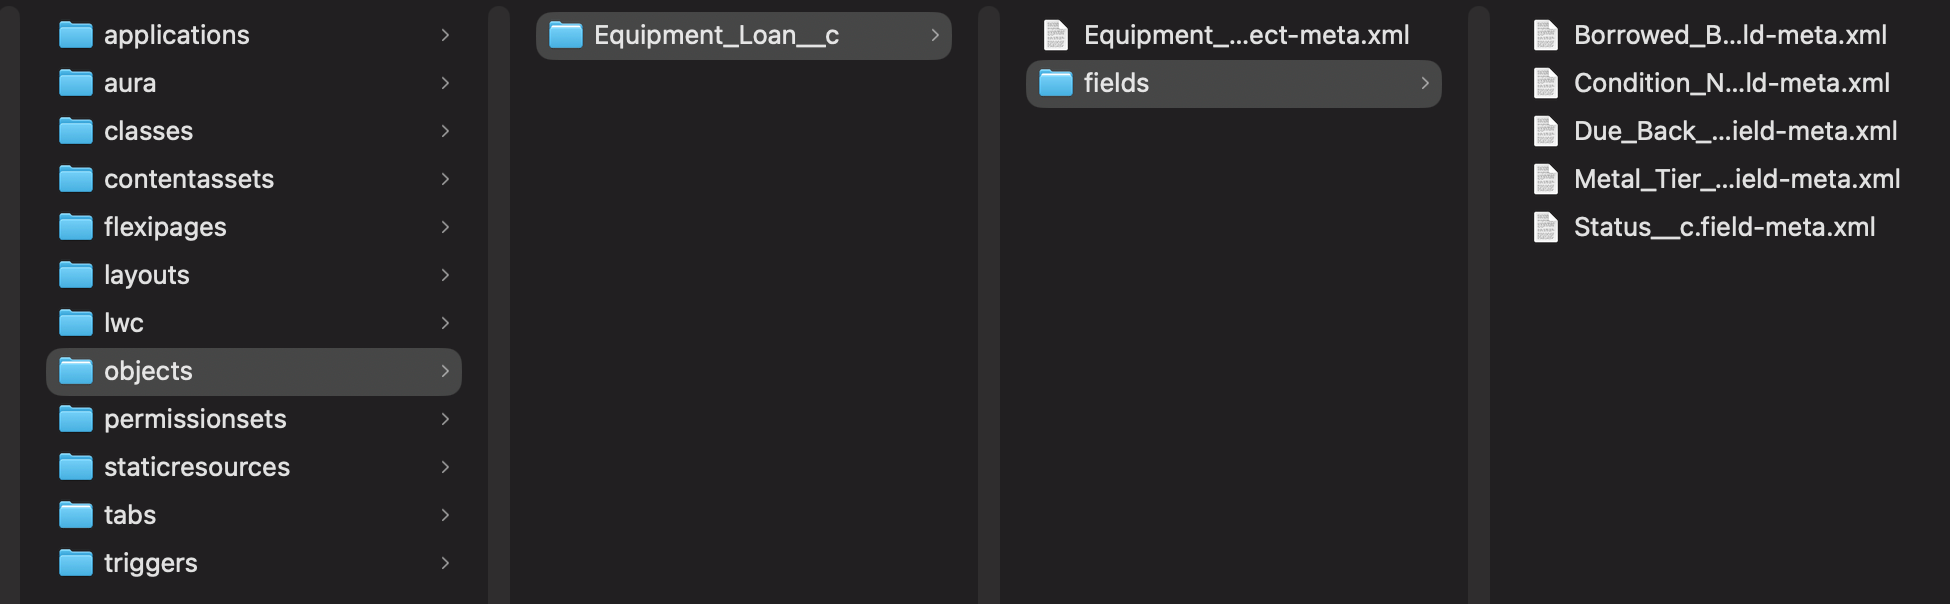
Once it was done, I checked both the terminal output and the folder itself. The folder you’re looking for here is force-app/main/default/objects/Equipment_Loan__c. Within it, you should see the fields it has created as well.
Building the Permission Set
Building once again on top of the existing prompts, I then asked Claude Code to build a permission set according to our requirements:
Create a permission set called Equipment Loan (Read Only) that only grants Read access to the object and its fields, and another called Equipment Loan (Full Access) that grants Read, Create, and Edit on Equipment Loan, Read and Edit on all of its fields. Make the tab visible to both. Don’t grant Delete to either permission set.
Looking at the files that were output, there’s something that I want to bring your attention to. Inside the permissionsets folder, you should now see two new fields: one for the Read Only, and one for the Full Access. For the Read Only, if you take a look at the XML file that was generated, you should see a few lines of code for each field and the associated permissions, as well as the permissions for the object itself. Let’s take a look at one of the fields first:
   <fieldPermissions>
        <editable>false</editable>
        <field>Equipment_Loan__c.Borrowed_By__c</field>
        <readable>true</readable>
    </fieldPermissions>
Note that the editable tag is marked as false, while the readable tag is marked as true. Both should be true for the Full Access permission set. Now, let’s look at the object permissions:
   <objectPermissions>
        <allowCreate>false</allowCreate>
        <allowDelete>false</allowDelete>
        <allowEdit>false</allowEdit>
        <allowRead>true</allowRead>
        <modifyAllRecords>false</modifyAllRecords>
        <object>Equipment_Loan__c</object>
        <viewAllFields>false</viewAllFields>
        <viewAllRecords>false</viewAllRecords>
    </objectPermissions>
Here, we can see that there’s no ability to create, delete, or edit; however, there is the ability to read. Similarly, View All Fields, View All Records, and Modify All Records are all false, as we expect to see. For comparison, here’s what Claude Code has built for the Full Access permission:
   <objectPermissions>
        <allowCreate>true</allowCreate>
        <allowDelete>false</allowDelete>
        <allowEdit>true</allowEdit>
        <allowRead>true</allowRead>
        <modifyAllRecords>false</modifyAllRecords>
        <object>Equipment_Loan__c</object>
        <viewAllFields>false</viewAllFields>
        <viewAllRecords>false</viewAllRecords>
    </objectPermissions>
Delete, Modify All, and both View Alls are all false because we didn’t explicitly tell it to enable those. However, the ability to read, edit, and create is enabled. This is as expected.
Building the Lightning Page
Last but not least is the Lightning Page. This is where we’re going to have all the fields added to the UI for the end user, and we’ll also put the activity history on the page as well:
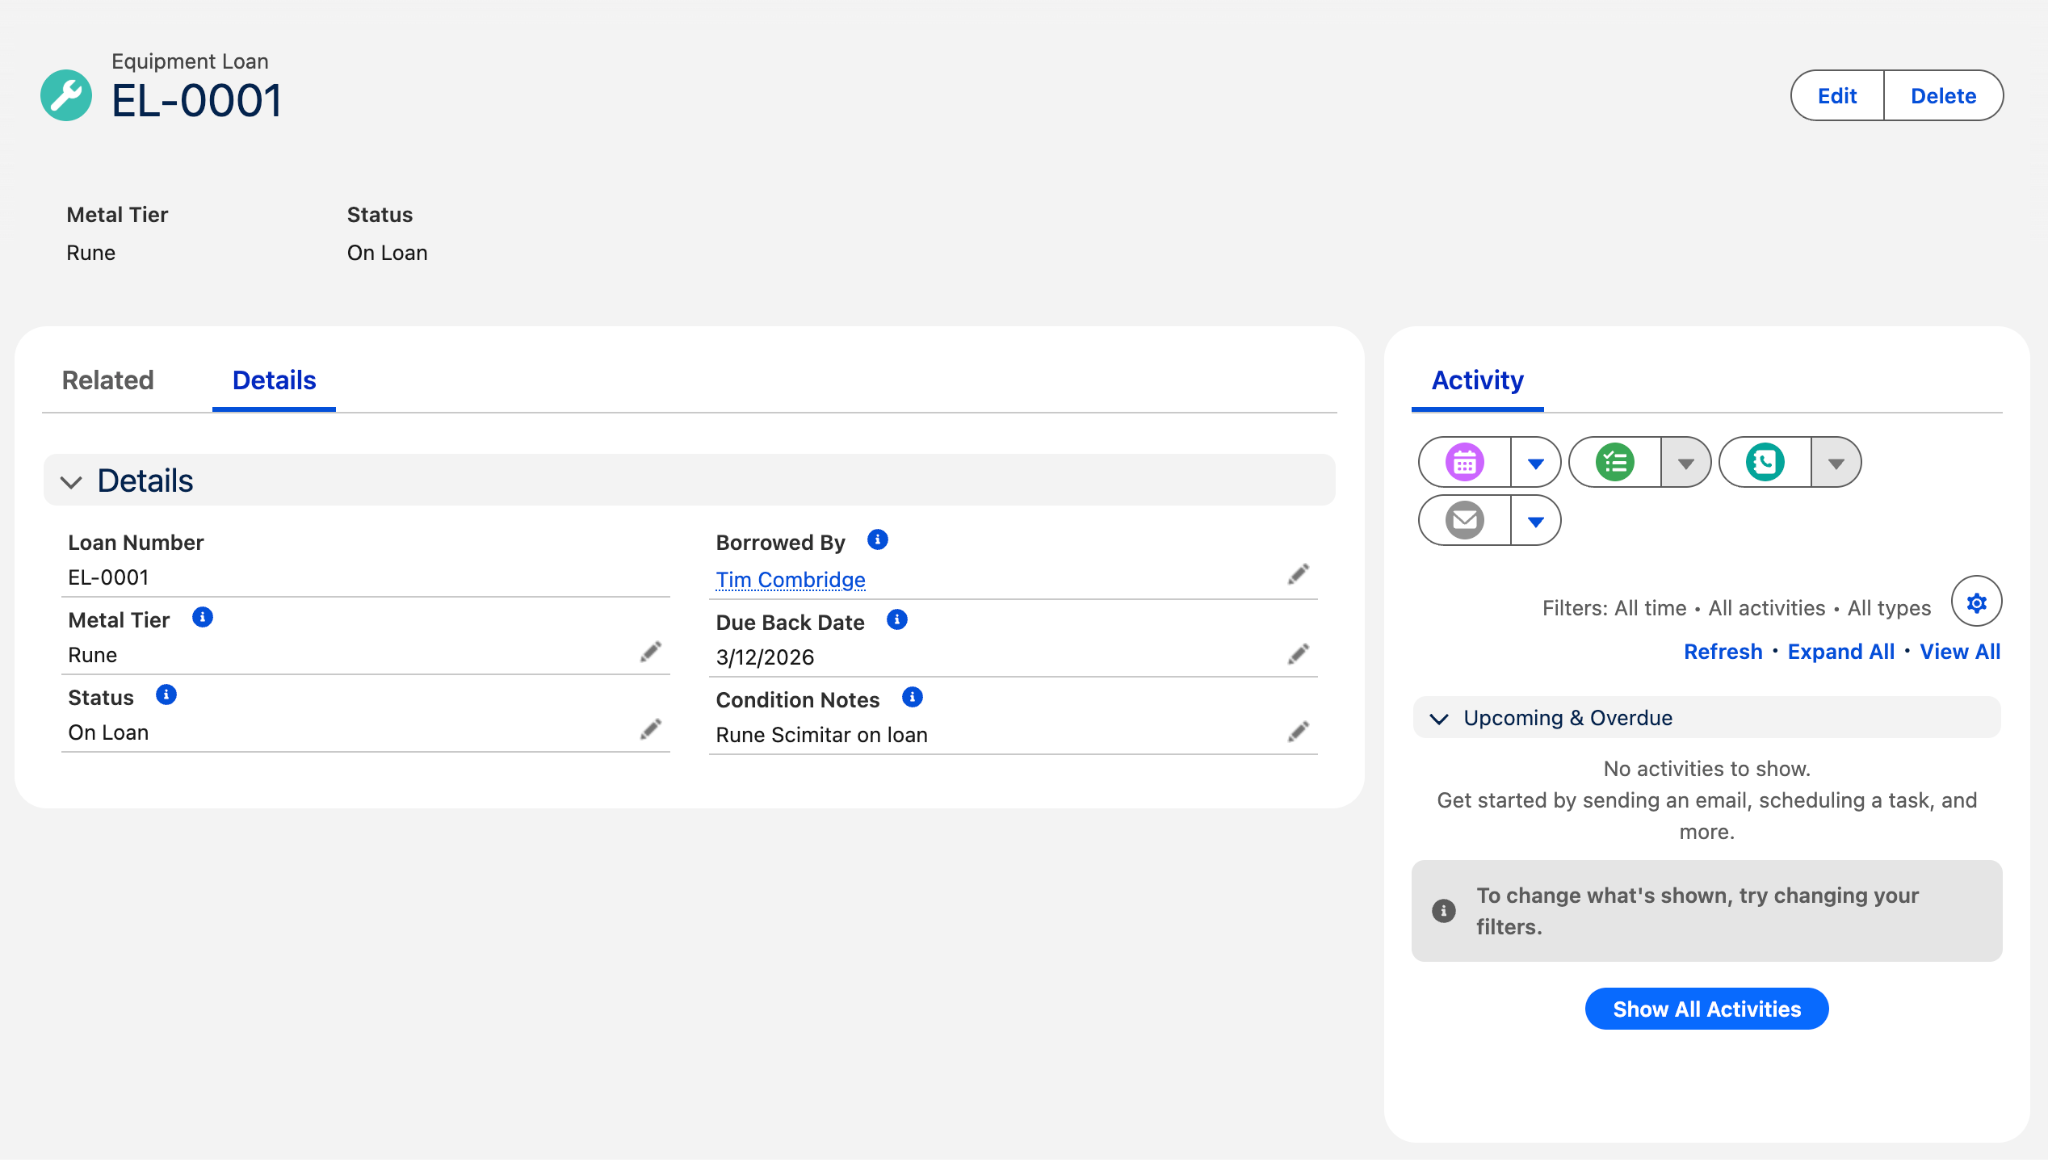
Create a Lightning record page for Equipment Loan with the item name, Metal Tier, and Status in the header, all fields in a details section, and an activity section. Make it the default record page for the object.
After about a minute, Claude Code returned and told me that the Lightning Page was done. It mentioned that the default Lightning Page template already had an activity section, so it just shuffled things around.
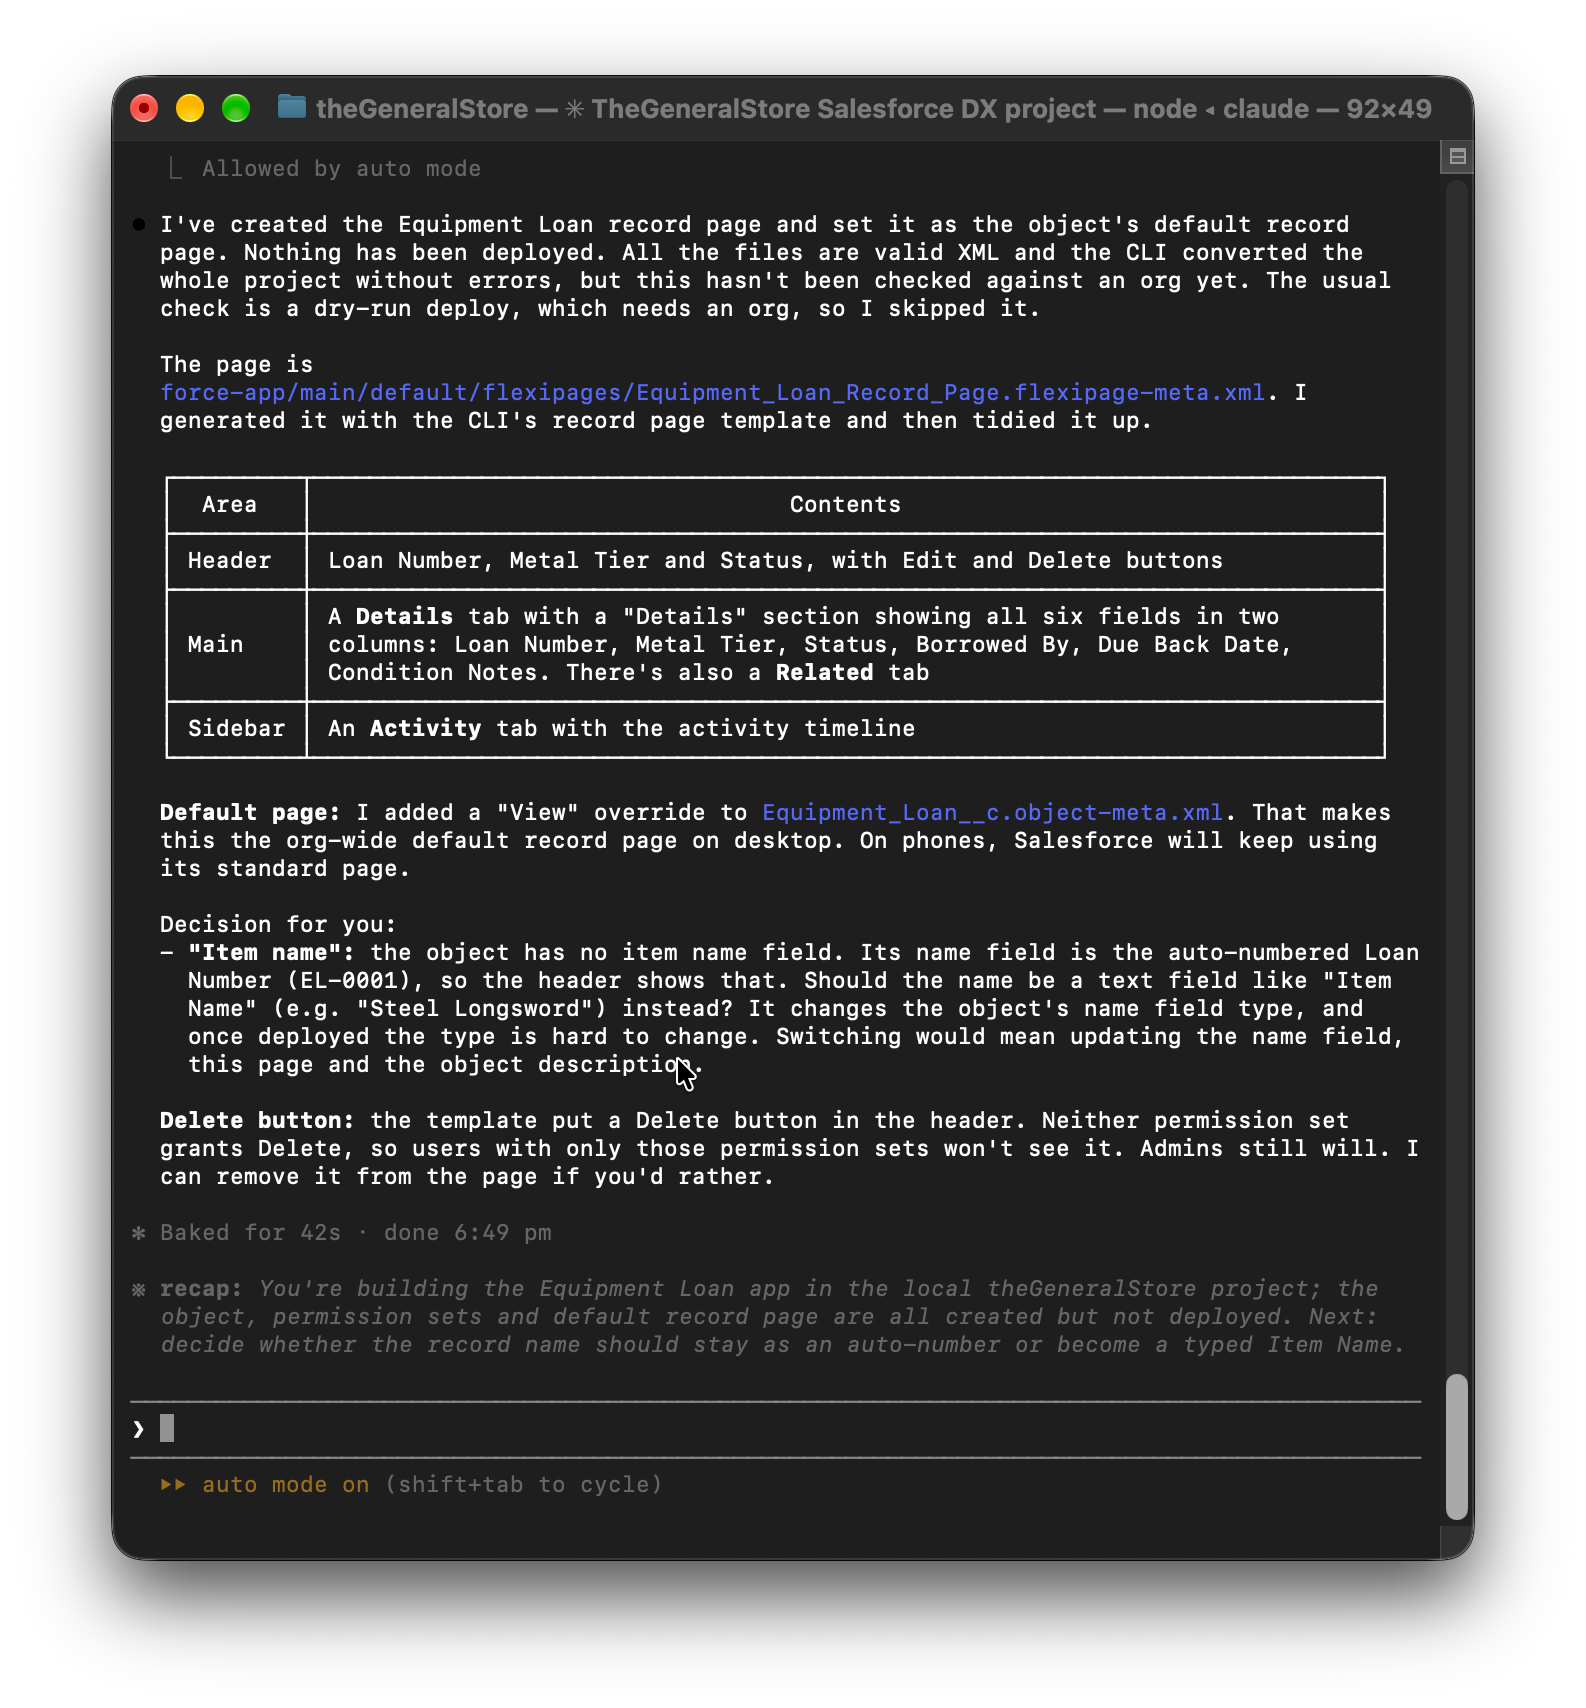
The Lightning Page is a bit difficult to see without looking directly at it, so it’s time to pop it into the developer org so we can double-check everything. You could also use a scratch org at this point if you’d prefer. However, before we do that, we need to package up the metadata.
Packaging the Metadata
If you’re new to this concept, think of creating a package similarly to creating a change set. You’re basically building a box that your metadata will go into, and you can deploy this box between environments as required:
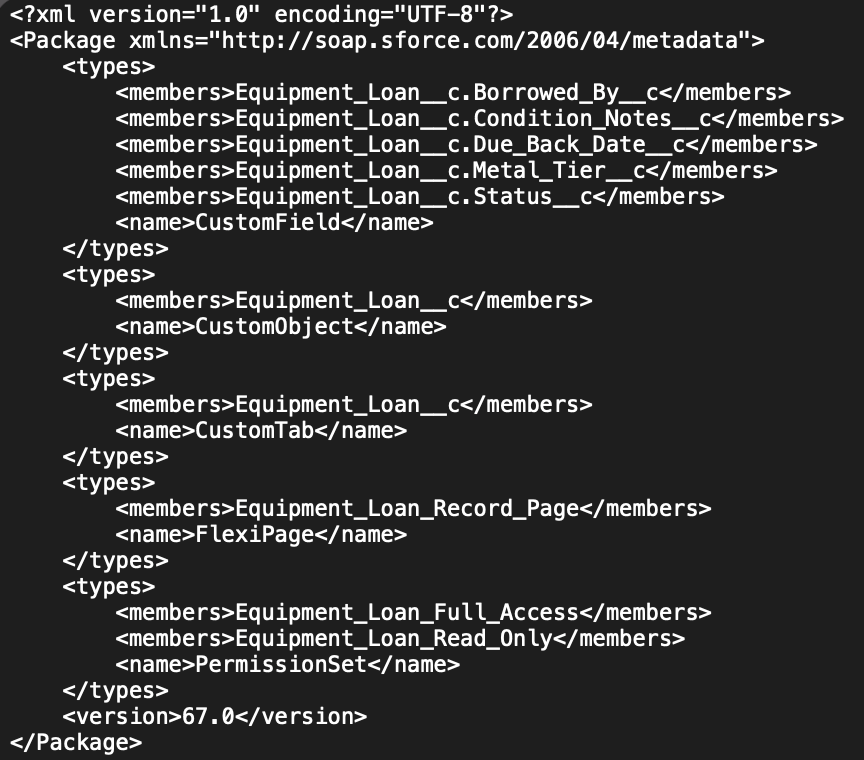
Create a package that contains all the metadata that you’ve just created: the custom object, fields, permission set, and Lightning record page.
A simple enough request, Claude Code took me under 20 seconds to create the package.xml file that I requested, and I was able to confirm that it contained all the metadata that I was expecting.
Now, before you go ahead and get Claude Code to do the actual deployment for you, please consider if this is something that you actually want to do. I know many Salesforce professionals who prefer to handle deployments themselves, and not leave it to an AI agent.
This is your call, or your call as an organization. For this example, I’m going to handle the deployment myself as well. However, as you can see below, the metadata that Claude Code built is now ready to be deployed into whatever org I want.
Working Safely as a Salesforce Admin
As you should’ve done in the example above, you should always build in a sandbox, developer org, or scratch org first. In fact, I would go so far as to say that you should be careful when giving your AI agents the ability to touch your production org. Many Salesforce professionals choose to only give their AI agents the ability to retrieve metadata and work with it locally. Deployments are still done 100% by humans. This is a stance that should be considered.
Be specific when prompting. You’ll notice that there were some things I was specific about in my prompts, things like the names of fields, API names, and the types of permissions to give. This is critical, because Claude is trained on generic data. Your org has additional context that it could use (not demonstrated above), but anything that isn’t documented or available to it will need to be provided.
Summary
While the setup was a bit deep, actually putting Claude Code to use as a Salesforce builder is quite simple. The upfront friction can be daunting, but I’m truly hoping that now that you’ve seen how simple it is, you’ll be confident in taking advantage of it.
Claude Code is a fantastic tool, but by giving it the right tools, it can become even better when working with Salesforce. Can you see how this could be a game changer for you? What are you planning to build with the Salesforce plugin for Claude Code? Let us know in the comments.