

Many brands using Marketing Cloud have the same basic email templates that offer limited branding options. So how do you make yours stand out?
This blog post will teach you easy changes you can make to your basic Salesforce Marketing email templates so they look in tip-top condition, including responsive images, adding custom fonts, and zhuzhing-up with hover effects.
Marketing Cloud Email Code is Locked
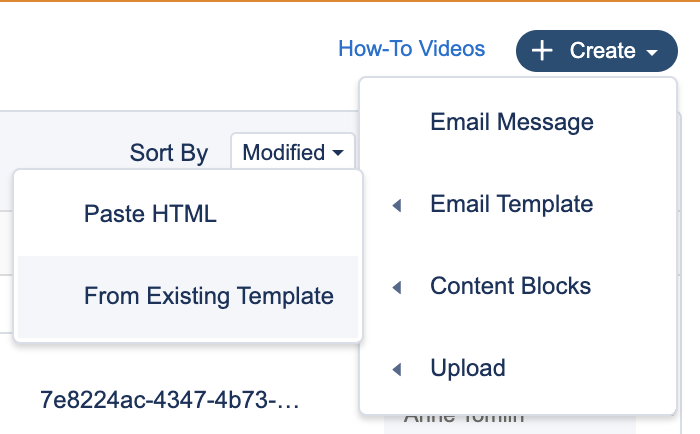
First things first, the code in Marketing Cloud’s ready-to-use email templates is locked and cannot be edited. You need to be able to add or change code when you use these techniques, so create a new template from an existing template.
Navigate to Create → Email Template → From Existing Template
1. Solving the Outlook scale-to-fit retina-image problem

Salesforce Marketing Cloud’s ready-to-use templates do not render correctly in desktop Outlook versions when retina images are used.
A retina image is saved at double the size it will appear in the email. For example, a full-width retina image in a 600px-wide email would be saved at 1200px wide, so that when it’s displayed at the lower width, it will look crisper due to the increased pixel density.
SFMC’s way of handling retina images for all email clients is the “scale-to-fit” check box. When the box is checked, the width of the image is changed to 100%, and the height is changed to auto in the code. This works great in most major email browsers, but results in retina images being displayed at their full intrinsic width (1200px in the previous example) in desktop Outlooks, completely distorting the layout of the email.
The code of an image in a SFMC ready-to-use template with “scale-to-fit” selected looks like this:
<img src="https://www.image.s4.sfmc-content.com/lib/f1234567890/m/1/abc12345-67de-8901-f2gh-34567ij8kl90.png" alt="Emails Y'all" width="100%" style="display: block; height: auto; width: 100%; padding: 0px; text-align: center;" />
Desktop Outlooks only care about the width=”100%” part of the code, while most other major email clients emphasize the width: 100%; inside style=””. This allows us to serve a set width for the image to just the desktop Outlooks. To address the remaining email clients, you will want to add max-width: 600px; so that the image will never be any larger than it is in the desktop view. The final image code will look like this:
<img src="https://www.image.s4.sfmc-content.com/lib/f1234567890/m/1/abc12345-67de-8901-f2gh-34567ij8kl90.png" alt="Emails Y'all" width="600" style="display: block; height: auto; width: 100%; max-width: 600px; padding: 0px; text-align: center;" />
Once these changes to the image code are made, Outlook will render the retina image at the correct display width, and your layout will be preserved.
2. Changing the font for Outlook
You’ve probably already experienced your fonts being changed to Times New Roman in Outlook when you never selected it. You aren’t alone. Times New Roman is the default font for the desktop Outlooks. If you don’t specify a font or only set it once in the <head> of the email, the desktop Outlooks will use Times New Roman.
You can resolve this issue by using the Outlook font fix:
<!--[if mso]> <style type="text/css"> /* Begin Outlook Font Fix */ body, table, td { font-family: Arial, Helvetica, sans-serif; font-size: 16px; color: #939598; line-height: 1.5; } /* End Outlook Font Fix */ </style> <![endif]-->
This piece of code only applies to desktop Outlooks because it is surrounded by conditional logic that targets only desktop Outlooks (<!–[if mso]><![endif]–>). It should be placed right before the ending </head> tag, which you can access by using Code View in the template. This code tells every table cell (<td>) in the email to use Arial, and because it is wrapped in a desktop Outlook only conditional, it doesn’t affect any other email client. This code will work everywhere until or unless you specify a different font either by highlighting text in the rich text editor and selecting a different font from the drop-down, or typing the new font directly into the code.
All current SFMC ready-to-use templates have this fix already implemented, but it is worth checking if you have it in any templates that were made prior to 2020. The Outlook font fix is integral to the next topic.
3. Adding a custom/web font
The difference between web-safe fonts and web/custom fonts is very important. A web-safe font is a font that is installed on every computer. Examples include Arial, Comic Sans, Courier, Georgia, Tahoma, and Verdana. You can consider them a “safe bet” when rendering the text as you intended.
Web-safe fonts are the only fonts that work in the desktop Outlooks. Conversely, web fonts, also called custom fonts, are not widely supported; they work only in Apple Mail, iOS Mail, Samsung, Mail, Outlook for Mac, and Outlook App (Android) at the time of writing.
Most brand fonts are custom fonts. To use them, the font files must be hosted on a server somewhere. The most commonly used font file types are woff, woff2, ttf, and oft, though woff is most commonly used.
I’ll be using Google Fonts to demonstrate how to implement web fonts; it’s an excellent resource for custom fonts, but be warned that the only Google Fonts that work in Gmail at this moment are Roboto and Open Sans. No, that is not a joke. It is real.
When you have selected the font you want to use, it is good practice to choose both the regular and bold font weights. Only select the weights you need, because if the weight of the font files is too large, your text will take a while to load and it will use up your subscribers’ data. Google Fonts will warn you when your selections are too heavy.
To implement the web font, you will most often use the link method. Some ESPs require web fonts to be implemented using the import method, so be sure to confirm the method you want to use with your ESP.

Copy the provided link and paste it in the <head> of the email, which you can access using the Code View link. I like to put the link after the meta tags, but before the first <style type=”text/css”>. The last step is to access the code of the modules where you want the web font to be used and put the name of your font surrounded by single quotes before the declared web-safe font. Most often, you will enter the rich text editor, click “HTML Editor” tab at the top, and then enter the new font name like this:
<h1 style="font-family: 'Roboto', Arial, Helvetica, sans-serif; font-size: 28px; color: #808080; line-height: 1; font-weight: bold; font-style: normal;">This is a headline</h1>
If you want paragraph text to render in your web font, you must add the same font family declaration to the <p> tags like this:
<p style="font-family: 'Roboto', Arial, Helvetica, sans-serif;">This is some paragraph text.</p>
Since web fonts don’t work in desktop Outlooks, it is imperative that you add the Outlook Font Fix from #2 if you use any web fonts. If you do not add it, all of your text will appear in Times New Roman.
4. Vertically aligning columns
Vertically aligning columns refers to where the column content starts and ends in relation to the content in the corresponding column. SFMC ready-to-use templates always align your columns top, even though the default for HTML vertical alignment is middle.
The Airbnb email on the left is most indicative of SFMC ready-to-use templates’ alignment top. The beginning of the content in both columns starts at the very top of the column. The Peloton email shows a vertical alignment of middle. The image in the right column is taller than the content in the left column, so it centers vertically in the middle of the column. Lastly, the Molekule email shows the air purifiers vertically aligned bottom. The bottom of each air purifier email is at the same vertical height. Imagine if this email had the air purifiers vertically aligned top; it would have a very different feel.
SFMC ready-to-use template columns have an HTML declaration of top vertical alignment, denoted by valign=”top”. They also have a class of “responsive-td”, which we will use to override valign=”top”.

In the head of the email, accessed via the Code View, find the first </style> tag, and add below it:
.responsive-td {vertical-align: middle; }
Don’t forget the period at the beginning! This bit of CSS will change the vertical alignment of all of your columns. There are multiple values you can use for vertical-align, but the ones you will use most often are top, middle, and bottom.
5. Creating Hover Effects
A hover effect is when something about the email changes when you place your cursor above an element in the email. This is the easiest way to add interactivity to an email. Hover effects work in AOL, Apple Mail, Yahoo! Mail, and Gmail, but are not supported in mobile devices at the time of writing.
There are a myriad of things you can do with hover states, but here we’ll cover buttons and links. Hover states are created using the CSS pseudo class :hover in the head of the email.
For buttons, SFMC ready-to-use templates already have the class “buttonblock” on them that can be used to put hover effects on all the buttons in the email. If you want to put a hover effect on just 1 button, you must add a new class or id to the button’s surrounding <td> like below:
<td class="innertd buttonblock newclass" align="center" bgcolor="#5D5D5D" style=" border-radius: 3px; -moz-border-radius: 3px; -webkit-border-radius: 3px; background-color: #5D5D5D;">
Similar to how we added styles to the head for vertical alignment, you’ll find the first </style> tag, and above it add:
.buttonblock:hover {background-color: #000000 !important; border-color: #000000 !important;}
The !important must be placed at the end of each style declaration for the hover effect styles to override the styles declared in the button code. After you have implemented these new styles, the background color and border color of your buttons will change to black when a cursor is placed above them.
Applying hover effects to links is very similar. To put hover effects on all the links in your email, add the following in the head above the first </style> tag:
a:hover {color: #FF0000 !important; text-decoration: underline !important;}
The a refers to the anchors, better known as links, in your email. When these styles are applied in the head, the link color will change to red and the link will be underlined when a cursor is placed above a link. If you want to target only one link for a hover effect, you will add a class to it:
<a class="hover" style="color: #000000; text-decoration: none;">
Summary
This blog post has taught you 5 easy changes you can make to zhuzh-up your basic Salesforce Marketing email templates to differentiate them from other brands. These may be small changes, but when your template looks similar to everyone else’s, small things can really set your email apart!
Feel free to discuss these and other email topics with me on Twitter at @pompeii79 and @emailsyall, or on the Email Geeks Slack channel.
Slides of the original 10/14/2020 presentation are available at https://www.emailsyall.com/fiveeasyways.
A recording of the presentation is available here.
