

The value of a good demo can’t be underestimated – a well-choreographed demo builds alignment, trust, and transparency. While we’ve already discussed how to run a solid functional walkthrough, in this article, we’ll discuss the ingredients of a good technical walkthrough – a “backend” demo intended for a technical audience that needs to understand how solutions work under the hood.
Technical walkthroughs aim to showcase how new or updated features have been designed, to outline the rationale behind technical decisions, earmark important technical considerations that admins, developers, or architects may need to be aware of when working in the org going forward, and ultimately, to foster transparency surrounding a solution. We’ll cover:
- The components of a clear and comprehensive technical walkthrough.
- The ideal demo flow to adequately inform listeners without overloading detail.
- Tips for running high-quality technical demos.
Typically, it’s best to set the stage with a functional walkthrough first, before you tackle your technical walkthrough. Check out the first article in this how to demo Salesforce series: Running a Functional Walkthrough.
Components of a Technical Walkthrough
Broadly speaking, a quality technical walkthrough should explain what you’ve built, how you built it, why you built it the way you did (given the parameters you had at the time), and the implications of the design decisions you made.
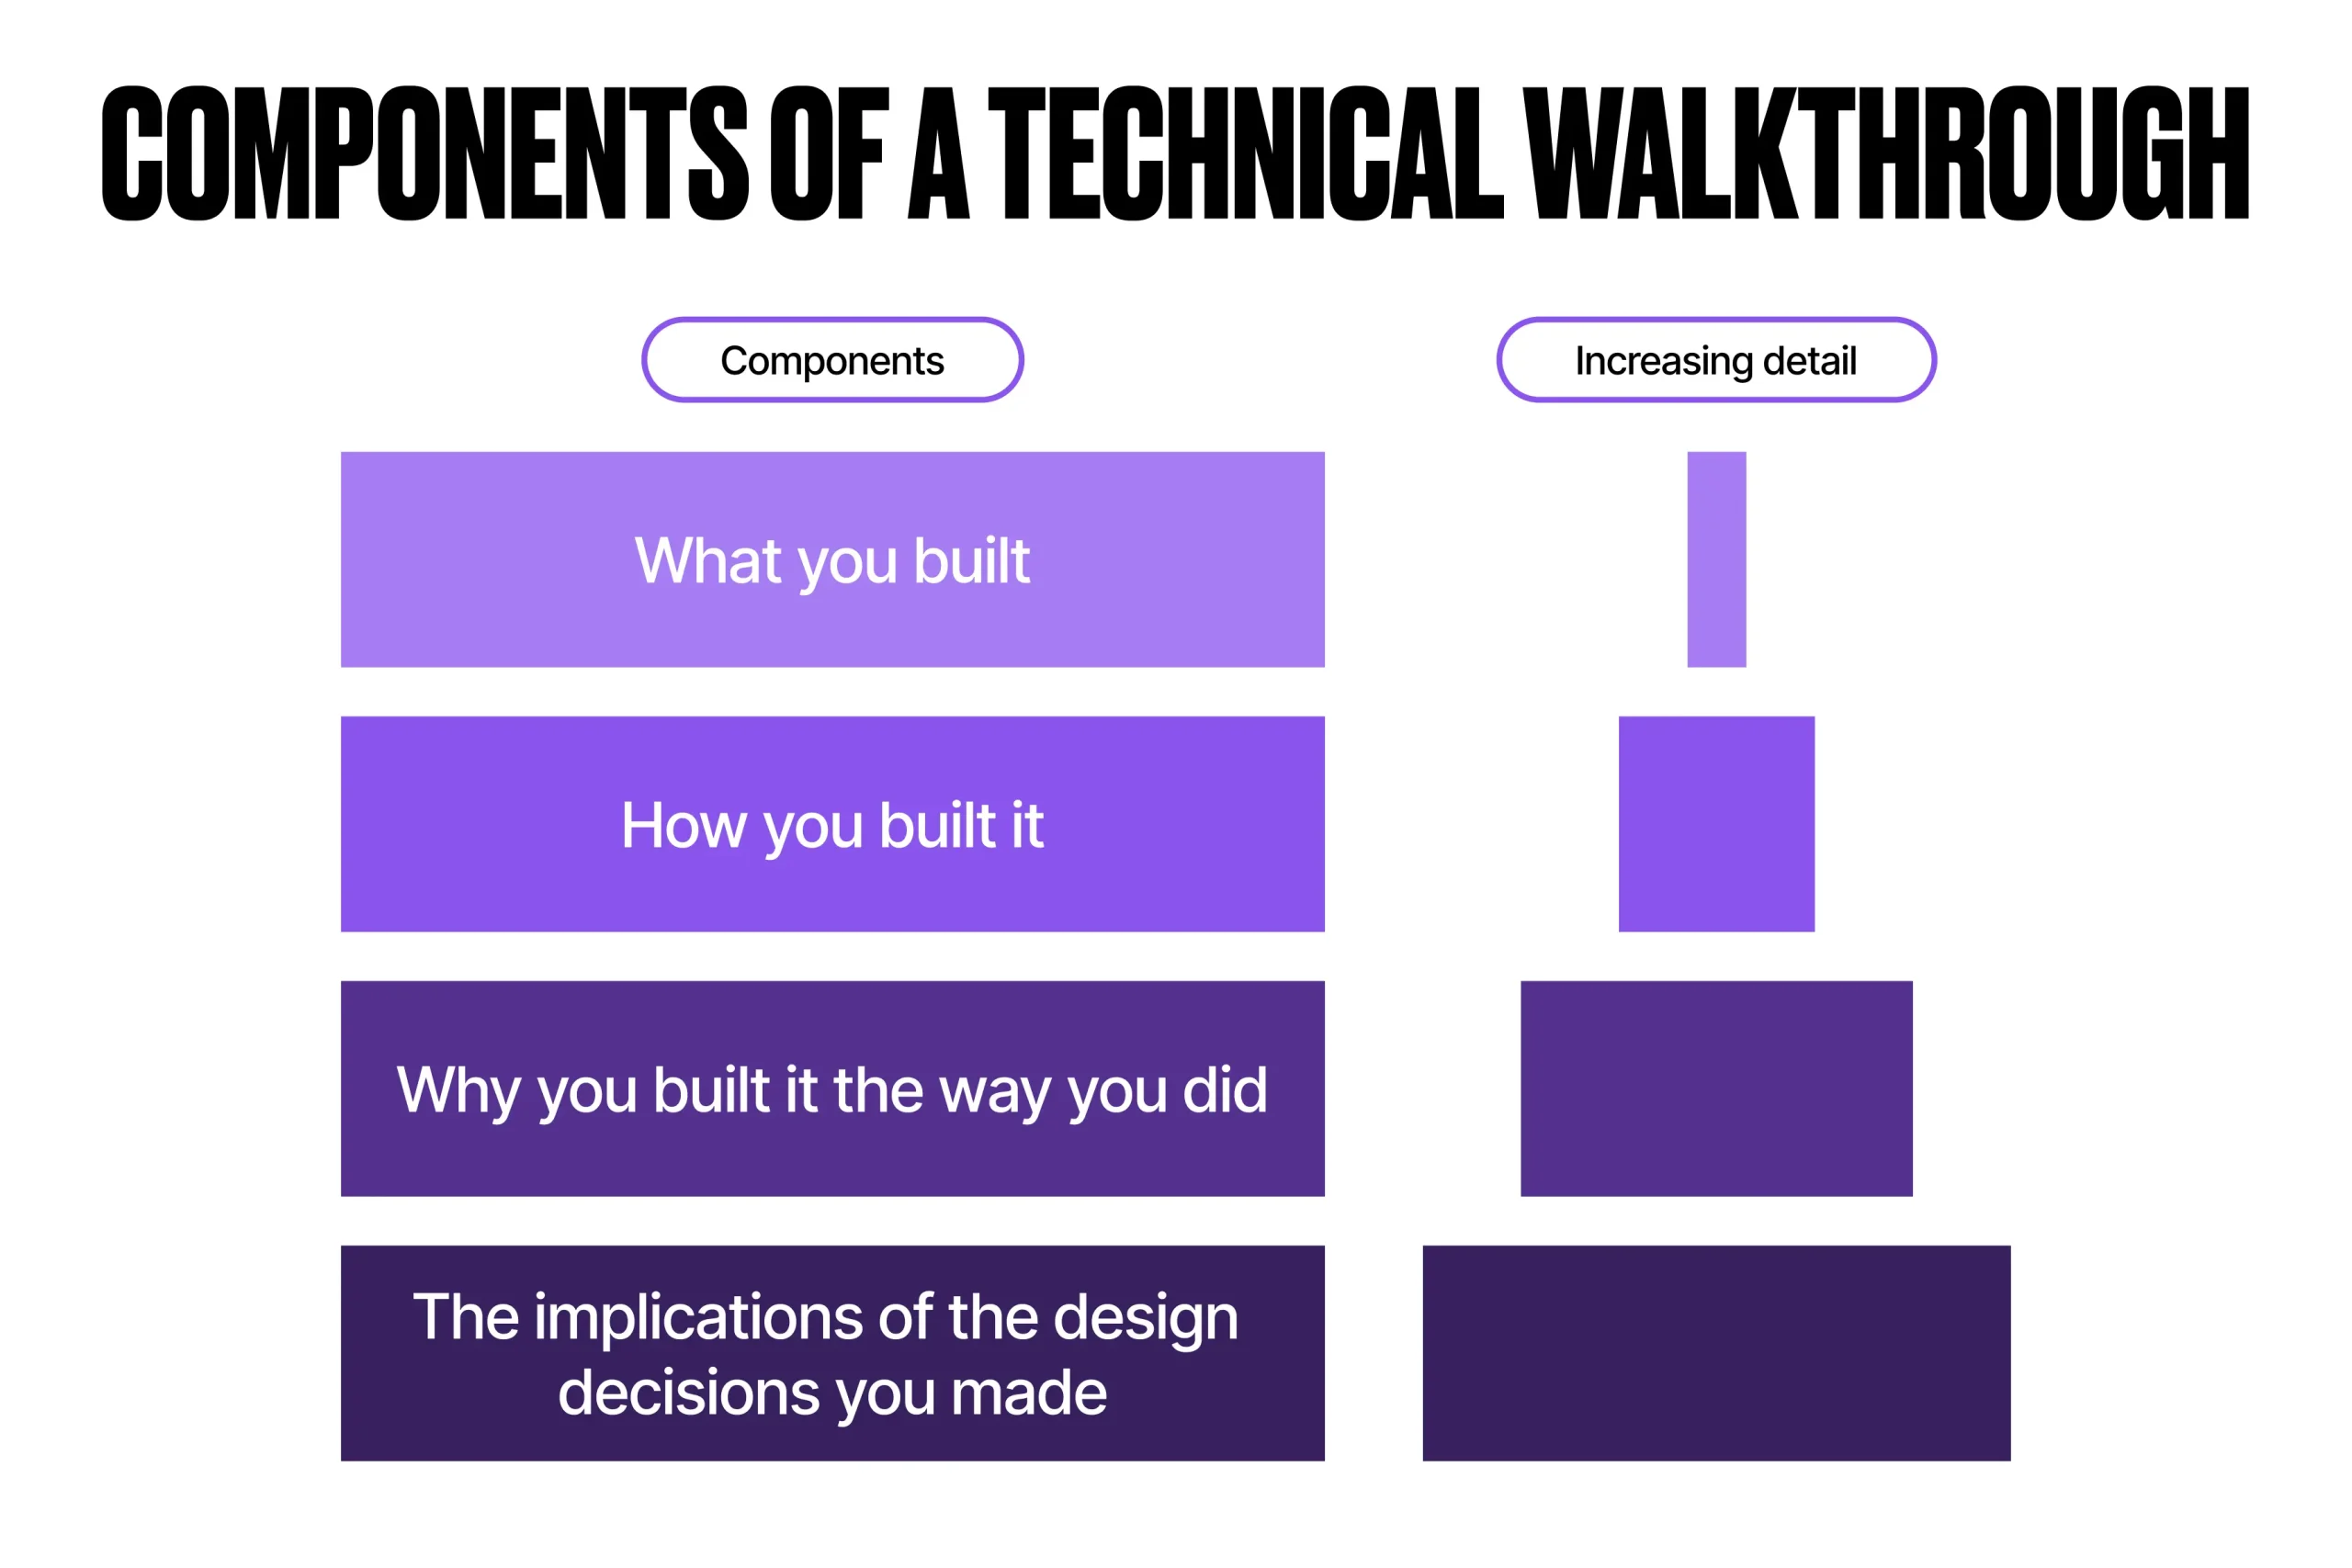
Each layer of this framework adds color to the solution, providing comprehensive information without getting lost in the details. If your technical team can speak to each of these points, you’re in a good place.
Underneath this high-level methodology, you can begin to flesh out the details of your demo.
1. Set Executive Context
Let’s start big-picture, ensuring demo audience members have the appropriate context to understand your technical walkthrough.
Start With the Vision
Wasn’t that for the functional walkthrough?
Yes, but it comes here too. Even technical stakeholders need to understand what the solution is trying to achieve and why. Building this context helps to set the stage for the story of your solution’s technical demo. Functional requirements often influence technical decisions. These dependencies are crucial for your technical stakeholders to be aware of. So let’s recap…
Begin your demo by reiterating the vision of the future-state system – the headline value statement of the project that your team used to drive the solution. Re-aligning on the vision anchors the demo in what really matters – the value delivered to the business.
Even though you are close to the solution and how it meets business needs, other technical stakeholders may not be close to “the business”. Starting high-level helps to scaffold more detailed discussions surrounding limitations, trade-offs, and roadmapping that may arise during the demo. At this moment, you can highlight:
- The vision statement.
- The major problem areas or pain points the solution solves.
Touch on the Functional Areas Your Technical Demo Supports
Briefly outlining the key functional areas of the system that the technical demo will address adds valuable context for your technical audience, helping to orientate them and provide clarity on what will and won’t be included in the demo.
Using a visual diagram to contextualize in and out of scope functional areas can help foster alignment:
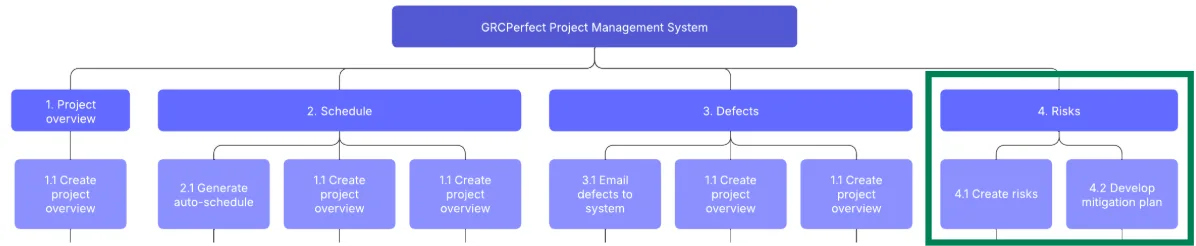
Add context to the functional area(s) that you will demo, explaining:
- The technical maturity of each functional area (i.e. is this brand new functionality, or are you building into existing features that may come along with technical debt?).
- The key features contained within each in-scope functional area that you will demo.
- Which user personas are implicated by each functional area.
Mention Platform and Business Considerations
Platform and business considerations often have significant impacts on technical designs:
- Platform considerations may include the OOB Salesforce capabilities at the time of design, or license restrictions.
- Business considerations may include the organization’s appetite for technological change, the level of technical proficiency of users, and the organization’s budget to invest in systems change.
In the design phase, these variables influence important architectural decisions. These decision-drivers are often disguised as “institutional knowledge” and tend to disappear as staff members move on.
Technical demos are an important place to make these considerations clear, building transparency and traceability so that future technical team members can understand the landscape in which certain decisions were made.
2. Architectural Overview
Like your functional demo, your technical demo should start big-picture, and add details as you go. Early in the demo, it can be useful to reiterate the system landscape architecture and the architectural patterns employed in the development of new functionality.
This sets the technical context for your demo, helping to ground architectural decision-making and aligning the technical team on standard norms and procedures relating to how you implement changes.
This section of the demo should briefly cover:
- System architecture: Salesforce clouds/features involved, external systems, etc.
- Data flow: Data sources and source systems, event triggers, etc.
- Integration patterns: REST/SOAP APIs, middleware, etc.
- Deployment strategies: Sandbox or scratch org utilization, CI/CD methodology, etc.
You may opt to leverage visuals such as a System Landscape Diagram, data flow diagram, and/or deployment pipeline to support this part of the demo (check out Salesforce Architects for reference diagrams).
3. Feature-Specific Technical Demo(s)
Now that the appropriate business and technical context is set, we can get into the meat of the technical walkthrough – demoing the backend of specific features.
For each demo, remember to briefly state the business value of each feature. If audience members did not attend your functional walkthrough, you may benefit from demoing the front-end functionality of each feature before you dive into the backend. For each feature, you’ll want to explain the following aspects.
Salesforce Components Leveraged
Start with which OOB aspects of Salesforce were leveraged to support the solution, such as:
- Salesforce Cloud(s) and cloud-specific features.
- Apex, LWC, Flow, OmniStudio.
- Einstein.
Data Model Changes
Then, you can dive into changes to object and field-level metadata. Consider discussing:
- Inclusions of previously unused Standard objects.
- Configuration or deprecation of Custom objects.
- Object relationship changes.
- Highlight important fields that drive functionality, UX, or automation.
Automation Changes
Consider discussing:
- Where automations are built (i.e. Flow, Apex, etc.)
- Trigger context.
- Error handling.
- Bulkification / governor limits.
UI/UX Implementation
Consider discussing:
- Custom component accessibility.
- Conditional visibility.
- LRP components (i.e. Dynamic Forms).
- Page performance.
Security and Sharing Changes
Consider discussing:
- User access to new features.
- Changes to the sharing model.
- Changes to data security policies and protocols.
Remember that security and sharing in Salesforce represent a comprehensive set of tools and processes to safeguard data from malicious intent as well as to provide access to data only to users who explicitly need it.
Bugs and Limitations
It’s crucial to be explicit about bugs and limitations. If there are remaining bugs at the time of the demo, be sure to explain them, including (to the best of your knowledge):
- The expected vs actual behavior.
- The impact and criticality of the bug (i.e. does it prevent users from using the feature? Is there a workaround?)
- The anticipated resolution mechanism.
- The timeline to resolution of the bug.
All solutions have trade-offs and limitations; being transparent about what your solution doesn’t do is as important as effectively demonstrating what it does. Technical team members need to have a clear understanding of both the boundaries of a technical design and how limitations may impact future work.
Recap Key Architectural Decisions
In his 2024 article, “How to Effectively Document Your Salesforce Architectural Decisions”, Salesforce Architect Hamza Abib states that:
“Architectural decisions refer to the strategic choices made during the planning and implementation of a Salesforce project. These decisions shape the overall structure and functionality of the solution, which influences its scalability, performance, and maintainability.”
Hamza Abib, Salesforce Architect
Understanding what architectural decisions have been made, the trade-offs they imply, and the motivating factors behind these decisions is crucial to externalizing institutional knowledge and building transparency around solutions. Your technical demo is the perfect time to recap key architectural decisions relating to the demonstrated features.
Lessons Learned and Looking Forward
Strong technical teams evaluate their own performance. While this demo should not replace formal retrospectives, it can highlight critical learnings about the system and ways of working.
To close your demo, zoom back out to revisit how the demonstrated feature(s) constitute part of your system or product roadmap. Revisiting the roadmap serves to:
- Showcase progress against a wider system/product development plan.
- Address the timeline for managing limitations, resolving bugs, and executing future enhancements.
- Educate users as to what features they can expect in the future.
- Demonstrate a commitment to continuous improvement.
Technical Walkthrough High-Level Structure
To recap, your technical walkthrough should contain the following agenda items:
- Execute context (5min).
- Architectural overview (10min).
- Feature-specific demos (30-60min).
- Recap key Architectural decisions (10min).
- Lessons learning & roadmapping (5min).
Recall that your demo should help listeners answer:
- What features did we build?
- How did we build these features?
- Why did we build them in this way?
- How might these design decisions impact future work?
Tips for Technical Walkthroughs That Impress
The framework provided in this article should help you consistently structure strong technical walkthroughs. In addition to leveraging this methodology, you can also employ the following tips to deliver higher-quality demos:
- Supplement technical discussions with diagrams: Clean, simple architecture diagrams help to ground and demystify complex technical discussions, and provide an audit history of architectural decisions made.
- Be ready to demo: Simple as it sounds, make sure you are demoing in an environment that is prepared with adequate test data and a test user. Ensure you are ready to demo “happy path” scenarios, designed failures, and bugs where relevant.
- Focus on what’s new or changed: Orgs are complex. Outside of giving listeners the appropriate context, focus feature demos on new and changed functionality.
- Focus on “why”: Technical demos outline how features are built. However, technical team members also need to understand the “why” behind architectural decisions to build fluency with an org.
- Keep it simple: Technical doesn’t have to mean overly complicated. While using correct terminology, try to steer clear of overusing jargon terms or over-complicating subject matter that is already complex. Keep concepts as simple as possible, and elaborate where needed.
- Don’t be afraid to say “I don’t know” (but I can find out): Technical demos can be complex. Your team members won’t expect you to have every answer. Consider bringing a Technical or Solutions Architect in to support technical questions as an escalation point. If you don’t know an answer to a question at the moment, make a note of it and be sure to answer it in a follow-up to the demo.
Final Thoughts
Running a high-quality technical walkthrough requires both technical expertise and sharp presentation skills. Following a reliable methodology can take the guesswork out of how to structure a strong demo, setting you up for success.
Remember to record your technical walkthrough, or record a separate demo video (without live audience member feedback) to circulate to your technical team so that it can be referenced in the future.