Salesforce Quick Actions give your users a quick way to accomplish a task, such as create a record, update records, send an email or log a call. These are many standard actions but you can create custom actions too.
In this guide, we’ll dive into two types of Quick Actions – Global and Object-specific Actions – including how to create them and where you can access each type of action.
Types of Salesforce Quick Actions
- Global Actions: are not related to a specific record and can be placed anywhere that actions are supported.
- Object-specific Actions: are related to a particular object, eg. when you create a Contact via the Contacts related list on an Account record, the ‘Account Name’ field is populated for you.
Where to Find Quick Actions in Salesforce
Actions on a Salesforce Record Page
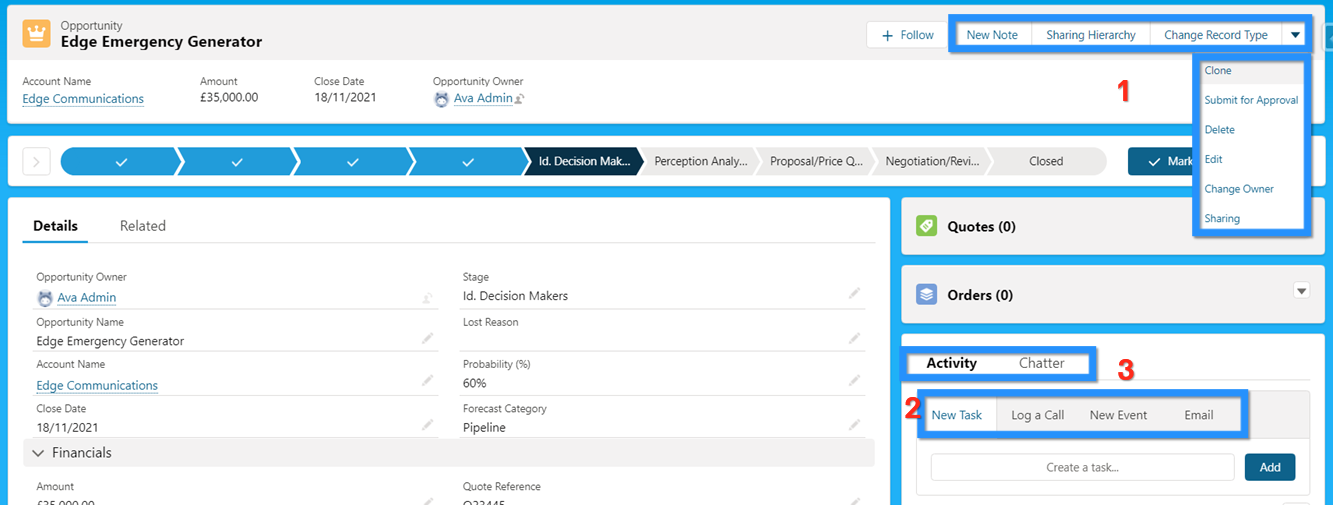
You’ll find your standard and custom actions in Salesforce on:
- The record highlights panel
- Activity component
- Chatter component

Actions on the Homepage Assistant
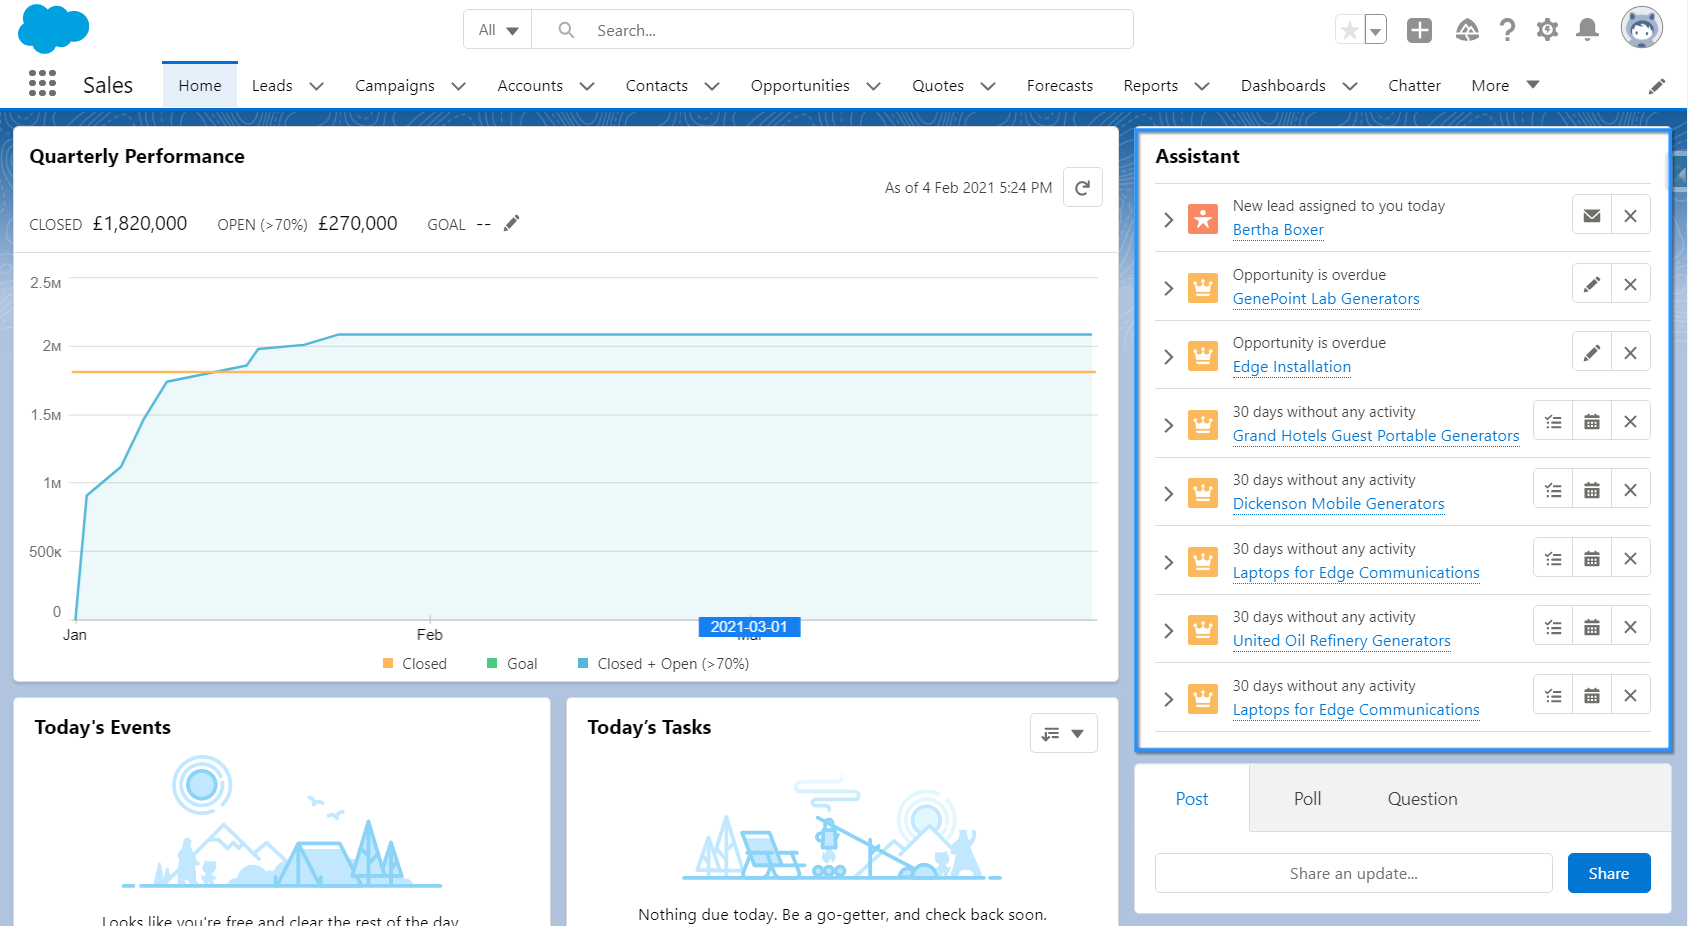
The Homepage Assistant is a productivity tool for your users to better manage their daily workload. The Homepage Assistant displays up to 10 updates about Leads and Opportunities.
Users can also create a new Task, create a new Event and send an email from the component.

Actions on List Views
Actions can appear on list views (except the ‘Recently Viewed’ list view). If you create a custom action, you’ll need to add the button to the object’s list view search layout:


Actions on Salesforce Chatter


Actions on the Salesforce Mobile App
Actions can also be used on the Salesforce mobile app. Initial actions will be displayed, with the option to view other actions by clicking ‘More’.


Global Publisher Layouts
So, we’ve seen where actions can be accessed and used, but what determines their order? Global publisher layouts can be set up to determine the order actions appear in certain interfaces, such as the Home tab, Chatter tab and mobile app.
Global publisher layouts only contain Global Actions! Actions for specific objects are determined in their object page layout.
Salesforce Global Actions
Global Actions are not related to a specific record and can be placed anywhere that actions are supported. Example Global Actions include:
- Create
- Question
- Log a call
- Send an email
- Custom actions, which can invoke Flows, Visualforce pages and Lightning components.
How to Create a Global Action
We are going to create a way for our internal employees to create Leads that come from ‘Employee Referrals’. The action will show minimal fields and set some default values, so creating a Lead only takes seconds!
1. Go to Setup → User Interface → Global Actions → Global Actions. Click ‘New Action’.
2. Select Action Type = ‘Create a Record’. Click to select your Target Object (the object you would like the action to apply to) = ‘Lead’, and give it a Label.
3. Click Success Message. This message will appear to the user when they complete the action.
4. Next, we’ll add relevant fields that the user will need to complete to the layout. Notice that we didn’t include many fields, including some required fields! This is because we can set default values in the next step – this will let the user save the record without having to manually enter those details.
5. Let’s set predefined values for Lead Status and Lead Source.
Click New, then click to open up the list of Lead fields. Select Lead Status.
Click to open up a list of predefined/accepted values for the picklist field we selected. Select Open – Not Contacted, then click Save.
Let’s repeat that, this time choosing Lead Source and a relevant picklist value.
6. We can now add the new action to a Global Publisher layout by navigating to Setup → User Interface → Global Actions → Publisher Layouts.
It’s worth noting that you can have more than one Global Publisher layout and assign them based on profiles, thus enabling you to make actions available to some users and not others.
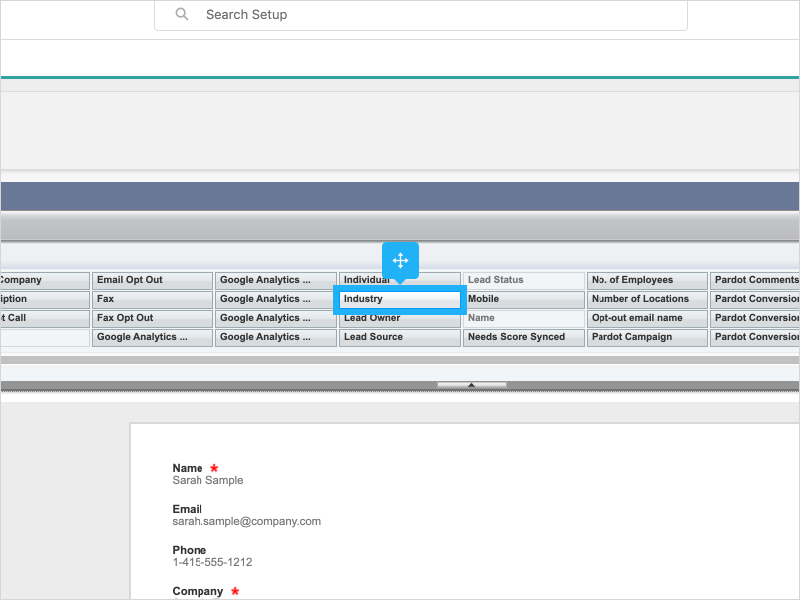
Click Mobile & Lightning Actions. With your mouse, click and drag New Employee Refe…, then drop it on to the canvas. Click Save.
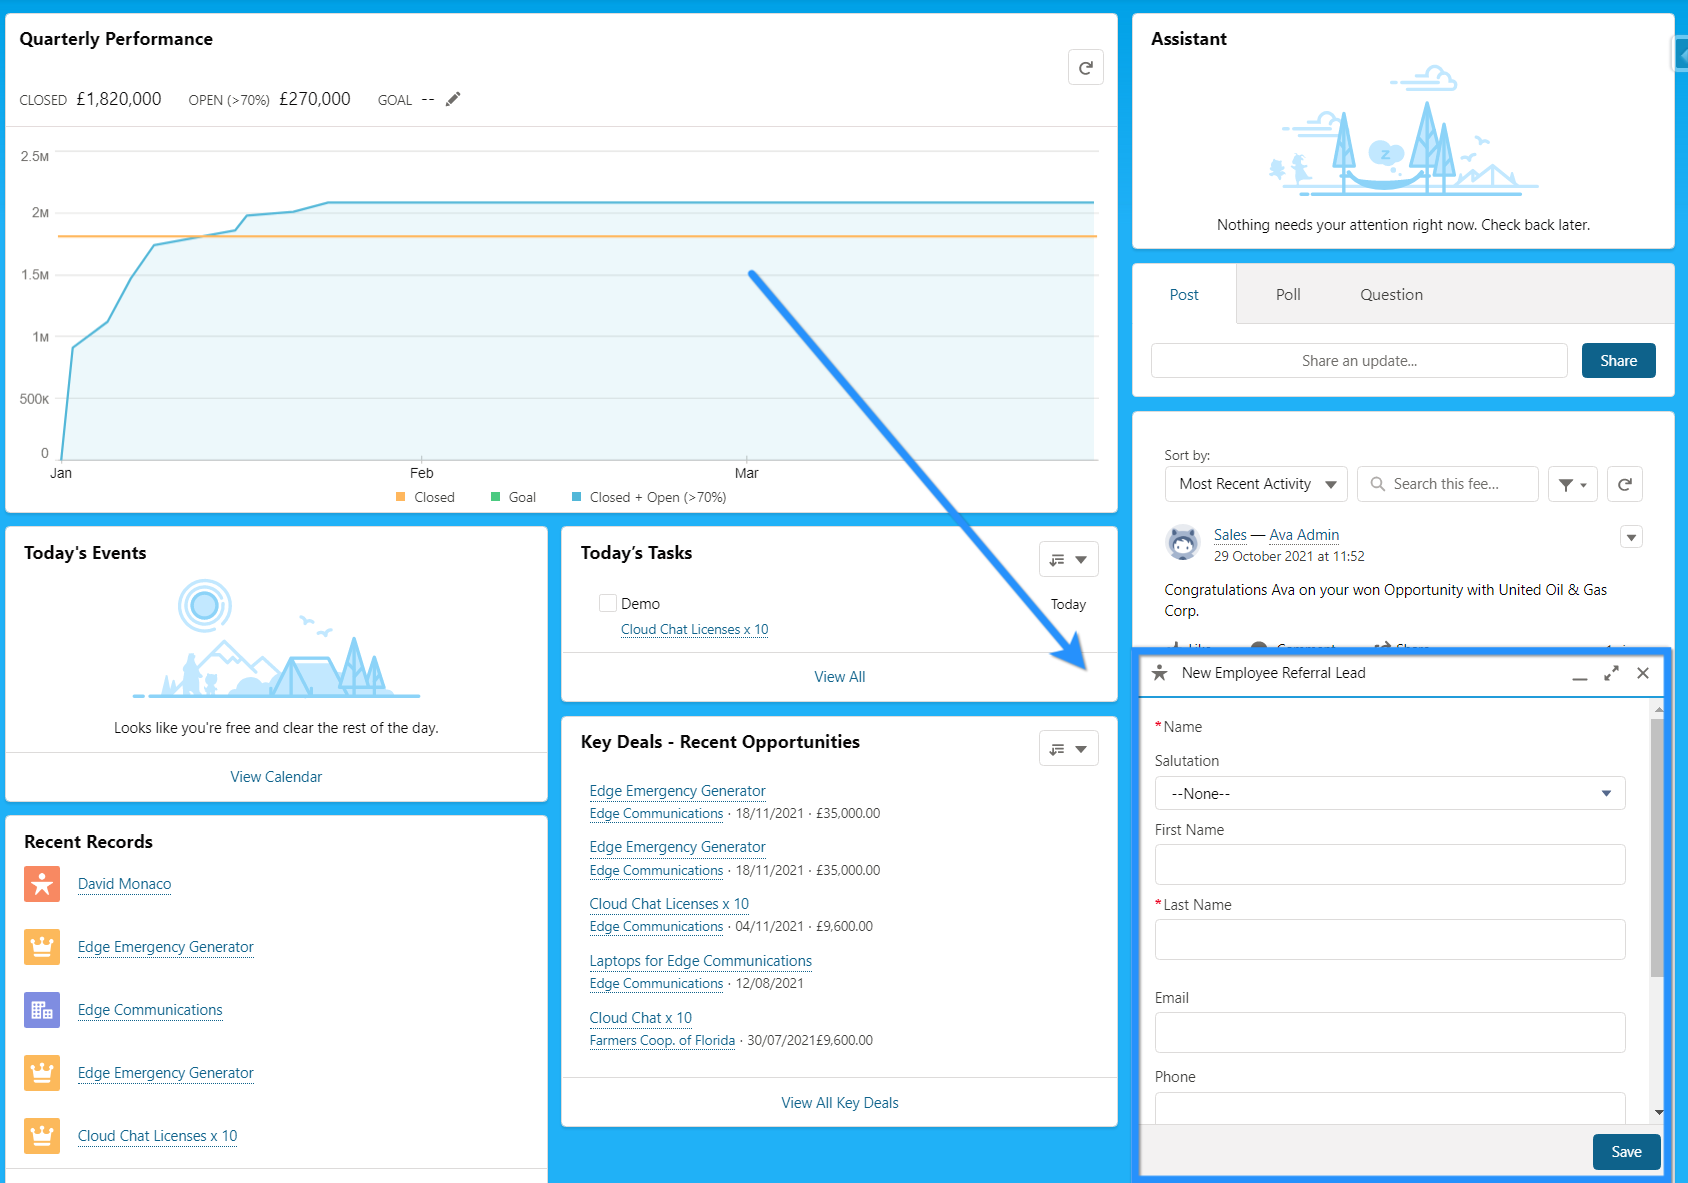
The new action can now be found in the Global Actions section at the top of the screen. When a user clicks the action, they are presented with a pop up window to create their new Lead!

Salesforce Object-Specific Actions
Salesforce Object-specific Actions work much the same as Global Actions, however they are related to a particular object! Trust me when I say you are familiar with this type of functionality – when you create a Contact via the Contacts related list on an Account record, the ‘Account Name’ field is populated for you. This is an example of an object-specific action.
Funnily enough, Object-specific Actions can only be placed on the object they are related to…you make them available by adding them to the object’s page layout. So, this means you can expose Object-specific Actions to some users and not others.
How to Create an Object-specific Action
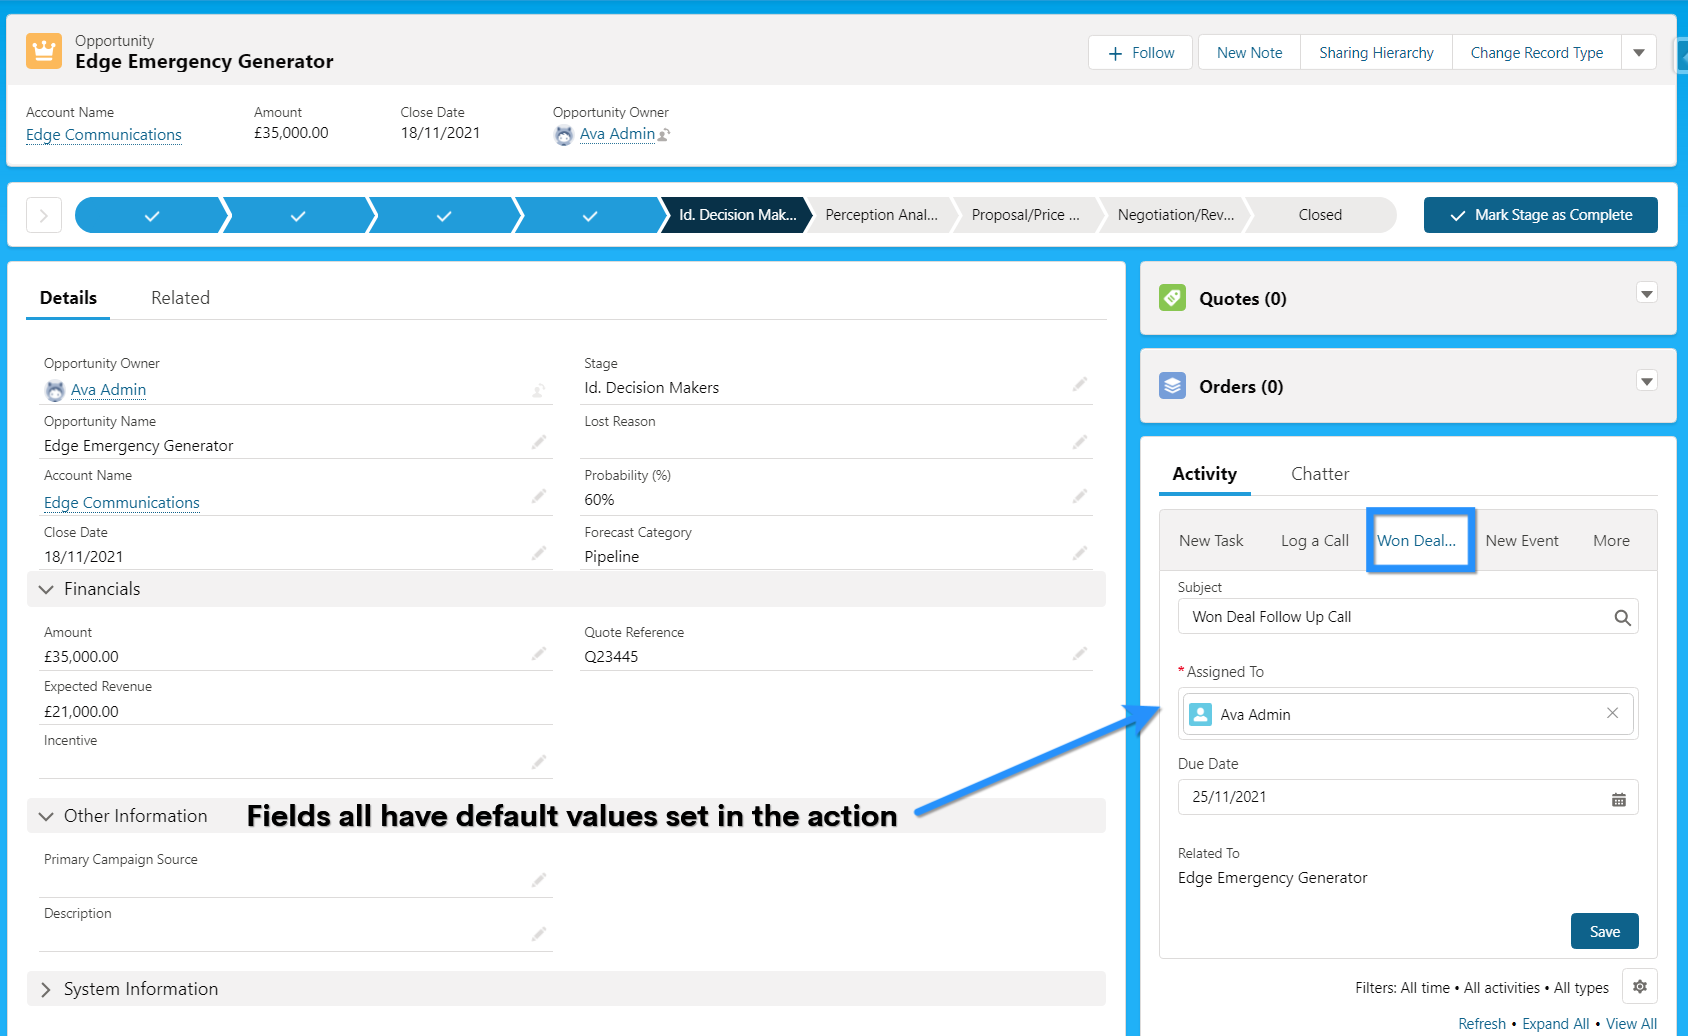
We are going to create a new object-specific action on the Opportunity object. This action will create a new Task to call an Account, 7 days after an Opportunity is Closed Won. We’ll default all the field values, so our users won’t have to manually complete any information!
1. Let’s head over to Setup → Object Manager → Opportunity → Buttons, Links, and Actions. Click ‘New Action’.
2. Select Action Type = ‘Create a Record’, Target Object = ‘Task’, give it a Label and a Success Message.
3. Next, add the relevant fields to the layout.
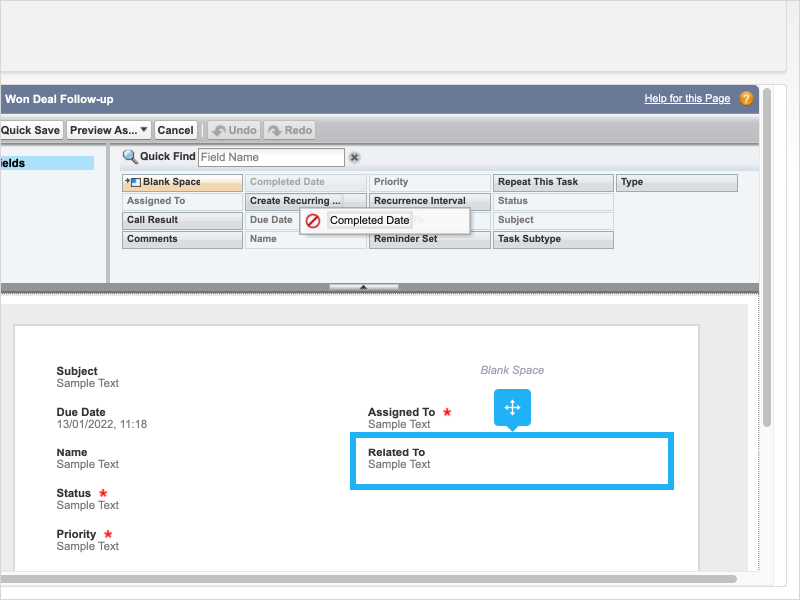

4. We’ll default a ton of information on the Task record so our users don’t need to manually input it! This includes doing some clever stuff, like setting the Task ‘Due Date’ to 7 days after the Opportunity ‘Close Date’.


- Click New, and select Due Date.
- Show Formula Editor, and Click Insert Field.
- Click Opportunity, scroll down to find Close Date.
- Then, click Insert. Type +7 after the field name.
- Finally, click Check Syntax
5. Next, navigate to Page Layouts and add the new action to the relevant pages.
Click Mobile & Lightning Actions, click and drag your action, then drop it on the canvas.
As this is an activity action (Task, Event, Email), it will appear on the Activity Component on the Lightning record page. When a user clicks the action, they are presented with the fields, and they are already completed!

More Resources
- Quick Actions
- Trailhead: Understand How Actions Work in Lightning Experience
- Trailhead: Create Global Quick Actions
- Trailhead: Create Object-Specific Quick Actions




Comments: