

Winter ‘22 is bringing a lot of new features, one of the most exciting being Dynamic Interactions becoming GA. Alongside Dynamic Forms and Dynamic Actions, they give all Salesforce #AwesomeAdmins even more power.
In this post, we’ll cover what Dynamic Interactions are, how to get started, how to update your components, as well as what is and isn’t supported.
What are Dynamic Interactions?
Dynamic Interactions are a new way to enable several components on the same app page to interact with each other. Previously, if you had 2 components in App Builder, there was no easy way to make them talk to one another.
For instance, if a user clicks on an item in a list view, you couldn’t automatically update other components on the page. Well, you could, but you would need to ask a developer to write the code to wire the 2 components together.
No more! Enter Dynamic Interactions, a great way for any Admin to wire components themselves, with just point and click tools.
Getting Started with Dynamic Interactions
So far there are no out-of-the-box components available for use with Dynamic Interactions. If you want to follow this tutorial, we’ve created a package with some demo components in it.
We don’t recommend adding these to a real Production environment; even though no harm would be done, these components were just created to present a demo of the feature, and may not be ready for production.
So, let’s get started. After installing the package, go to App Builder, and create a new App Page.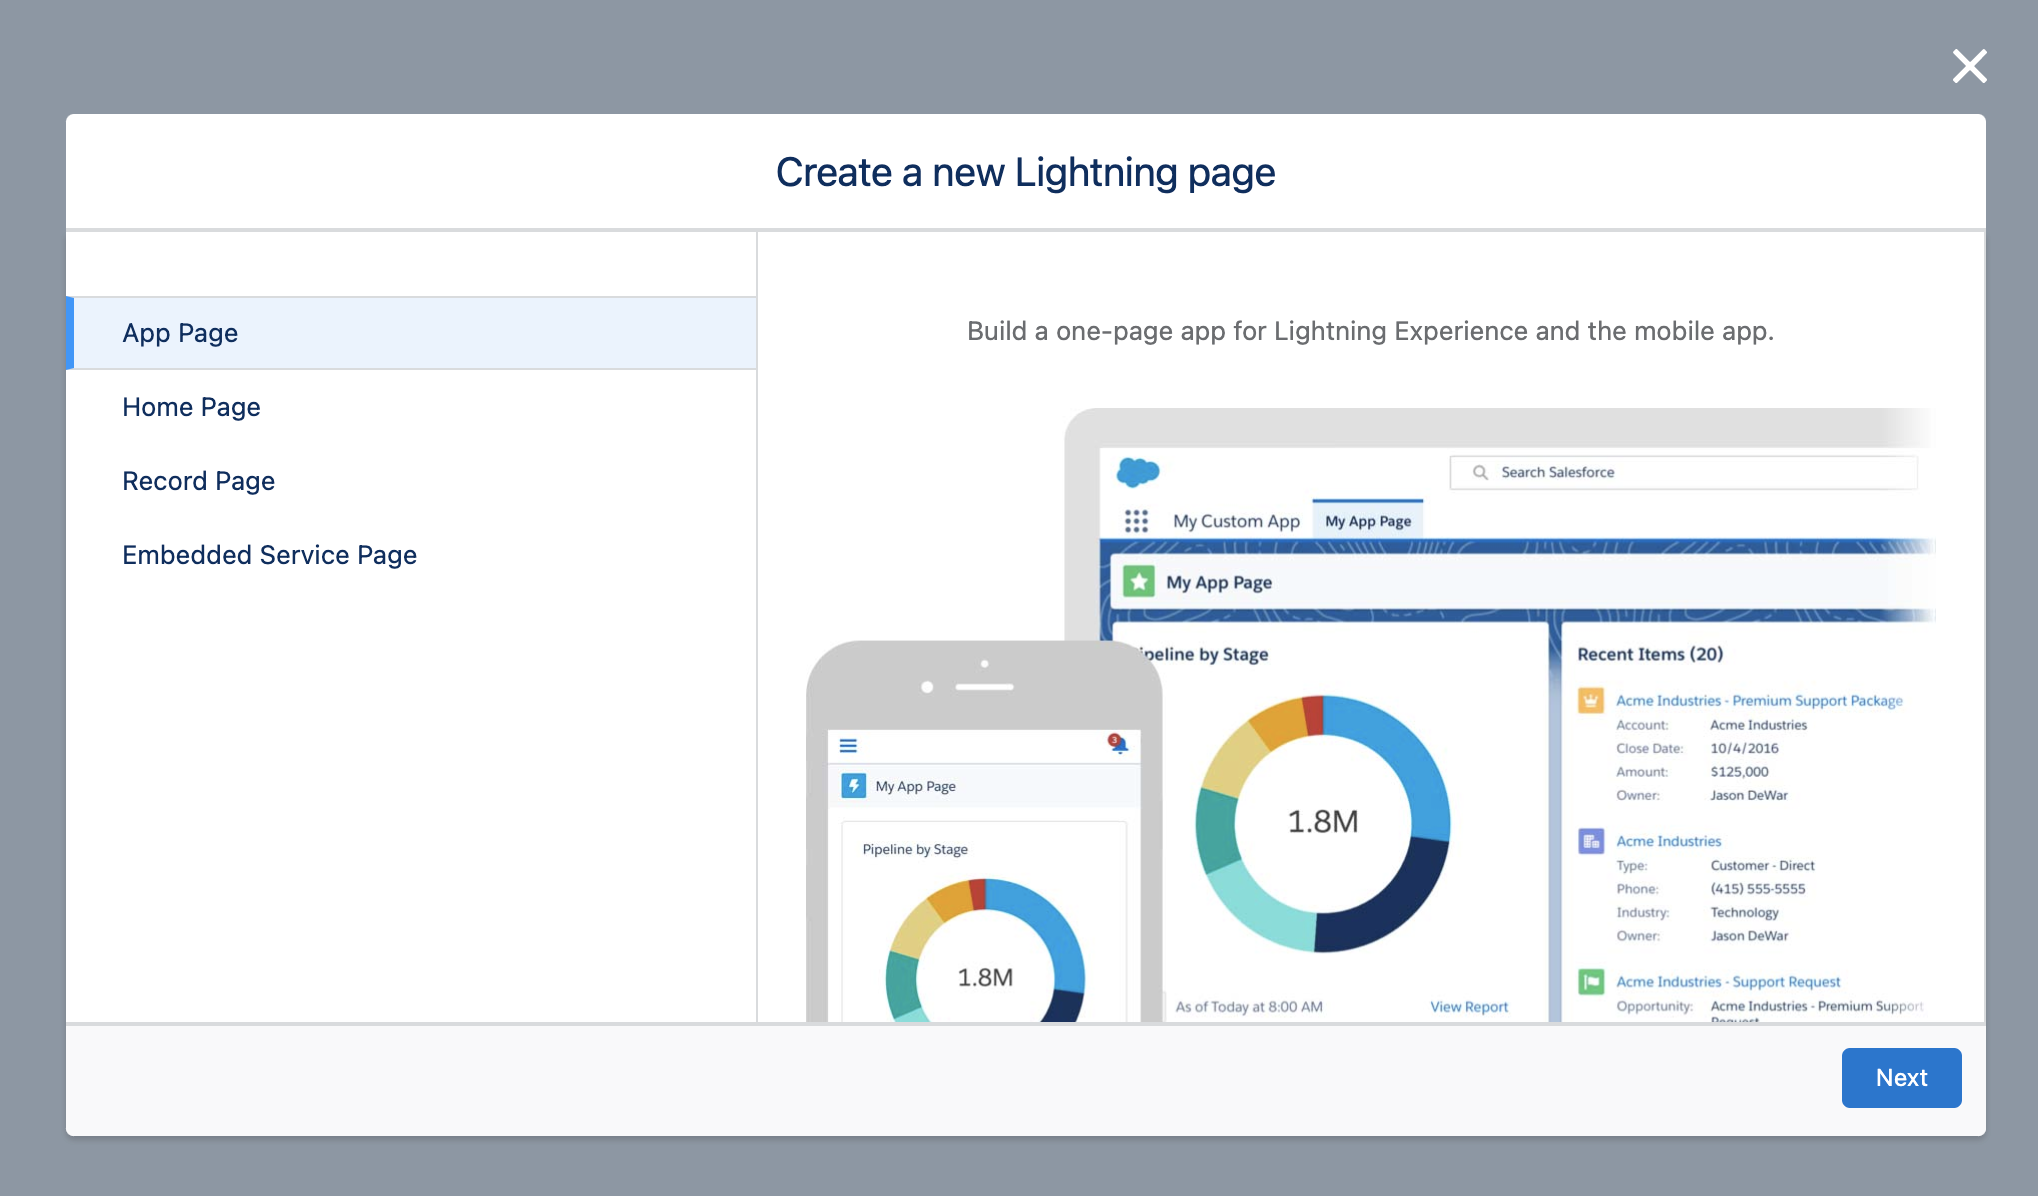
You can choose any template you want, I’ll be using the “Main Region and Right Sidebar” in this tutorial.
- Add the “Account List” component to the left section, and the “Account Location” and “Account Detail” to the right section, one above another.
You should have something like this: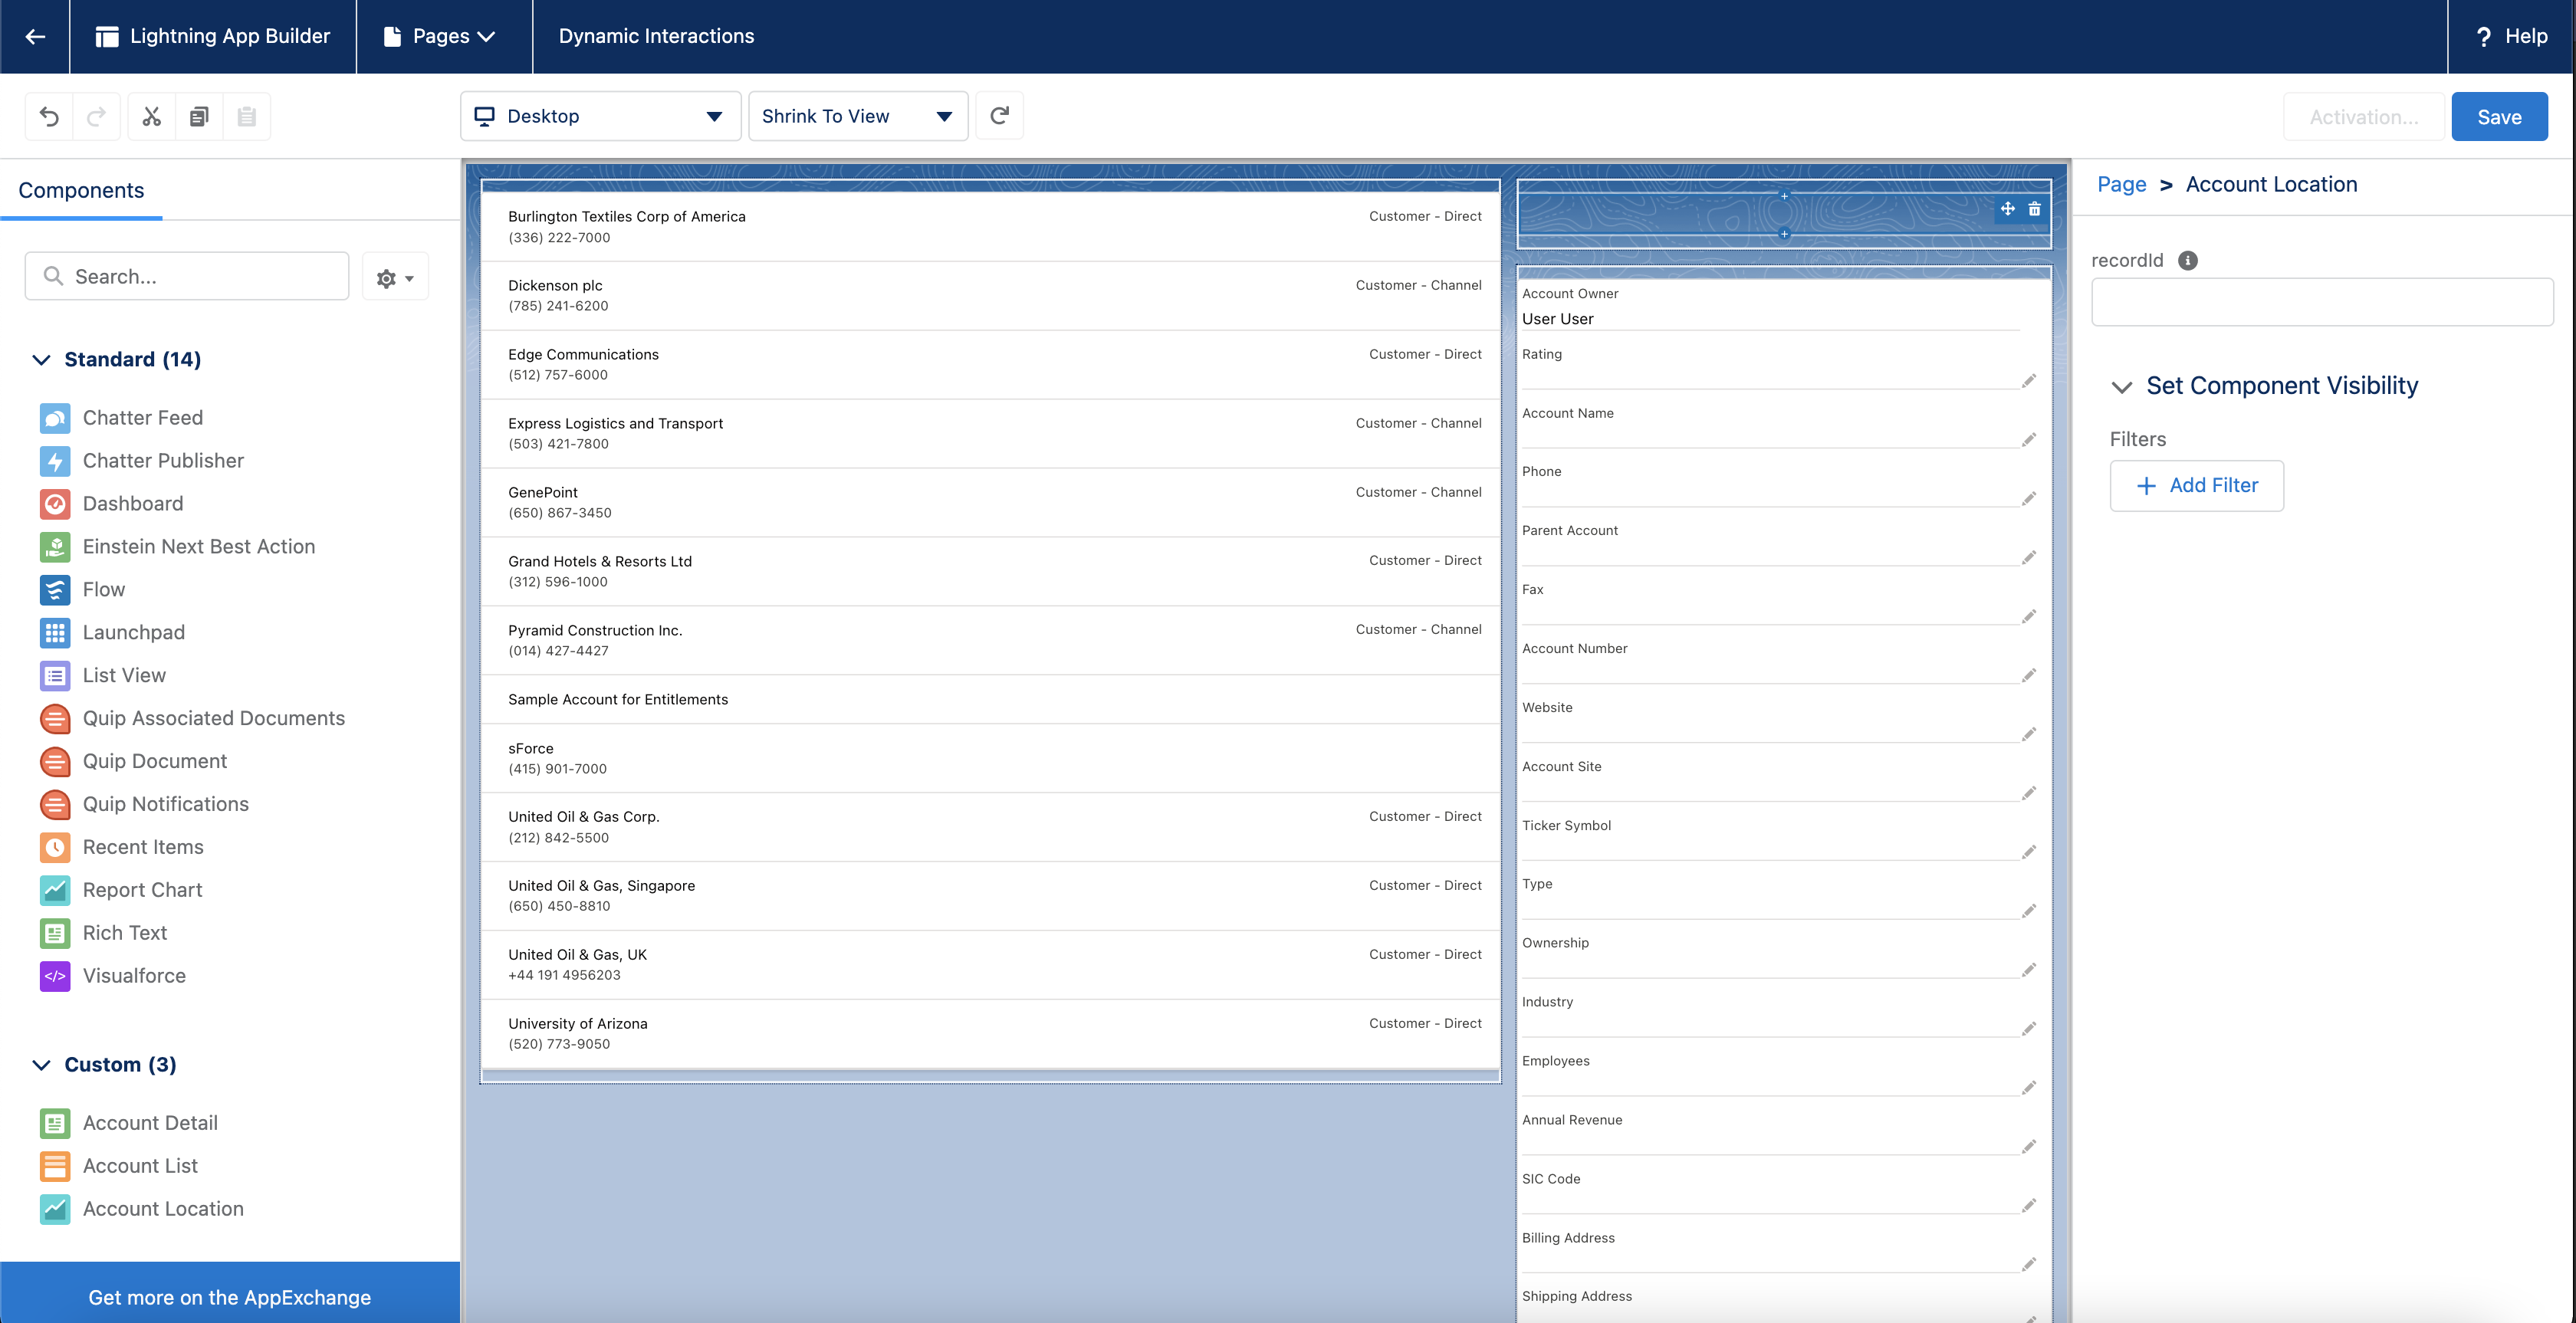
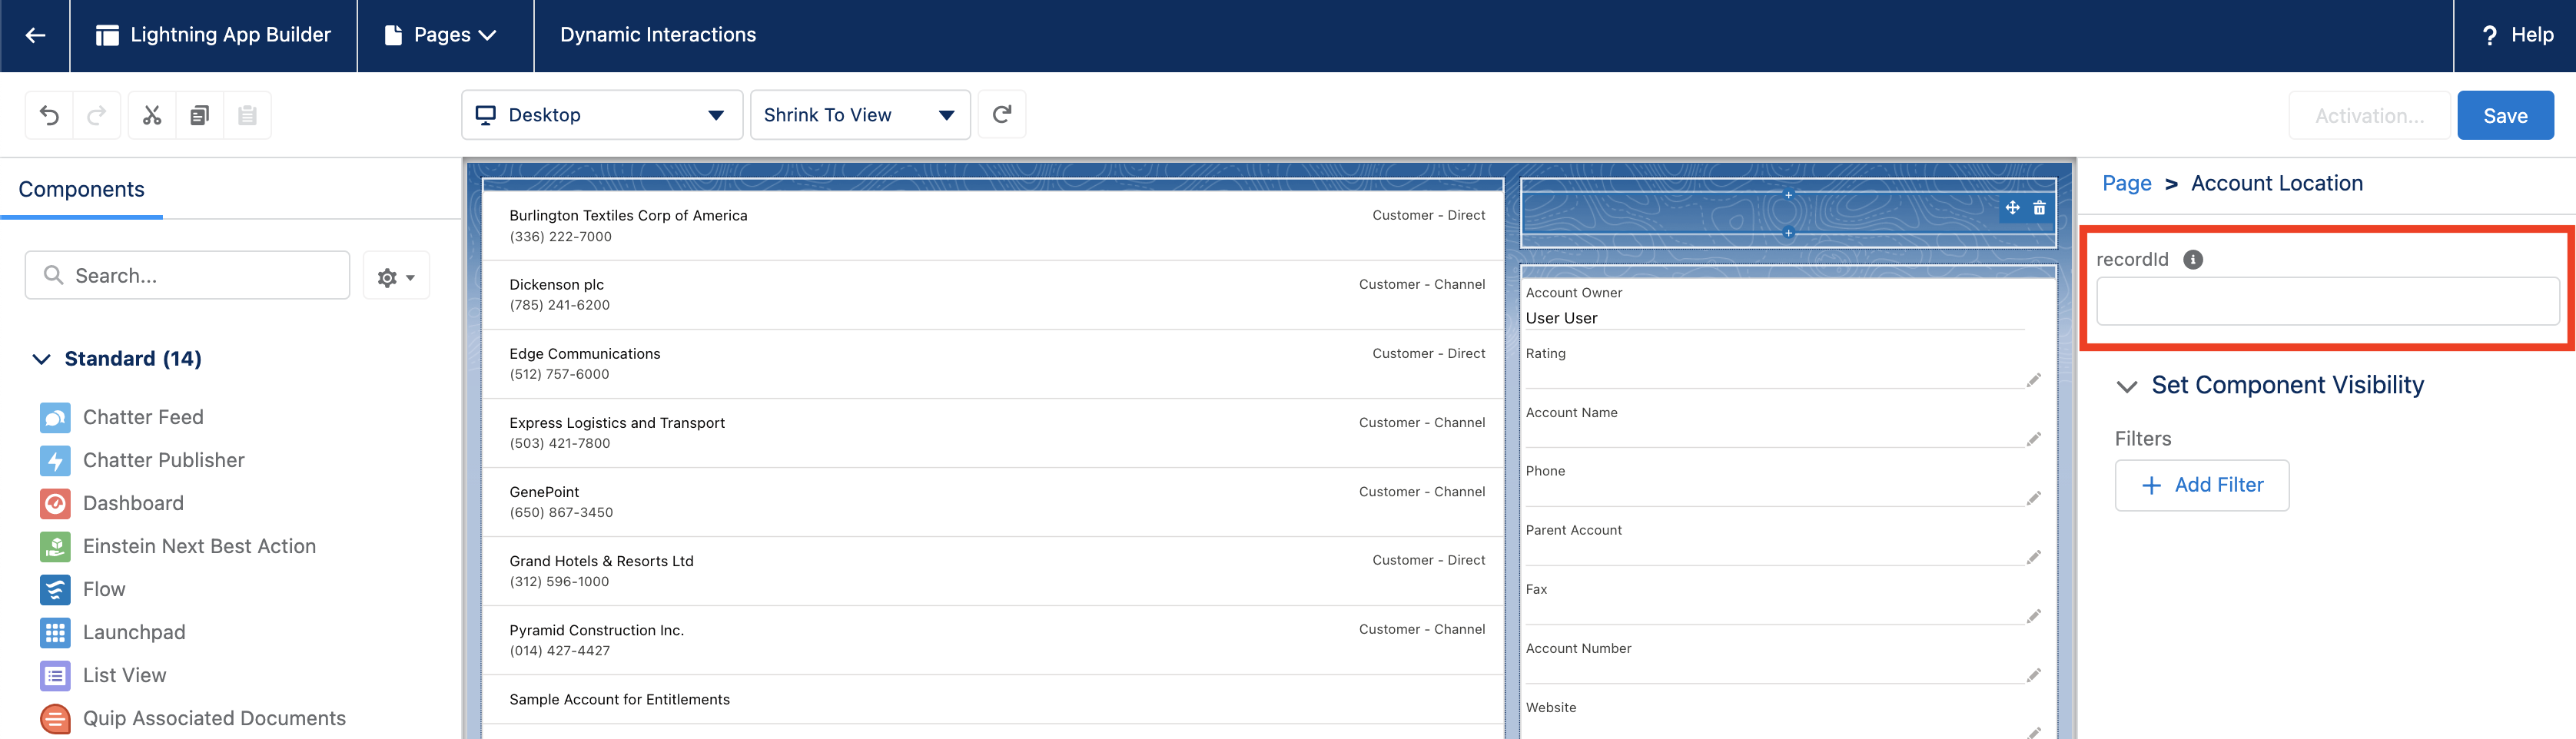
- Click on the “Account Location” component. You can see that there is a “record Id” attribute available. Until today, it could only be hardcoded, or used on a record page for one specific record.
Instead of setting an Id right here, we’ll use a dynamic value, coming from another component.
- Click on the “Account List” component in the canvas, and notice that there is something new here. Just next to the usual “Properties” tab, there is a new “Interactions” tab:
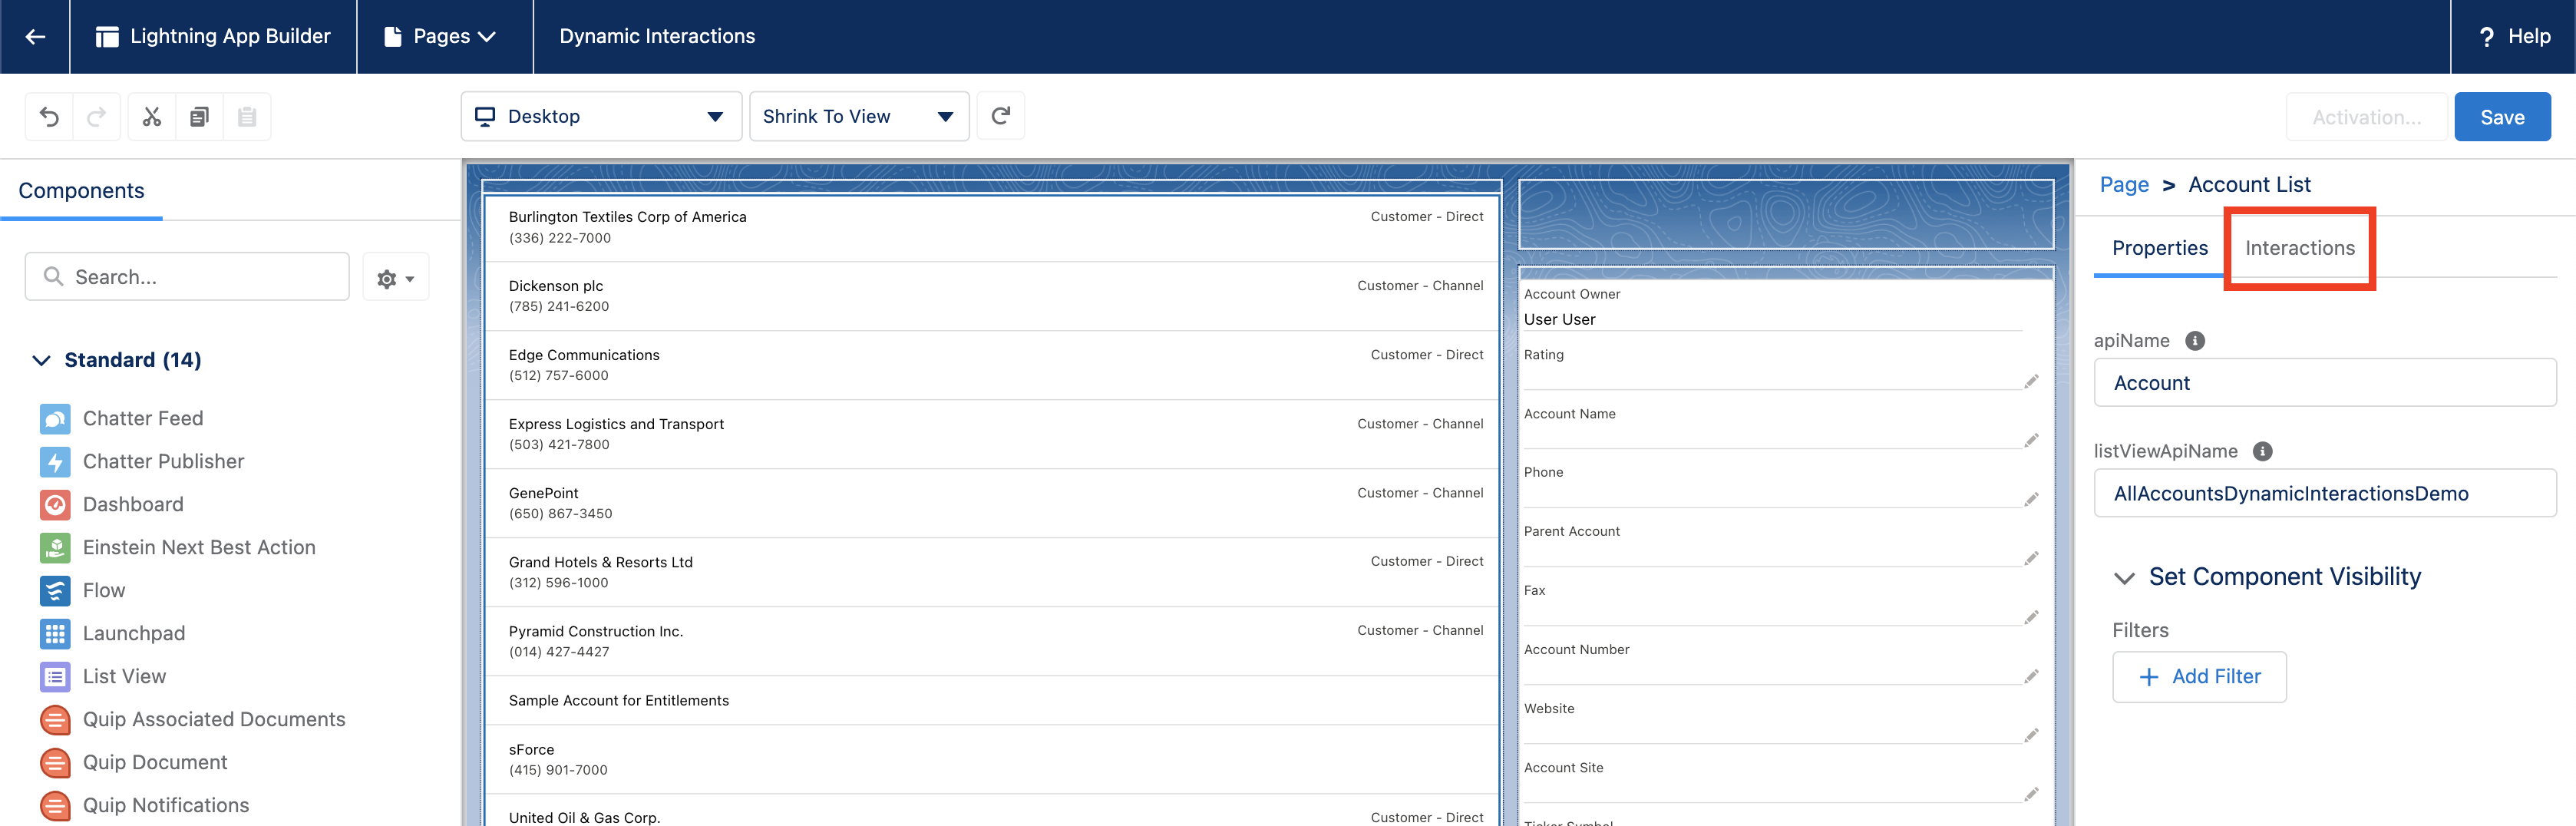
- Click on it, and then click the “Add Interaction” button.
What we’ll do here is select which component should react when we select an Account in the list. This is quite easy to do, just go to the “Component” field, and you’ll see a list of all the components available on the canvas.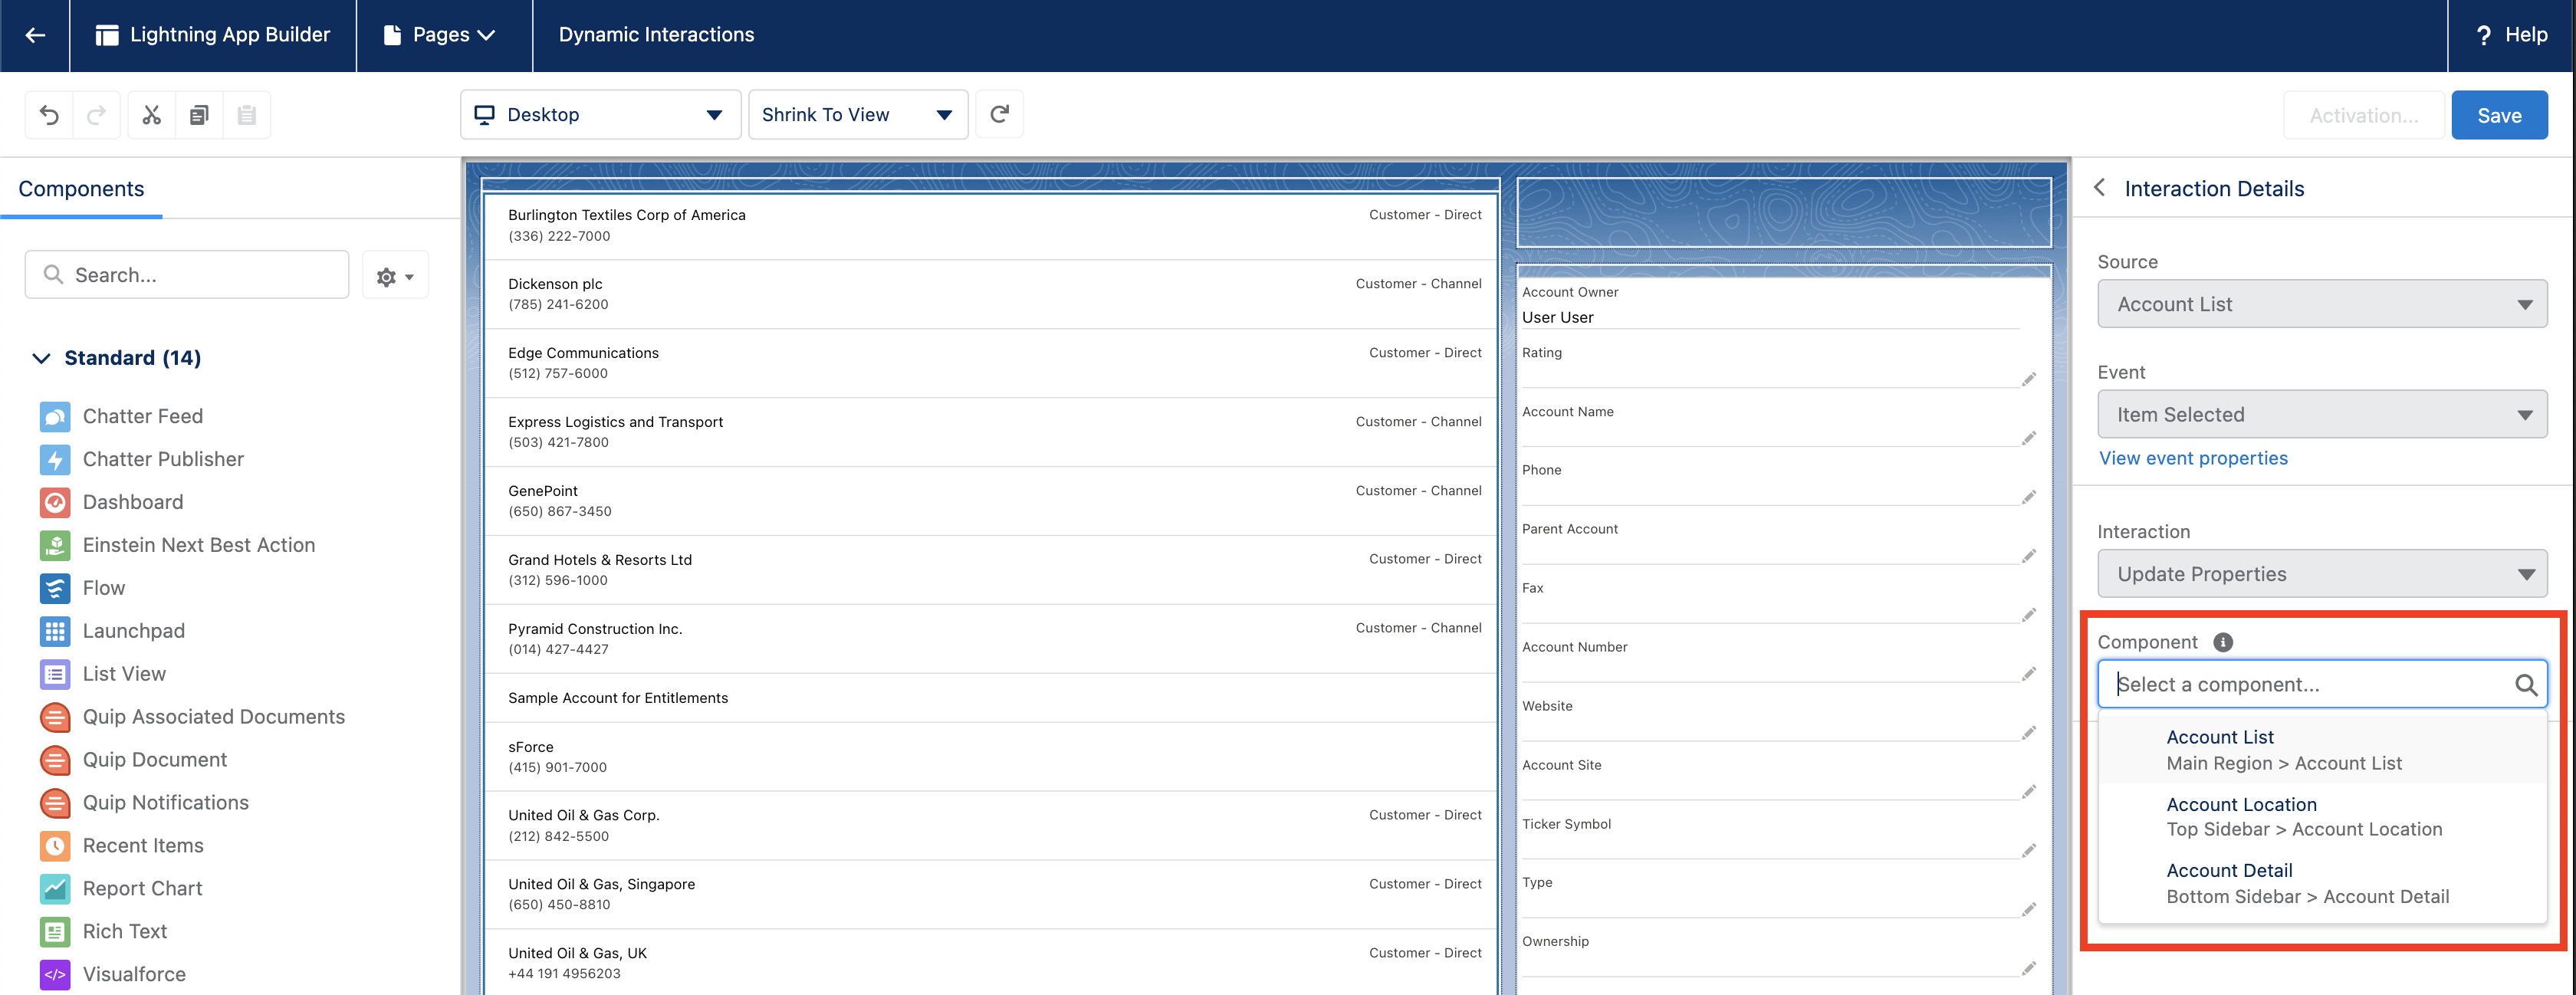
We want both the “Account Location” and “Account Detail” components to be updated with the information from the selected account. Let’s start with “Account Location”.
- Select it in the list available in the “Component” field.
What you see is that the available properties for the selected target component are displayed here. Remember when we clicked on the “Account Location” component in the canvas previously and saw that we could manually set a record Id?
Instead of hardcoding it, we’ll use a dynamic value. This value comes from the event fired by the “Account List” component when we select a row.
- To use a dynamic value, click on the {!} button on the right side of the recordId field, and start typing “{!”. You’ll see an “Event” value appear, select it and then type “.” to see the available values fired by the event:
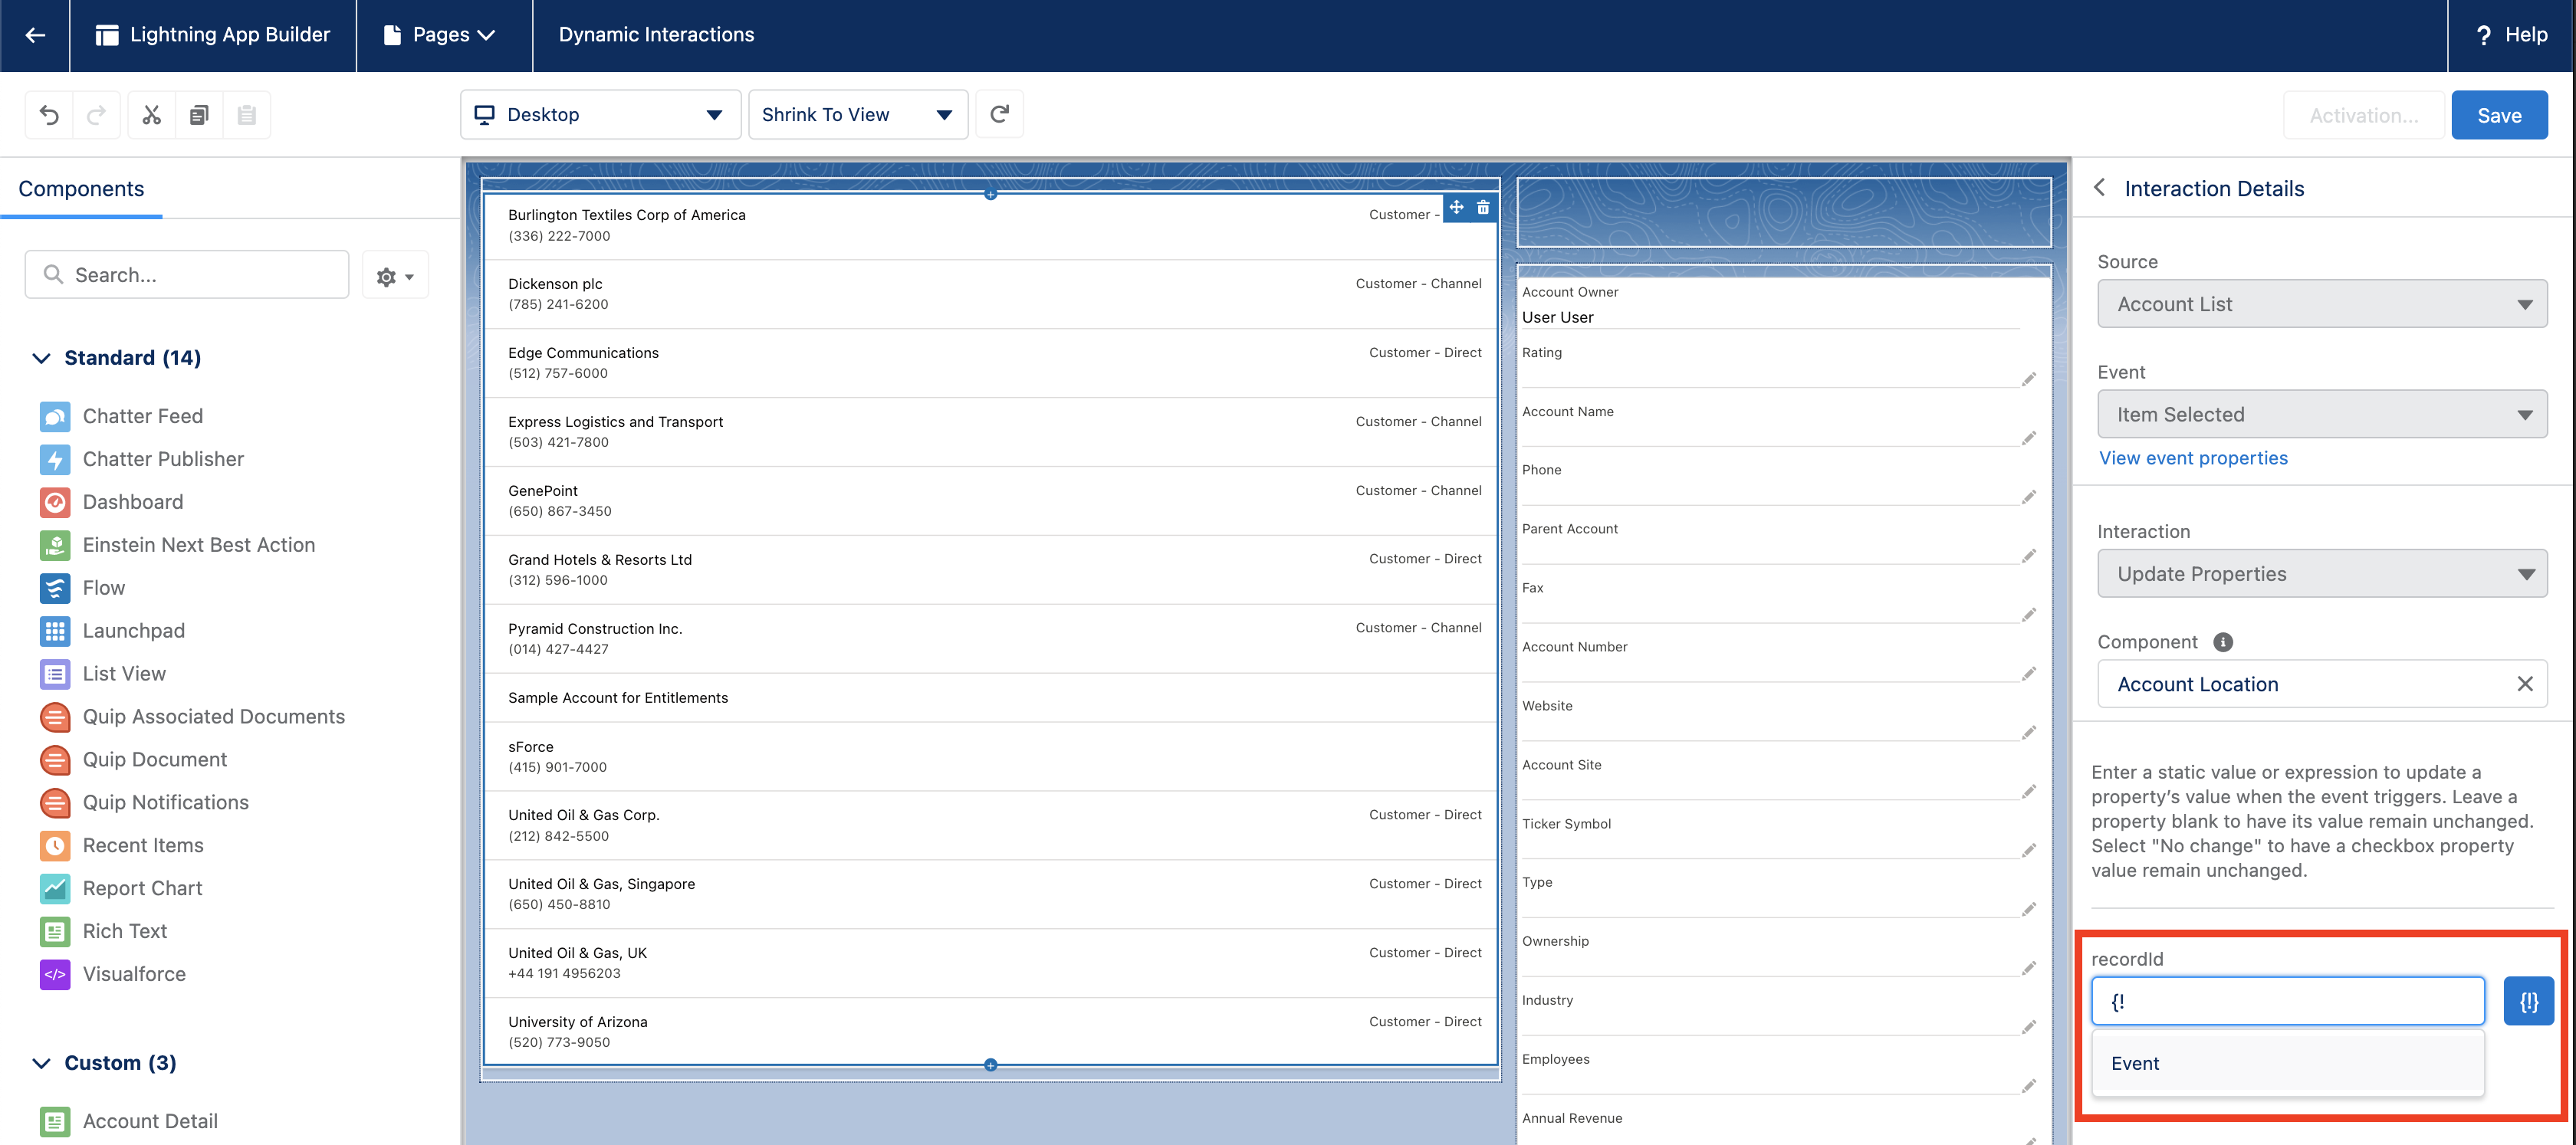
Here you can see 2 values, apiName and recId. We want to use recId, so select it and finally close it with a final “}”. Ok, so it’s still a little bit techy…but you can do this!
Note that you could also hardcode a value directly here if you want to, by unchecking the blue “{!}” button. This makes you switch between a direct value or a dynamic value. This could be useful if a target component requires more attributes than the source component gives you.
For instance, a target component may require an object name (like Account, Contact or Opportunity), whereas a source component may only give you a record Id. You could then use a combination of dynamic and hardcoded values.
Go back to the Interaction page for this component (left arrow at the top of the properties panel, next to Interaction Details, or just unselect/select again the “Account List” component in the canvas).
Then do the same steps to wire the second component, “Account Detail”. This time you’ll need both the apiName and recId. Either select the values from the drop downs, or copy and paste the following values:
- {!Event.recId} for recId property
- {!Event.apiName} for apiName property
You should end up with something like this: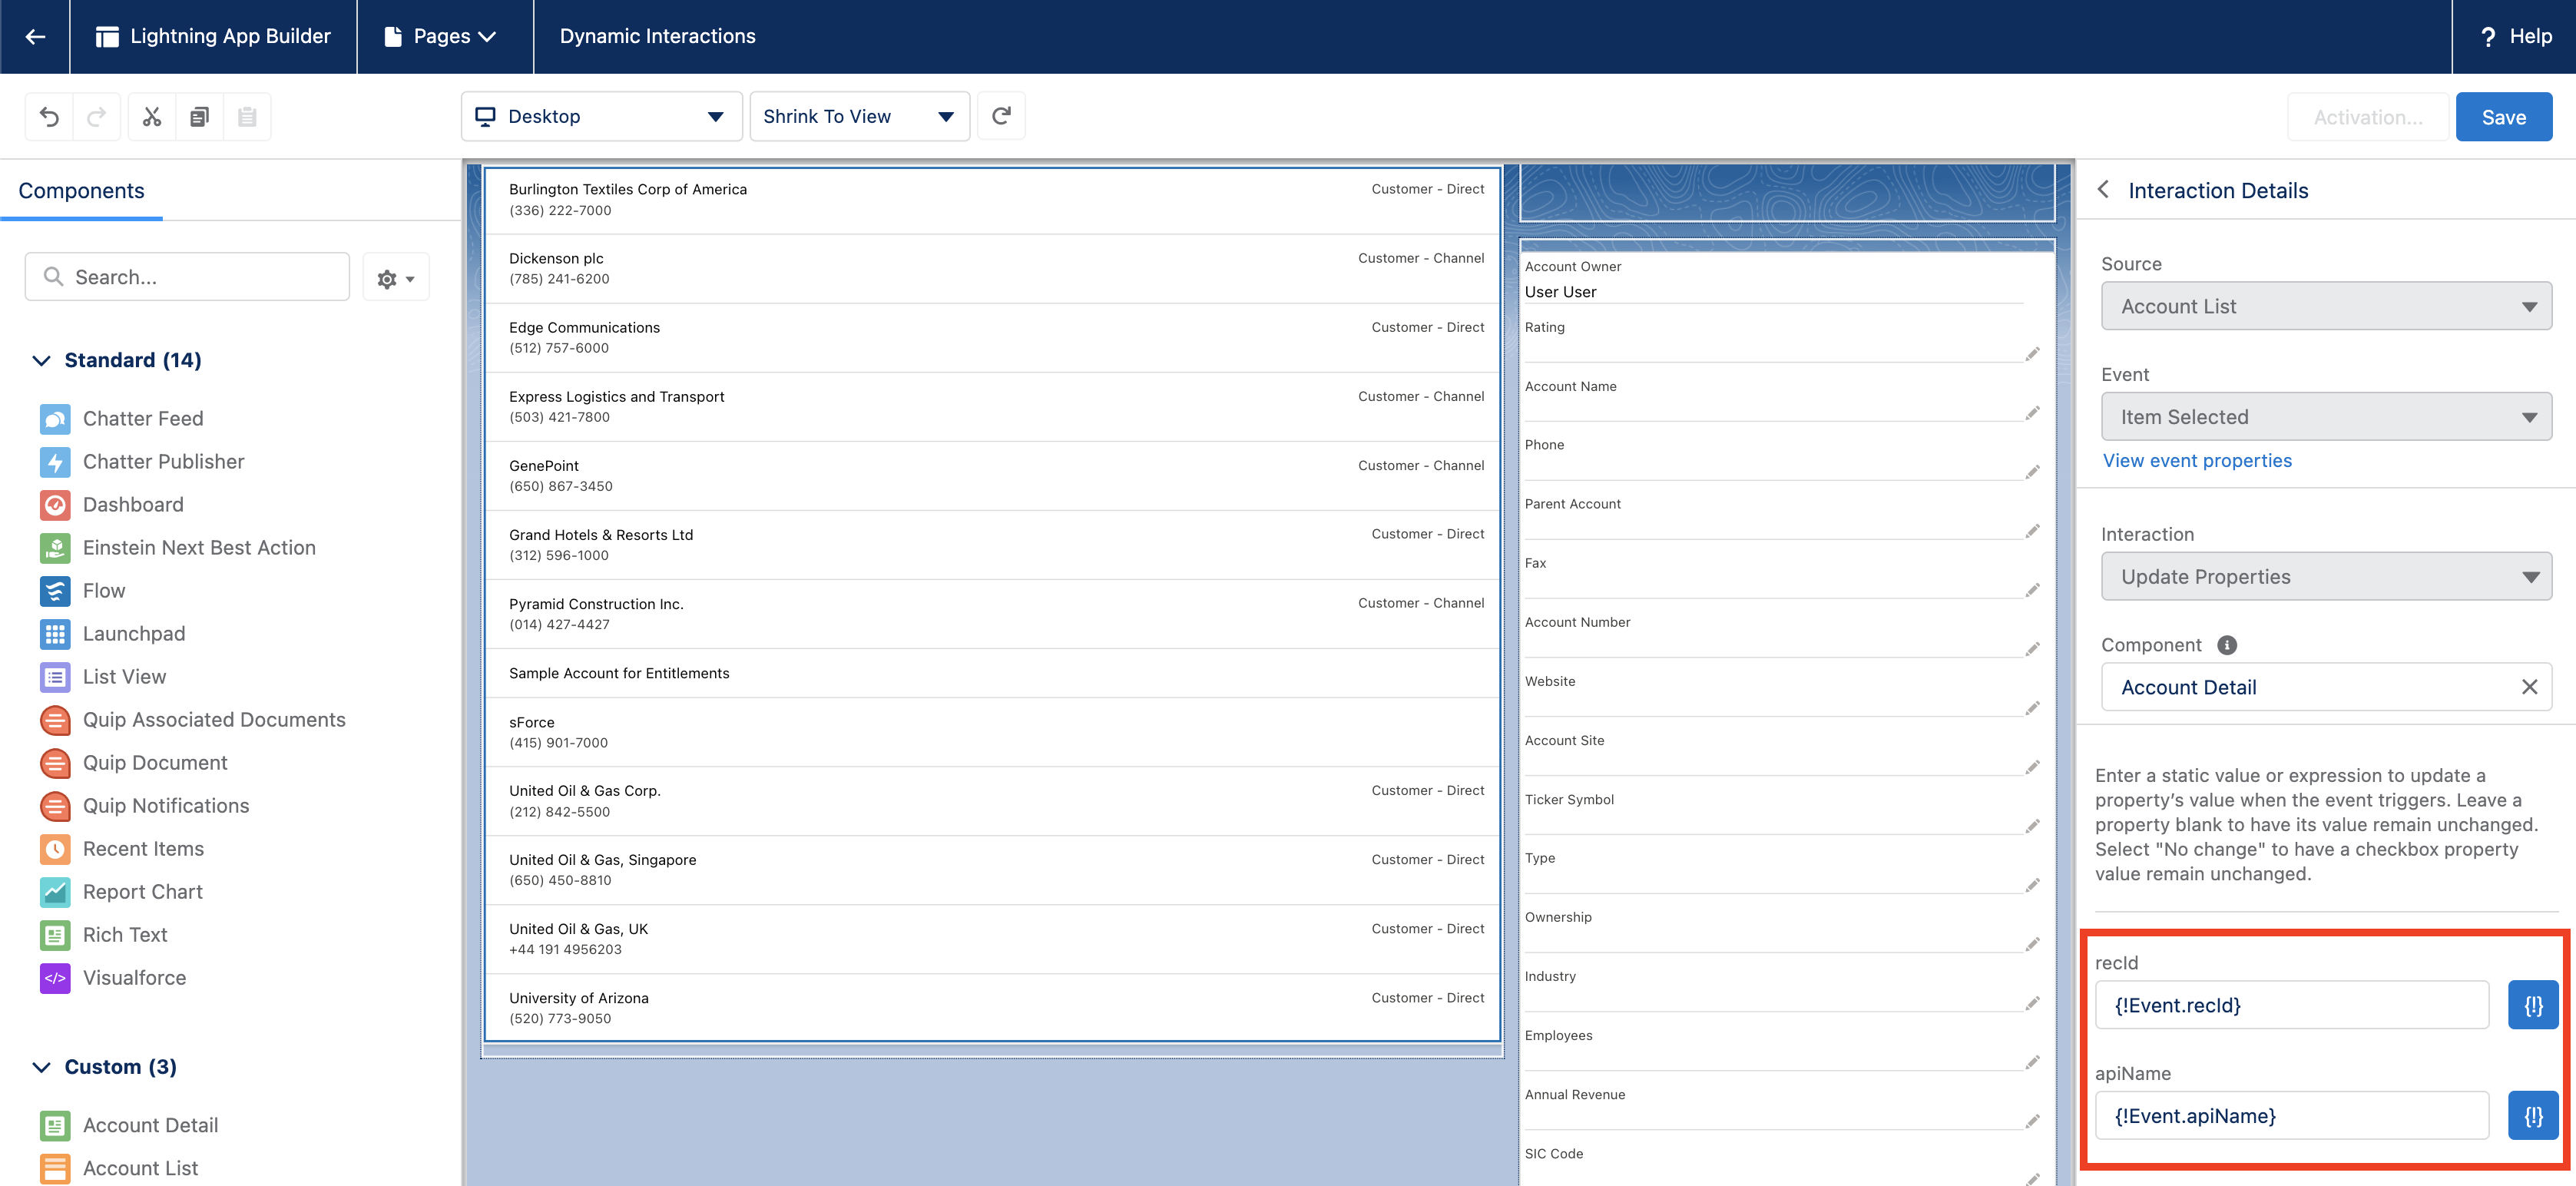
Note that in this case, you could also hardcode the object apiName, as this will always be a list of Accounts:
Once everything is set up, save and activate the page.
- Go back to Lightning Experience, open the newly created App page and test it. Select a record on the left and see the components on the right being updated.
That’s it, you’ve just wired 2 components with point and click, congratulations!
How do I make my components compatible?
This guide is intended to demystify Dynamic Interaction for Admins, but as we’ve seen, currently no standard Salesforce components have an “Interactions” tab available in App Builder.
However, if they have properties that you can manually set, you can make them react to a Dynamic Interaction coming from another component. In reality, you will likely need a developer for this! A developer can update the configuration file to expose events in App Builder, in the same way they expose properties in code to App Builder.

What’s not supported?
Dynamic Interactions are already working great today, but there are still some considerations.
As of today, no standard Salesforce component is exposing events to App Builder, so none of them will have an “Interactions” tab. However, as they already have properties available in App Builder, they can be targeted by a Dynamic Interaction fired by one of your custom components and updated dynamically.
Also, Dynamic Interactions are currently only available on App Pages. In future, I look forward to them being added for Home Pages and Record Pages. What are your thoughts on Dynamic Interactions? Let us know in the comments and in the Trailblazer Community Group.
Resources
- Salesforce Dynamic Interactions – Demo video
- Build your apps faster with Dynamic Interactions – CzechDreamin session
- Introducing Dynamic Interactions, the Latest Low-Code Innovation for Salesforce Platform – Blog post
- Salesforce Launches Dynamic Interactions, New Low-Code Innovation for Building Interactive Apps Fast – Blog post
- Dynamic Interactions – Release Notes
- Dynamic Forms, Actions and Interactions – Trailblazer Community Group
