


Salesforce Experience Cloud (formerly Community Cloud) allows organizations to create portals where customers and partners can log in for a restricted view into your Salesforce org – like a “window”. Experience sites can be customized to maintain your company’s brand, meaning they won’t look how your org looks to internal users.
Themes & Branding is a topic you’ll find in the Salesforce UX Designer certification outline. Compared to Salesforce themes, Experience Cloud takes UI customization a step further, introducing new terminology you need to know to take full advantage of Experience Cloud customization.
1. Experience Workspaces
Your admin panel. Access “Experience Builder”, Moderation section, Administration settings, and more.
An Experience “switcher” can be launched from the icon at the top-right of the screen while you’re in the flow of work.


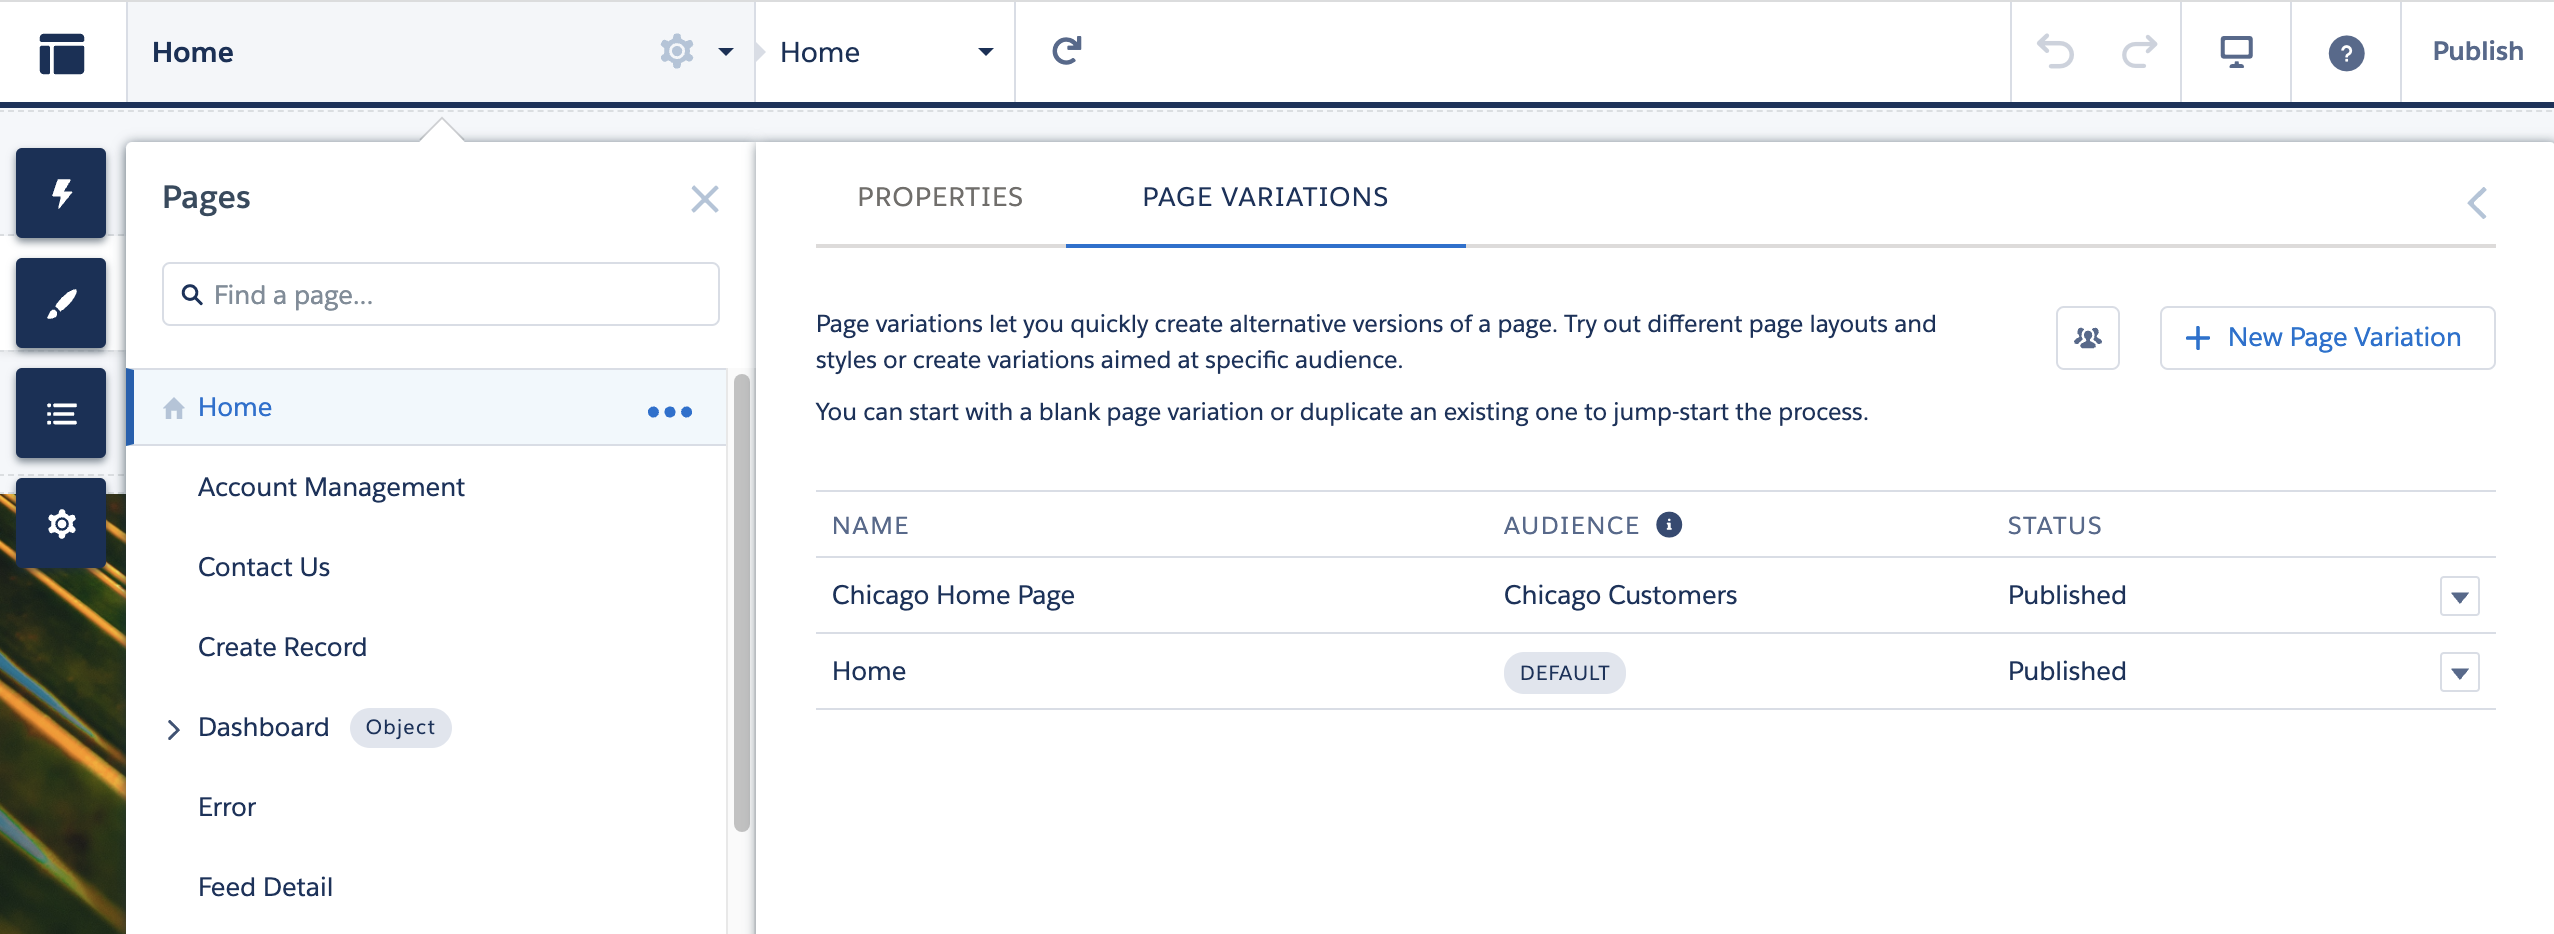
2. Experience Builder
Customize the pages on your Experience Site with Themes, Components, and more (we’ll dive into each of these!)
Switch between pages using the dropdown menu.

3. Experience Cloud Templates
Choose a ready-made template when creating an Experience Cloud site. These cater to customer service, account management, and partner onboarding/information sharing uses cases:
- Customer service
- Customer Account Portal
- Partner Central
…or build your own! (read this article first)


See the selection here.
4. Themes
With your selected template, you can change the theme. A theme pulls together colors, component styling, images, and more. Each theme’s UI has been designed with an objective, for example, to “aid customer discovery”, “promote your content”, “showcasing your brand”.
- Keep a pre-built theme
- Customize pre-built themes (override)
- Create your own custom theme


See the selection here.
5. Theme Regions
Theme Regions are the parts that make up the theme as a whole. Examples are the header, footer, navigation, search, and the user profile menu. Each theme comes with options for Theme Regions that you can choose between, for example, hide/keep the header region and navigation.
6. Components
Each Experience Cloud page is made up of components (Lightning components). Think of these as building blocks you can reuse across multiple pages. When using an Experience Cloud Template, many components are already on the page for you to hit the ground running.
Components can be added to pages with drag-and-drop from Experience Builder. Some examples of popular components include:
- Dashboard
- Calendar
- Tile menu
- Recommendations carousel
- Search

7. Experience Cloud Audiences
Audiences combine your site users into groups according to the characteristics they share. These characteristics are defined by the admin, and can be broad or go granular with and/or logic across all user fields.

After creating audiences in Experience Cloud, you can take advantage of Branding Sets, Page Variations, and Component-Level Audience Targeting.
(Manage audiences while configuring any of these functionalities, using the icon highlighted below)

8. Branding Sets
You can break out your site’s Theme into multiple Branding Sets. Branding Sets enables your site to dynamically change its look according to which user is viewing it; you assign Audiences to Branding Sets to make them work.
The example below shows alternative brand colours for the Chicago Audience (ie. users with the city “Chicago”).


9. Page Variations
Page Variations also enable your site to dynamically change its look according to which user is viewing it.
While Branding Sets determine the site’s appearance (theme colors, logos, font etc.), Page Variations focus on the layout and component behavior – in other words, show a different home page layout to customer service managers, who want to see the case list view higher up on the page. You assign Audiences to Page Variations to make them work.

10. Component-Level Audience Targeting
Component-Level Audience Targeting allows you to show/hide specific components according to which user is viewing the page.
Again, you assign Audiences to the components to make the visibility changes work. This avoids creating multiple page variations when it’s only specific components that make the difference.
- In Experience Builder, a banner notifies you if the page contains components that are visible only to specific audiences.
- When hovering over a dynamically visible component, the frame appears purple.

Try for yourself!

You can get hands on with all of these Experience Cloud terms by taking the Trailhead module: Personalize Experience Cloud Sites with Audience Targeting


Comments: