A Trigger is an Apex script that executes before or after data manipulation events, such as before or after records insert, update, or delete. Triggers are written to perform tasks that can’t be done by using point-and-click tools in Salesforce. Salesforce newbies often jump into writing multiple triggers on the same object. Later, they realize that they can’t control which trigger runs first. A simple Trigger Handler Framework can control the order of execution. It’s simply a rule of keeping strictly one trigger per object.
Likewise, when onboarding an existing Salesforce implementation, document the number of triggers per object, as a part of its Health Check, and decide if you want to remediate it. While we’re at it, let’s also design our triggers with a universal on/off checkbox. By utilizing this tick box, we can turn on/off all triggers in one click. It’s helpful because triggers are often required to be turned off during data loading.
The Tick Box
Go to: Setup → Platform Tools → Custom Code → Custom Metadata Types → New button
Label: Org-Specific Setting
Plural Label: Org-Specific Settings
Starts with vowel sound: Ticked
Object Name: Org_Specific_Setting
… and Save.
Next, click the “New” button on Custom Fields for adding the on/off tick box.
Field Type: Checkbox
Field Label: Value
Default Value: Checked
Field Name: Value
… and Save.
Next, to add your first record, click the “Manage” button.
After entering the “Manage” page, click the “New” button and enter a new CMT record as follows:
Label: Run All Triggers
Org-Specific Setting Name: Run_All_Triggers
Value: Ticked
… and Save.
You can add more records down the line, for example, “Run All Validation Rules”.
The Single Trigger Per Object
Here is the single trigger for the Account object. Don’t forget to uncomment your required lines of code.
trigger AccountTrigger on Account (before insert, before update, before delete, after insert, after update, after delete, after undelete) {
    if (Org_Specific_Setting__mdt.getInstance('Run_All_Triggers')?.Value__c == true) {
        TriggerHandler handler = new AccountTriggerHandler(Trigger.isExecuting, Trigger.size);
        switch on Trigger.operationType {
            when BEFORE_INSERT {
                // handler.beforeInsert(Trigger.new);
            }
            when BEFORE_UPDATE {
                // handler.beforeUpdate(Trigger.old, Trigger.new, Trigger.oldMap, Trigger.newMap);
            }
            when BEFORE_DELETE {
                // handler.beforeDelete(Trigger.old, Trigger.oldMap);
            }
            when AFTER_INSERT {
                // handler.afterInsert(Trigger.new, Trigger.newMap);
            }
            when AFTER_UPDATE {
                // handler.afterUpdate(Trigger.old, Trigger.new, Trigger.oldMap, Trigger.newMap);
            }
            when AFTER_DELETE {
                // handler.afterDelete(Trigger.old, Trigger.oldMap);
            }
            when AFTER_UNDELETE {
                // handler.afterUndelete(Trigger.new, Trigger.newMap);
            }
        }
    }
}
Here is a screenshot from my org, however, you won’t be able to save the Trigger on your org yet because its dependent Handler class is pending.
The Trigger Handler Interface
An interface (not related to user interfaces) is like a class in which none of the methods have been implemented – the method signatures are there, but the body of each method is empty. To use an interface, another class must implement it by providing a body for all of the methods contained in the interface.
Interfaces enforce developers to follow the same blueprint. So there should be only one TriggerHandler Interface in the whole org; not one per object.
public interface TriggerHandler {
    void beforeInsert(List<SObject> newRecords);
    void beforeUpdate(List<SObject> oldRecords, List<SObject> newRecords, Map<ID, SObject> oldRecordMap, Map<ID, SObject> newRecordMap);
    void beforeDelete(List<SObject> oldRecords, Map<ID, SObject> oldRecordMap);
    void afterInsert(List<SObject> newRecords, Map<ID, SObject> newRecordMap);
    void afterUpdate(List<SObject> oldRecords, List<SObject> newRecords, Map<ID, SObject> oldRecordMap, Map<ID, SObject> newRecordMap);
    void afterDelete(List<SObject> oldRecords, Map<ID, SObject> oldRecordMap);
    void afterUndelete(List<SObject> newRecords, Map<ID, SObject> newRecordMap);
}
You can save the Interface, but you won’t be able to save the Trigger yet.
The Trigger Handler
Here is the Trigger Handler for the Account object. Don’t forget to uncomment your required lines of code.
public without sharing class AccountTriggerHandler implements TriggerHandler {
    private boolean triggerIsExecuting;
    private integer triggerSize;
    public AccountTriggerHelper helper;
    public AccountTriggerHandler(boolean triggerIsExecuting, integer triggerSize) {
        this.triggerIsExecuting = triggerIsExecuting;
        this.triggerSize = triggerSize;
        this.helper = new AccountTriggerHelper();
    }
    public void beforeInsert(List<Account> newAccounts) {
        // helper.doTask1();
        // helper.doTask2();
    }
    public void beforeUpdate(List<Account> oldAccounts, List<Account> newAccounts, Map<ID, SObject> oldAccountMap, Map<ID, SObject> newAccountMap) {
        // helper.doTask3();
        // helper.doTask4();
    }
    public void beforeDelete(List<Account> oldAccounts, Map<ID, SObject> oldAccountMap) {
        // helper.doTask5();
        // helper.doTask1();
    }
    public void afterInsert(List<Account> newAccounts, Map<ID, SObject> newAccountMap) {
        // helper.doTask2();
        // helper.doTask3();
    }
    public void afterUpdate(List<Account> oldAccounts, List<Account> newAccounts, Map<ID, SObject> oldAccountMap, Map<ID, SObject> newAccountMap) {
        // helper.doTask4();
        // helper.doTask5();
    }
    public void afterDelete(List<Account> oldAccounts, Map<ID, SObject> oldAccountMap) {
        // helper.doTask3();
        // helper.doTask1();
    }
    public void afterUndelete(List<Account> newAccounts, Map<ID, SObject> newAccountMap) {
        // helper.doTask4();
        // helper.doTask2();
    }
}
Here is a screenshot from my org; however, you again won’t be able to save the Handler class in your org yet because its dependent Helper class is pending.


The Trigger Helper
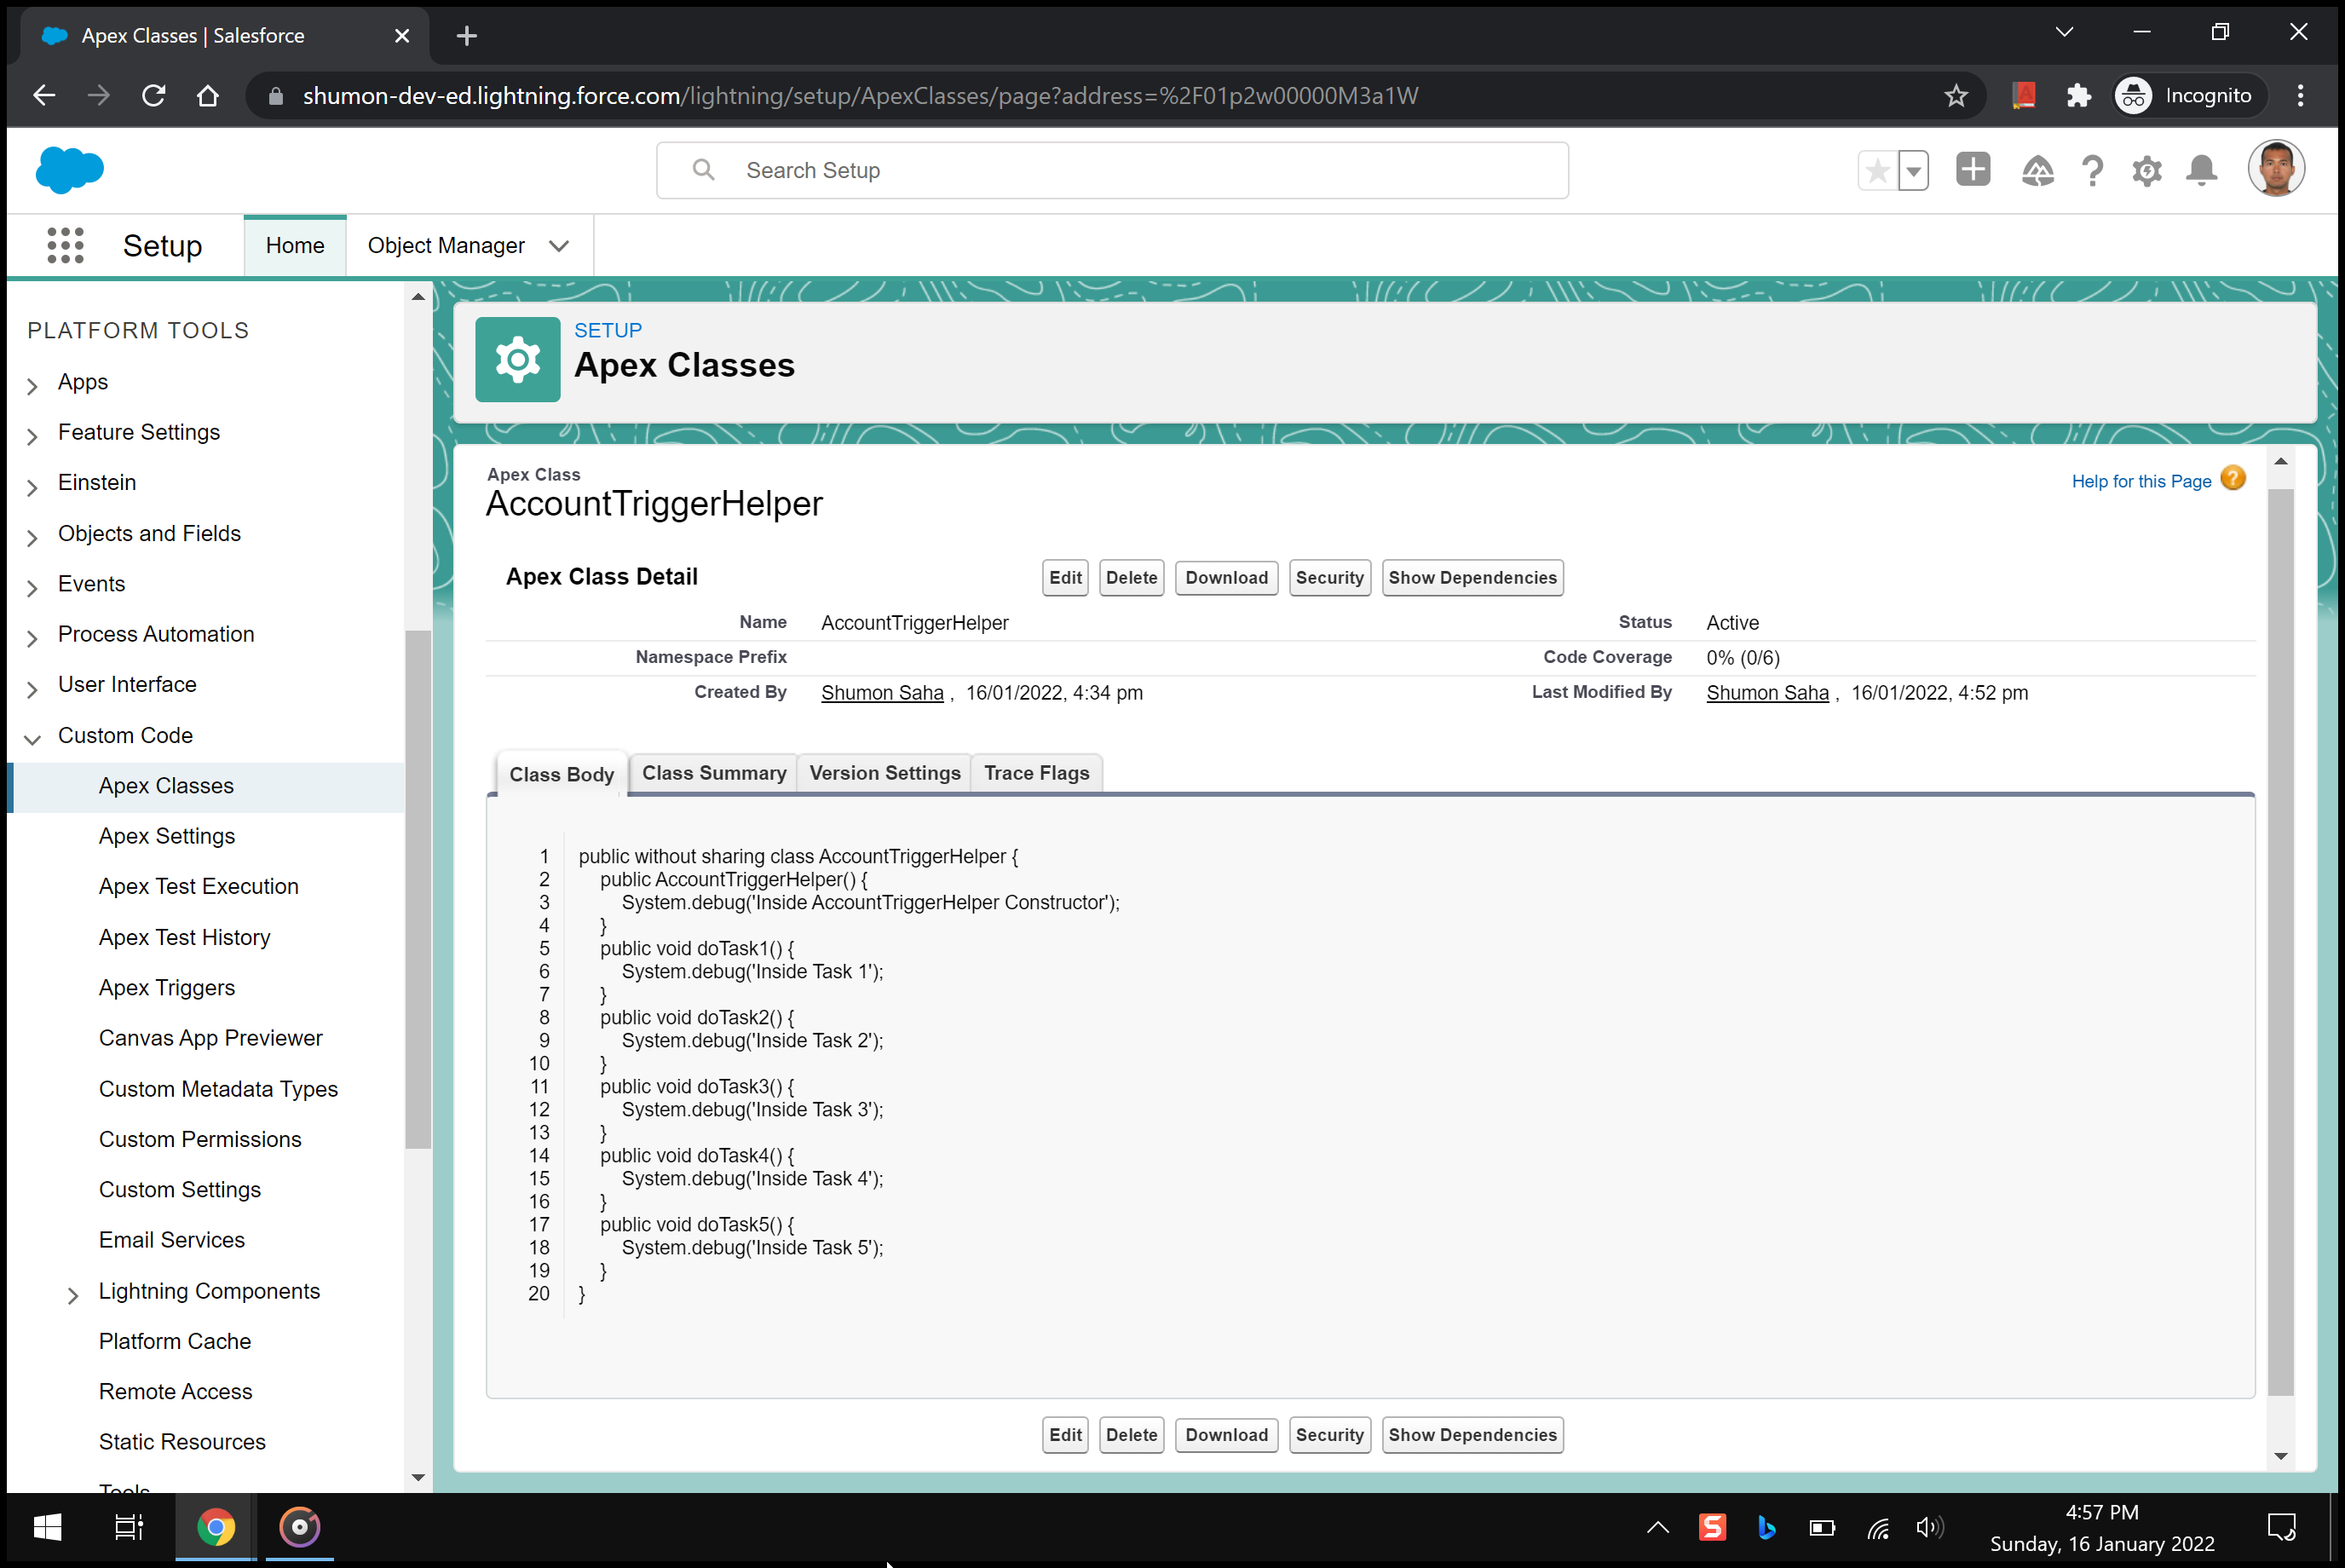
This is where you write your small bite-sized tasks (not related to computer bytes). Rename the functions as required.
public without sharing class AccountTriggerHelper {
    public AccountTriggerHelper() {
        System.debug('Inside AccountTriggerHelper Constructor');
    }
    public void doTask1() {
        System.debug('Inside Task 1');
    }
    public void doTask2() {
        System.debug('Inside Task 2');
    }
    public void doTask3() {
        System.debug('Inside Task 3');
    }
    public void doTask4() {
        System.debug('Inside Task 4');
    }
    public void doTask5() {
        System.debug('Inside Task 5');
    }
}
Now you can finally save all files (Helper + Interface + Handler + Trigger). Edit the Helper, rename the functions, and write your modular tasks.
Test Your Changes
Don’t forget to uncomment your required lines of code before testing.
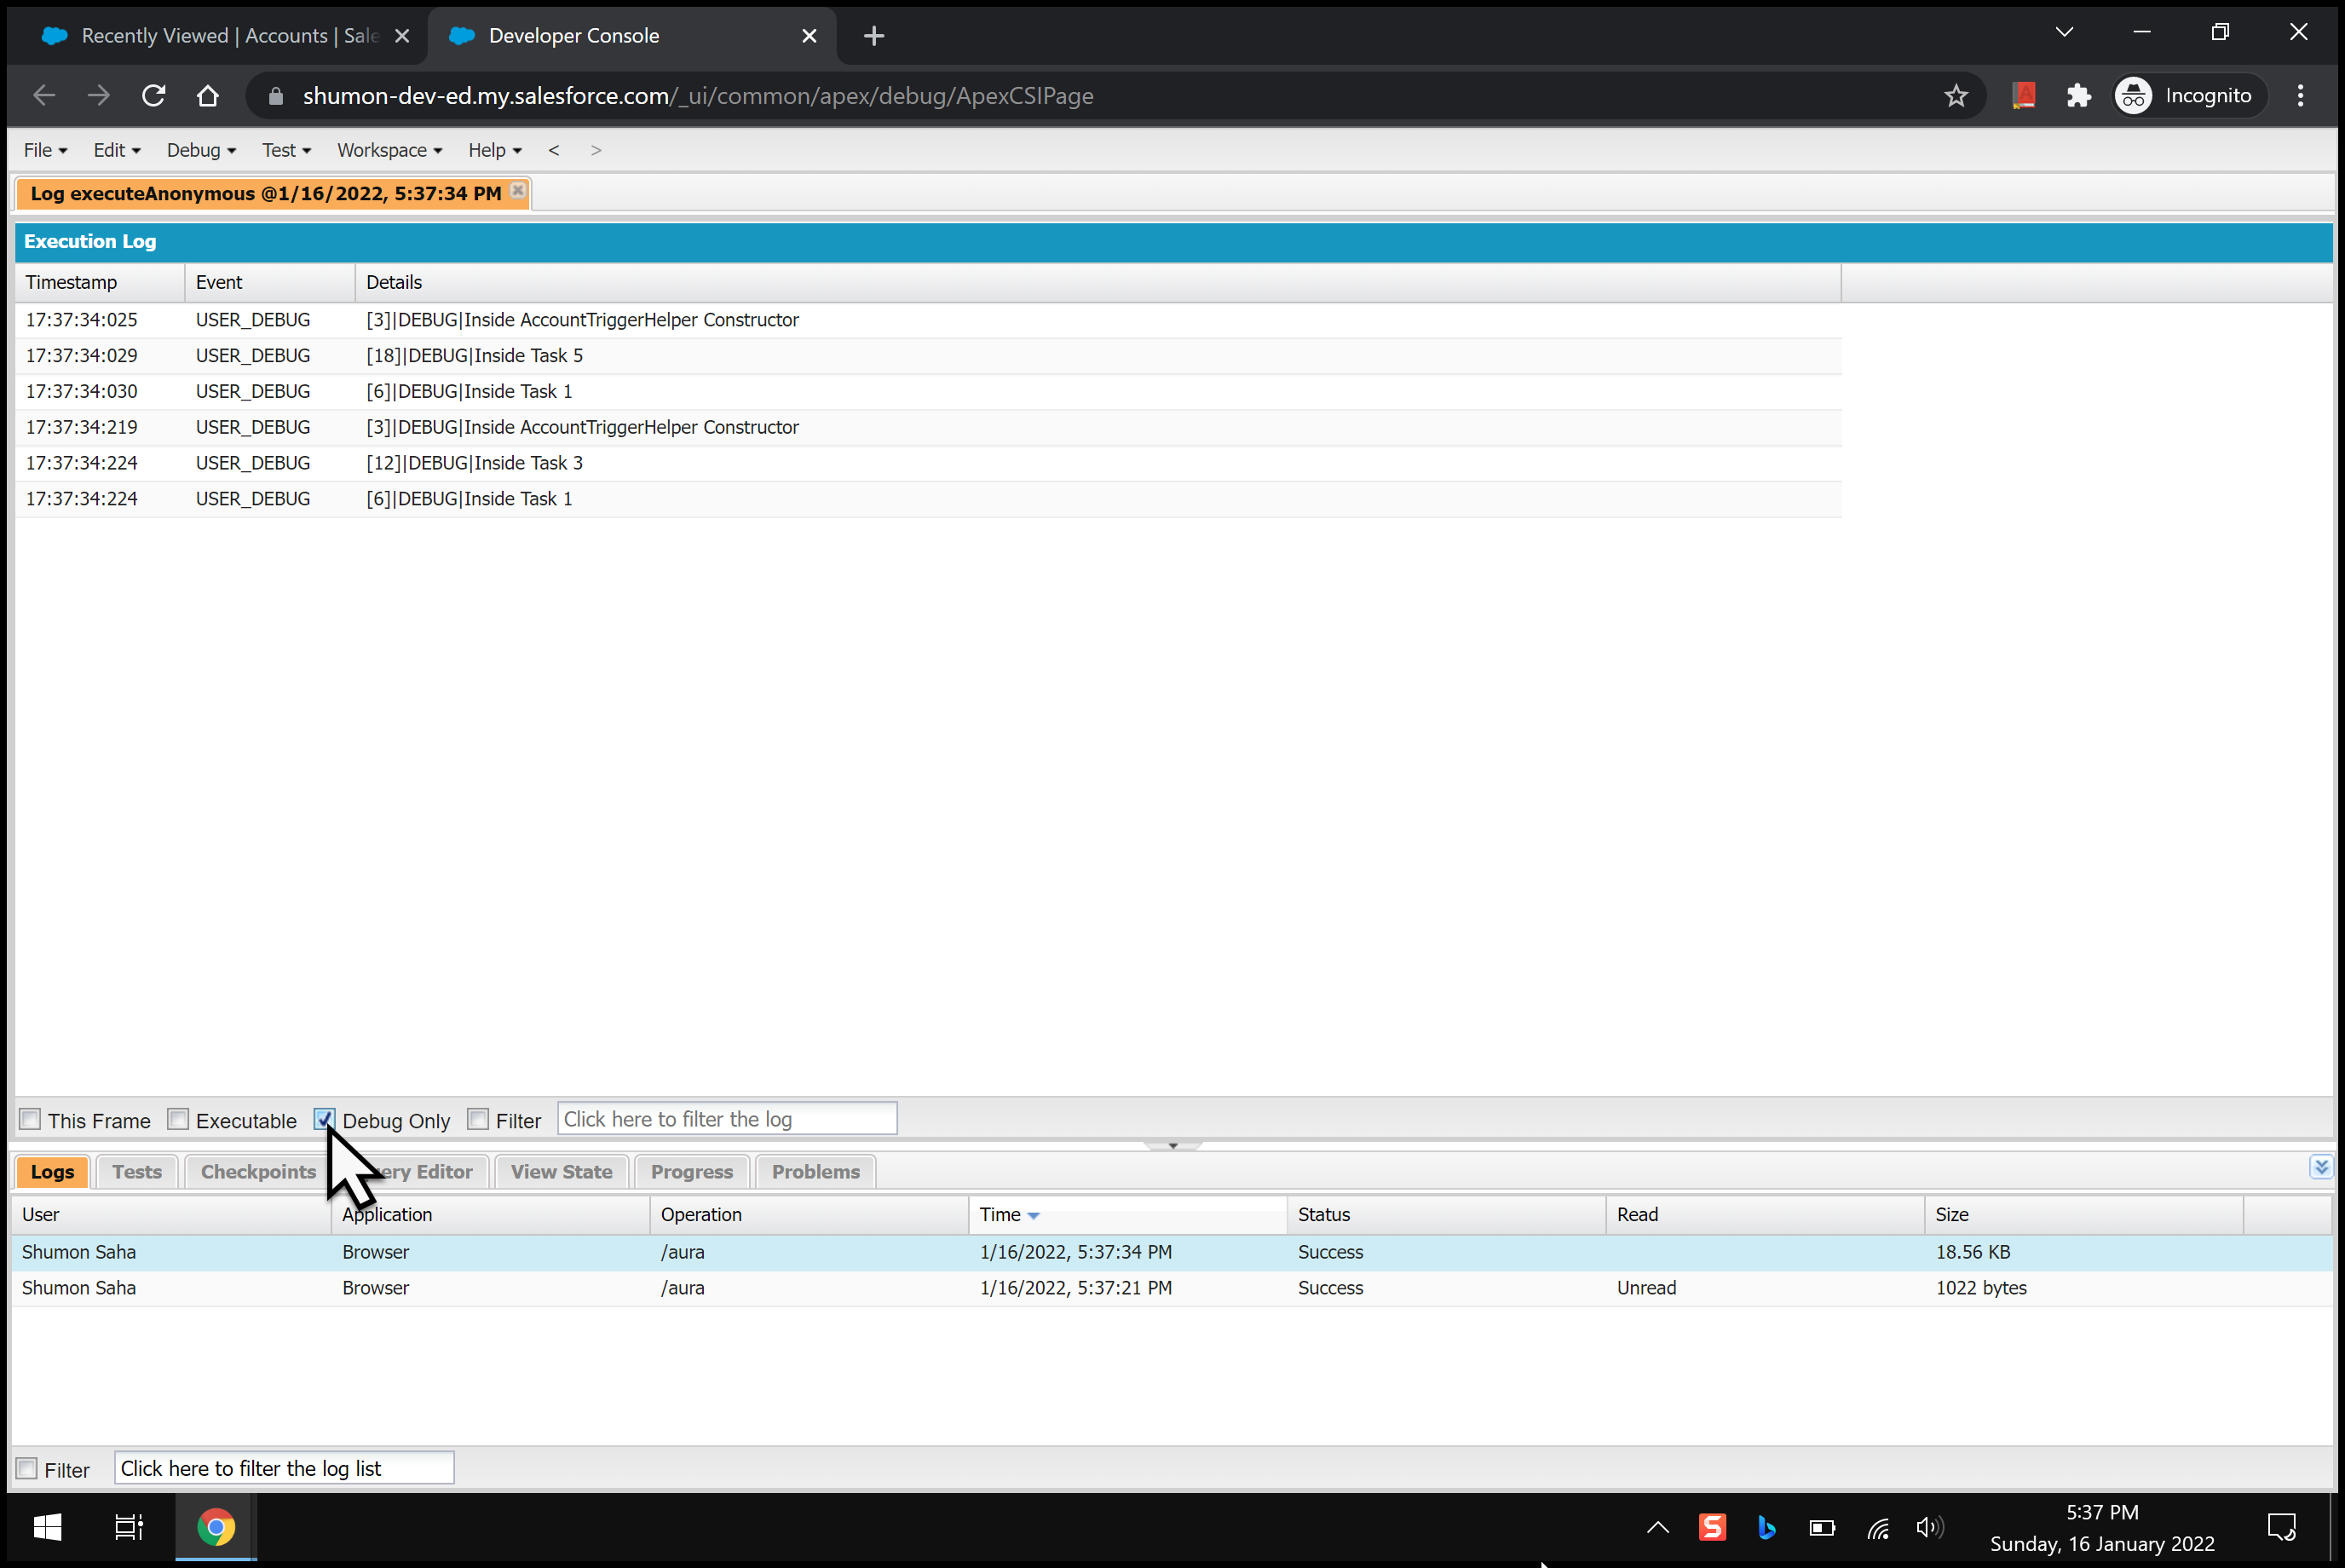
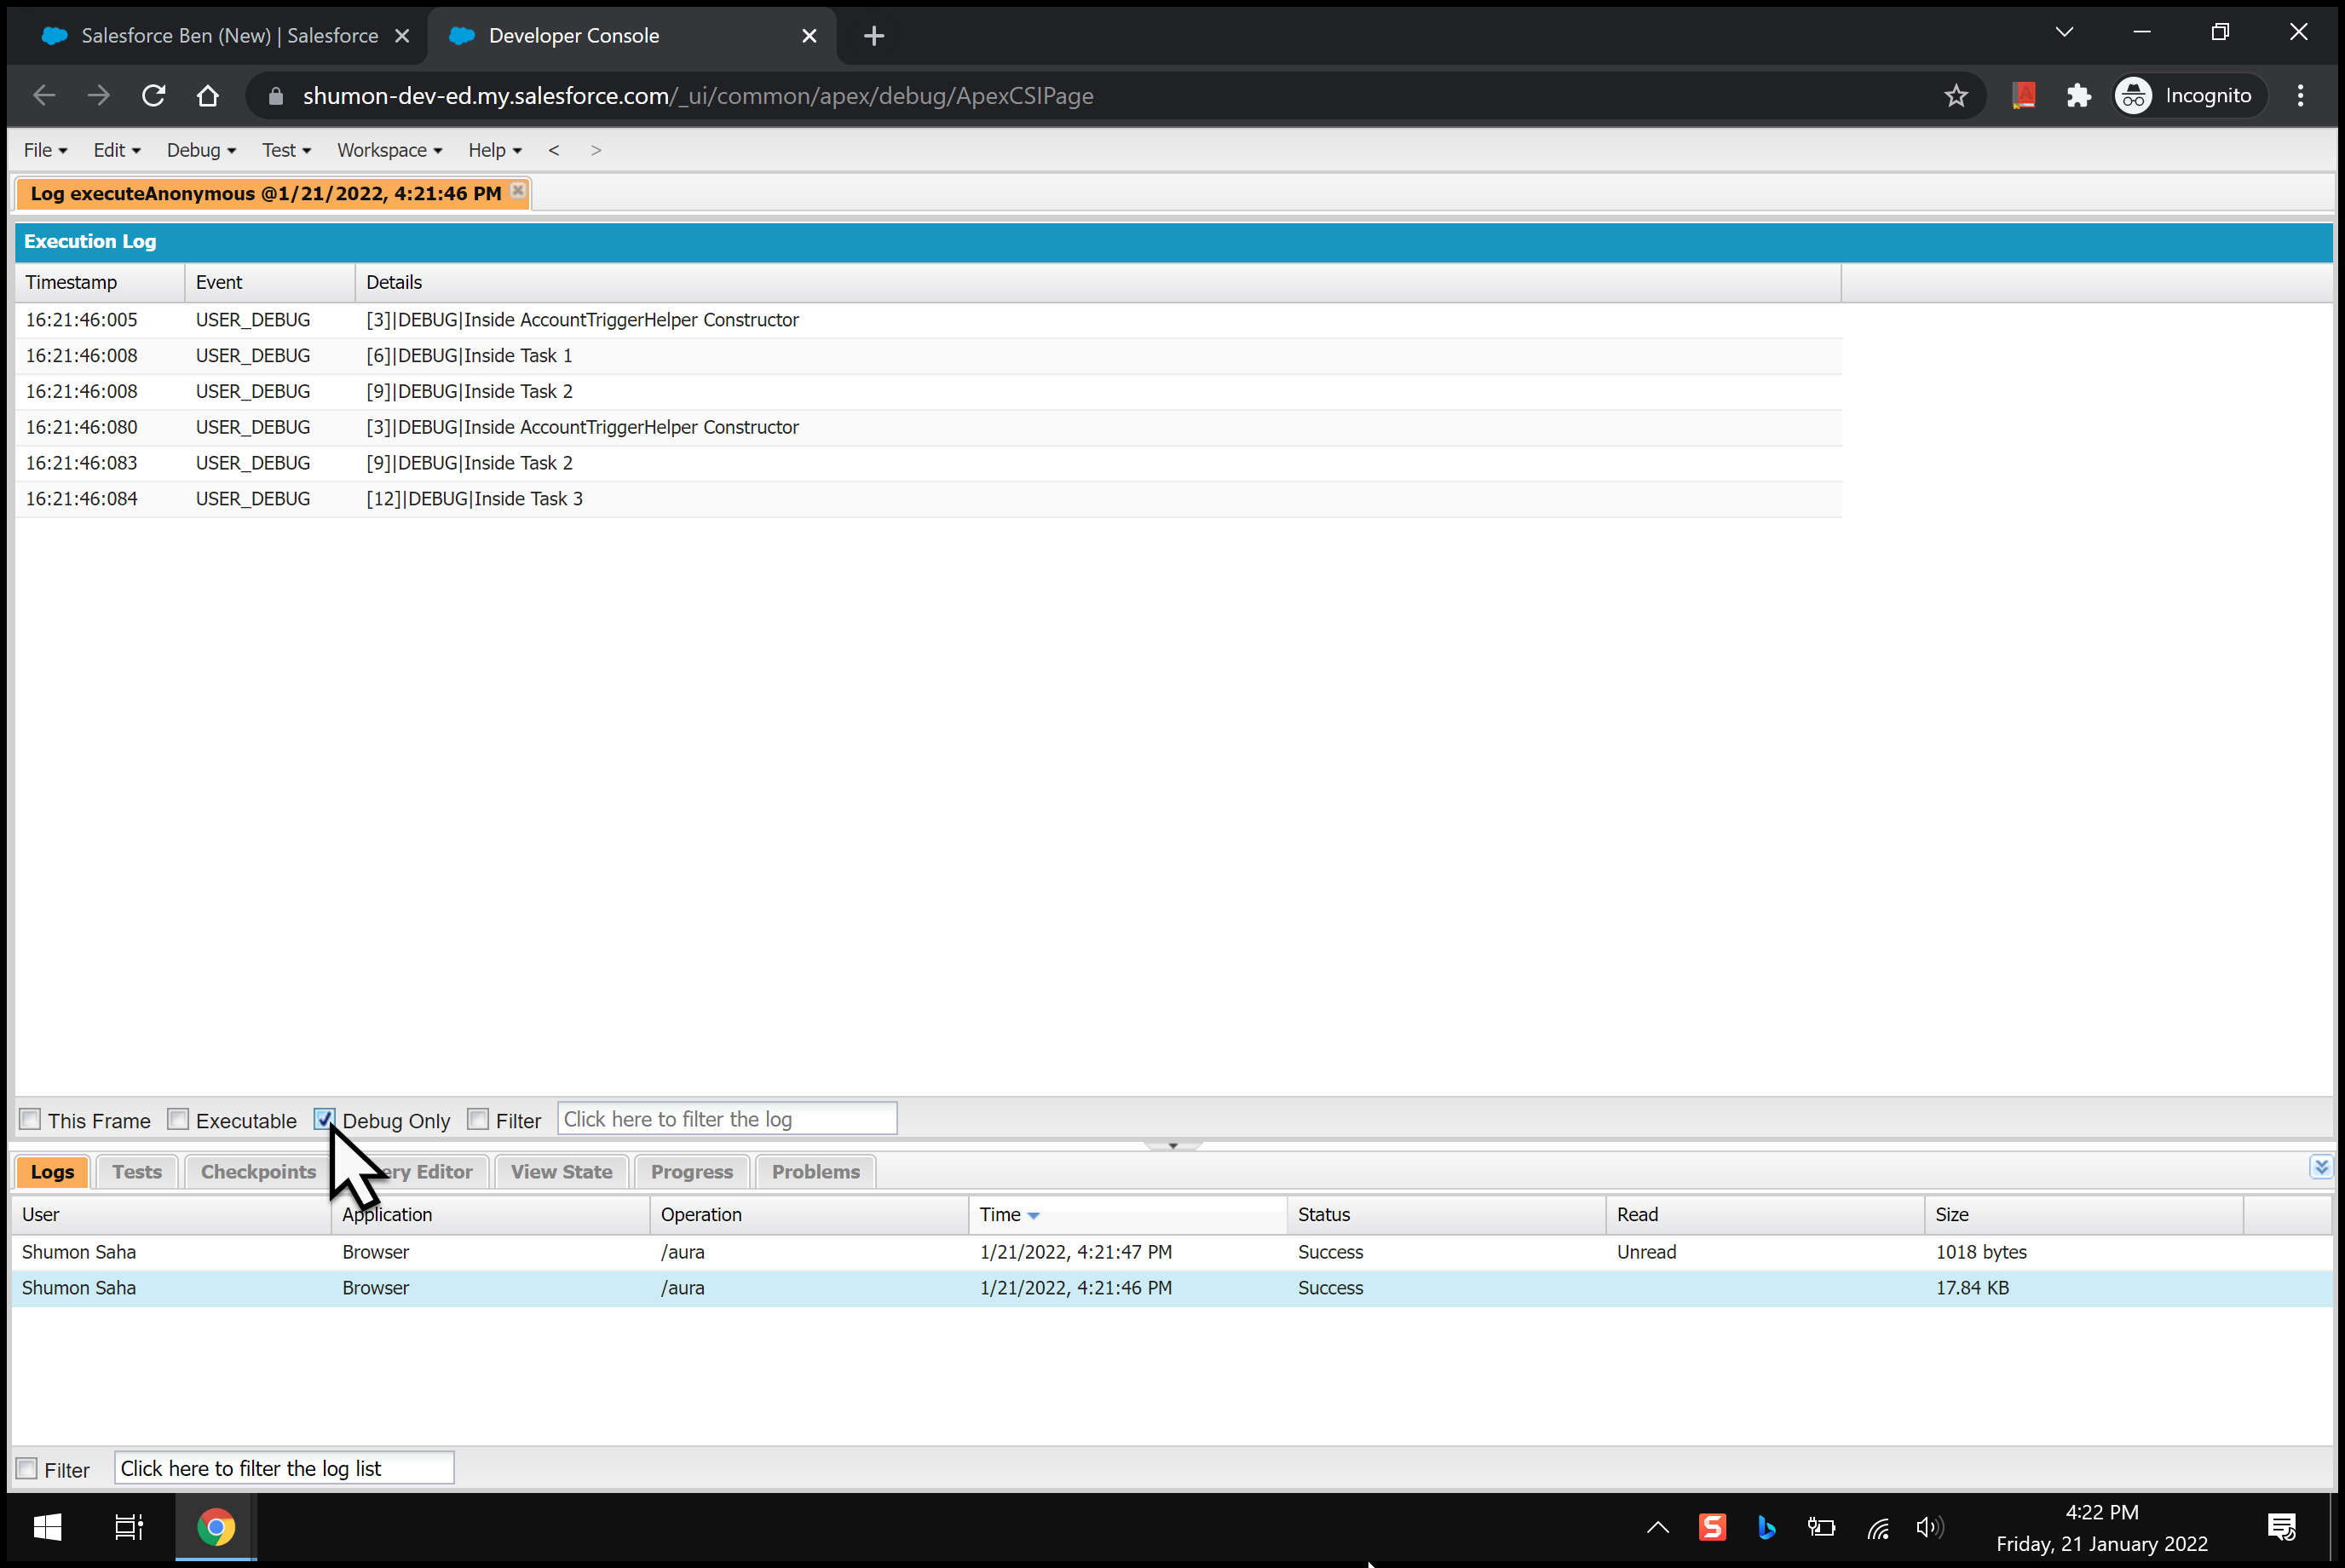
You can test it as a normal day at work within the Account tab while having the Developer Console open in another browser tab.
Creating a new Account record calls handler.beforeInsert() and handler.afterInsert().
Editing and saving an Account record calls handler.beforeUpdate() and handler.afterUpdate().
Clicking “Delete” on an Account record calls handler.beforeDelete() and handler.afterDelete().


Lastly, restoring a deleted Account record from the Recycle Bin only has one corresponding trigger event – AFTER_UNDELETE – and calls handler.afterUndelete().
Test Classes
Don’t forget to write your test classes immediately, and don’t delegate them to the unsuspecting intern.
We are unable to provide test classes because we wouldn’t know your required business case. Test classes are not supposed to sweep code in order to increase code coverage. Test classes are supposed to trace actual business processes and as a result, will show you unused code to delete.
Summary
So what have we learned?
- Incorporate the Trigger Handler Framework from the start only if you have to write a trigger.
- More than one trigger on the same object leads to a random order of trigger execution.
- When onboarding an existing Salesforce implementation, document the number of triggers per object, as a part of its Health Check, and decide if you want to remediate it.
- We can control the order of execution by having strictly one trigger per object. For example, AccountTrigger.
- This Trigger will intercept all Account events, and call corresponding Handler functions.
- The Handler functions call bite-sized business processes in the Helper Class.
- The order of trigger execution is now controlled by you.
- Use an Apex Interface to enforce all Trigger Handlers to follow the same blueprint.
- Design your triggers to be disabled by unticking the “Run All Triggers” record in Custom Metadata Types. Disabling is often required during data loading. Ensure that you don’t delete the CMT record.
- Lastly, don’t forget to uncomment the required lines of code before use.
References
- Trigger Context Variables
- Safe Navigation Operator
- When is a Boolean not a Boolean?
- Rethink Trigger Logic with Apex Switch
- Switch Statements
- Enums
- TriggerOperation Enum
- Interfaces
- Lists and Maps
- Using the this Keyword
- Introduction to Custom Metadata Types
- Creating an On-off Power Switch for All Org Automations
- The Custom Setting Every Administrator Needs
- Amit Sharma on the Trigger Handler Framework
- “Just Because It’s Possible to Write Code, Doesn’t Mean You Should Write Code” – Parker Harris
- Last but not least, “Triggers are the original sin on Salesforce.” – Siddhesh Kabe


Comments: