

The native Data Table component available in Screen Flow is a crowd favorite and has received significant support from Salesforce over the years. Whenever you need to display or make quick changes to a collection of records, you should consider the Data Table component for Screen Flow.
In this overview, we’re going to learn how to configure the Data Table component in a Screen Flow and go through an example together.
Constructing the Screen Flow
In this example, we’re going to create a Screen Flow that displays a collection of Lead records together in a single screen, allows the user to select multiple of those Leads, and marks them as Closed – Not Converted.
Step 1: Gather Collection
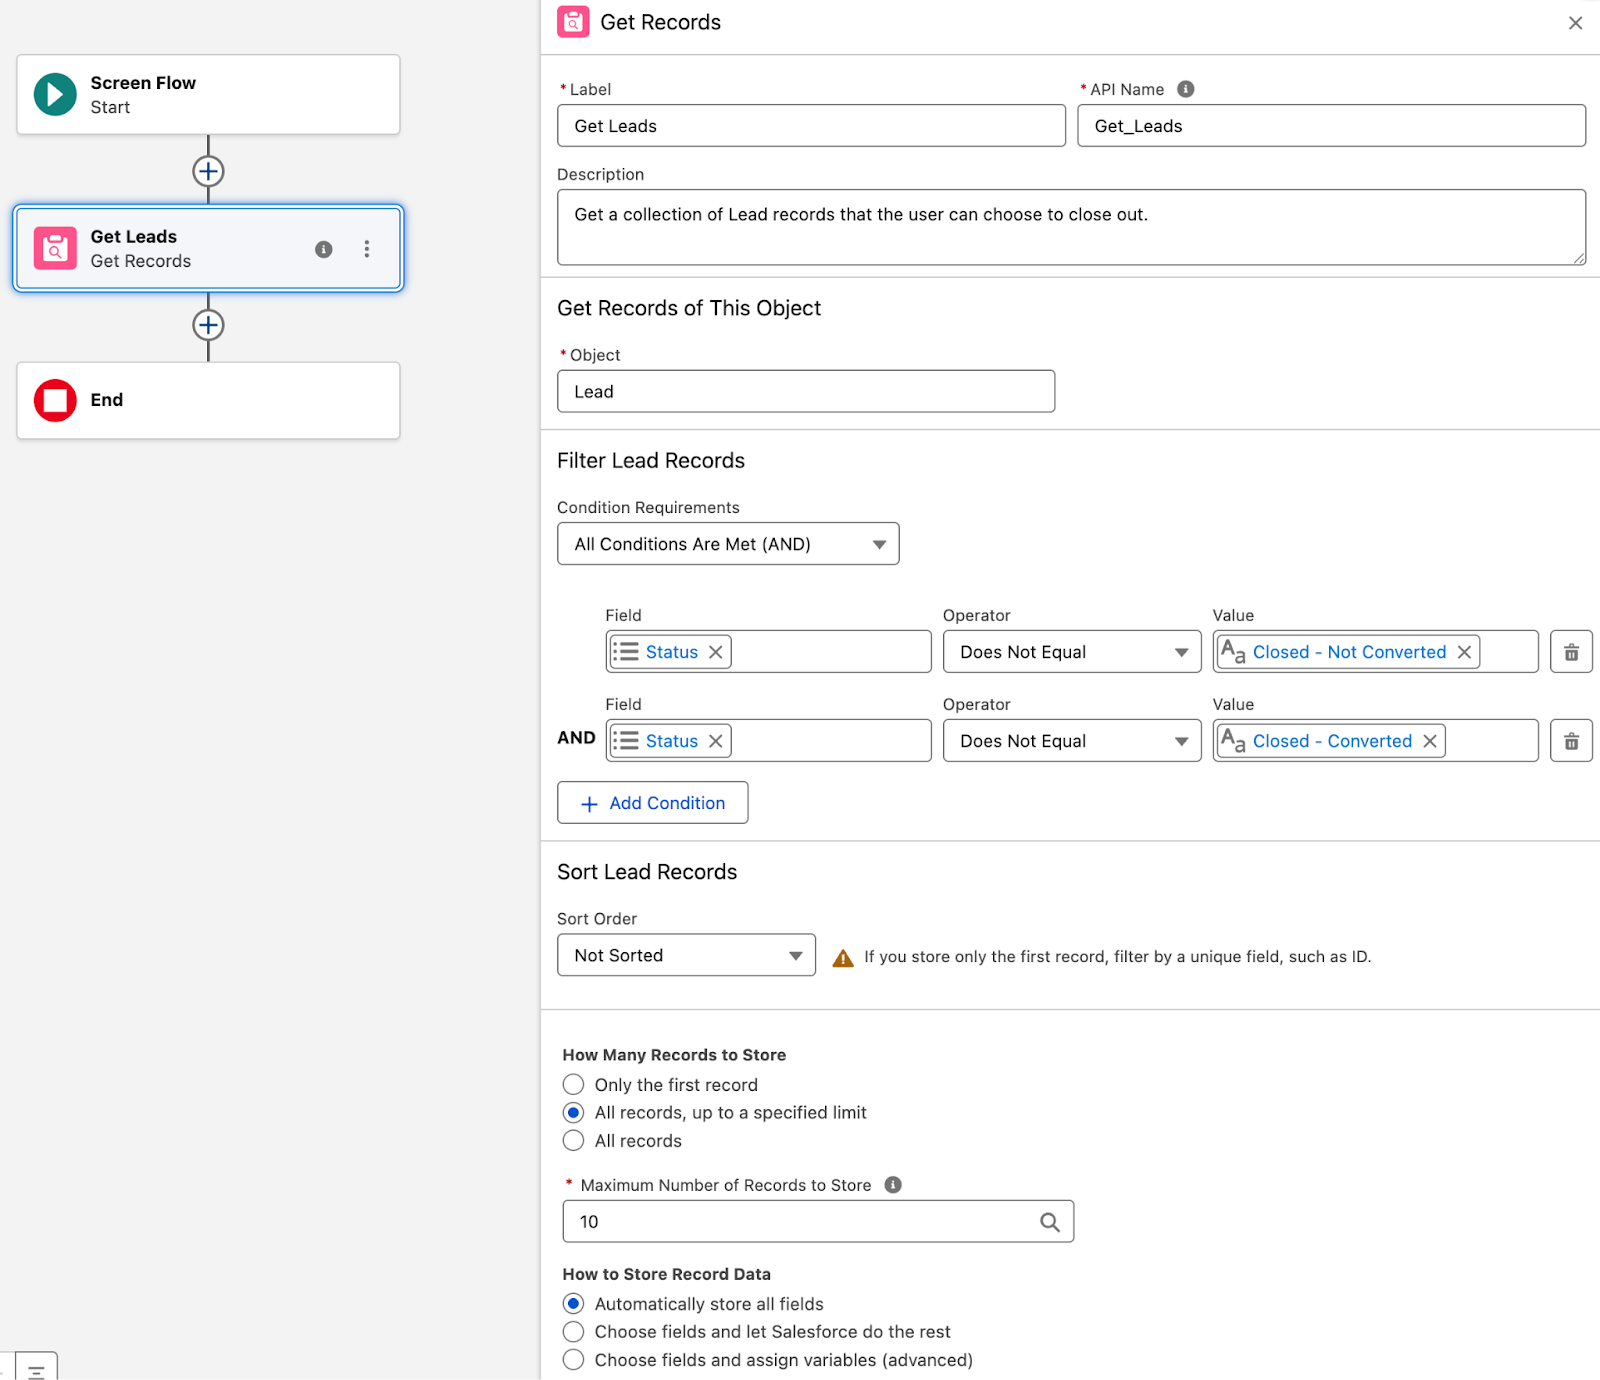
Given that we want to be displaying a collection of Lead records in the Data Table component, we first need to retrieve them. To do this, we’ll use a Get Records element and configure it to gather Lead records that are not already converted. I am also limiting it to just 10 pull records at a time.
Step 2: Screen Element
Now that we’ve gathered the records we want to display, we need somewhere to display them. The Data Table component requires a Screen to display it in, so we’ll create a Screen called Display Leads to Close.
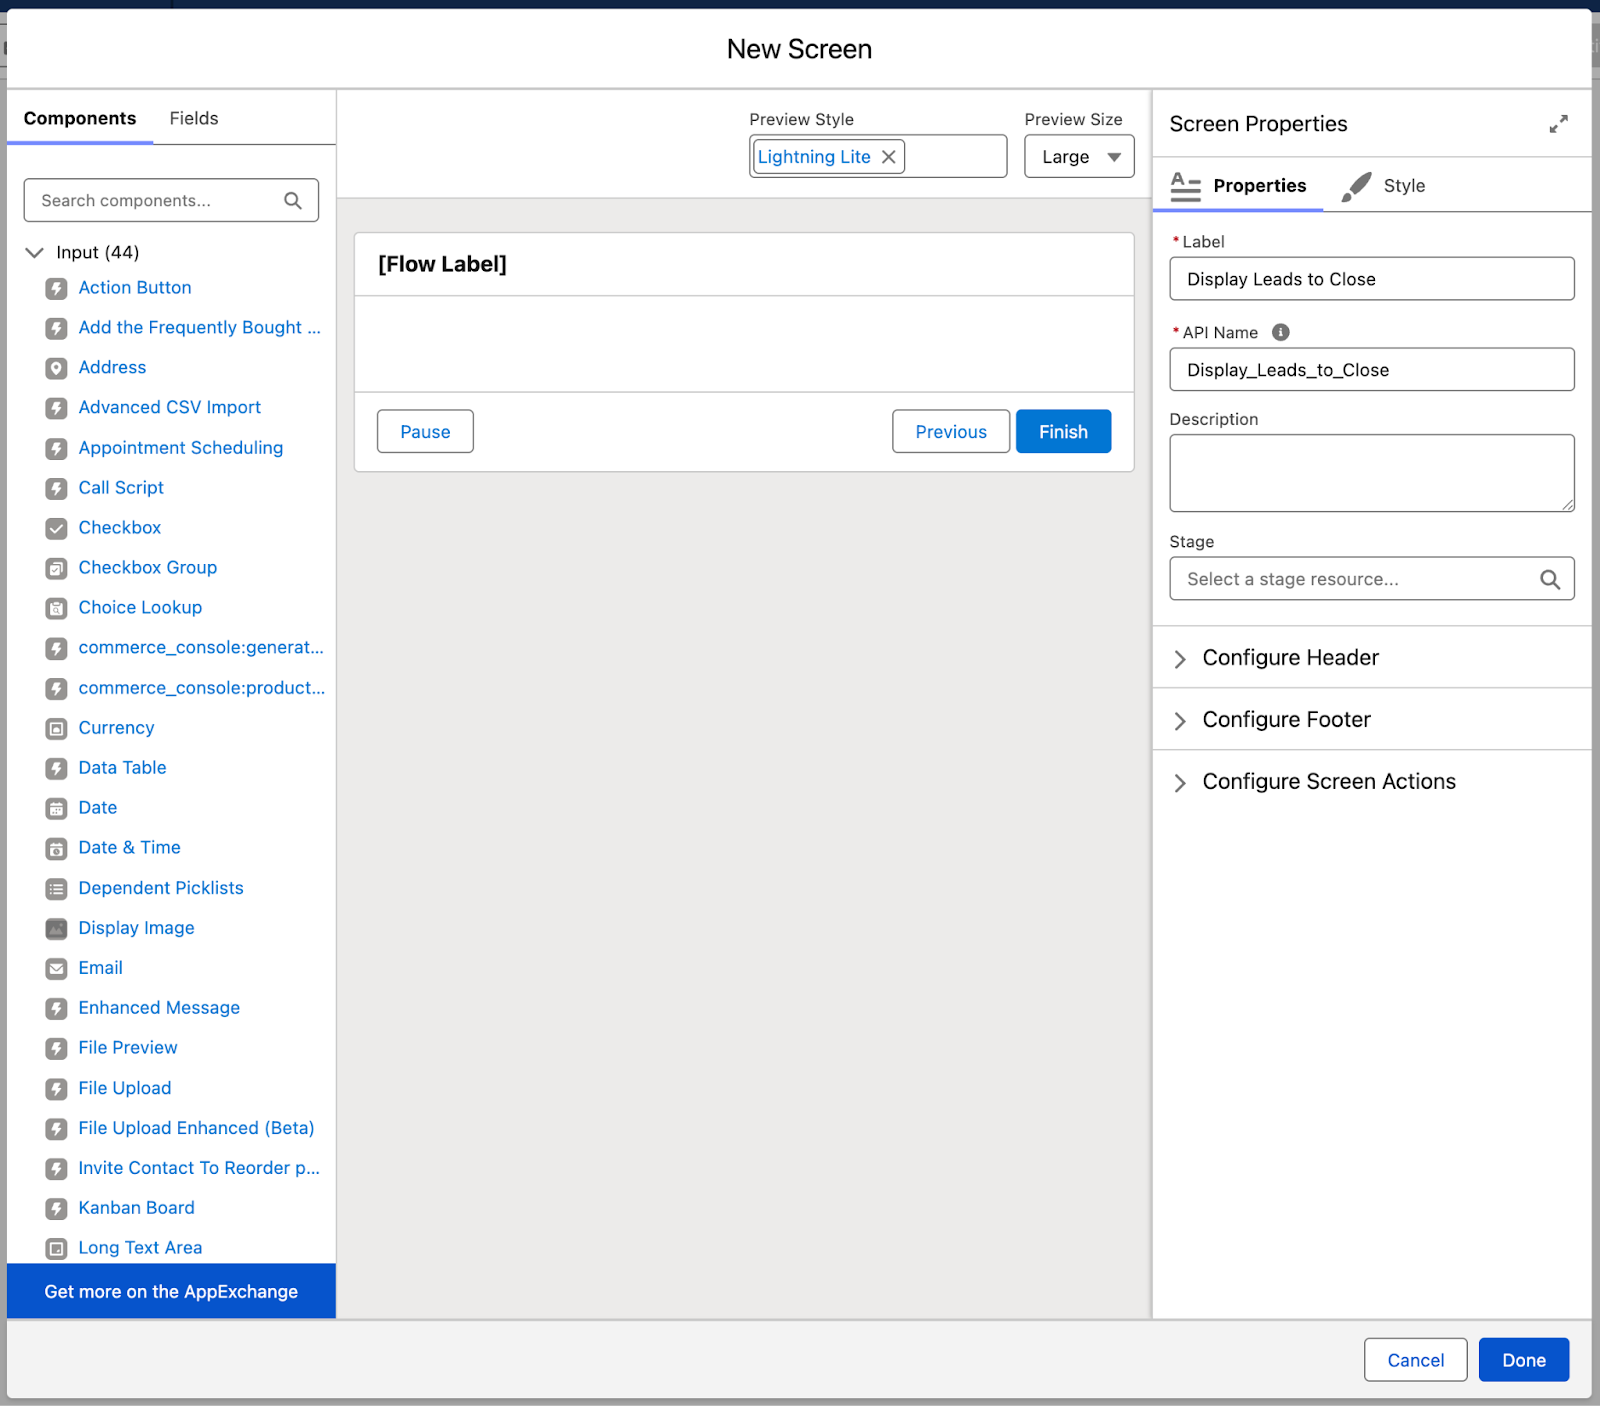
In the Components tab of the editor, search for “Data Table” and drag it onto the canvas from the Input section.
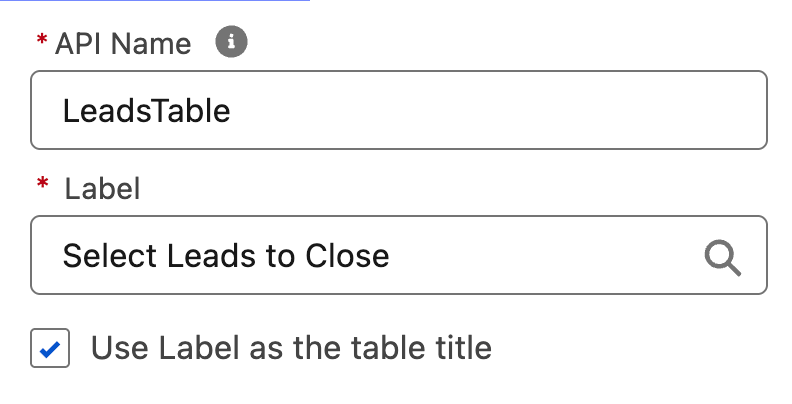
From here, we’ll give it an API Name of LeadsTable and a Label of Select Leads to Close. Tick the Use Label as the table title box as well.
Step 3: Configure the Source Collection
Now that we’ve added the Data Table, we need to populate it with the data that we’ve gathered in the Get Records element from earlier. In the Configure Data Source section, set the Source Collection value to Leads from Get Leads.
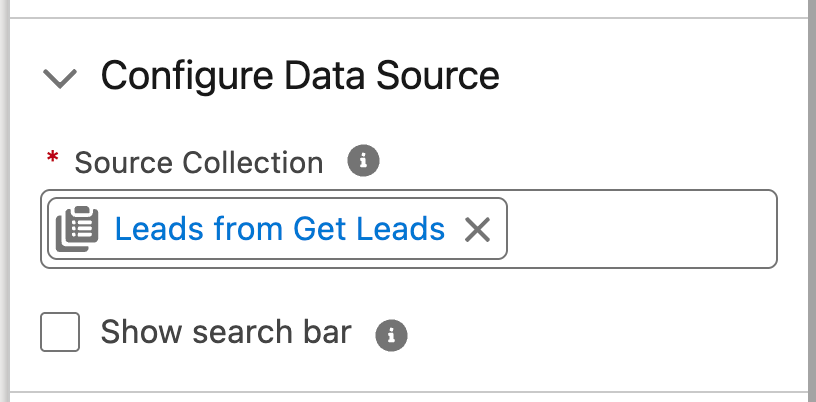
Optionally, you can choose to turn the search bar on by checking the box underneath.
Step 4: Configure Rows
Next up is the Configure Rows section. Here we can configure if we want to make it a read only table, or if we want to allow a selection of a single or multiple records. In the example that we’re working through, we want to allow for multiple records to be marked closed in bulk, with a minimum of 1 record.

You can also choose to use a different field as the unique identifier, but we’ll leave the Id as it is. Given that we’re dynamically querying the Lead records and have no prior methods of determining what should be selected, we’ll also leave the Default Selection blank.
Step 5: Configure Columns
Now comes the fun part – choosing what columns are displayed to the end user. We’ll keep it simple and just do the following:
- Full Name
- Phone
- Status
To do this, you need to search for the field in the Source Field (searching for either API Name or Label will work), select the right fields, and click Done each time to lock it in.
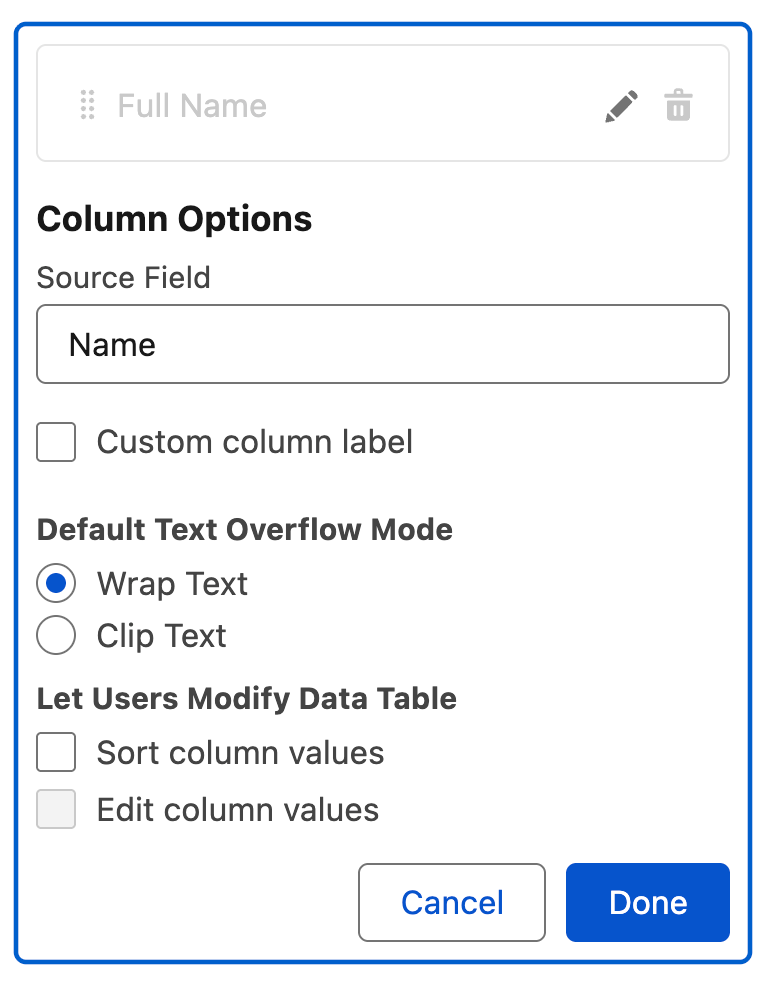
You could choose to add a custom label if you wanted to, but we don’t need to do so for this example. Additionally, for longer text fields (like Description), you can also switch to Clip Text for text overflow to make it behave a bit more like regular List Views. As we don’t have any longer text, we’ll not enable this for any of the aforementioned fields.
Step 6: Construct the Remainder of the Flow
With the key focus being on the Data Table component, I won’t go into too much detail regarding the rest of the Flow, but I will summarize it.
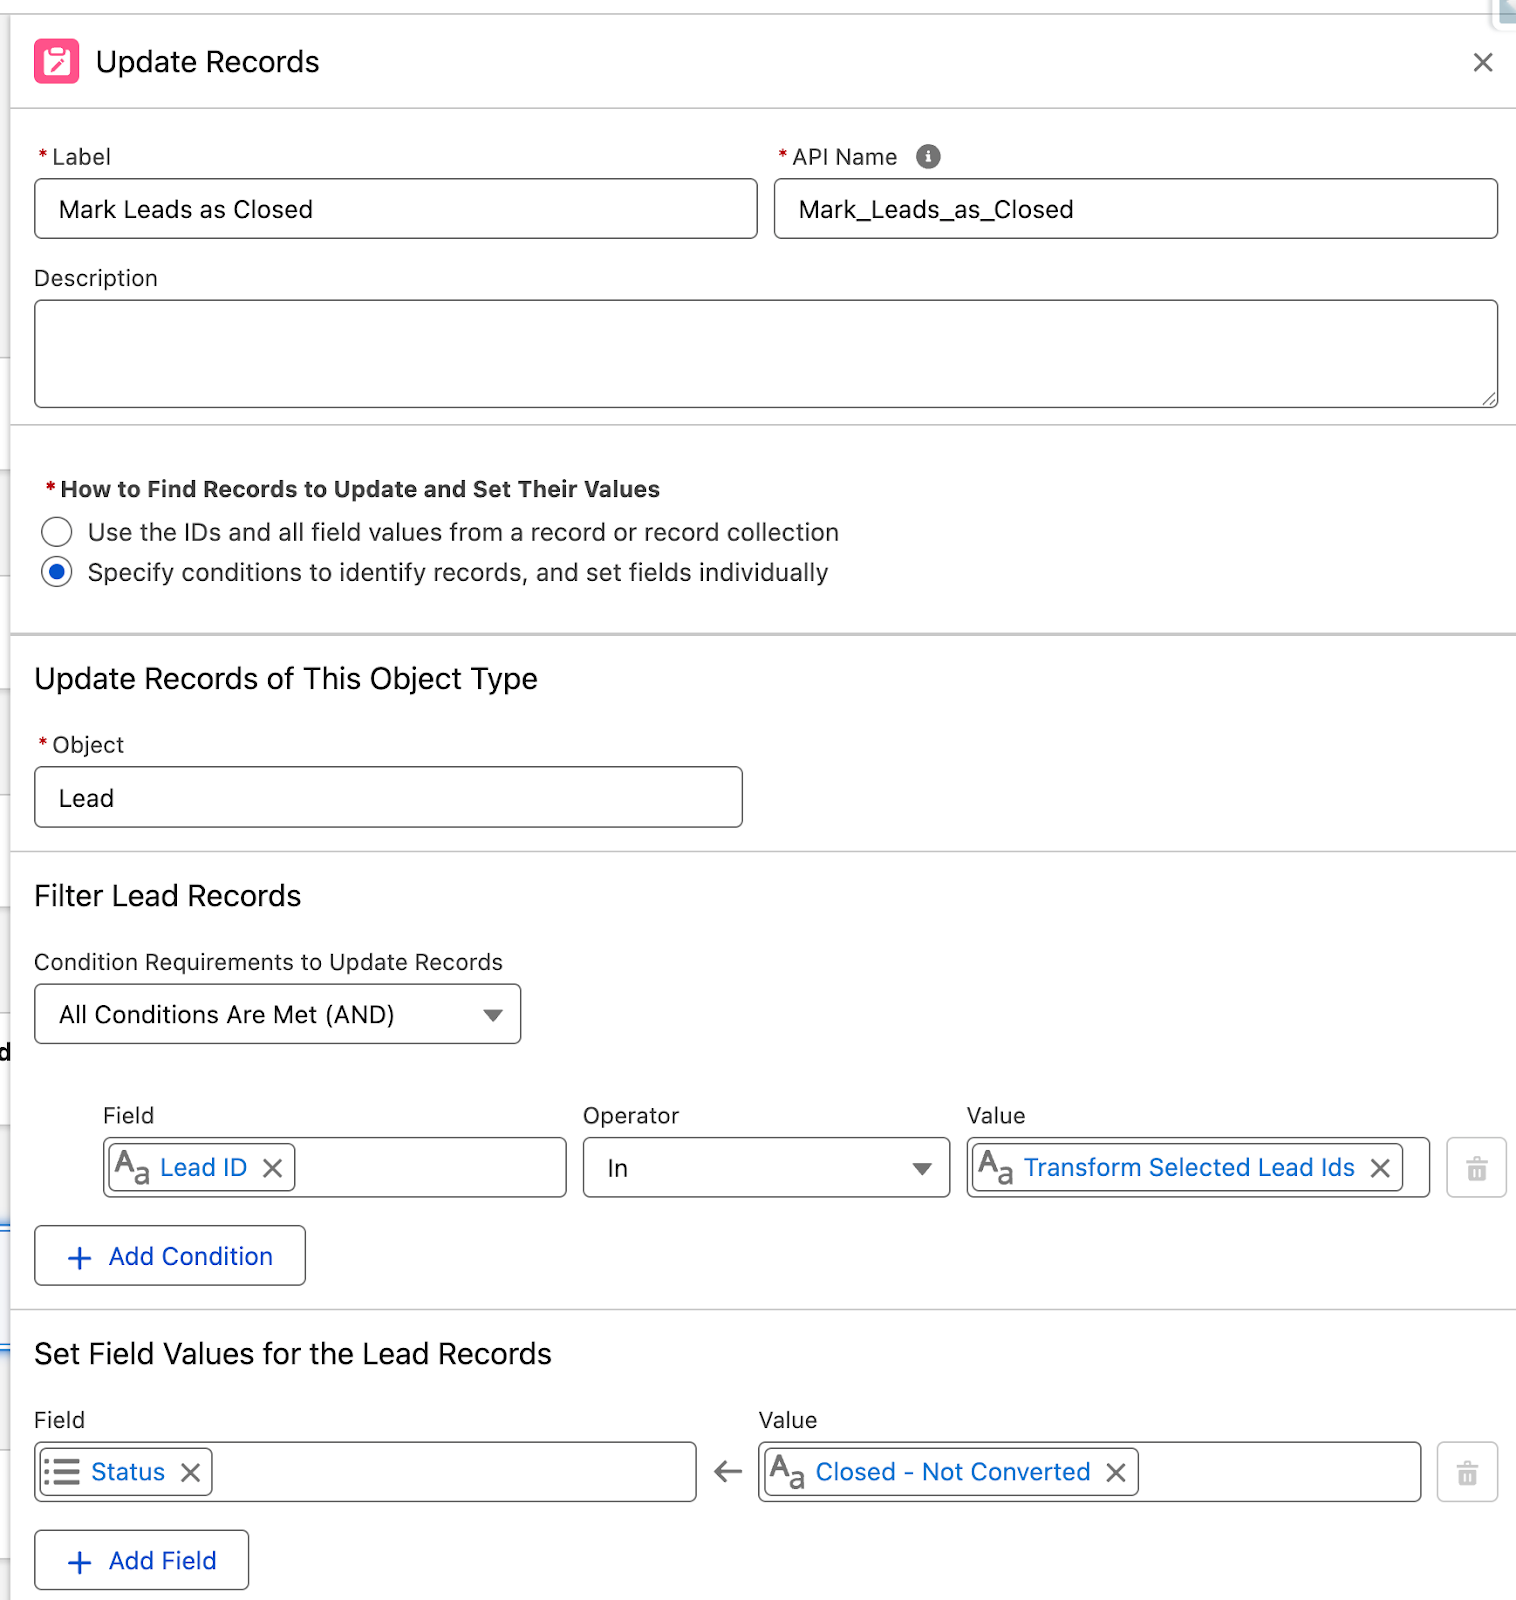
Once the user has made their selection and clicked Next, we want to change the Status of each of those records to Closed – Not Converted. To achieve this, we’ll use a Transform element to extract the Ids from the Lead Table, then add an Update Records element and use the transformed Ids from the Data Table component.
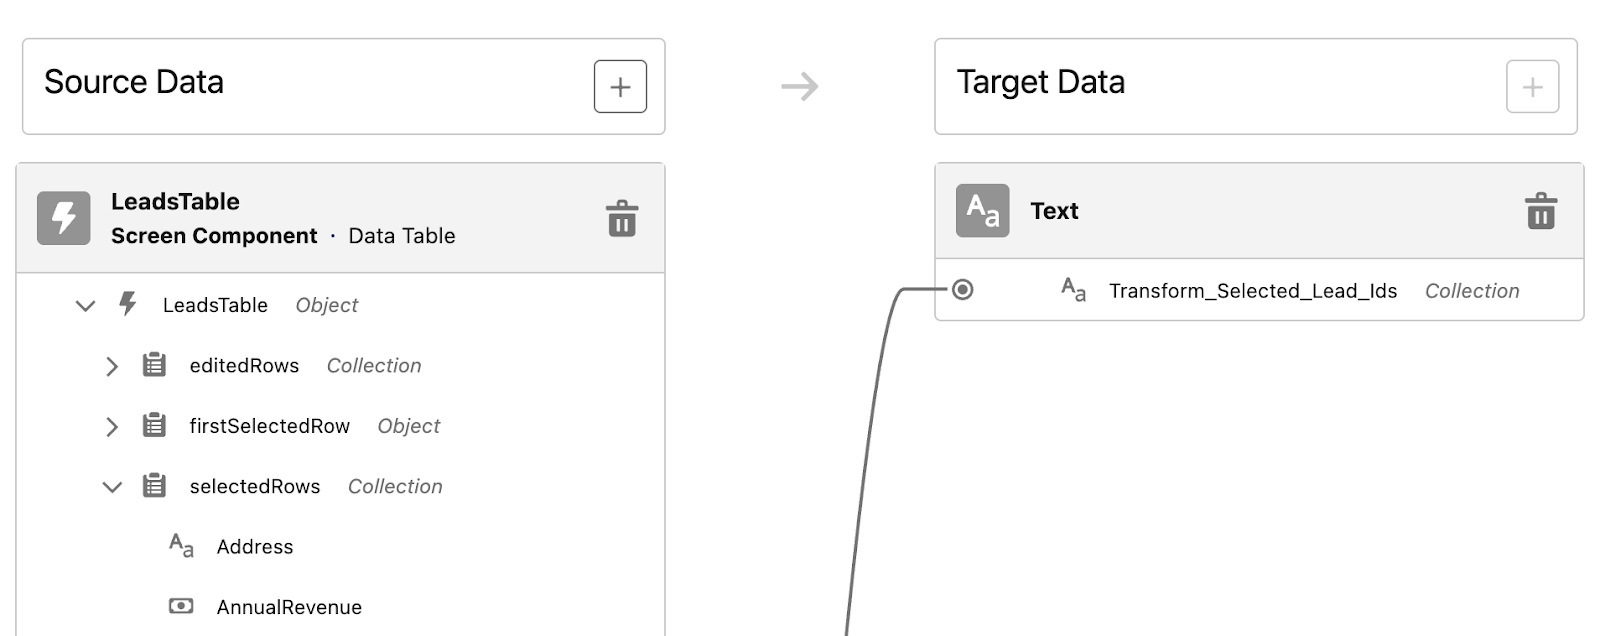
Connect the Id node from inside the selectedRows collection to a new Text Collection Target Data set. This splits the Lead Ids into their own text collection for use in the Update Records element.
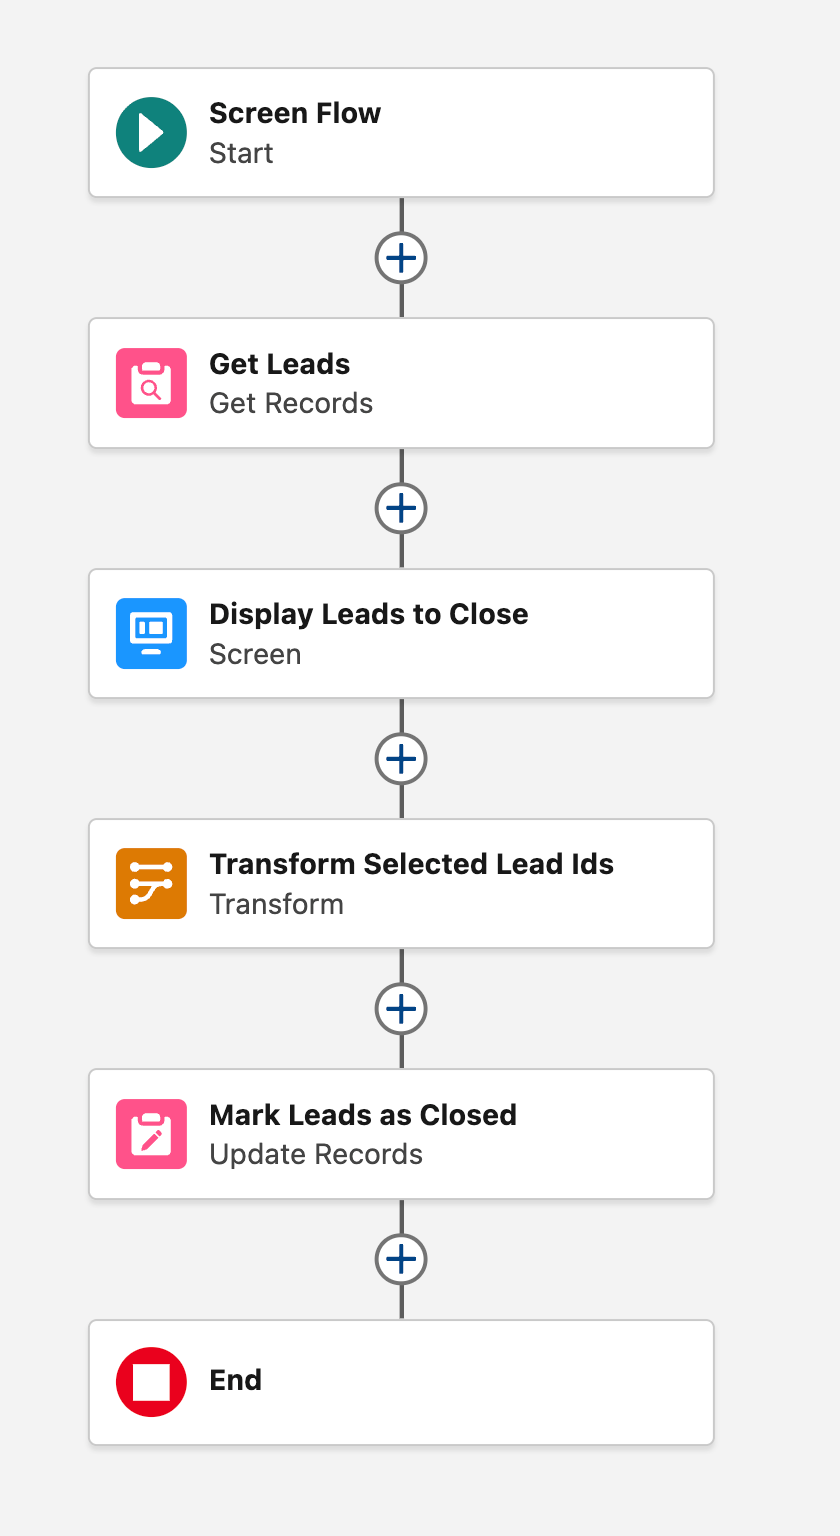
Once this is complete, your Flow should look like the one below. Make sure you save the Flow before continuing!
Step 7: Test the Flow
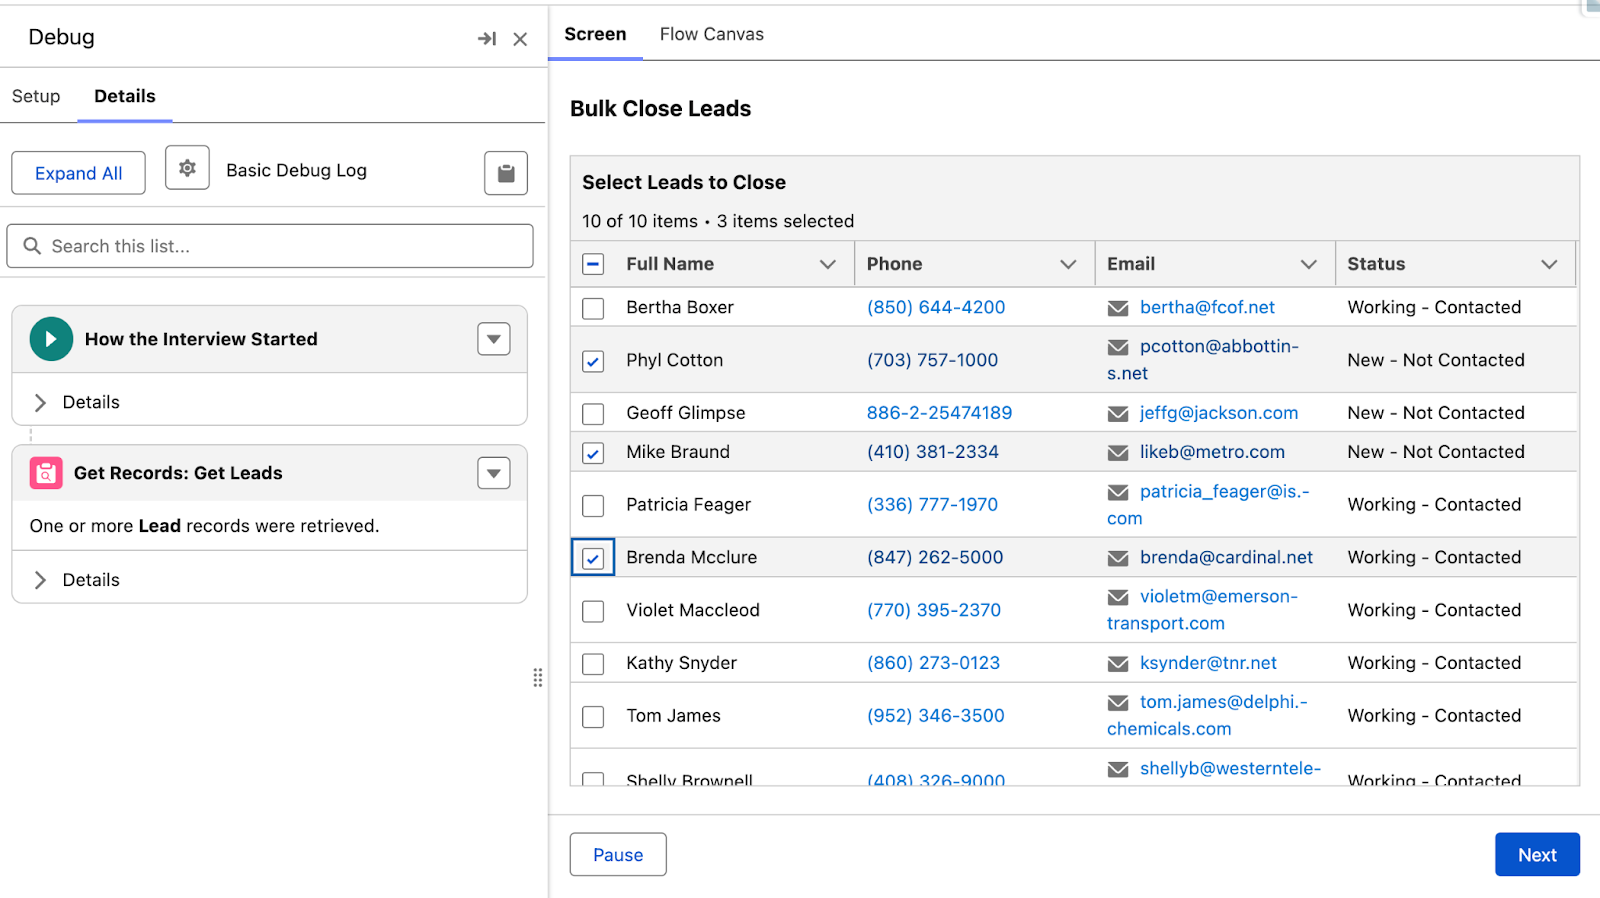
Once saved, click the Debug button to begin a debug run. Here we can see a collection of Leads (and notably, none of them are closed – showing Get Records criteria is working).
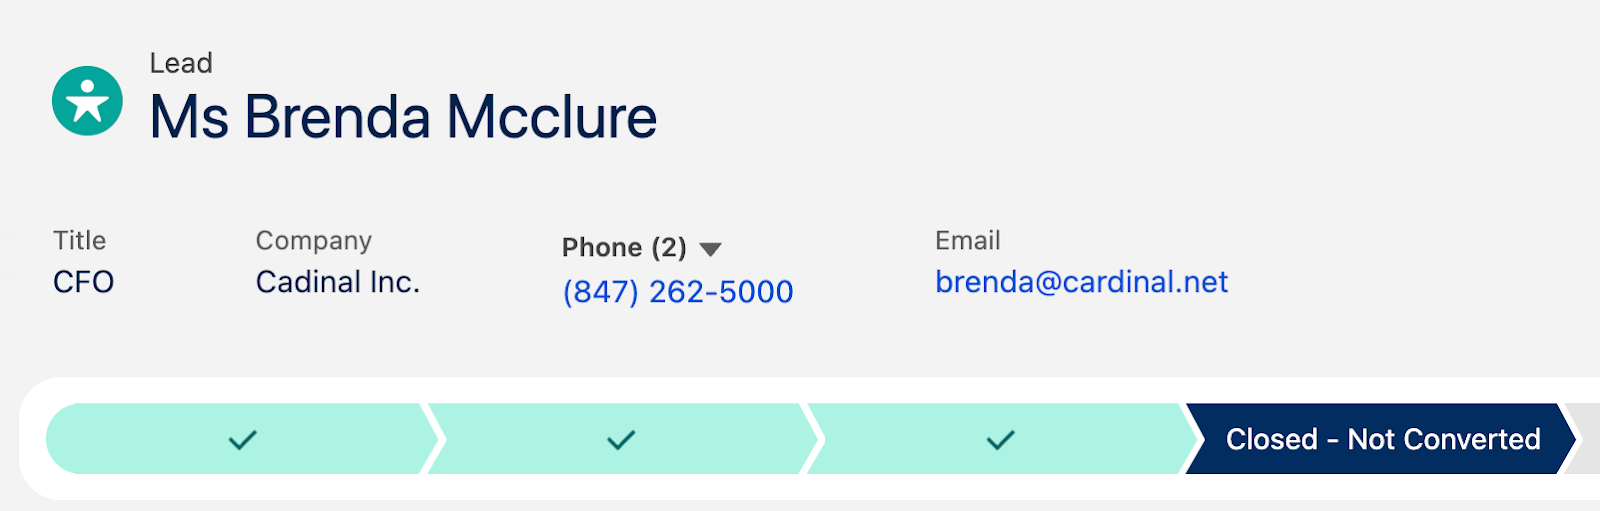
After making a selection, clicking Next will go ahead and update those records to have a Status of Closed – Not Converted. I checked Brenda Mcclure, which is one of the Leads that I selected, and confirmed that it worked!
Summary
The Data Table component for Screen Flow is an out-of-the-box option that you can use to display records in a tabular format and make some quick changes.
While the out-of-the-box Data Table Flow component is not as feature-rich as other third-party offerings, it will cover a lot of basic functionality and enable businesses to display a data table within a Screen Flow without having to install a third-party component.

Comments: