

Salesforce CPQ, now part of Revenue Cloud, brings a whole new level of power into Salesforce, allowing you to build complex pricing engines to support your sales team in sending out accurate quotes.
What we are going to run through this tutorial is how to filter product selection using CPQ custom actions. Once created, you will be able to show and hide products to the right users in an easy and declarative way.
In this tutorial, we will learn how to…
- Create custom actions to show different products for different users
- Scale solution if you have more regions
The Business Case
On your Salesforce CPQ project, a stakeholder has asked you to set up different product visibility for sales rep based on regions (EMEA and US). Every Sales user must see and select only specific products related to their region.
Step 1: Prepare the User, Product and Quote Objects
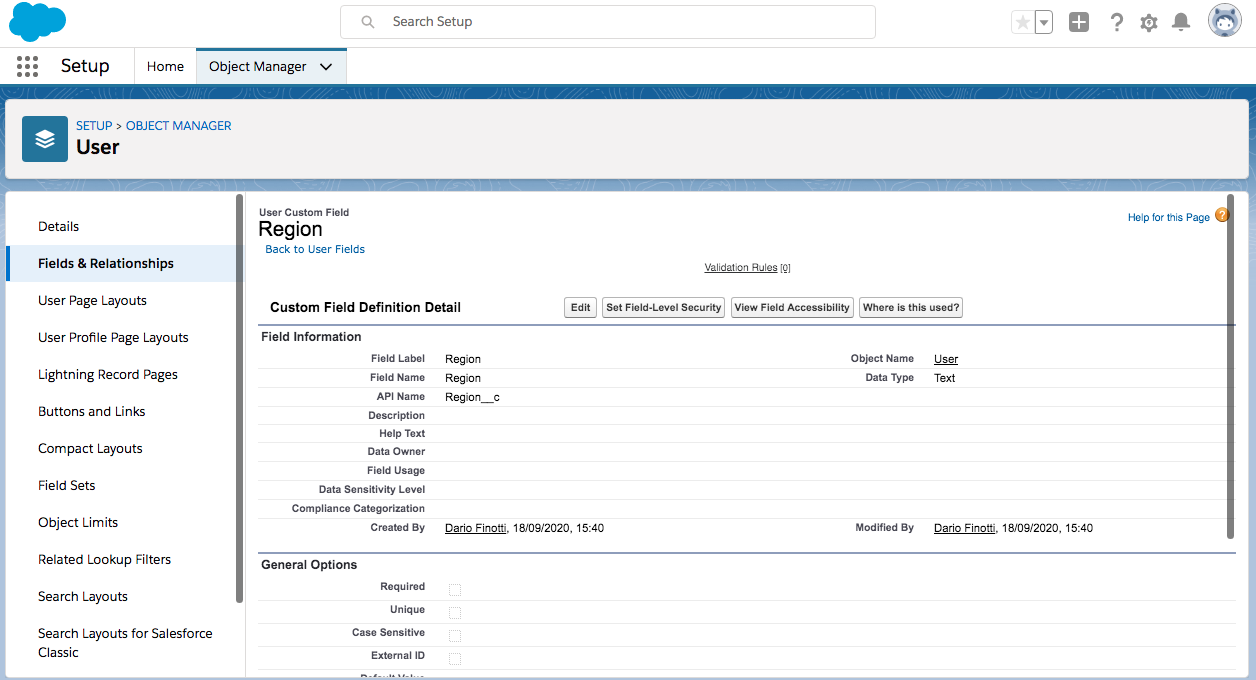
1a. User Object
Firstly, we need to create a field on the user object to use custom conditions that drive action visibility later on.
- Go to Setup, select the “Object Manager” tab. Search “User” in the quick find box.
- Create a new “Region” field (like in the image below. Note – it could be any field type that fits your needs best):
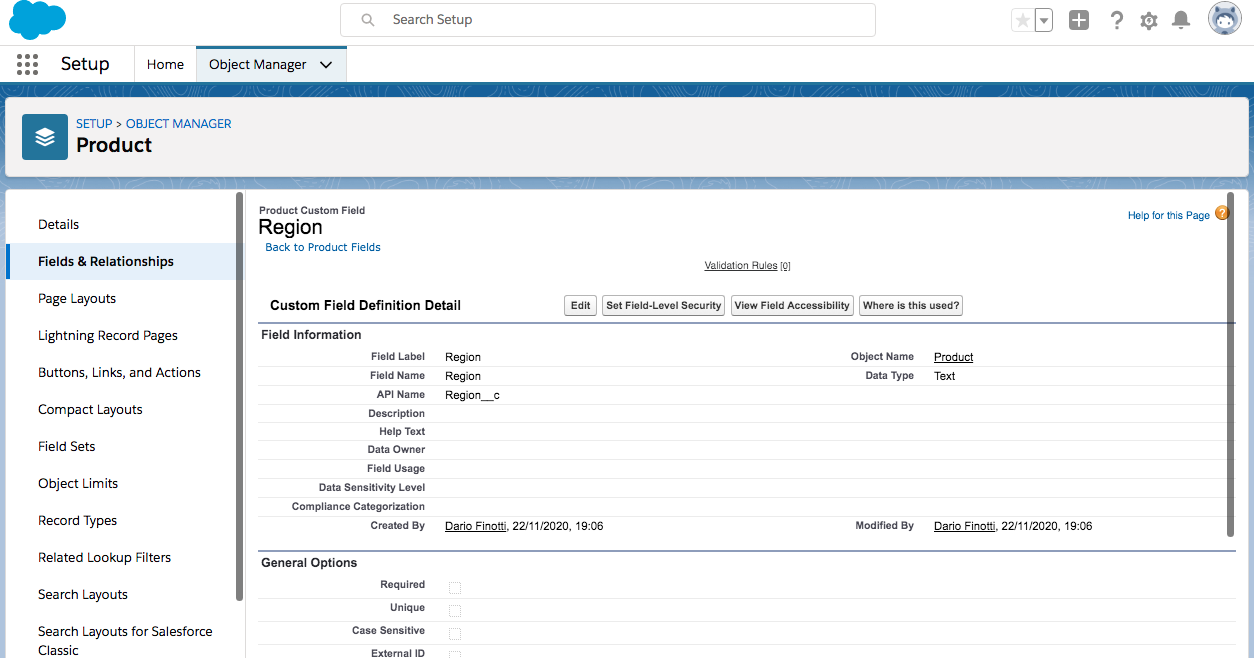
1b. Product Object
Now we will create the same field on the product object to use on the search filter.
- Go to Setup, select the “Object Manager” tab. Search “Product” in the quick find box.
- Create a new “Region” field (like in the image below. Note – it could be any field type that fits your needs best but it must be the same field type as the field you created on the user object):
Note: it’s not mandatory to create a new field on the product object. You can choose an existing field to base your filter on, for example Product Family. In this article, I want to show you the cleanest way without impacting any existing configurations.
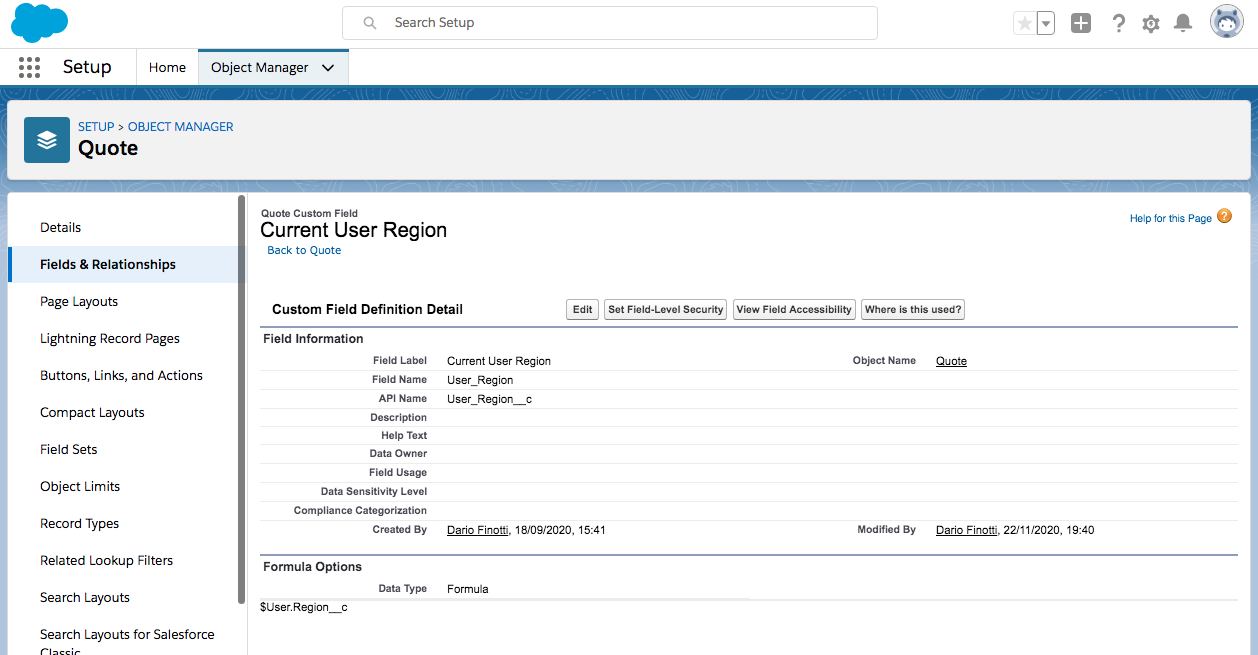
1c. Quote Object
Finally, create a formula field on the quote object. This will tell us the current user’s region.
- Go to Setup, select the “Object Manager” tab. Search “Quote” in the quick find box (choose the CPQ one).
- Create a new “Current User Field” field (like in the image below).
Step 2: Prepare the Custom Action and Related Objects
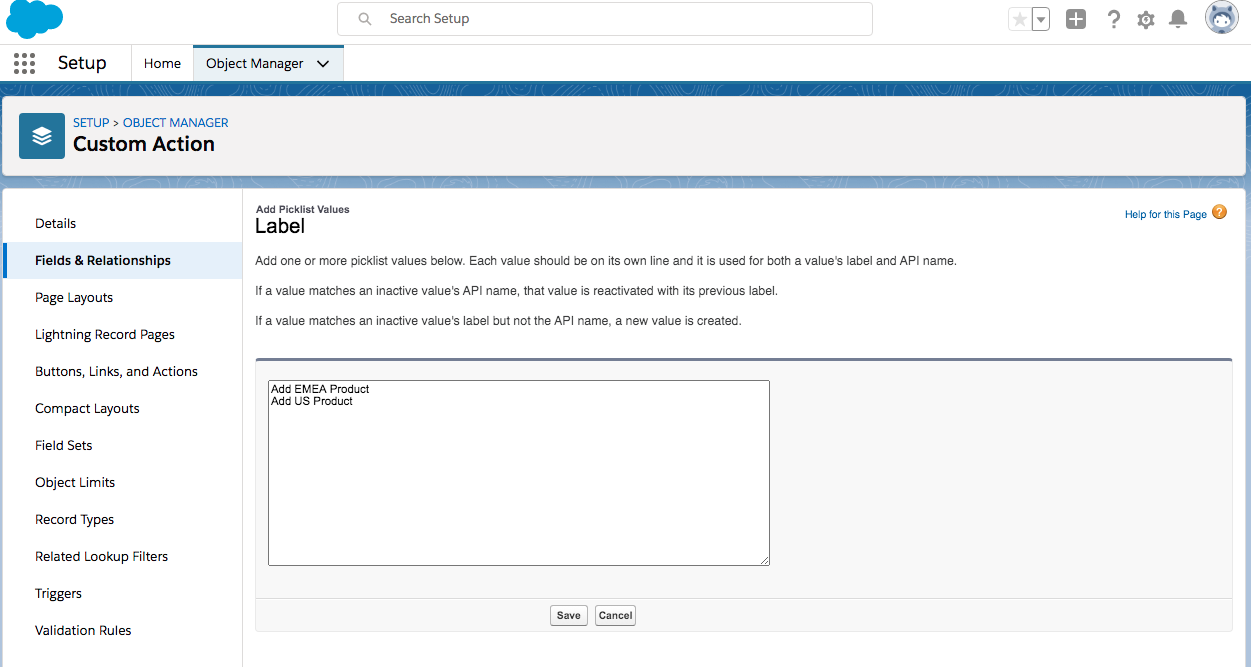
2a. Custom Action
We need to create new labels for our actions. I’m referring to the specific actions available with CPQ only (they are not standard custom actions).
Here are the steps to do that:
- Go to Setup, select the “Object Manager” tab. Search “Custom Action” in the quick find box.
- On the “Fields and relationships” section search for the “Label” field.
- Add the new picklist values (like in the image below)
2b. Search Filter
Next, add the product region field like a new picklist value to filter the results for user searches:
- Go to Setup, select the “Object Manager” tab. Search “Search Filter” in the quick find box.
- On the “Fields and relationships” section search for the “Target” field.
- Add the Region API name, like a new picklist value (shown in the image below):

Now add the new value as a field dependency.
- On the “Fields and relationships” section search click on the “Field Dependency” button,
- Include the Region__c value under Product on “Target Object” field dependency.
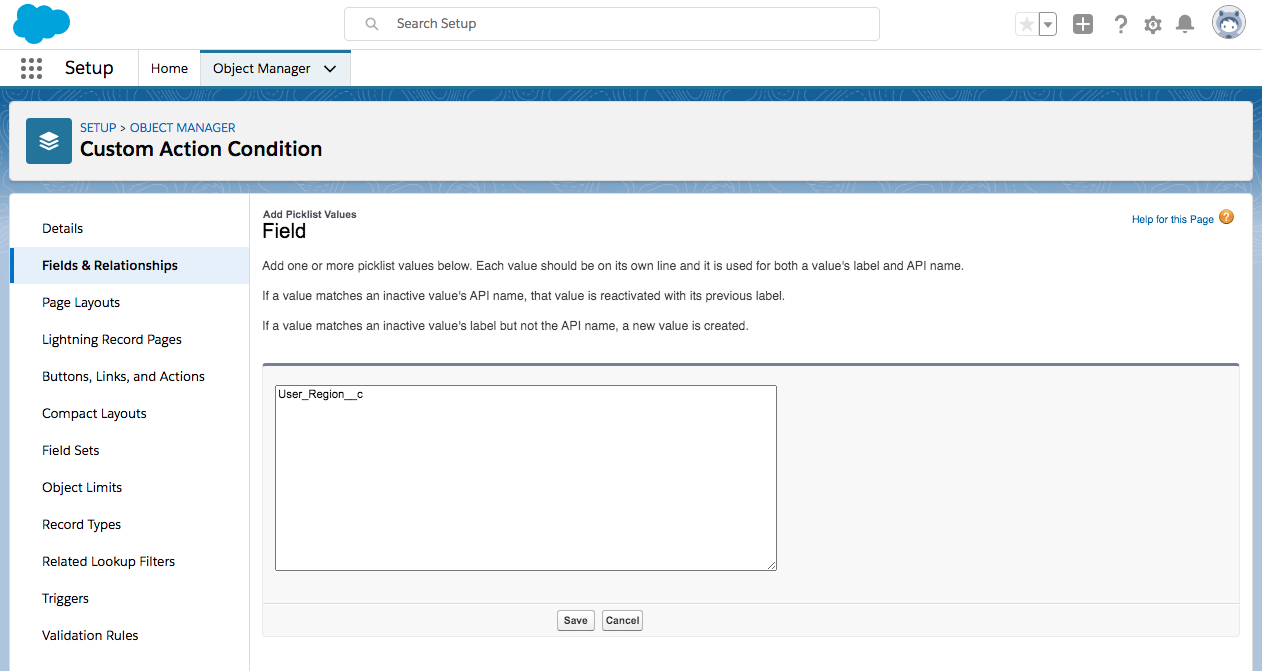
2c. Custom Action Conditions
Finally we create the product region field like a new picklist value on target fields to drive the user search:
- Go to Setup, select the “Object Manager” tab. Search “Custom Action Conditions” in the quick find box.
- On the “Fields and relationships” section search for “Field”.
- Add the Quote current user region field as new picklist value (note: always use the API name)
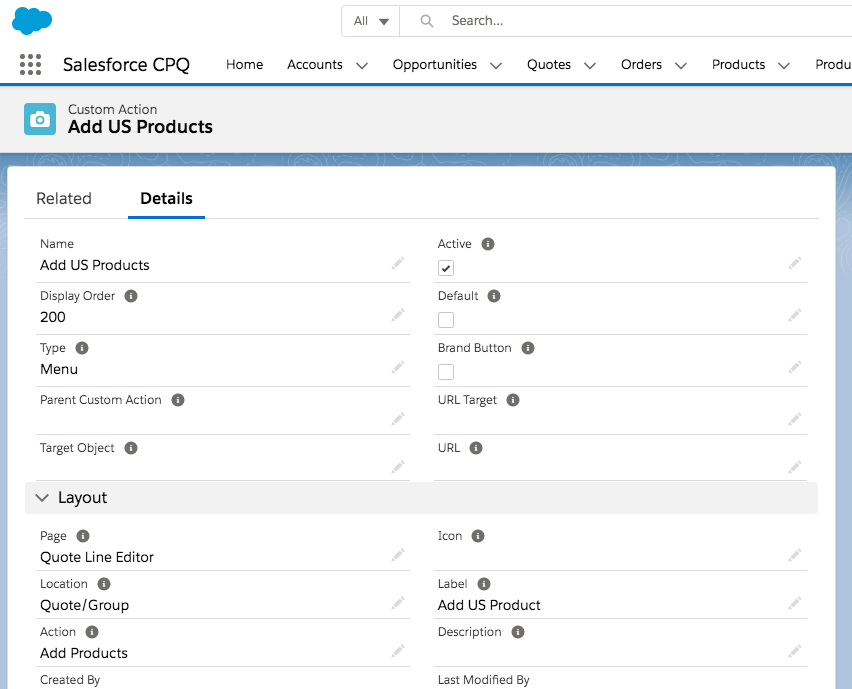
Step 3: Create the Custom Action
We are ready to create our awesome custom action!
- Go to the App launcher, type “Custom Action” using the item search and click on “Custom Action”. Click on the “New” button.
- Create the first Action for “US Sales” (shown in the image below):
Step 4: Create the Filter
We need to create this Filter record to filter and only show products related to the US Region.
Go the related list called “Search Filters” on the US custom action and create a new filter (shown in the image below):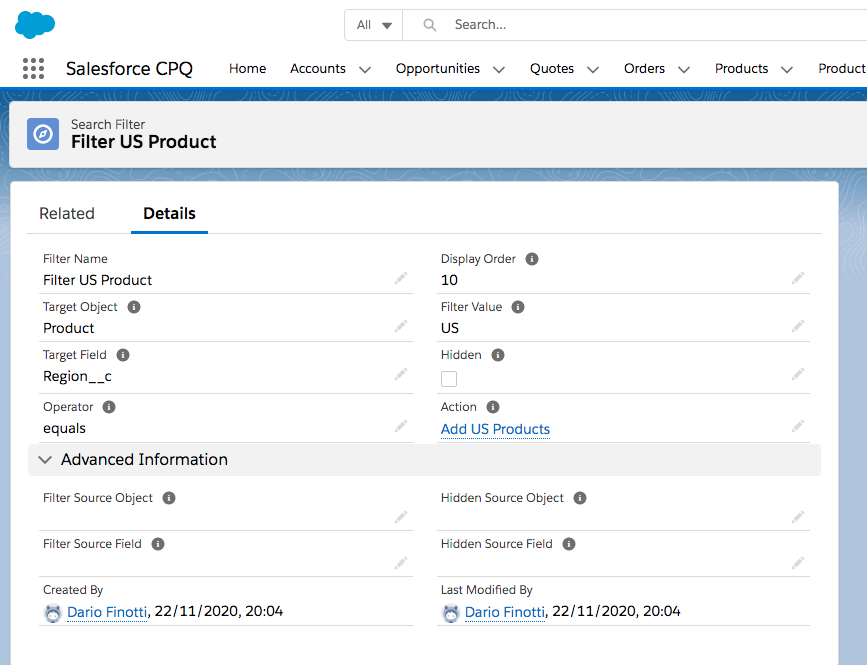
Step 5: Create the Custom Condition
We need to create this Condition record to filter and only show the action to users assigned to the US Region.
Go the related list called “Custom Action Condition” on the US custom action and create a new Custom Action Condition (shown in the image below):
That’s it! Repeat steps 3 to 5 to create the other Custom Actions and related objects for EMEA.
Step 6: Update the Region Fields on Users and Products
The final step is to update your Product and User records on Salesforce to decide:
- Which product/s to show for each region,
- The list of sales reps assigned to each region.
You should use Dataloader or an ETL tool to update products – I will let you choose your preferred tool.
Step 7: Test your results
To test results during the sales process, perform the following actions in order to test it:
- Login as a US region user,
- Find an existing quote or create a new one,
- Click ‘edit’ on the quote line items,
- Check if the US custom action is visible,
- Click on custom action and verify if only US products are shown.
Summary
I hope this tutorial about how to use Custom Actions with Salesforce CPQ has shown you the power to hide and show products to the right users in an easy and declarative way.
You can have more than 2 actions if you have more than 2 regions and decide to show the standard add product action only to the sales managers and above – just a couple of ways for you to extend this solution further.
