






Highlights
- Users can select multiple records in a List View or Related List and access them in a Screen Flow starting in Winter ‘27.
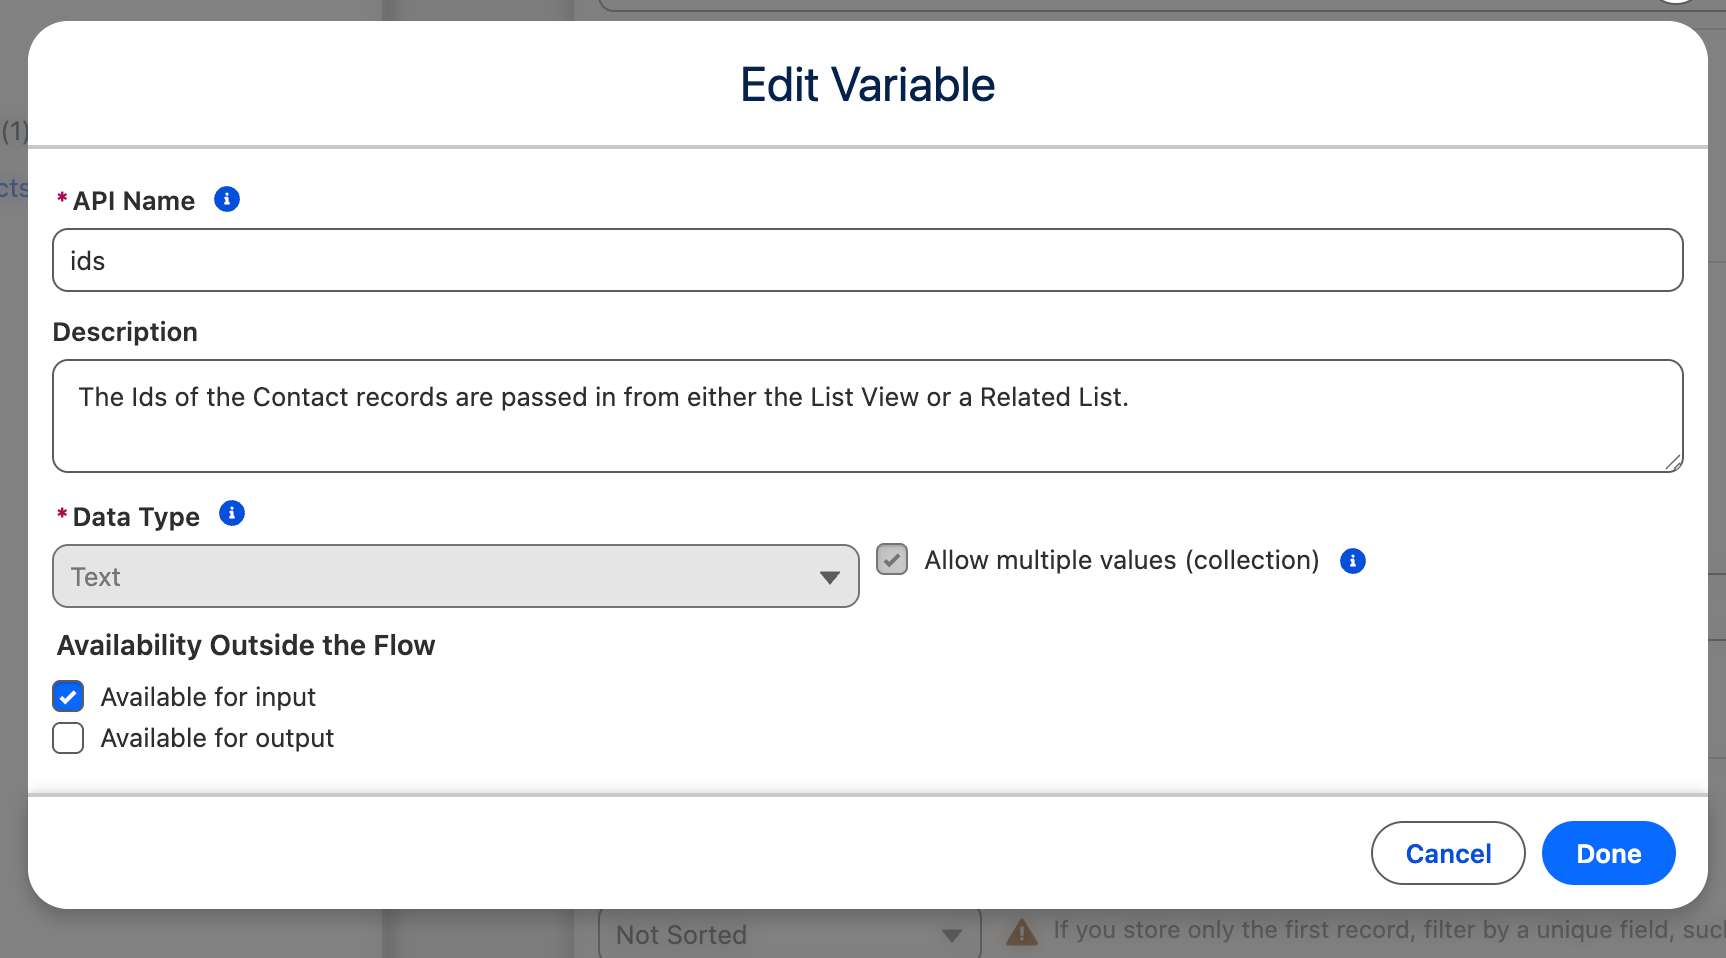
- In Flow Builder, you’ll need a Text Collection variable called “ids” that has been marked as available for input. This is where the Ids of the selected records will be passed, ready for processing.
- The process is as simple as creating a screen flow, creating a quick action on the relevant object, and adding that action to the List View or Related List.
Winter ‘27 was an absolutely huge release, full of new features and improvements. I wrote extensively about some of the new features coming to Flow, and I encourage you to check out the full article for more details.
I wanted to dive deeper into one of the new features that has been a bit overlooked, but is extremely powerful: the ability to perform actions to multiple records at the same time using a Screen Flow.
What Are Mass Actions?
To sum it up briefly, you can select multiple records in either a List View or a Related List and pass those Ids into a Screen Flow to perform mass actions upon. You can empower your users to select multiple records in a List View or a Related List, and click a button to open a Screen Flow in a popup modal.
The possibilities are endless here. It seems like such a small and simple feature, but what you’re actually able to do is open up Screen Flow to your end users in a whole new way.
Setting It Up
Configuring this new feature is extremely simple, but it may not be immediately obvious how to do it. I’ll break down exactly how to do this below. Together, we’ll build a simple Screen Flow, then apply it to both a List View and a Related List.
Building the Screen Flow
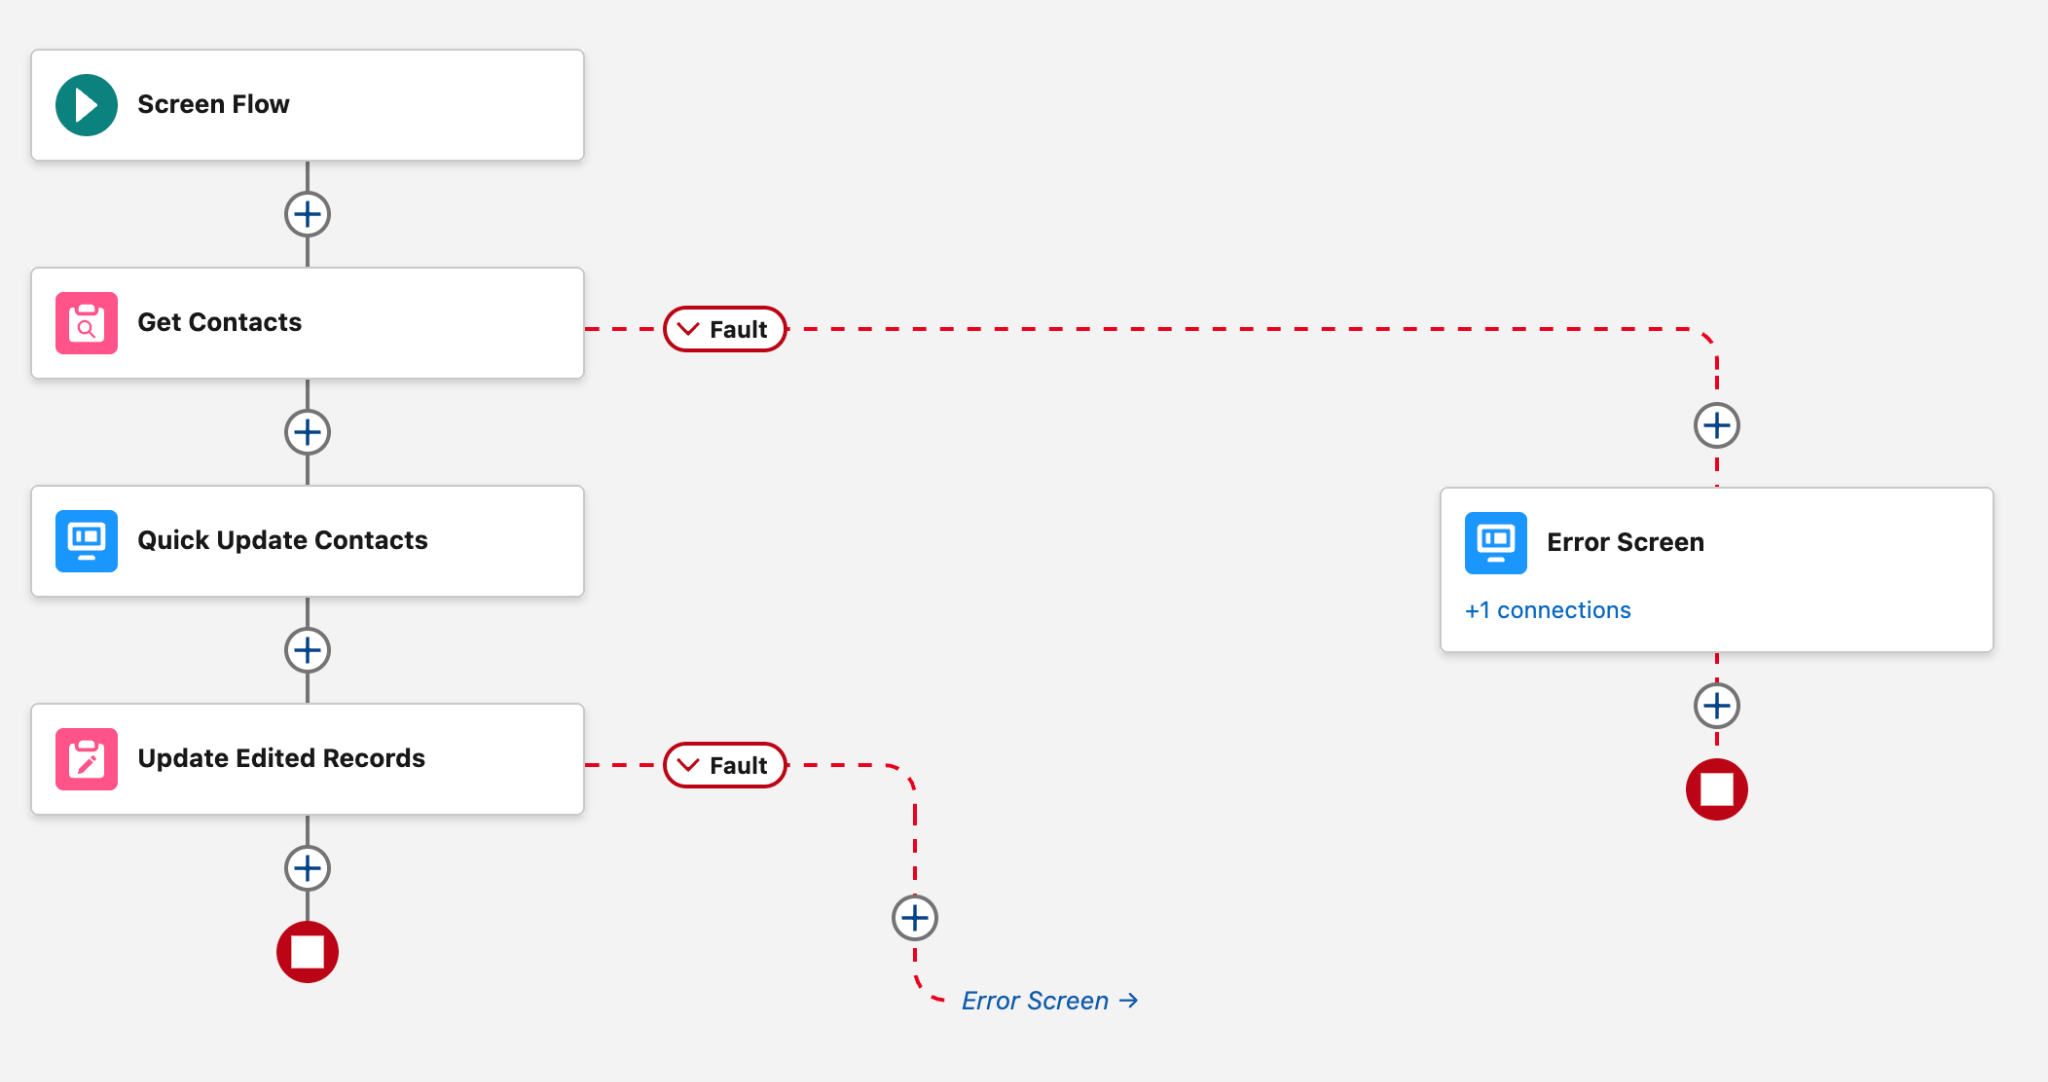
Firstly, we’ll build a simple Screen Flow that will receive the Ids of one or more Contact records, and offer to update some basic information on the records. To do this, open Flow Builder and create a new Screen Flow. Then, the first thing we’ll do is create a new Text Variable called “ids” (MUST be lowercase), allow multiple values, and enable it to be passed in as an input.
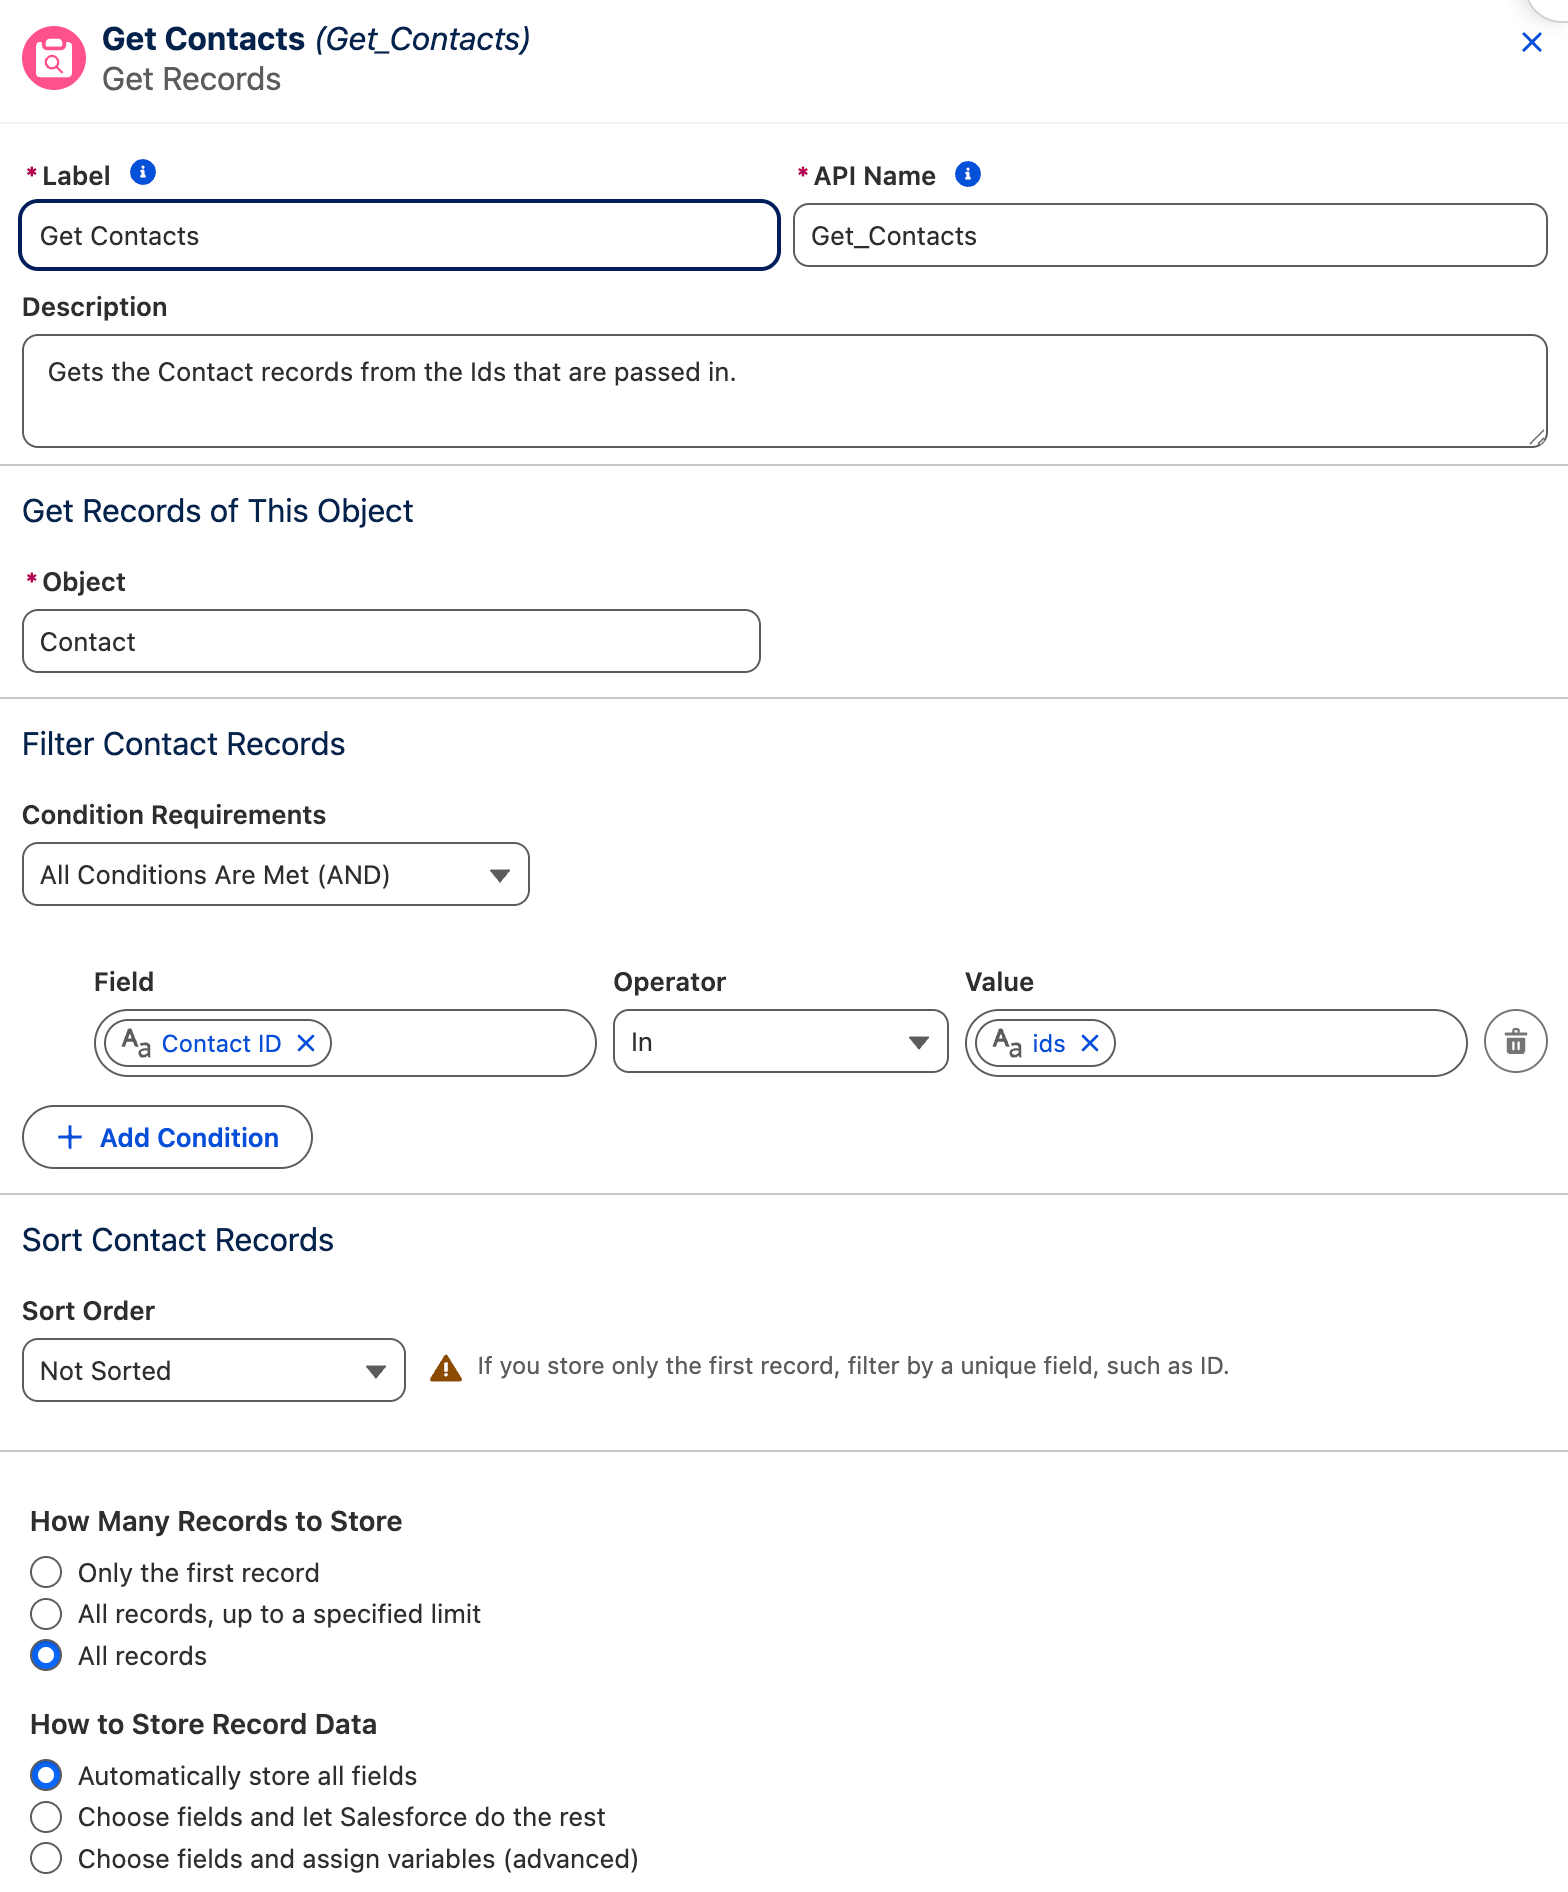
Then, we want to get the Contacts based on those Ids.
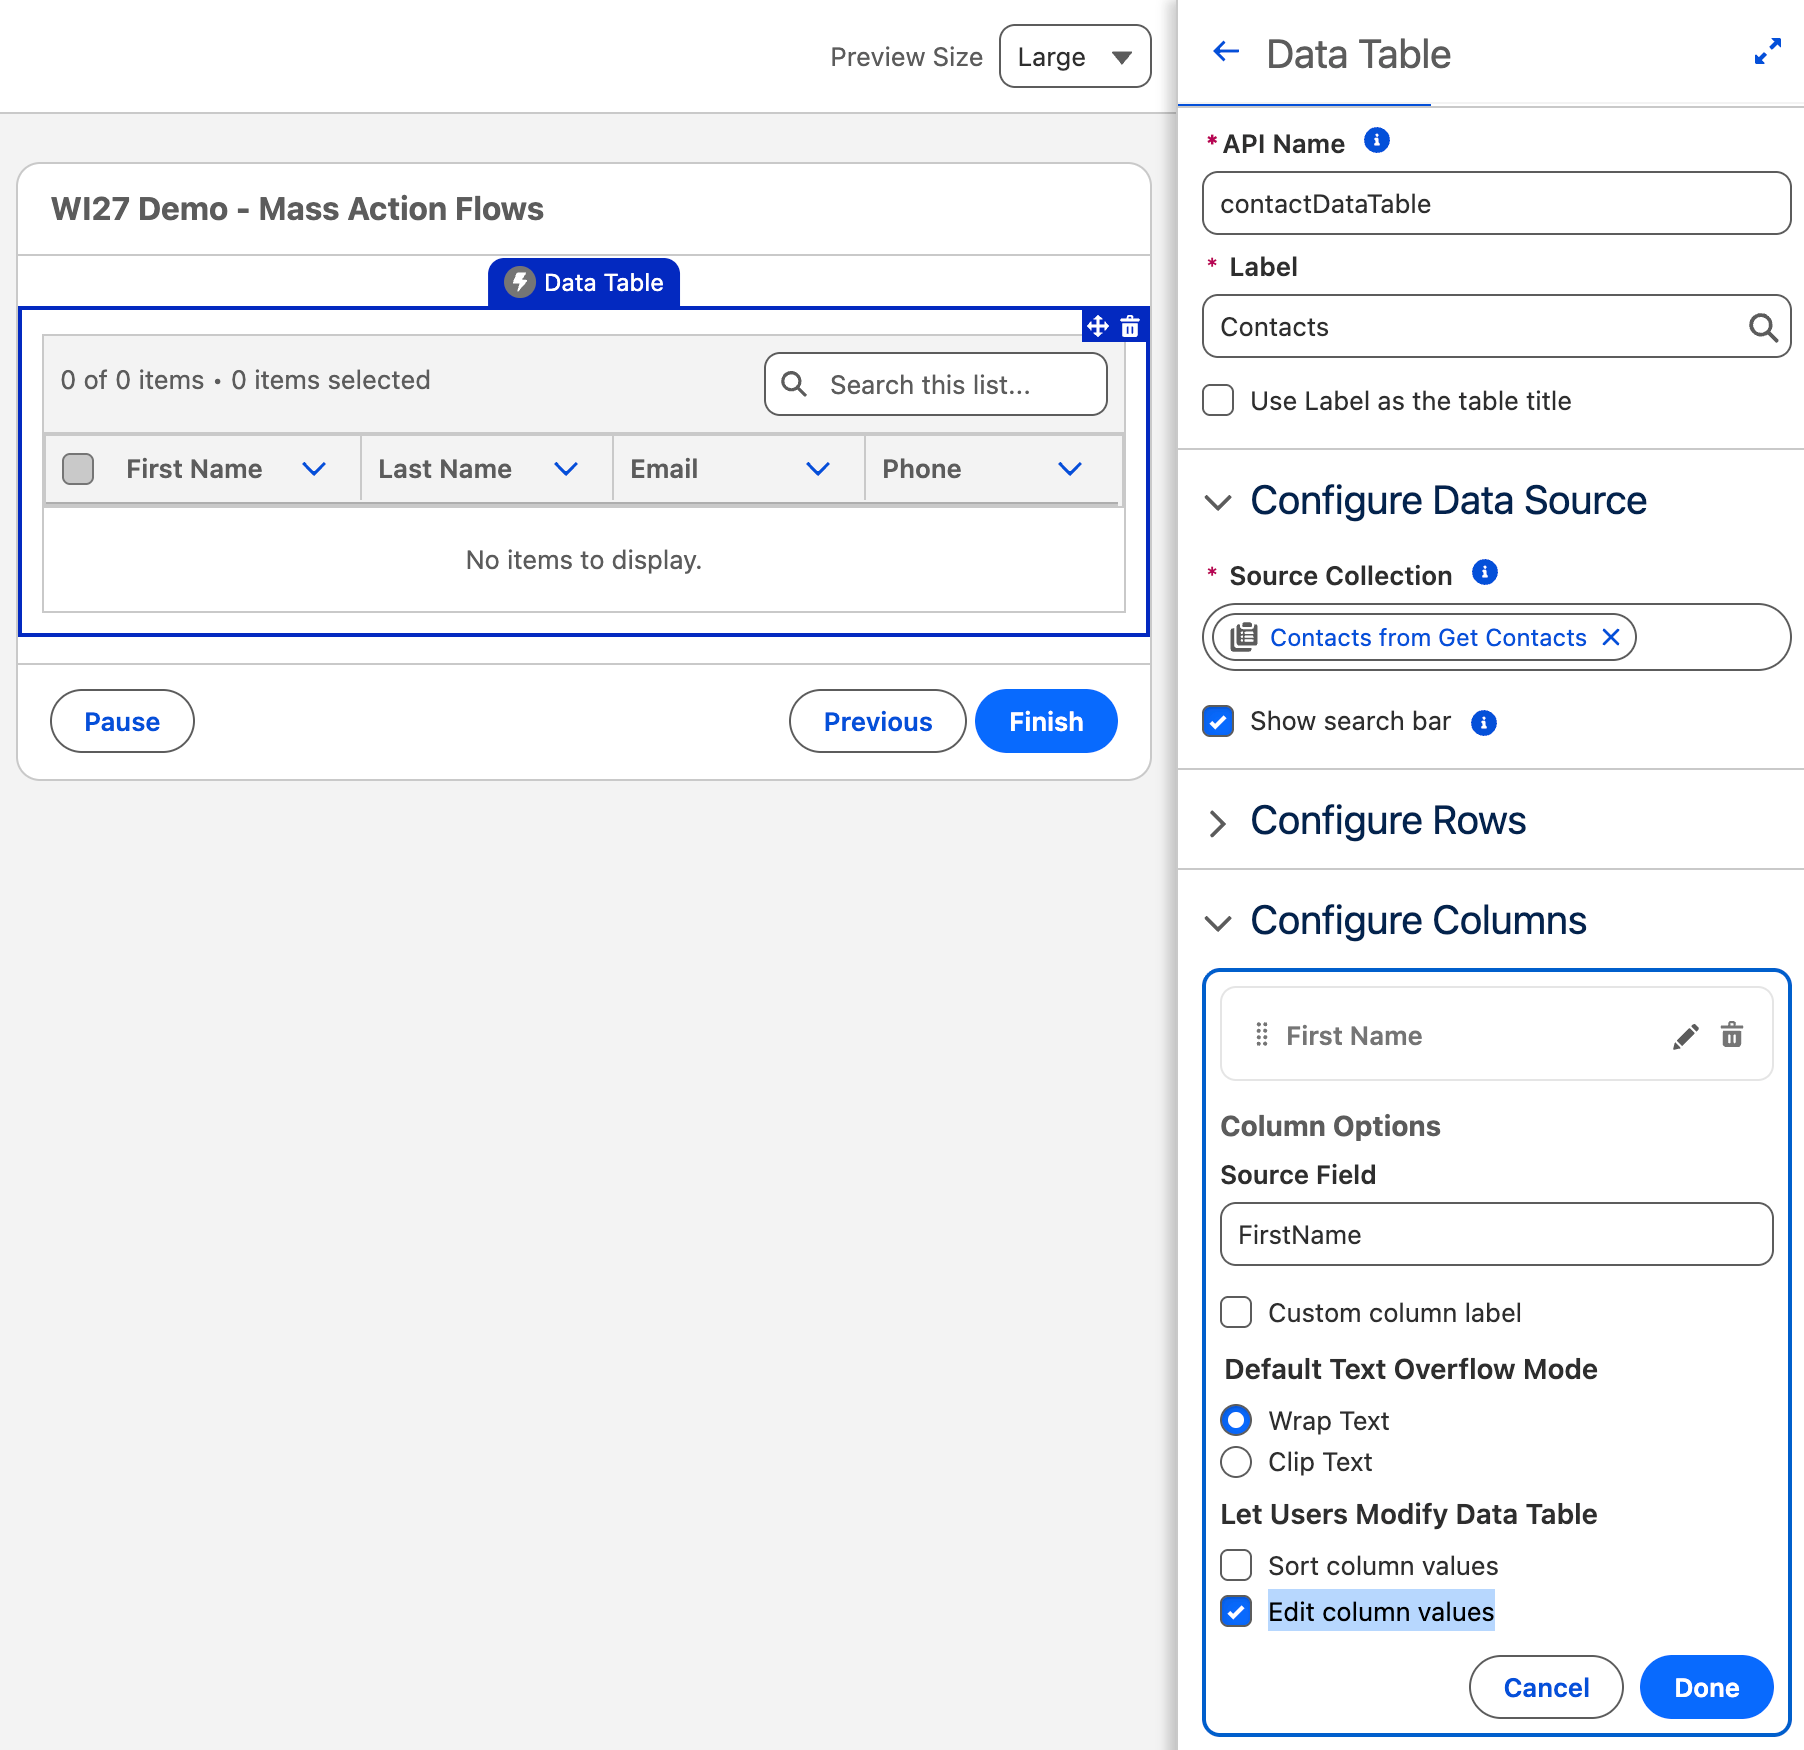
You’ll then need to create the Screen itself. To keep things simple, I added a single Data Table component to the Screen, added the First Name, Last Name, Email, and Phone fields to it, and made sure each of those was set to be editable.
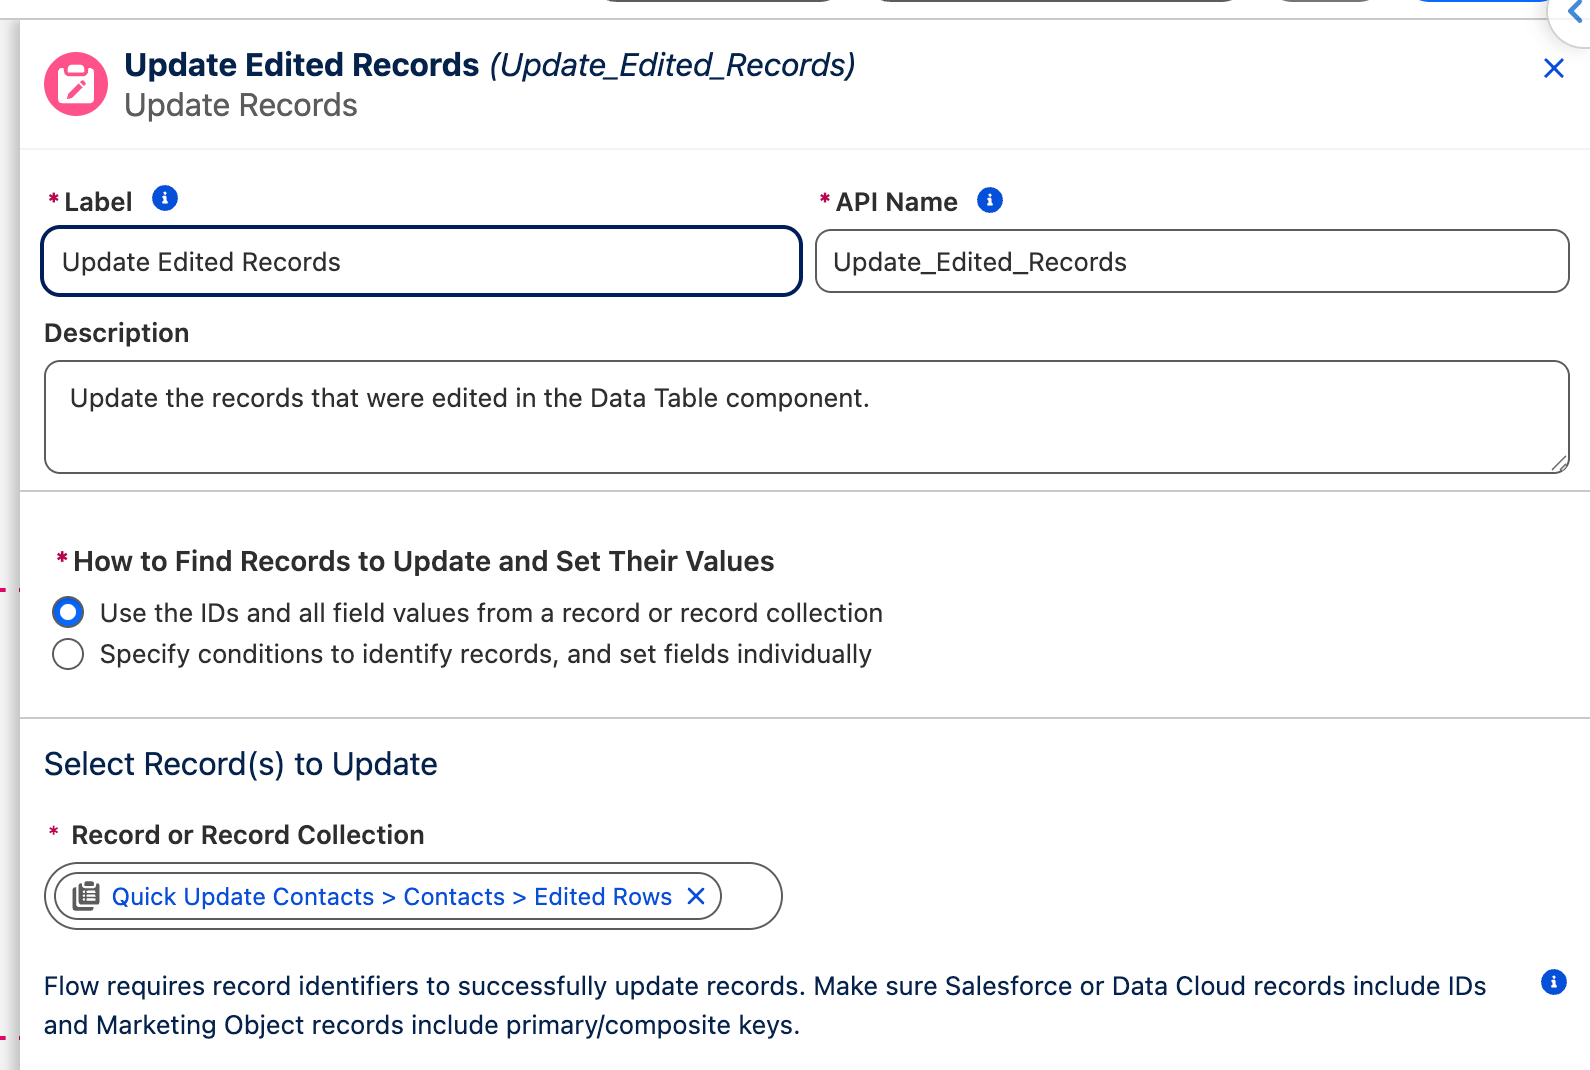
Finally, you want to use an Update Records element to update the records that were edited in the Data Table component.
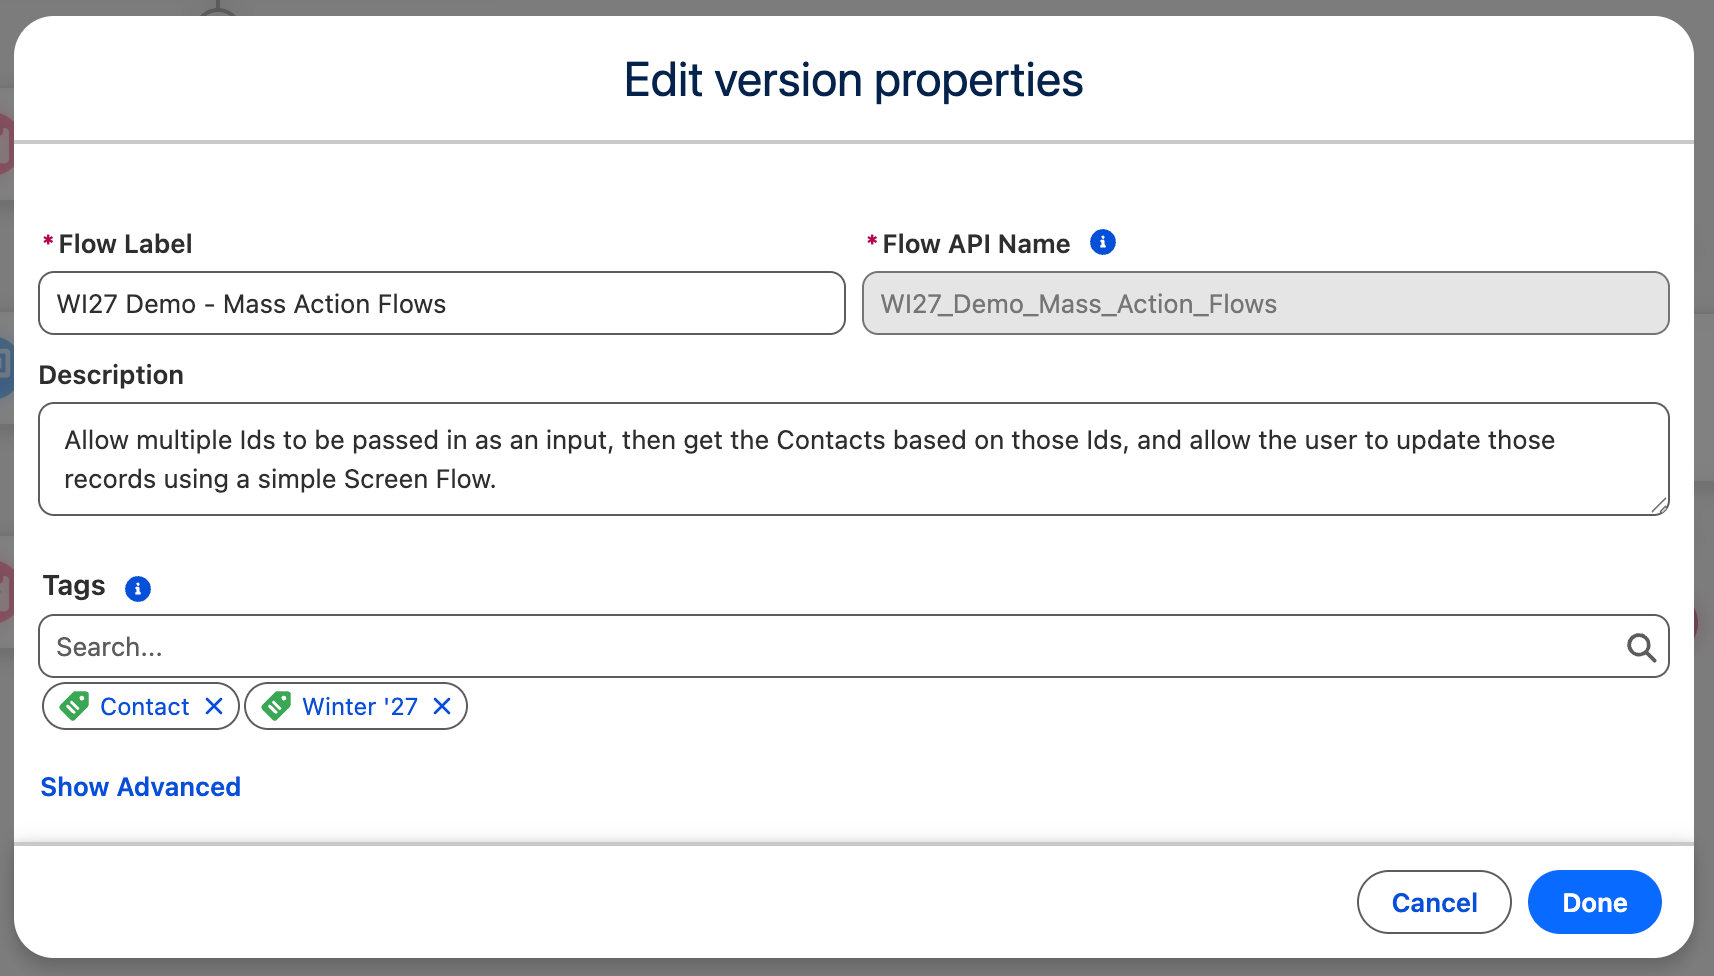
This is a great time to save the flow. I gave mine a quick name of “WI27 Demo – Mass Action Flow”, but you can get a bit more creative if you want. I’ve also tagged the flow accordingly.
Finally, add some method of handling your errors, and ensure you’ve got fault paths set up for each of the pink elements.
Finally, don’t forget to save the flow once you’re totally done, and activate it after testing!
Building the List View Action
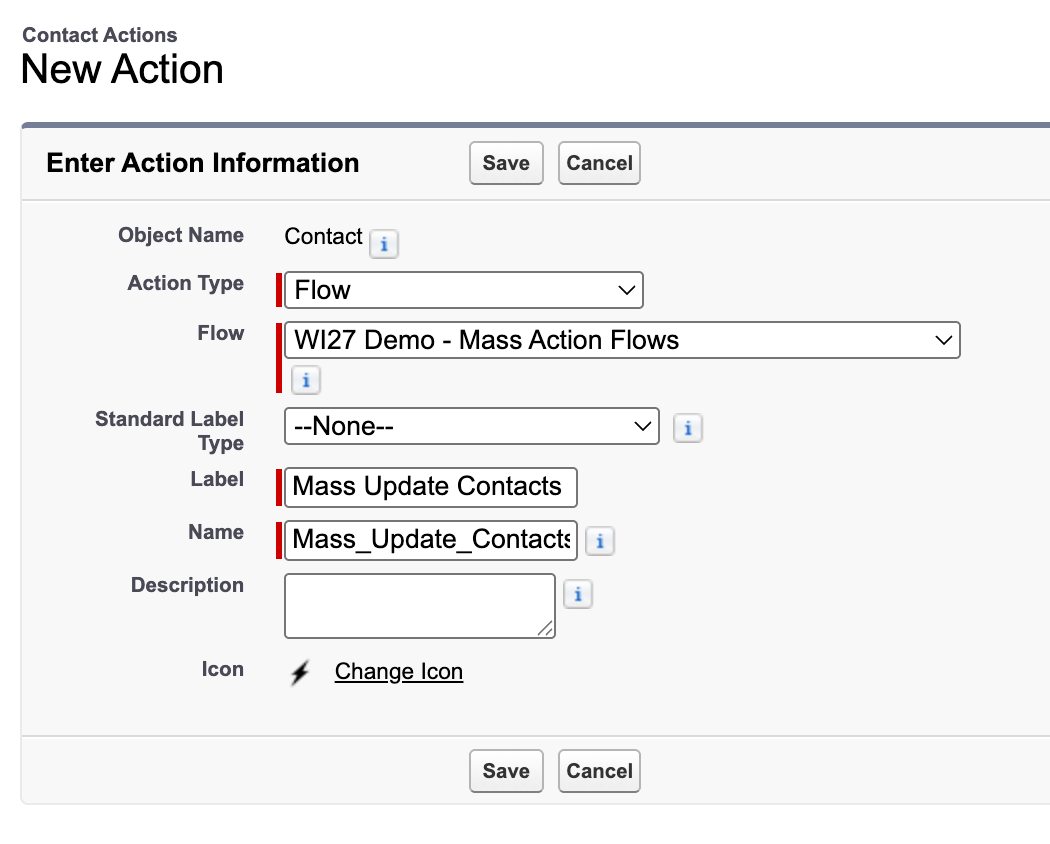
Once your flow is built, head over to Setup, Object Manager, then to the Contact object. Then, open the Buttons, Links, and Actions tab and click New Action. Your action should be built as below.
Action Type: Flow
Flow: Whatever you named your flow that you built in the previous section.
Set the rest of the fields as you see fit.
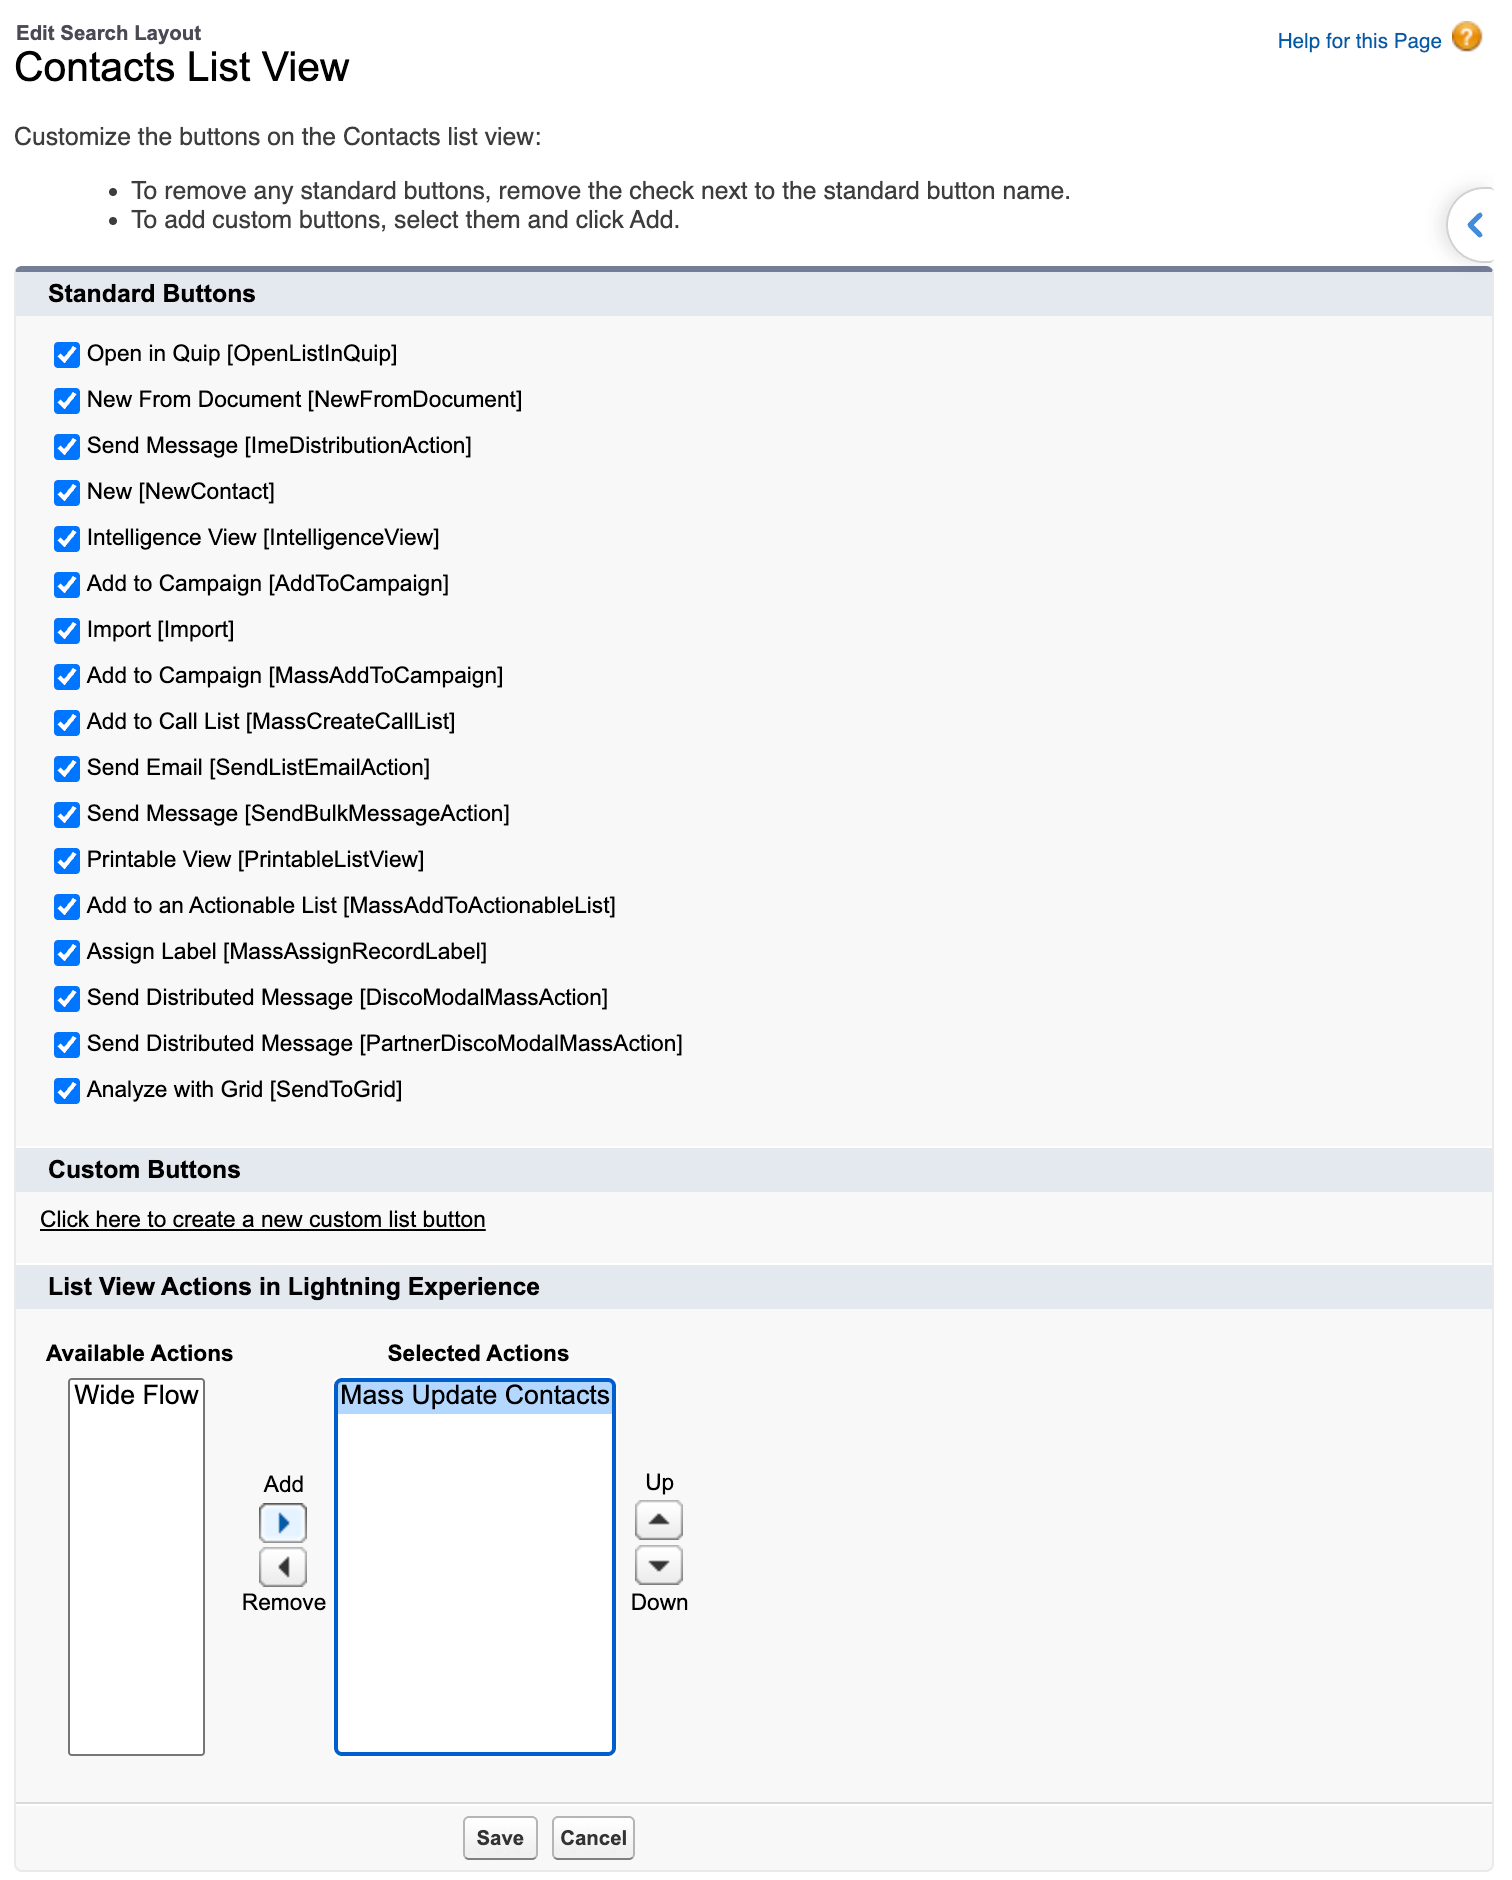
Next, head to the List View Button Layout tab, and edit your layout by clicking on the dropdown and selecting Edit. At the bottom of the page, you’ll see a section called List View Actions in Lightning Experience. Here, you’ll see the action you just created available to add. Add it, and click Save.
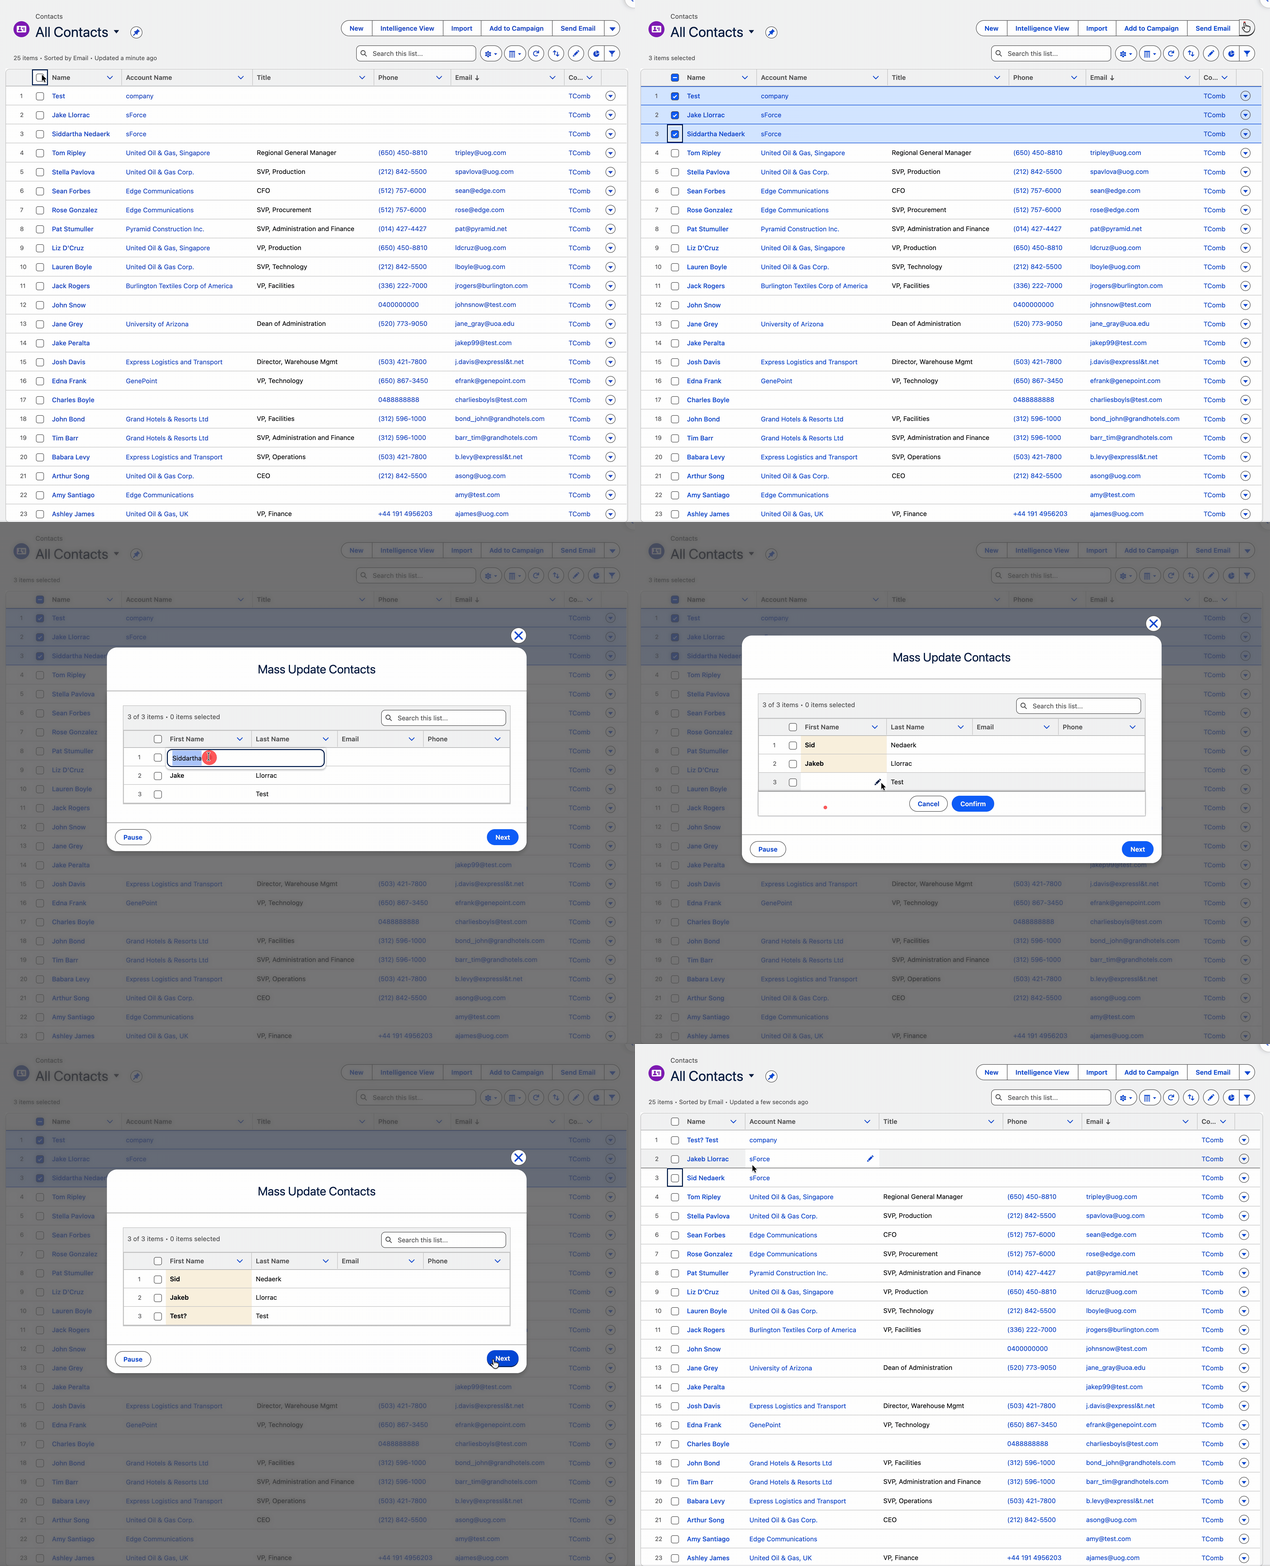
Now, it’s time to test it! Head over to your Contacts tab in the main Salesforce app, open a List View that you know has some records you can edit. Then, select the records you want to edit, and click on the action you added to the List View.
Building the Related List Action
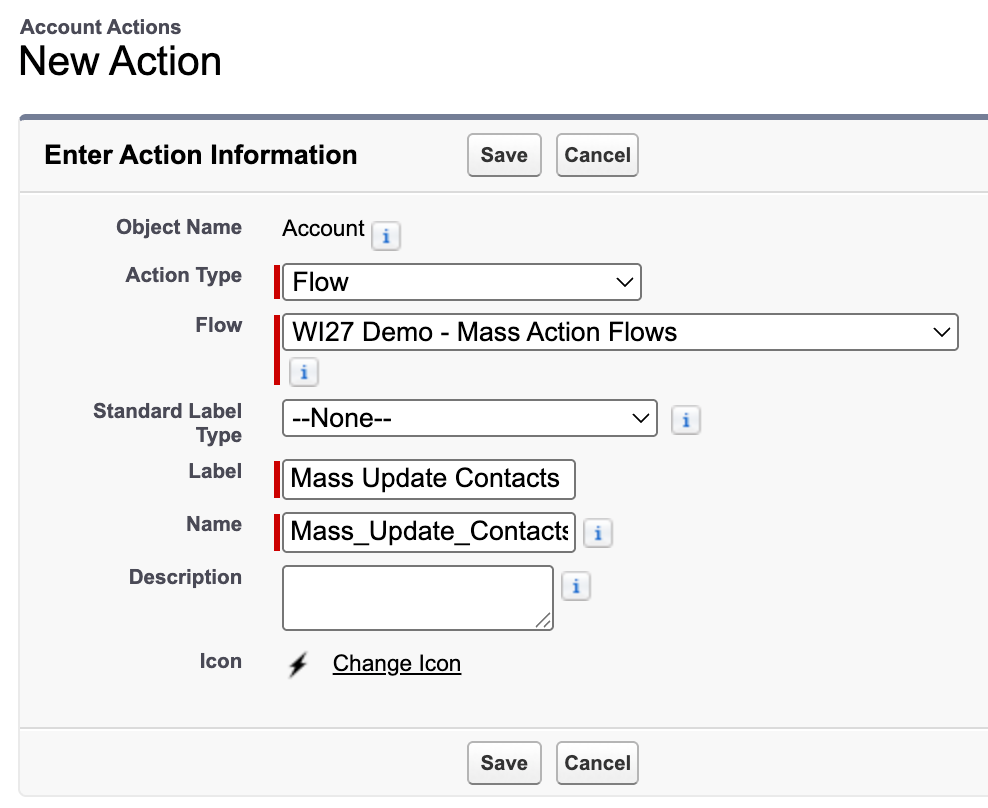
Now, let’s add the same flow as an action to the Contacts Related List on the Account object. Head over to Object Manager, then to the Account object. Create an action as you did in the previous section. The details should be as below.
Action Type: Flow
Flow: Whatever you named your flow that you built in the previous section.
Set the rest of the fields as you see fit.
This time, head to your Lightning Record Pages tab and edit the Account page that you wish to use. If you don’t have one ready to use, you can go to any Account record and click on the cog, then Edit Page.
If you don’t already have one, add a Dynamic Related List – Single component to your page, and set it up to display Contacts. Then, in the Properties panel for that component, head down to Actions, and add the action you created in the previous section.
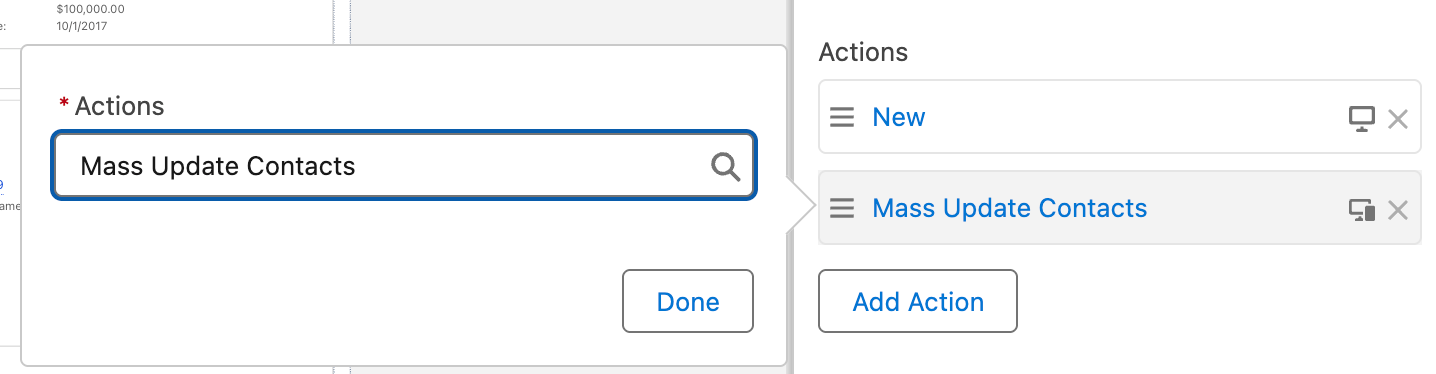
After you’ve added the Action to either a new or existing Dynamic Related List, save your page (and activate it if necessary).
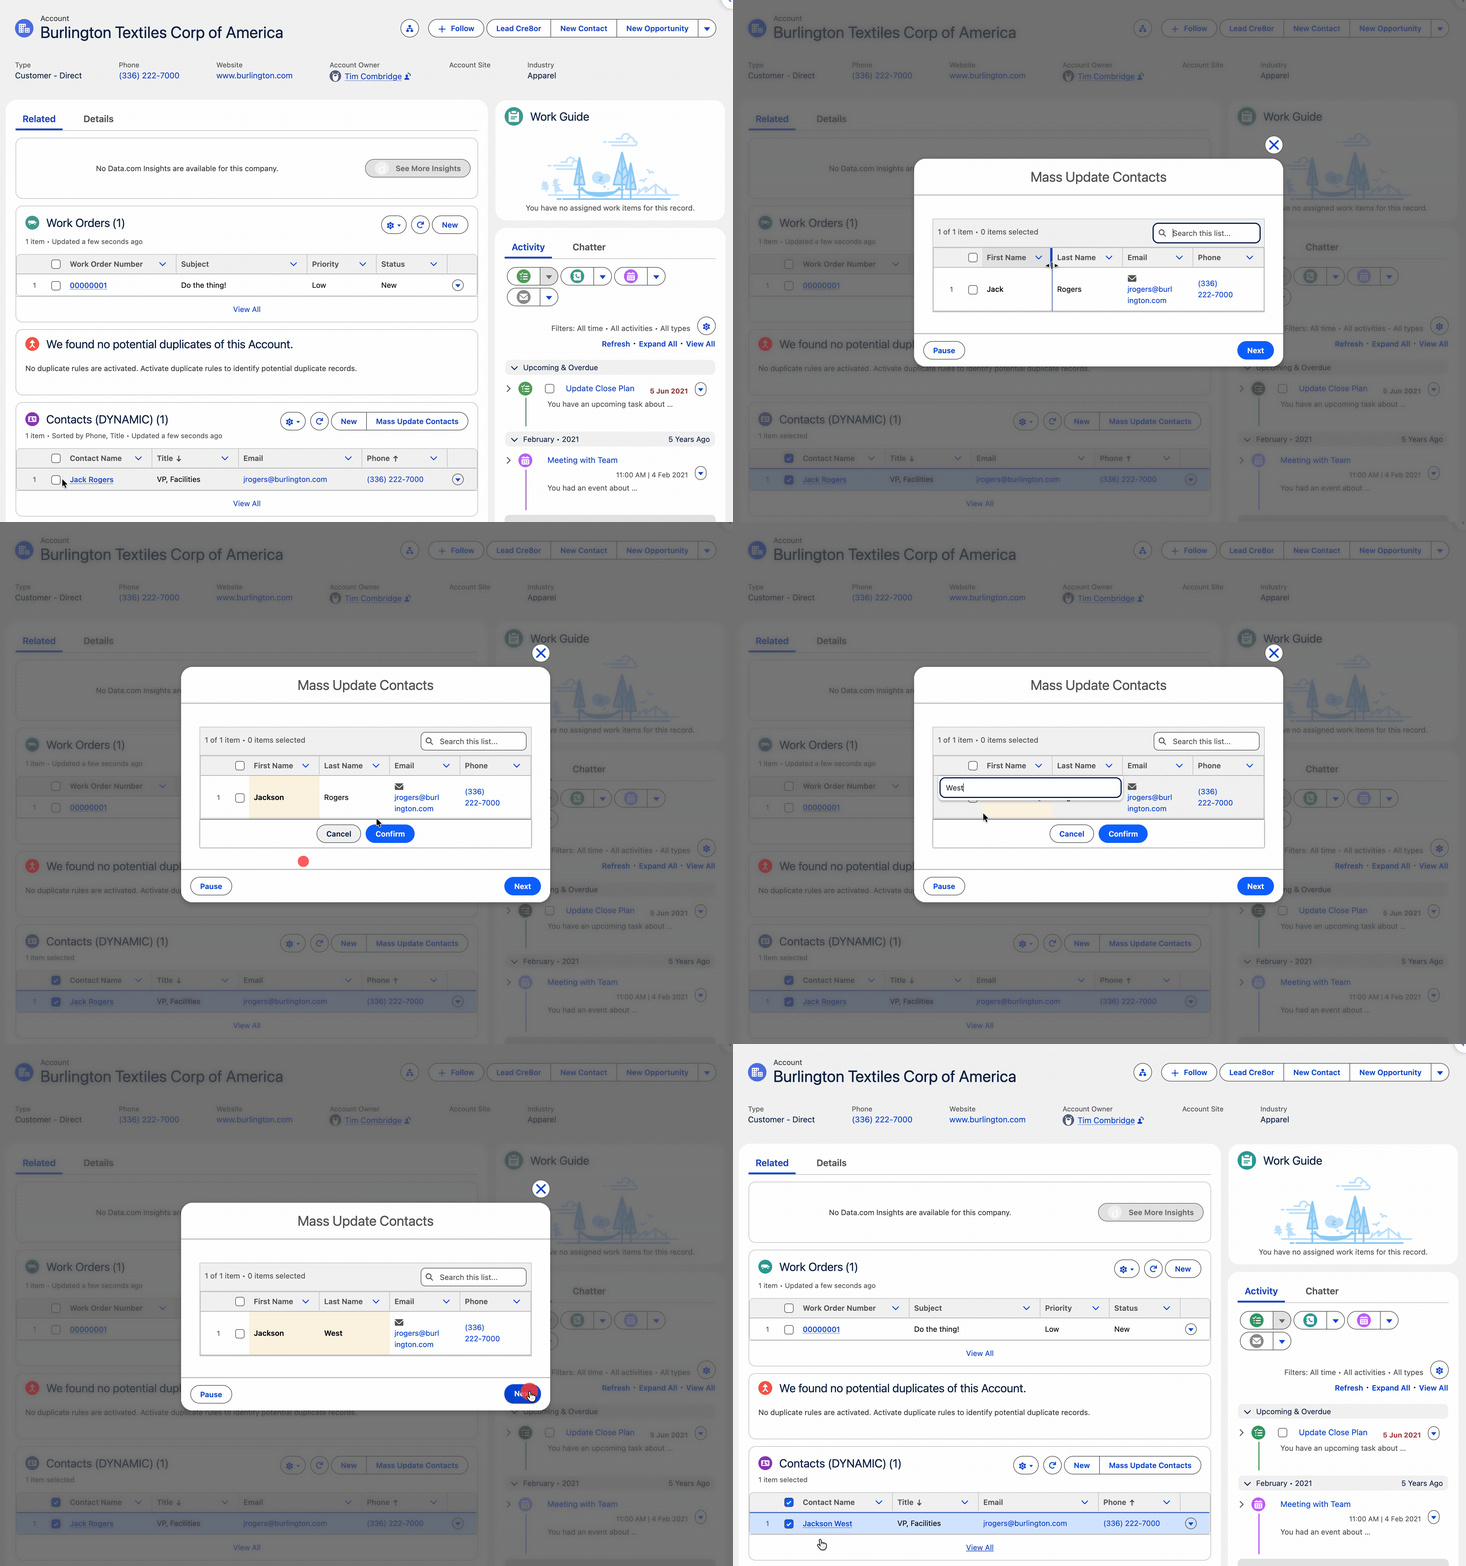
Once again, it’s time to test your work. Go to an Account record that has some related Contacts, and see if all is working as expected.
Use Cases
This one is tough, because we’re talking about Salesforce Flow here! The tool is so powerful, so flexible, that there’s truly no end to what you can do with it.
One idea that comes to mind is the ability to reassign multiple records to a new owner in one hit, but set the new owners one-by-one or in bulk as required. You could build a screen flow that gives users the ability to select which new owner should be assigned to each record, and maybe even add some notes to the record as well as a mini-handover.
My colleague Peter shared a story of building a Visualforce page (back in the day) for a school charity to progress pupil records to their next class at the end of the school year. This new Flow feature would be a great fit for that problem.
Another example would be for bulk status updates. If you’ve got a busy sales team who want to update all of their opportunities that they’ve actioned in the day in a single hit. Similar to the above scenario, they could also update opportunity notes in bulk when they do this.
Considerations
Remember that you need to use a Text Variable Collection that has been made available for input, and it must be called “ids”.
Most of the other considerations that you need to be aware of are the same as any other screen flow. Be mindful of downstream automations that may fire as a result of anything the flow does, and be mindful of governor limits when building your flows.
Notably, this will only work in Lightning Experience. If you’re still using Salesforce Classic, you really must get with the times!
Summary
Winter ‘27 was so big that this feature may have flown under your radar, but I hope you can now see just how powerful it is to be able to feed multiple records into a screen flow so easily. The possibilities truly are endless once you can think of a use case that would benefit from it.
Speaking of killer use cases, have you got one in mind already? Share this post on LinkedIn and tag me (Tim Combridge) and the SF Ben page; we’re always stoked to hear how the global Salesforce community is using new Salesforce Flow features!