


Duplicates are nasty. Duplicates are a problem for all marketers, splitting a Prospect’s profile across several records (leaving gaps or causing conflicts), and of course, skewing Engagement Metrics.
There’s no doubt that duplicates in Salesforce are universal pain in the backside. Why duplicates are a pressing problem for Pardot marketers, in particular, is due to a six-letter acronym: AMPSEA (Allow Multiple Prospects with Same Email Address). The change that AMPSEA bought in, means that for every lead or contact in Salesforce, you have an equivalent prospect record. Any duplicates created on the SF side will be synced down to Pardot. Now it’s been turned on as default for any new accounts, many marketers are feeling the bite of bad data.
Cluttering your Pardot account is bad – that’s not news – but people typically sweep the topic of tackling duplicates under the rug until it’s too late. Hitting up against your Pardot database record limit is when you are forced to reduce down your prospect records.

Merging in Salesforce is one way to do this. First, you have to see the scale of the issue and identify.
In this post, I will show you how to build a report that will show you duplicate Leads that have been detected when Salesforce Duplicate Rules processed.
Before we kick off, I am assuming that you have the recommended matching and duplicate rules in place. Here’s more information on Salesforce Duplicate Management, including the recommended Standard Matching Rules and Standard Duplicate Rules, plus Stacy’s fantastic recommendations for taking these Duplicate Rules further (a post that has proved very popular!).
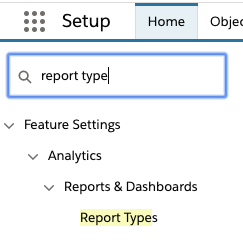
Step 1: Create a Custom Report Type
Go to Salesforce setup, and search for ‘Report Types’.
- Click ’New Custom Report Type’.
- Choose Leads as the Primary Object.
- Name your report type, eg. Duplicate Leads Detected. Add a description, I like to describe what our business considers a duplicate, ie. what criteria the rule is looking for matches on.
- Store in the ‘Administrative’ category.
- Select ‘Deployed’.

Step 2: Relate Report Objects
On the next page, find the dropdown in the ‘B’ box, and select ‘Duplicate Record Items’ from the dropdown box.
Keep the A to B Relationship as ‘Each “A” record must have at least one related “B” record.’ What this is saying is: only pull leads into the report that have been marked as duplicate.

Top Tip: to create the report type for your next object, you have to start from scratch. The clone button only works if you are creating a report type for that same object.
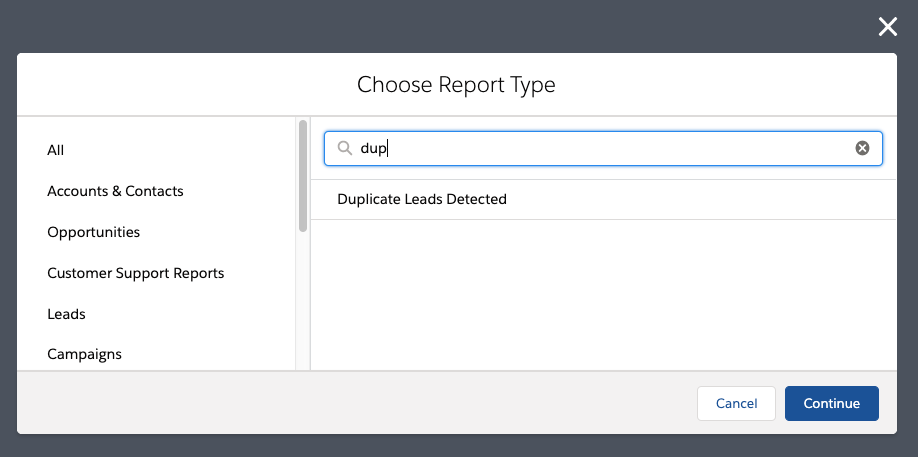
Step 3: Create the Report
Hop out of setup and back into the main interface. Go to the Reports tab, click ’New’ report, and search for the report type you created.
Add the columns you want to the report. I recommend adding the ‘Converted’ field, as this will help you distinguish between leads and contacts in the report. Add any groupings you fancy (for making charts) – but mine is only a functional report.
Make sure you save the report, then ‘Run’.

Step 4: Grant Access to Users
Who needs to report on duplicates? Is it a group of users, or individuals?
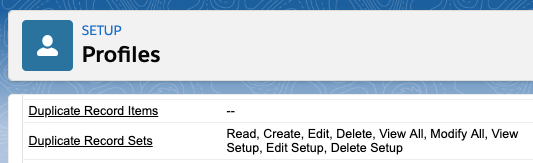
For those of you who know your way around Profiles & Permissions in Salesforce, this is the correct profile-level access users need to use the duplicate reporting:
I’m now going to show you how to grant access to duplicate reporting using a permission set*.
(*! this is one option out of a few. Permission sets are the most flexible permission that can be added and removed from individual users. You/your admin may instead decide to amend the object permissions at the profile-level).
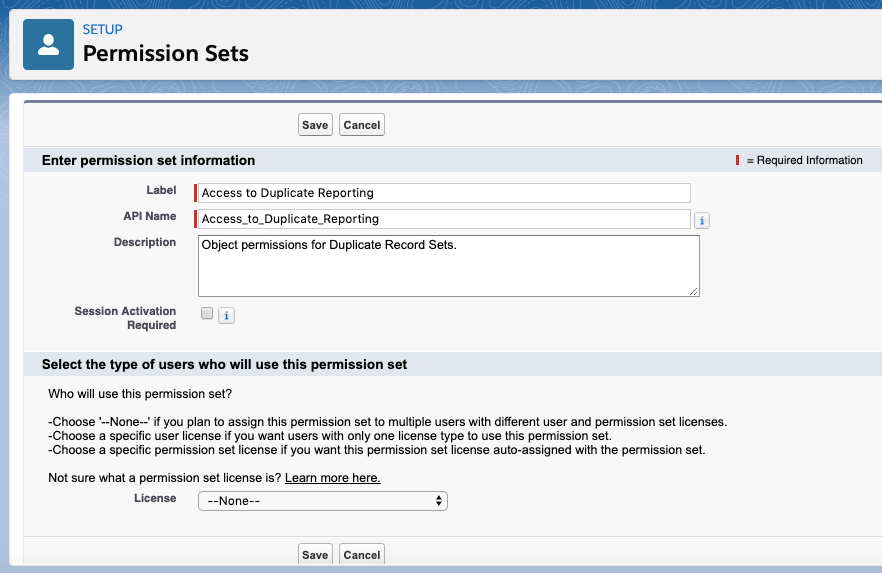
Back in Setup, search for ‘Permission Sets’, and bring up the list.
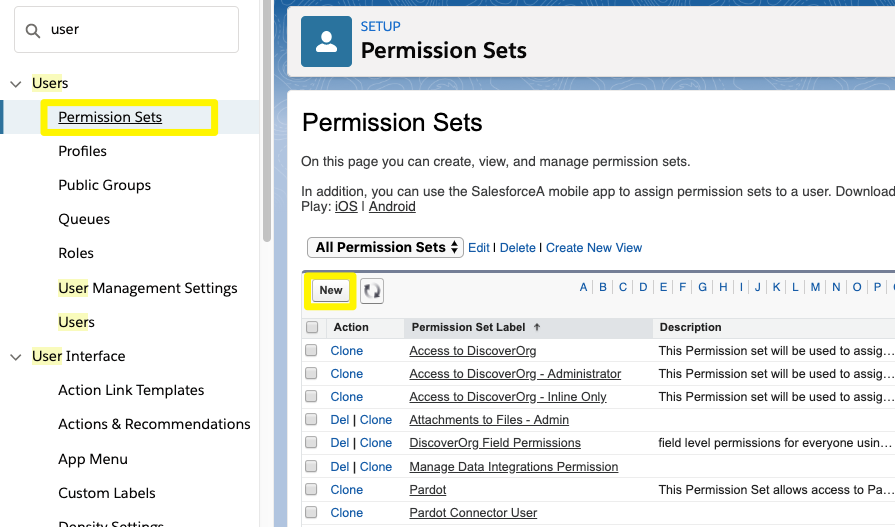
Create a New Permission Set, and call it “Access to Duplicate Reporting” or similar:
Head to ‘Object Settings’, 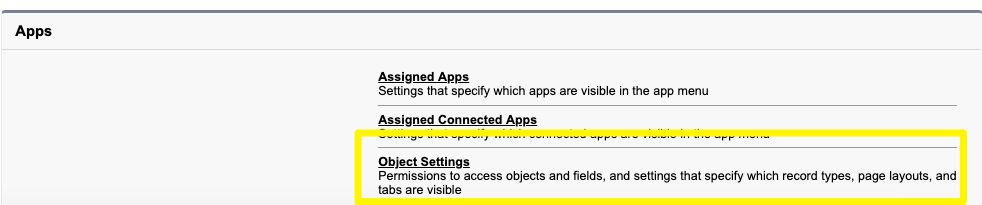
Find Duplicate Record Sets in the list, click into it, then ‘Edit’.
In the ‘Object Permissions’ box, select:
- Read
- View All
It should look like this:

Click ‘Manage Assignments’, and add the users who need access.

Top tip: make sure that these users have access to the report folder where these duplicate monitoring reports are stored!
Step 5: Stamping out those Dupes!
Depending on how your Duplicate Rules have been setup, users should be alerted on screen when duplicates arise. This is in the form of a banner message, and visible also in the Potential Duplicate Component (you will need to add this to your Lightning Record Page Layout).

From this component, you can begin merging Leads.
! Warning: merging is irreversible!
Duplicate contacts and leads will appear in the popup window. You can choose up to 3 leads to merge (but, you can only merge leads with leads, not leads with contacts). Next, you can select which values to keep as the master for each field.

! Warning: again, merging is irreversible!
Summary
Duplicates are nasty. Duplicates are a problem for all marketers, splitting a Prospect’s profile across several records (leaving gaps or causing conflicts), and of course, skewing Engagement Metrics.
Merging Lead/Contact records in Salesforce is the way to do this, but first, you have to see the scale of the issue and identify the duplicates – which is what the report you have created in this tutorial will enable you to do!