One of the amazing features of the Lightning Experience is the ability to customise almost anything. Salesforce built Lightning from the ground up and designed it to be componentized and therefore easily customisable. The best bit? It can be done with all clicks and no code, unlike Salesforce Classic.
A feature that I see completely underutilised across clients org’s is the ability to customise record pages with templates. I believe as most people are most recently making the switch to Lightning, they are too used to not being able to modify the general layout of Salesforce and therefore don’t realise the power of Lightning yet.
Lightning pages give you the ability to create completely customised pages using a set of premade templates, you can create three types of Lightning pages: Home page, App page or Record Page. For the purposes of this tutorial, we are going to just look at record pages.
Lightning Templates
Record pages in Lightning are your objects. If you click into a Lead, Account or Opportunity record, the screen you are presented with is the record page. When you navigate to create a record page, you are asked to select the object you wish to create one for and are presented with a number of standard templates (Custom templates are available but require a developer). With each Template, you can modify to your heart’s content with a variety of standard components (For a few of my favourites, check this post).
It’s important to remember when deploying this to your own, or a client’s Org, that everyone uses different features and has different priorities in Salesforce. For some they might not use Chatter, others might value the detail page over any other section. This could differ by profile as well, support might want a completely different layout than sales. Finding out this information can help you build out your Lightning pages to suit your client.
Let’s check out a few…
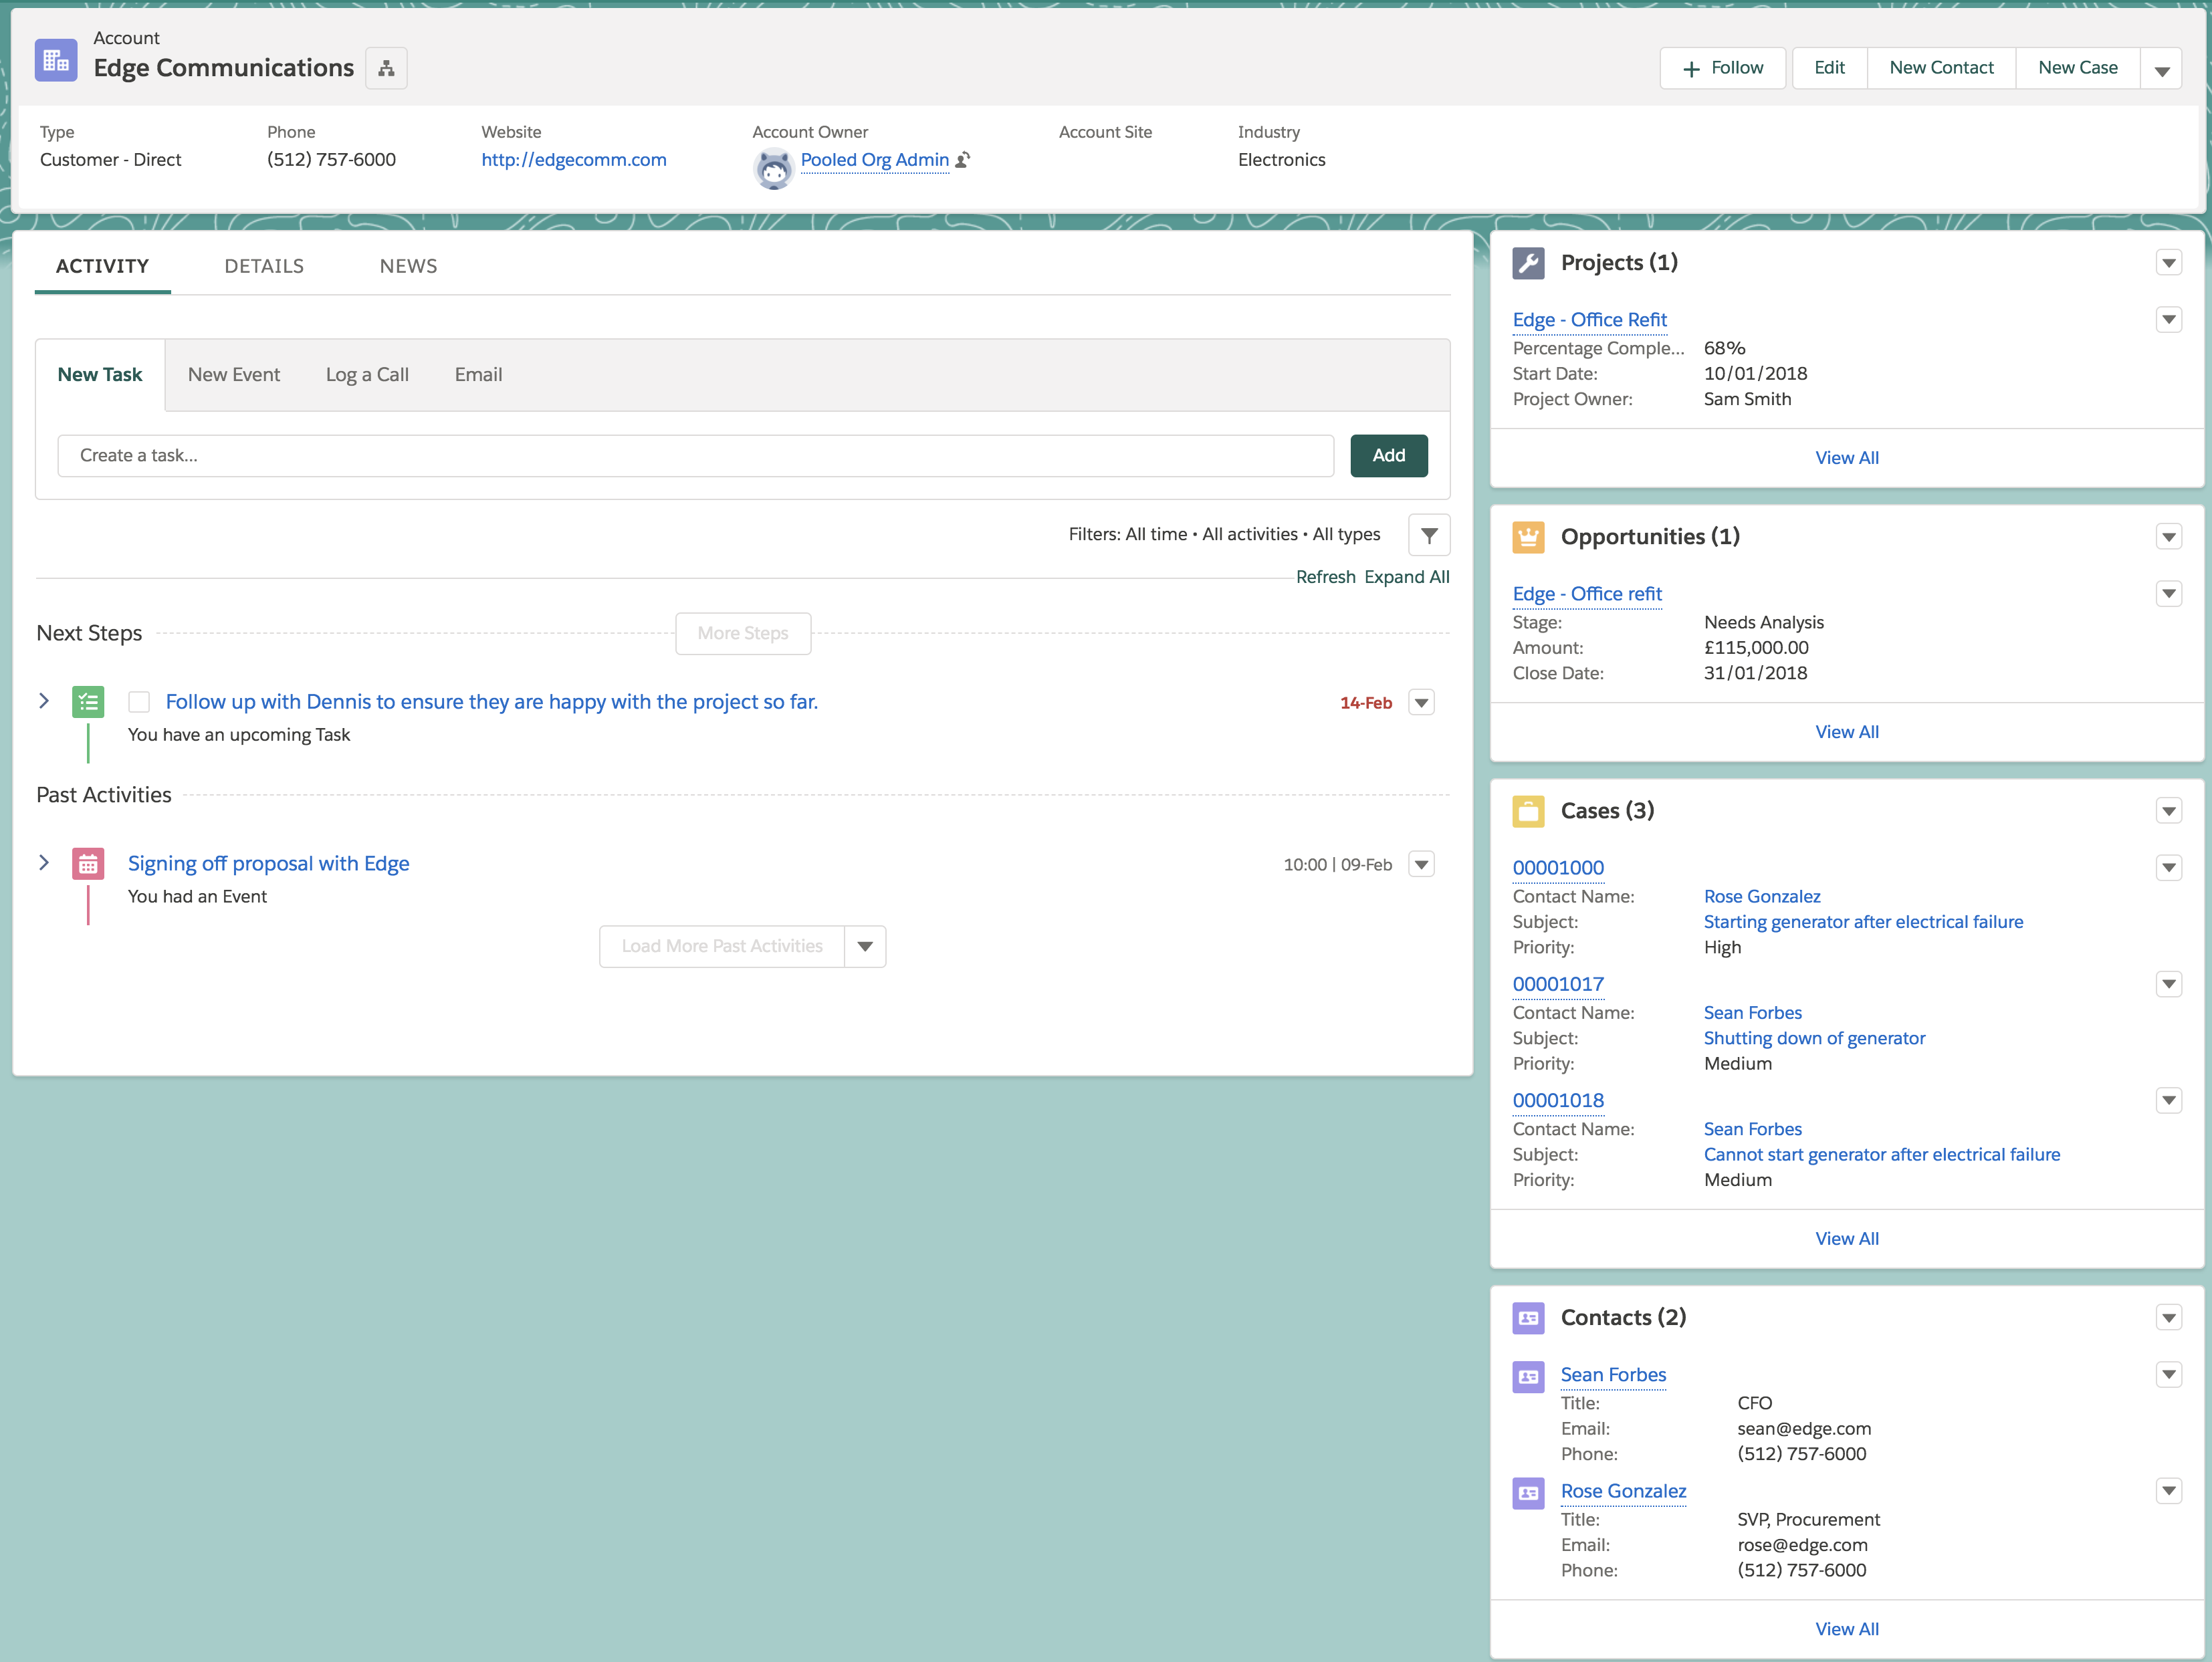
Header and Right Sidebar
The default Lightning record page is up first. This page has been slightly modified from the default, but the template remains the same. This template is using the Highlights panel in the top section, with a tabs component on the left showing a variety of information spread across different pages, and the related list component on the right column.

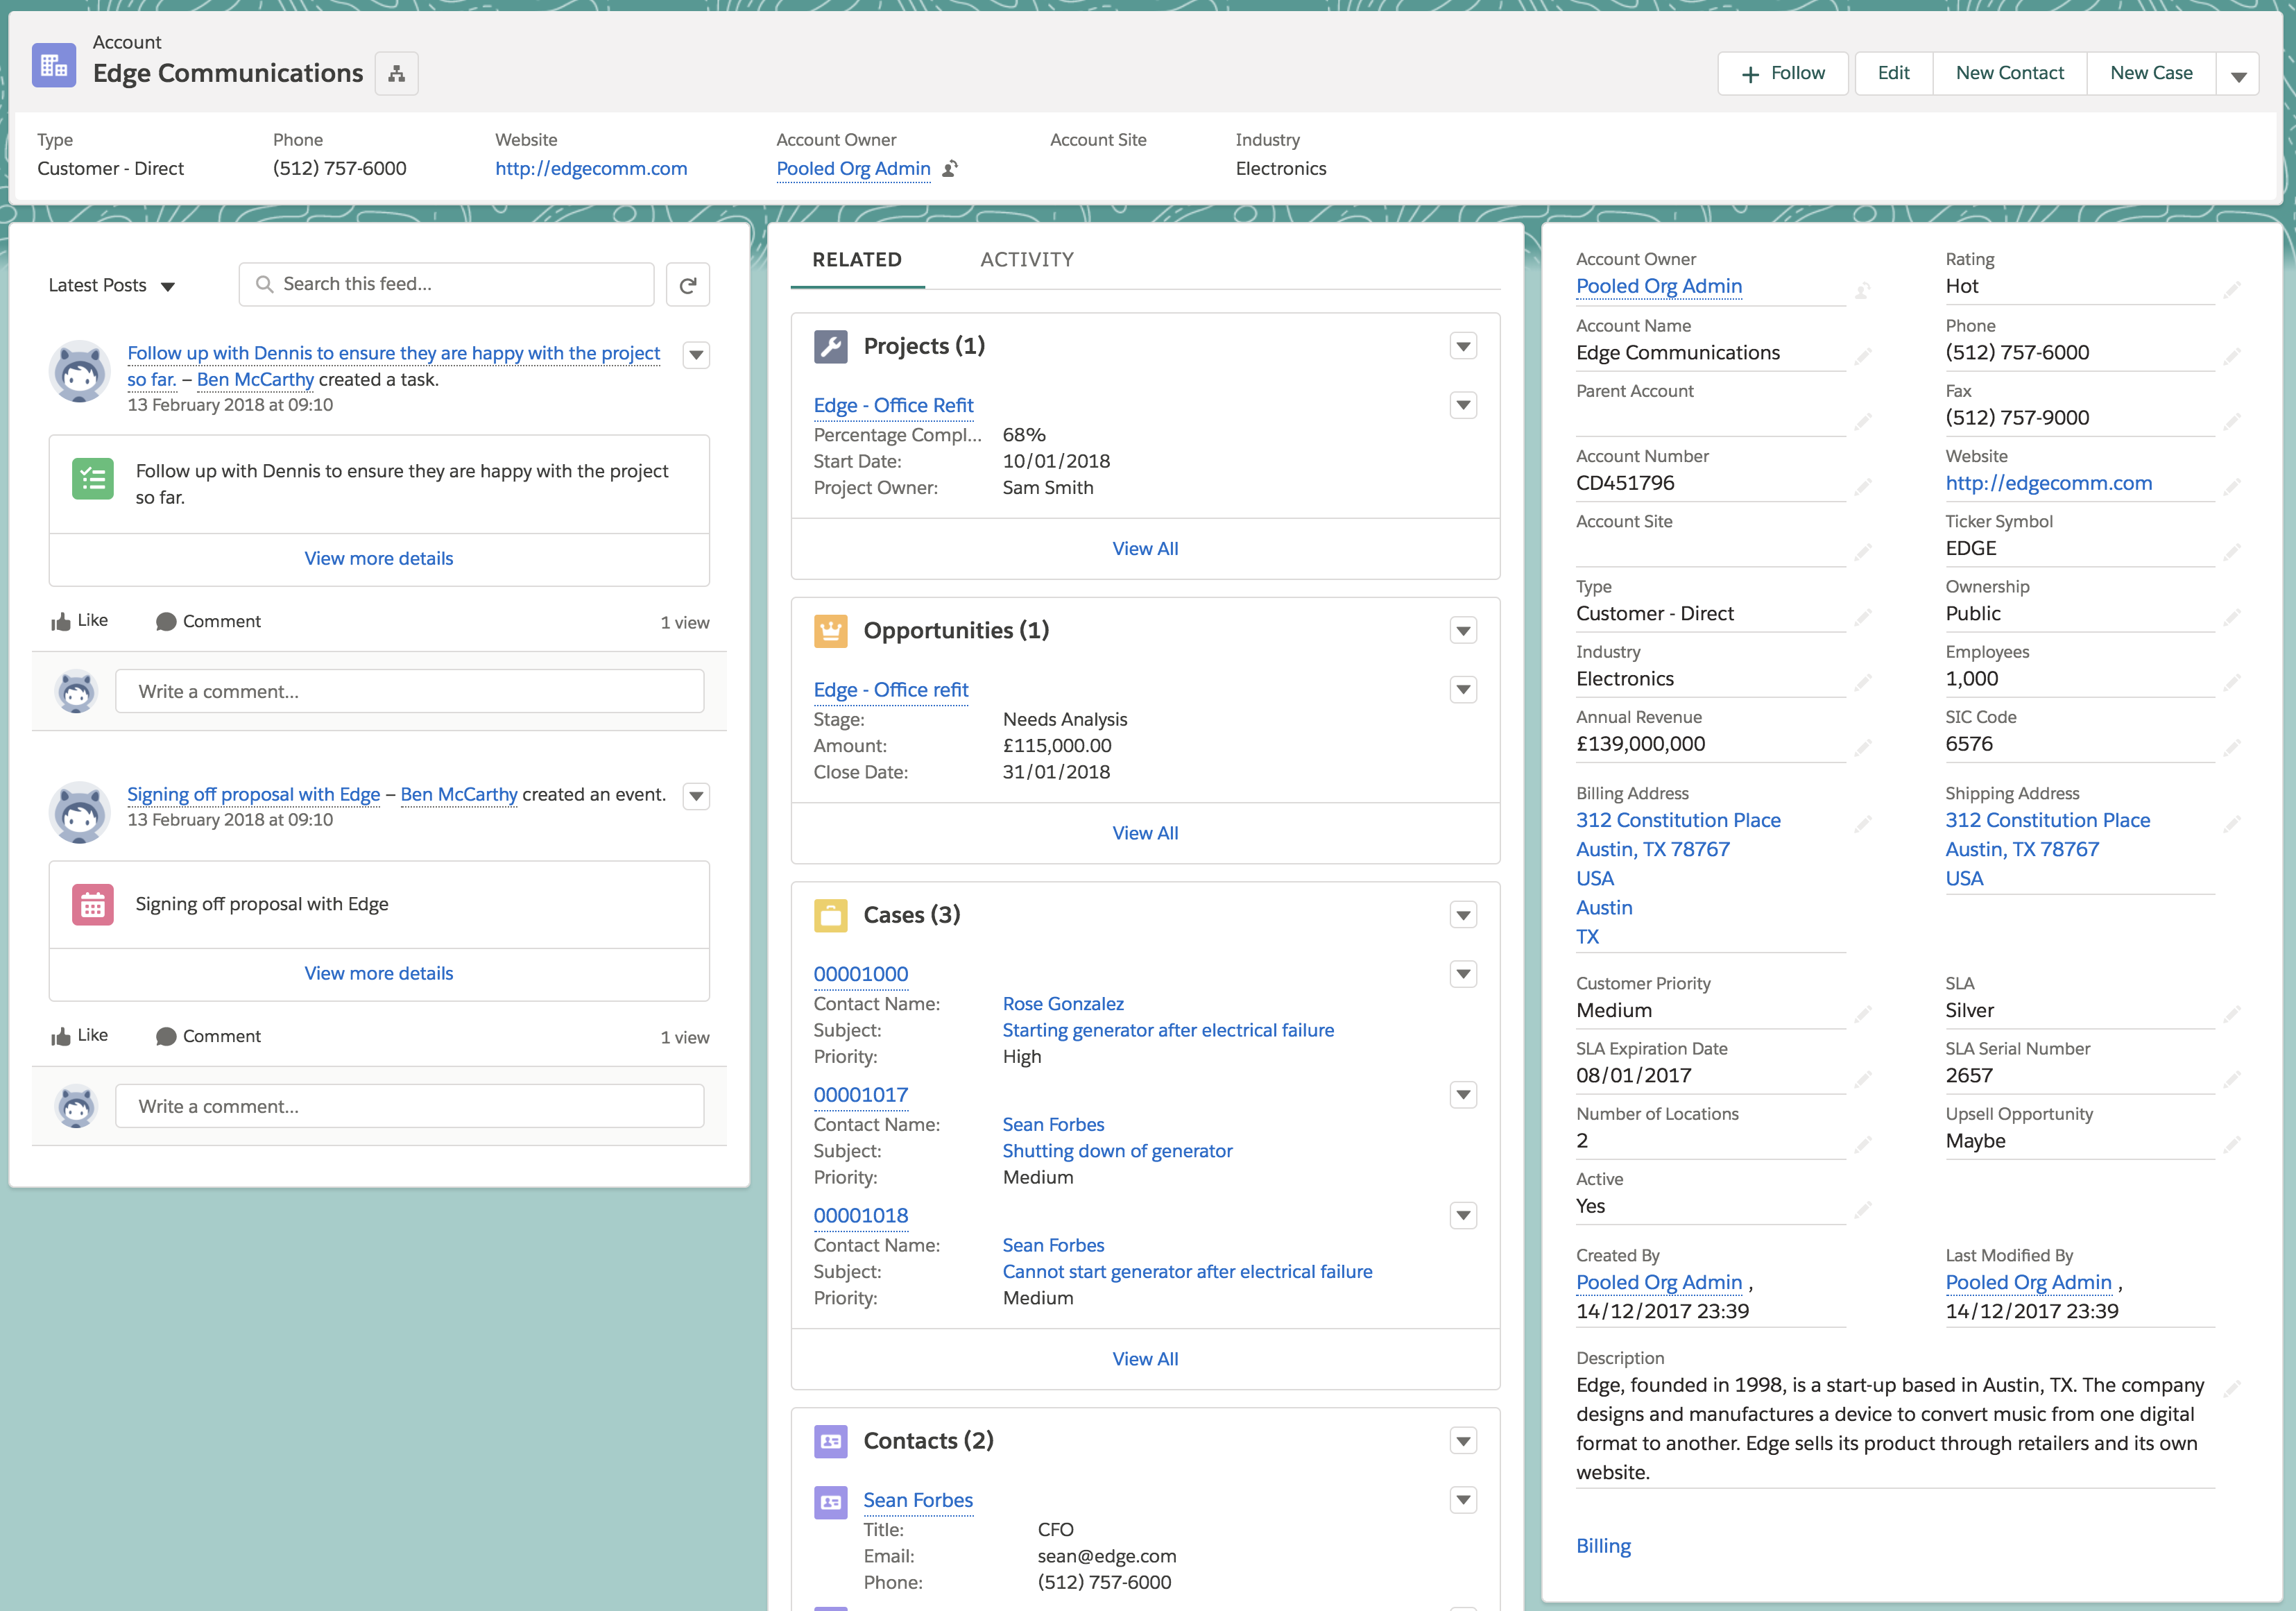
Header and Three Columns
Next up we have the header and three columns Lightning page. Similar to the above but with an extra columns sitting in the middle and evening out the widths. This template is great for a team who want to see more on the same page at once and aren’t concerned with information overload. Here we have chatter on the left, a tabs component in the middle, and the details component on the right.

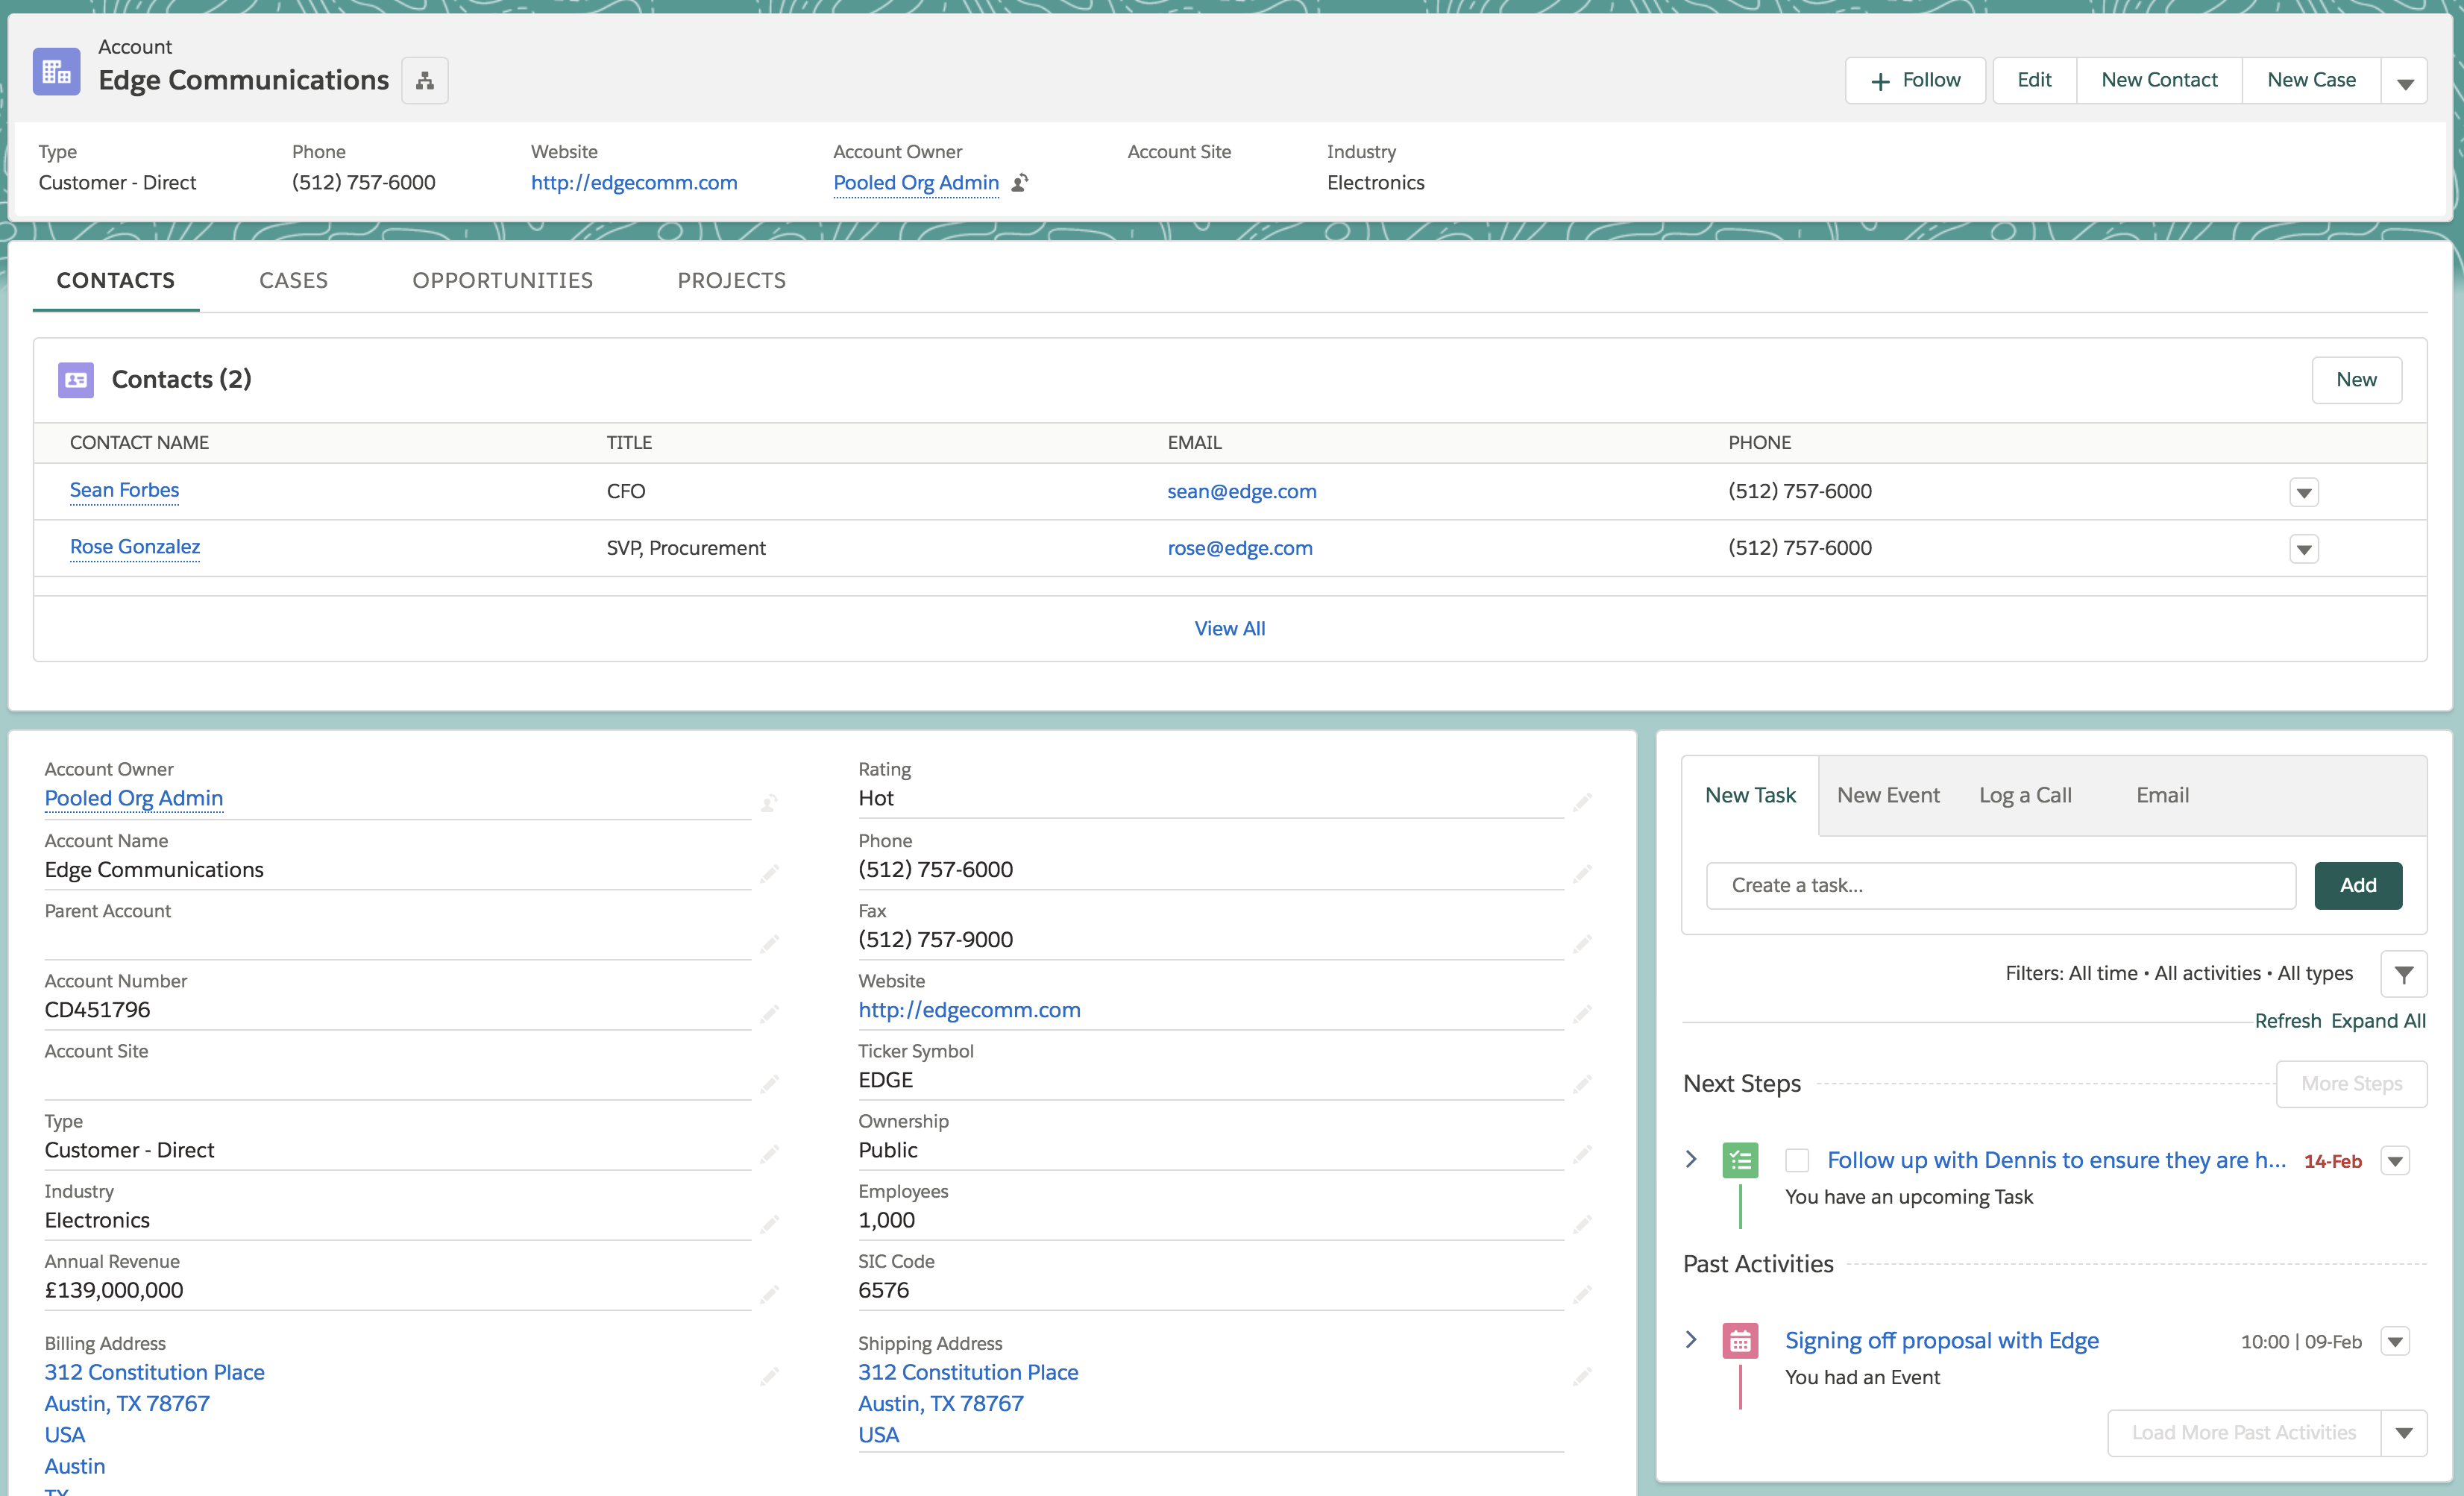
Header, Sub-Header, Right Sidebar
A slightly different template this time which has two headers at the top to put various summary information, and two columns below. Here the tab component works well at the top and can be moved around to show the most relevant related list first. Below this sits the details and activity component.

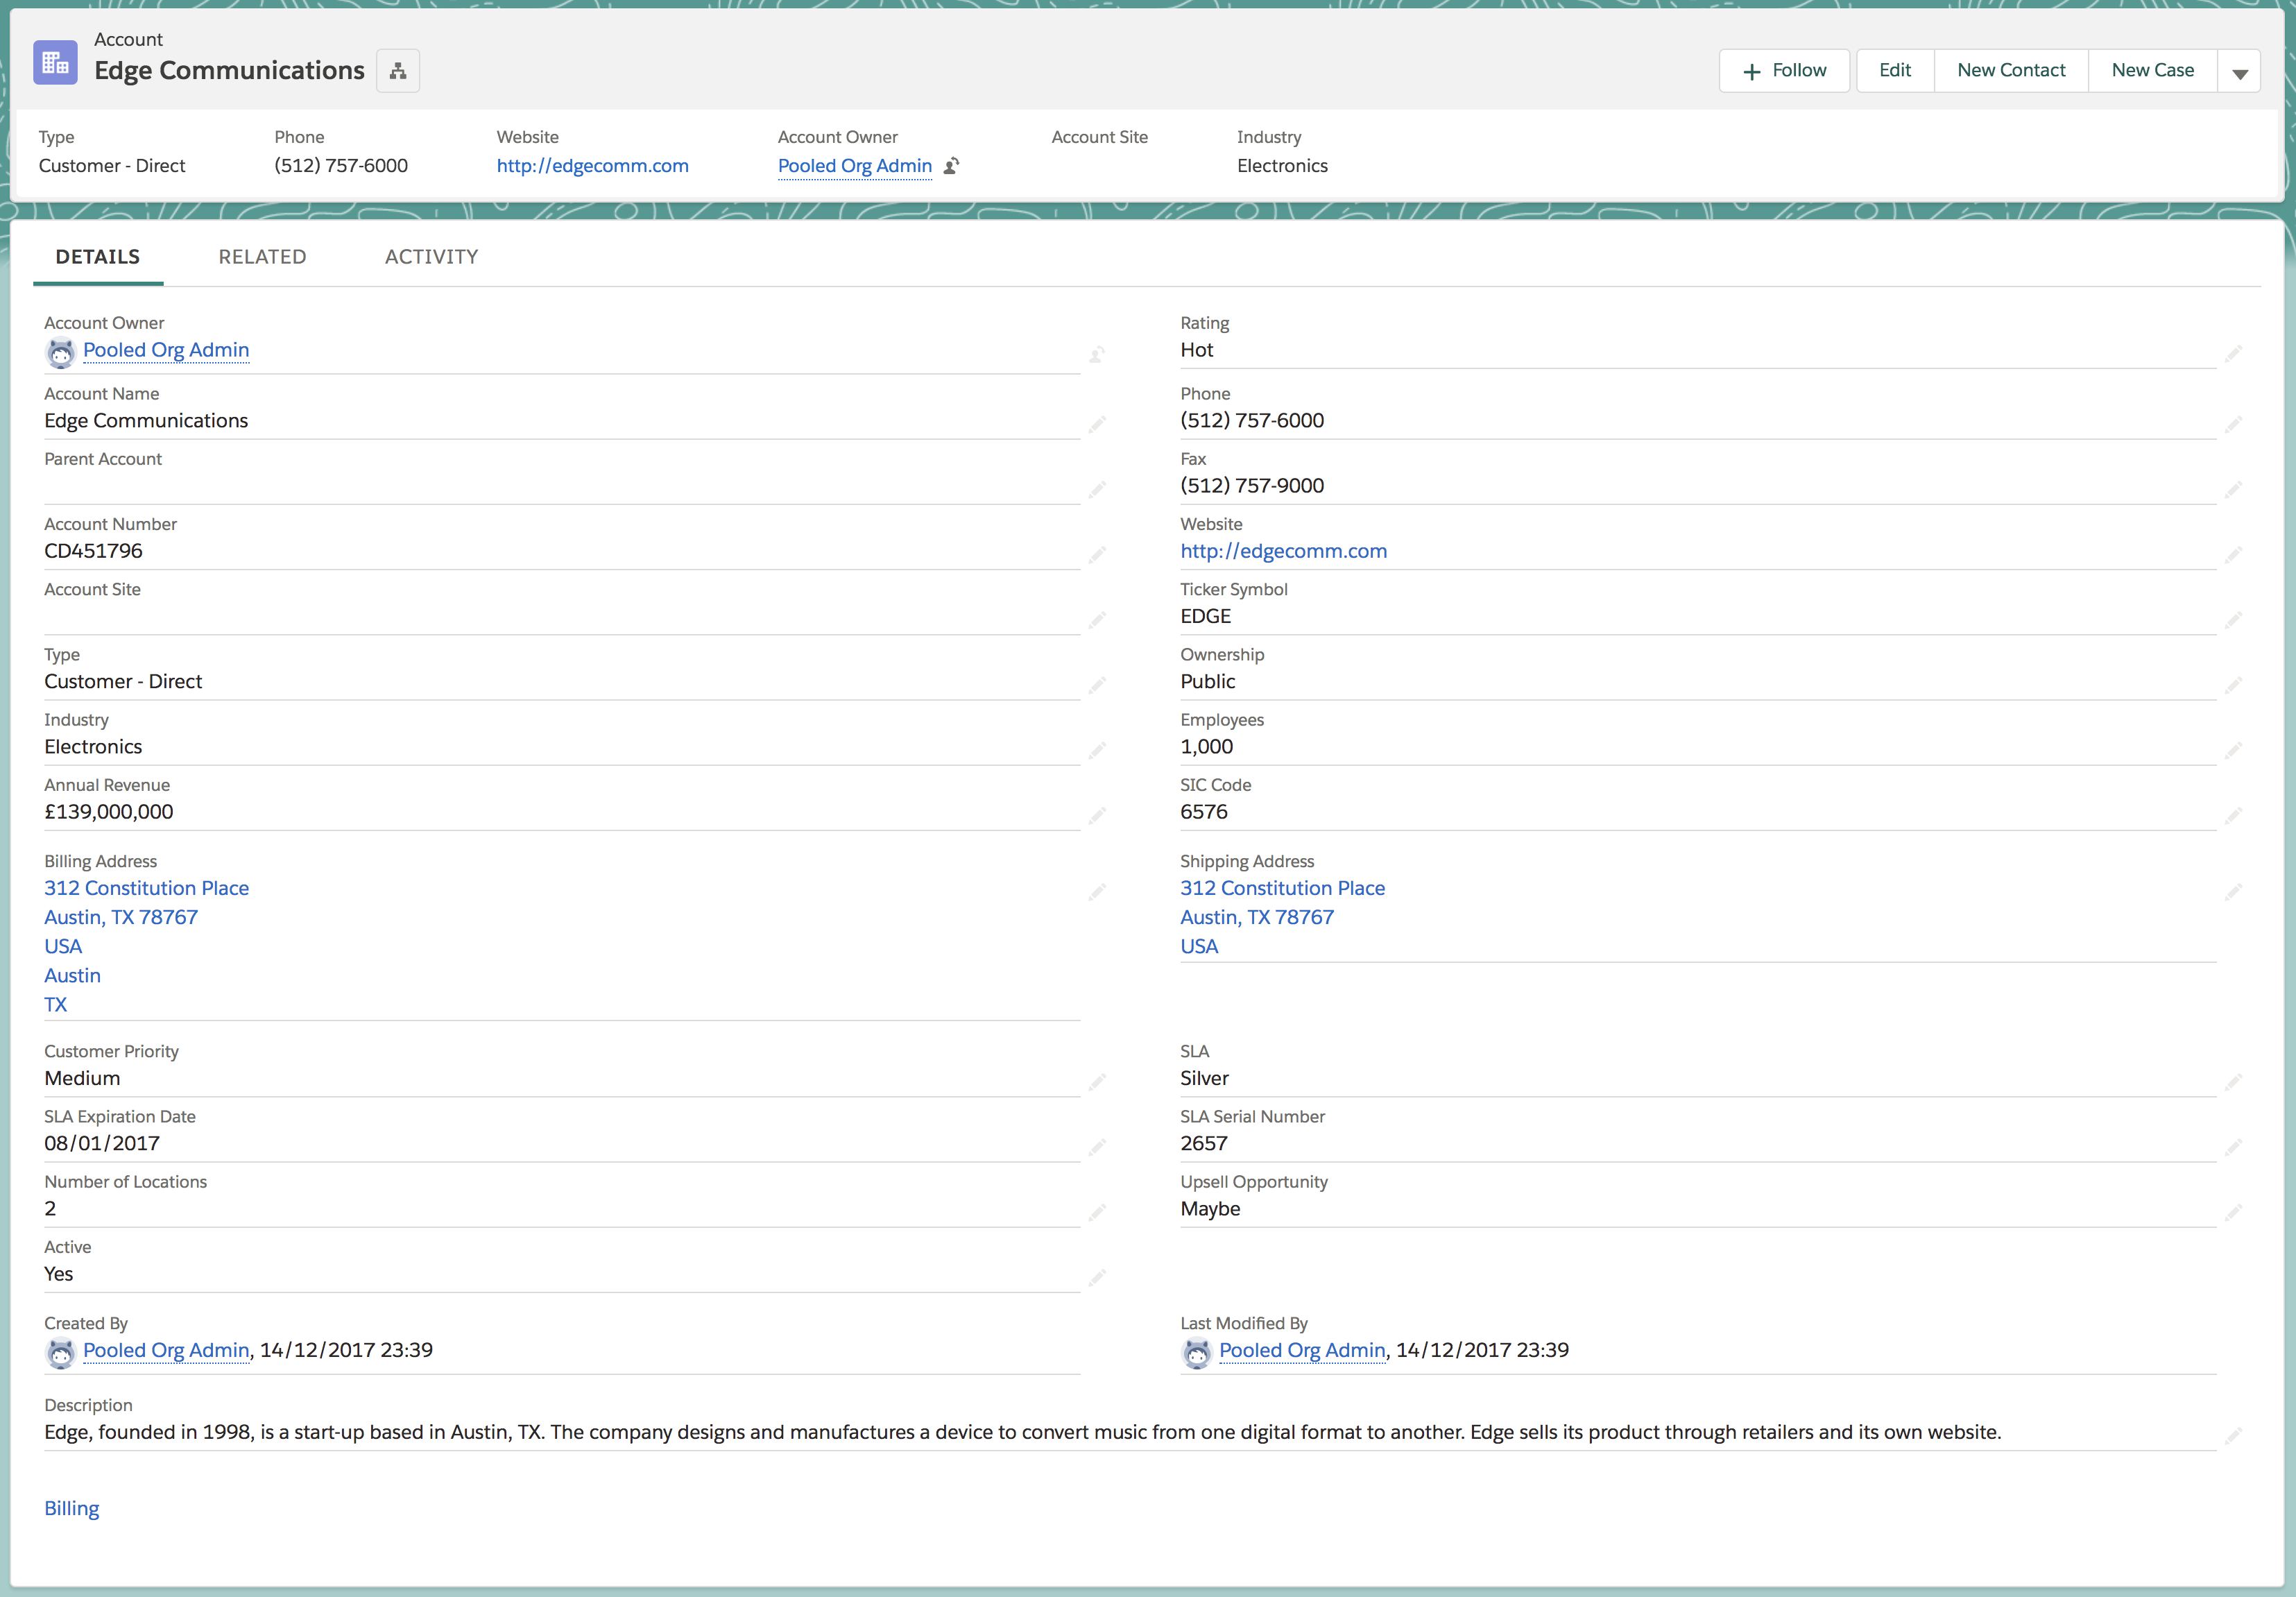
Header and One Column
Another slightly different template that only contains the highlight panel and one column. This simply contains the highlight panel with a large tabs component, perfect if you have a lot of information that needs to be shown using one component.

Building Lightning Pages
Building Lightning pages couldn’t be simpler, you can probably get going in a sandbox in under 10 minutes.
- Firstly navigate to the setup section of Salesforce and type in “Lightning App Builder” into the search and click on “New”.
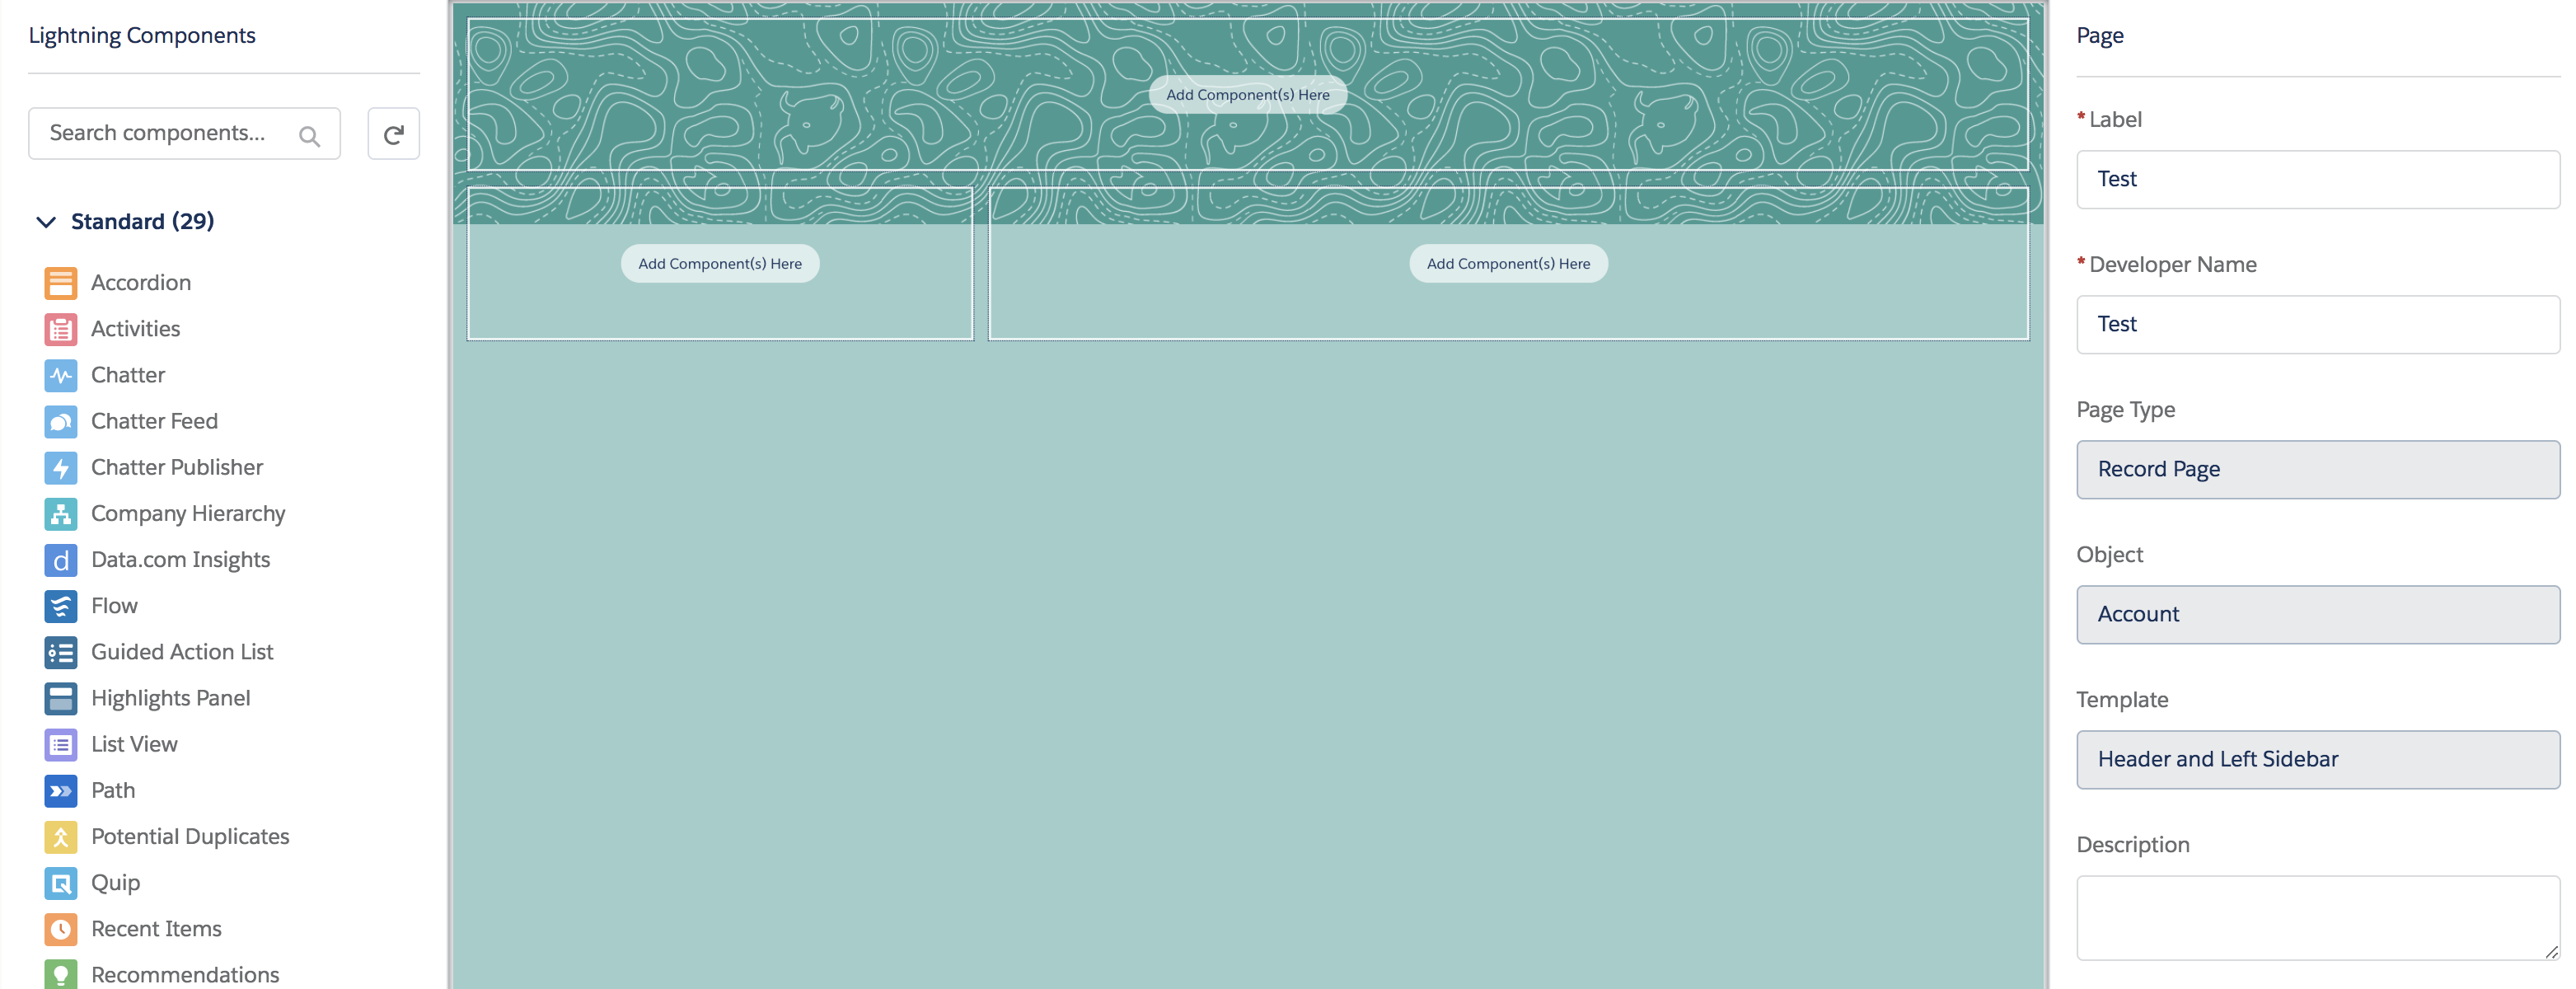
- This will bring you into the nifty looking Lightning App Builder and firstly ask you which page you wish to create. For the purposes of this tutorial, hit “Record Page”
- Next give your Lightning page a name, and select an object. I would recommend starting with Leads, Accounts or Opportunities due to the amount of feature available out of the box.
- After you click next, you will then have the option to select a template or clone an existing one. I would recommend starting fresh to get the creative juices flowing! Also be sure to avoid the “Console” templates unless this is what you are after and use a console App
- After hitting finish, you are now ready to drag and drop your components to start building up your page. If you are unfamiliar with Lightning Components I would recommend checking out this post.
- Enjoy and let me know how you get on!

Comments: